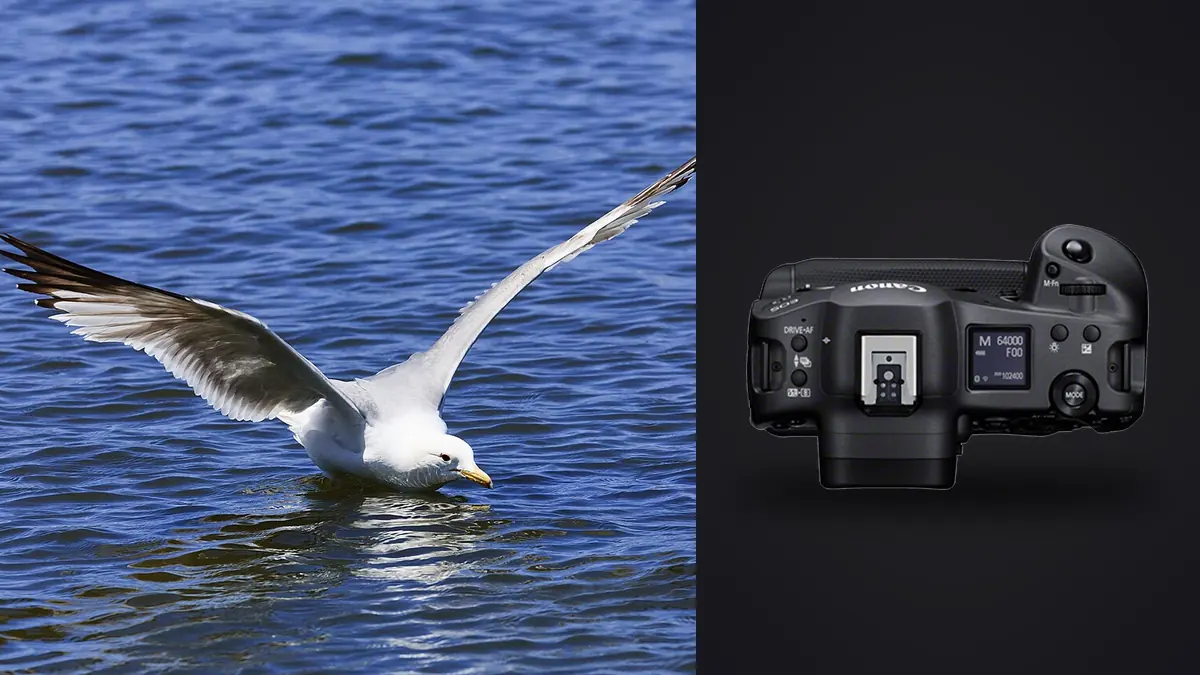
A useful Canon EOS R3 bird-in-flight setup is not a single list of menu values. It is a small system that connects subject behavior, autofocus area, shutter strategy, exposure, lens handling, and review. The best starting point for a gull crossing open sky is not the best starting point for a tern dropping behind reeds. Build two or three deliberate configurations, test them on ordinary birds, and learn which control changes the camera without pulling your eye from the viewfinder.
This Lens and Location Guide begins with habitat, access, flight line, and working distance, then connects those constraints to focal length and camera behavior. It avoids a universal shutter speed because wing motion, angle, light, and the amount of blur you want all matter. The aim is repeatability: choose a position and lens for a known visual problem, then diagnose focus, motion, framing, or exposure from the resulting sequence.
Choose focal length from habitat and access
A long prime can isolate distant birds and hold a wide aperture, but it fixes the angle of view and can make a sudden close pass difficult to acquire. A telephoto zoom gives room to widen when a bird approaches, include habitat, or locate a subject against a busy background. Compare the actual lens, converter, hood, support, and minimum focus distance rather than reducing the choice to maximum reach.
Working distance should come from animal welfare and site rules before it comes from frame filling. Nests, roosts, feeding areas, and stressed birds need more space, and some locations restrict paths or hide placement. If the ethical position makes the subject small, accept an environmental image, wait for a lawful natural approach, or choose another location.
Background distance matters with any lens. A lower position may place the bird against distant water or sky, while a higher bank can merge it into reeds. Walk only permitted routes, study likely flight paths, and note where a zoom's flexibility or a prime's rendering actually changes the picture.
Map three flight environments, not one universal mode
Create a baseline for open backgrounds, another for clutter, and a third for birds that launch suddenly. Open sky gives subject detection and a larger AF area relatively little competition. Reeds, branches, surf, and a busy colony put strong edges around the bird, so a smaller starting area and more deliberate initial placement may be more dependable. A perched bird about to take off needs a configuration that can move from precise placement to continuous tracking without a menu visit.
Assign those situations to controls you can reach while supporting the lens. A custom shooting mode can hold the broad exposure and drive configuration, while a back button or another accessible control can temporarily call a different AF area. Keep the number of alternatives low. Five clever overrides are difficult to remember when a bird changes direction; two well-practiced options are more useful.
Write the setup on a card or phone note during early tests. Record the AF operation, area, subject-detection choice, drive mode, shutter mode, exposure mode, and any control overrides. If a firmware update or an accidental reset changes behavior, that note gives you a known baseline instead of relying on memory.
Separate initial acquisition from continued tracking
Bird autofocus has two distinct jobs. First, the system must acquire the intended bird rather than the foreground, water, or a second animal. Then it must continue following that subject through changes in distance and pose. When every miss is described simply as bad tracking, the wrong setting often gets changed. Review the first frame of a sequence separately from later frames to see which job failed.
For a bird that is already in open sky, begin with an area large enough to place around the subject as you raise the camera. Allow bird or animal recognition to refine the target, but watch what the display identifies. For a small bird among branches, start with a compact area over the head or upper body. Recognition can assist after acquisition, yet the photographer still needs to tell the camera which layered object matters.
Tracking sensitivity is not a quality control. A setting that resists switching can help when a branch briefly crosses the bird, but it can also remain attached to the wrong subject after a genuine change. A more responsive setting may suit erratic birds against clear backgrounds and may jump too readily in a colony. Test the same flight path at different values and keep the one whose mistakes are easiest to anticipate.
Make exposure stable across changing backgrounds
A bird can pass from bright sky to dark trees in less than a second. If the light on the bird remains constant, fully automatic exposure may change simply because the background changed. Manual shutter speed and aperture with Auto ISO can preserve the chosen motion and depth settings while allowing sensitivity to follow light, but exposure compensation and ISO limits still need attention. Full manual exposure is often calmer when subject illumination is steady.
Protect pale feathers and reflective water by checking the histogram and highlight warning on test frames. The viewfinder preview is useful but can look different as ambient light changes. A white bird does not need to be rendered gray merely to avoid every blinking pixel, and a dark bird does not need lifted shadows at the cost of a blown sky. Decide which detail supports the picture, then place exposure accordingly.
Use a shutter time based on the result, not a borrowed number. A banking raptor may need less motion stopping than a small bird with rapid wings. A slower exposure and smooth pan can communicate movement, while a shorter one can describe feather position. Stabilization can reduce camera movement, but it cannot stop the bird itself. Make test sequences at the actual focal length and likely viewing size.
Control bursts around behavior
The R3 can produce dense sequences, but holding the shutter through every approach creates more repetition without guaranteeing the decisive pose. Watch for behavioral cues: a crouch before launch, a head turn before a dive, feet extending toward a perch, or a change in wing rhythm. Begin just before the likely transition and release when the meaningful phase is over.
Choose a drive rate that lets you distinguish wing and head positions without making review unmanageable. The highest available mode can be appropriate for a brief, unpredictable event, while a lower rate gives more varied timing across a longer pass. Camera settings, file type, card, temperature, and other conditions can affect available behavior, so verify the exact combination in Canon's current documentation and with your own cards before an important outing.
Electronic and mechanical shutter choices also affect the field experience. Consider subject shape, artificial lighting, sound, viewfinder behavior, and the camera's restrictions in each mode. Do not assume that silent capture is always invisible or permitted. Birds may react to movement long before they react to shutter noise, and quiet access still requires distance and ethical fieldcraft.
Set the lens and controls for sustained tracking
Configure the lens focus limiter when the expected subject distance makes it useful. It can reduce the range the system must search after focus is lost, but the wrong limit can prevent acquisition completely. Check the switch every time a bird remains inexplicably soft. The same caution applies to stabilization modes and custom lens buttons: know their current state before the action starts.
Balance the camera and lens so the left hand carries weight near the center of mass and the right hand steers without gripping. A monopod can reduce fatigue at a fixed location; handholding can make sudden overhead movement easier. Loosen a tripod or gimbal axis enough for motion without allowing the lens to fall when released. Practice finding birds with both eyes open, then close or narrow attention once the subject enters the frame.
Leave enough space in the selected AF area and composition for an erratic wingtip or direction change. Tight framing magnifies every steering error. If resolution and delivery needs allow a moderate crop, a slightly wider capture can increase complete-wing keepers. This is a compositional tradeoff, not permission to treat focal length and field position as irrelevant.
Set viewfinder information so it helps without covering the bird. A level, histogram, focus indicators, and exposure scale all have value, but displaying everything at once can obscure a small subject. Create a clean tracking display and a more detailed setup display if the camera configuration permits it. Check that image review does not appear unexpectedly while the eye remains at the finder, and learn the control that dismisses playback immediately. These details seem minor during preparation and become important when a second bird enters the frame.
Run a field test before the real opportunity
Use common local birds, cyclists, or distant vehicles to test acquisition and panning. Include open sky, trees, backlight, and subjects approaching the camera. The goal is not a portfolio frame. It is to learn what the display shows when recognition succeeds, how quickly an AF area can be changed, and whether a control assignment remains comfortable after several minutes.
Review complete sequences at useful magnification. Find the sharpest plane in each miss. A crisp background means acquisition went elsewhere. A sharp body with a soft eye can indicate target placement or depth. Directional streaks across the whole bird indicate motion. A sharp head with blurred wings may be a successful choice. Label the cause before changing any setting.
Change one variable for the next pass. Altering AF area, tracking response, shutter time, and stance together makes improvement impossible to attribute. Keep short notes after each session and promote only repeatable changes into a custom mode.
Build a restrained local review loop
After securing verified copies, scan the shoot before asking imagic to analyze it. The application processes locally and can score sharpness, exposure, closed eyes where relevant, and composition while grouping near-duplicates and bursts. Its culling decision changes a photo's status; it does not delete the original. That makes automated review a starting point, not a substitute for checking rare behavior and unusual poses.
Review burst groups for eye detail, wing position, gesture, background collisions, and narrative difference. A lower-ranked frame may show the only clean talon position or the instant of prey transfer. If a saved verdict seems inconsistent with the pixels, check score freshness. Reselecting only re-ranks stored scores, while stale photos need a freshness check and reanalysis to receive current scoring.
The imagic desktop overview explains the local and non-destructive workflow. More systems for ingest, selection, and delivery are collected in the workflow and editing guides. Keep the field notes beside the edited contact sheet so recurring failure patterns can feed the next setup.
Use this pre-flight setup check
- Power and storage: confirm charged batteries, writable cards, and the intended recording arrangement.
- Exposure: make a test frame in representative light and inspect important highlights.
- Autofocus: verify Servo AF, the starting area, subject recognition, and the override control.
- Lens: check focus limiter, stabilization mode, hood, support tension, and front element.
- Drive: choose a deliberate burst rate and verify the active shutter mode.
- Ethics: maintain distance, avoid nests and distressed behavior, and follow access rules.
- Review: inspect one early sequence before waiting for the rare moment.
Frequently Asked Questions
Should bird detection stay enabled for every flight situation?
It is a useful default when the bird is visible, but it cannot choose through every obstruction or crowded scene. Keep a smaller AF area available and learn how to place the initial target yourself.
Is the fastest burst mode always best for birds in flight?
No. Use a rate that captures meaningful pose changes while preserving control over sequence length. Reserve the densest mode for brief actions where timing is genuinely unpredictable.
Why does focus jump to the background after an obstruction?
The camera may have lost the bird and acquired a stronger edge at another distance. Revisit the starting area, tracking response, focus limiter, and your ability to keep the AF region over the subject.