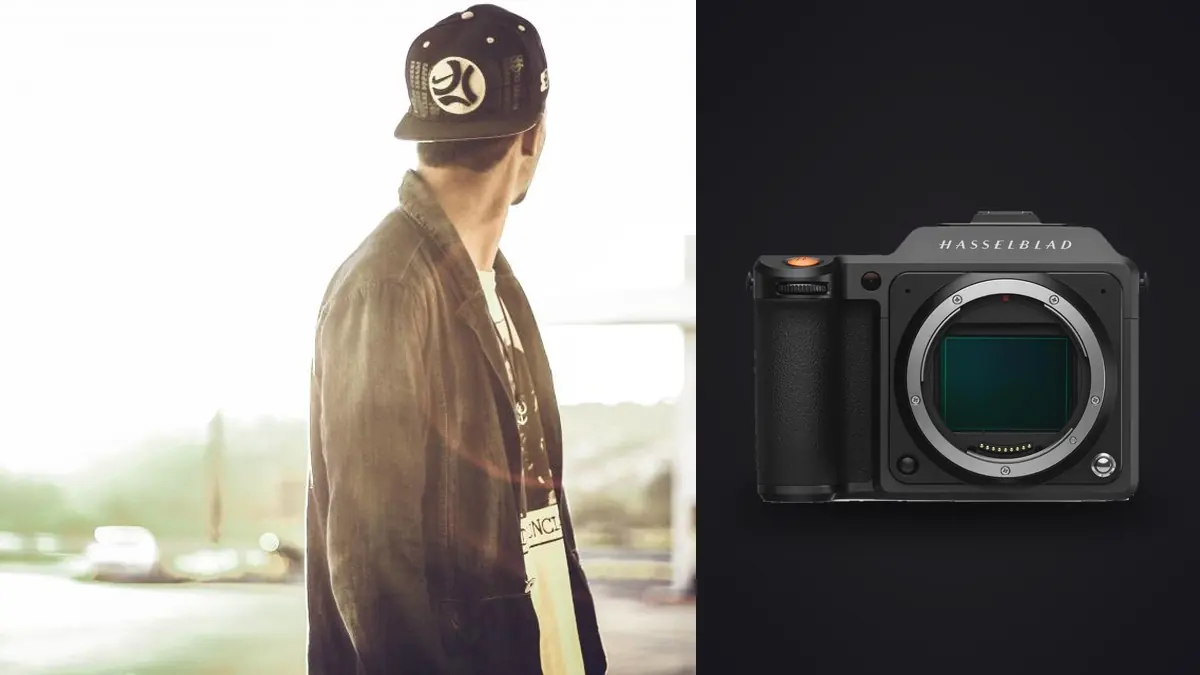
A commercial lookbook is a consistency assignment disguised as a creative one. Every garment must read accurately, the model must remain recognizably styled across the set, and the sequence must fit a predefined crop and delivery plan. The Hasselblad X2D 100C brings a 100 megapixel medium-format sensor, in-body stabilization, a 1TB internal SSD, and a CFexpress Type B slot to that job. Those capabilities are useful only when the room and lens plan support them.
This Lens and Location Guide connects XCD focal length, studio depth, camera height, model marks, power, client viewing, and storage handoff. It is designed to catch the spatial failures that become expensive during production: a crop that removes a hem, a wide viewpoint that changes garment proportions, or a workstation placed where no one can judge color consistently.
Lock the delivery matrix before scouting the set
Obtain a written list of products, views, aspect ratios, file dimensions, backgrounds, and naming requirements. Separate mandatory e-commerce coverage from campaign-style variations. A front, back, side, detail, and movement frame may sound obvious, but different brands define each view differently. Confirm whether footwear, accessories, labels, and garment interiors need dedicated images.
Mark the safe crop for every intended channel. A portrait web tile, square marketplace image, landscape banner, and printed line sheet can demand incompatible negative space. If one master frame must serve all of them, compose to the strictest shared area and test the actual crop before production. The X2D's resolution gives latitude, but it does not restore a cuff, shoe, or trailing fabric that was outside the frame.
- Approved shot list and garment order are visible to the photographer, stylist, and digital technician.
- Crop overlays or reference guides match the final aspect ratios.
- File naming includes style code, colorway, view, and a controlled sequence identifier.
- Decision authority is clear when styling and brand references conflict.
- A change log records deviations that cannot be corrected during the session.
Match XCD lens roles to floor depth
Check firmware, date, time, copyright metadata, battery health, and storage before the call time. Decide whether the internal SSD or CFexpress card is primary and define when files move to the workstation. If both are part of the day, label the handoff in the production notes. "It is probably on the other storage" is not an acceptable archive strategy.
Select lenses around working distance and garment proportions. A moderate focal length gives a natural full-length view when the studio has enough depth. A wider lens may be needed for a small set, but moving too close can enlarge the nearest body parts and pull garment lines outward. A longer lens compresses the scene and may demand more distance than the location offers. Tape the camera and model marks only after checking the complete framing, including shoes, raised hands, and moving fabric.
Clean the sensor and lens surfaces, then make a stopped-down frame of an even background to reveal dust. High-resolution files make small marks expensive when repeated across a catalog. Store a current dust reference and correct the physical cause before relying on synchronized spotting later.
| Area | Failure | Advance check |
|---|---|---|
| Framing | Required detail falls outside alternate crops | Overlay every delivery ratio on a test frame |
| Focus | Eyes sharp but garment front soft | Test aperture with the final pose angle |
| Color | Reference does not match production light | Capture a new target after each lighting change |
| Storage | Internal SSD and card become confused | Assign primary, backup, and transfer roles |
| Continuity | Camera or model position drifts | Measure and mark positions, then record changes |
Test location light and power with real materials
Do not approve the set using only skin and a gray card. Photograph the actual fabrics, especially black texture, saturated color, reflective trim, pale embroidery, and fine patterns. A setup that looks elegant on the model can lose weave detail or push one color channel beyond recovery. Inspect the DNG at a sensible magnification and compare it with the physical garment under controlled viewing light.
Choose the shutter behavior in relation to the lights and lenses. XCD lenses with central shutters can support flexible flash synchronization within their stated limits, but the complete combination of lens, trigger, and pack must be tested. If continuous LEDs are involved, make a banding test at the intended shutter speed. Never discover a timing incompatibility after a full colorway has left the set.
Set a manual white balance or record a reliable neutral reference under the final mix. Repeat the reference whenever power, modifier, distance, background, or ambient contribution changes. Keep display brightness stable during approval. A bright monitor in a dark studio encourages underexposed captures and gives the client a misleading sense of contrast.
Balance eye focus with garment depth
For a lookbook, the face is important but not the only plane that must read. A jacket lapel may project toward camera while the model's eyes sit farther back. Flowing sleeves, bags, and hands can occupy separate distances. Test the widest working aperture against the most dimensional outfit, then stop down until the required product areas are credible. Raise light output or ISO if necessary rather than sacrificing deliverable detail to an arbitrary aperture preference.
Use a controlled autofocus area and confirm which eye is selected. For static poses, single autofocus can reduce unnecessary hunting. For a short walk or fabric movement, continuous autofocus and a modest sequence may be appropriate, but high frame volume does not replace repeatable marks. Ask the model to begin and end in known positions so focus and framing can be compared across takes.
At 100 megapixels, tiny subject movement is easy to confuse with missed focus. When a frame is soft, inspect eyelashes, garment seams, jewelry edges, and the direction of blur. If every edge moves in one direction, shutter speed or camera movement is likely. If one plane is crisp and another is not, placement or depth is the issue. Diagnose correctly before changing autofocus sensitivity.
Run each location set as a closed production loop
Finish one product's mandatory views before adding optional motion or creative frames. The photographer calls the view, the stylist confirms garment state, the digital technician confirms file arrival and focus, and the client representative approves when required. Only then does the team advance. This rhythm prevents a beautiful session from ending with a missing back view.
- Read the style code and colorway aloud and place it in the file or slate record.
- Confirm lint, wrinkles, closures, labels, symmetry, and accessory placement.
- Make the neutral front frame and inspect focus, exposure, crop, and color.
- Complete mandatory side, back, detail, and movement views in the agreed order.
- Flag the approved frame without deleting alternatives.
- Verify file count and storage before the garment leaves the shooting area.
Watch continuity across the day. Compare shoulder height, camera level, floor line, background tone, and model scale against the approved reference. Stabilization can help a handheld creative frame, but a fixed support is usually better for repeatable catalog geometry. If the camera moves, record the new height, angle, and distance so the set can be restored.
Protect files at the location handoff
The internal SSD provides substantial working space, but internal capacity is not a backup while it remains inside the only camera. At defined breaks, copy files to the workstation and then to separate storage. Verify the copy before clearing any source. Keep a transfer log showing the last style code and frame on each handoff, especially when the shoot uses both internal and removable media.
Do not rename a subset in a way that breaks source traceability. Preserve the original filename in metadata or a manifest, then generate delivery names from the approved product table. If the brand requires immediate proofs, export from a clearly marked working copy. Never let a rush proof become the sole record of a selected frame.
For local review, imagic desktop can scan the copied folder before analysis and store non-destructive culling statuses. Analysis can help surface quality problems and related frames, but lookbook approval still depends on garment accuracy, continuity, and the client's shot list. Rejected status does not delete an original. The application applies stored edits only when you export.
Review perspective and color after the shoot
First compare within each required view, then compare the approved set across products. Check body scale, crop, floor line, background, skin treatment, black point, and garment color. A single image can look polished while still breaking the catalog. Use side-by-side contact sheets at the final aspect ratio, not only full-screen individual views.
If a learned style is part of the process, confirm that a real style profile exists before using it. Applying a personal style is not the same as choosing a generic preset, and every garment color still needs review. If no profile has been learned from the photographer's edits, establish the grade manually or train the profile through the intended workflow. More production and automation options are outlined at photo workflow automation.
Export a small test group with the final color space, dimensions, compression, and naming pattern. Open the exported files outside the editing view, inspect fine patterns for artifacts, and compare color against the approved reference. Confirm that every style code has all mandatory views. Only after that audit should the full batch be rendered and delivered.
Lens and location sign-off list
- The client has approved the representative crop and color reference.
- The camera and model marks reproduce the intended scale and perspective.
- Focus depth covers the product, not just the nearest eye.
- Every lighting change has a matching neutral and color reference.
- Internal SSD and CFexpress contents have been copied and verified separately.
- Selections are reversible and linked to original filenames.
- Retouching preserves fabric texture, construction, and true color.
- Test exports pass naming, dimensions, profile, and completeness checks.
The X2D 100C is most valuable here when detail and tonal control are governed by a disciplined production loop. Resolution magnifies both excellent styling and avoidable inconsistency. The checklist keeps the camera serving the catalog rather than turning the catalog into a camera demonstration.
Frequently Asked Questions
Should every fashion lookbook frame use the X2D's full resolution?
Use full resolution when the delivery, crop flexibility, or product detail benefits from it. If the output is small, the production may gain more from efficient storage and processing, but keep resolution choices consistent within required views.
Is the 1TB internal SSD a complete on-set backup?
No. It is storage inside the working camera and shares the same loss or damage risk. Copy files to at least one separate device, verify them, and maintain a clear transfer record.
Can automated culling choose the correct garment frame?
It can help identify technical quality and related images, but it cannot own brand-specific decisions about fit, styling, color, or required views. A person familiar with the shot list must approve the final select.