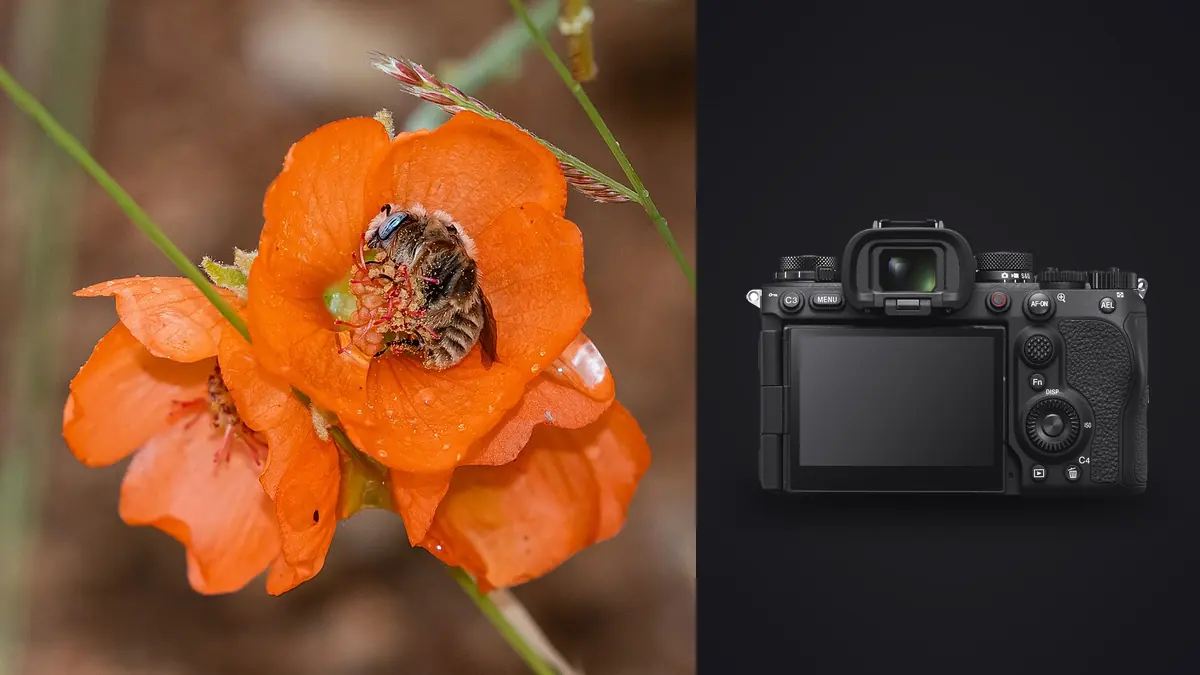
The Sony A9 III can remove one familiar source of distortion from fast-moving subjects, but a global shutter does not make macro photography automatic. At close range, a few millimeters of subject movement can move an eye outside the focus plane, reflective wings can confuse an exposure preview, and a flash can overpower the background before the insect is properly lit. The useful way to approach the camera is as a responsive platform whose speed still needs disciplined close-up technique.
This guide is organized around symptoms rather than idealized settings. Start with the frame that failed, identify whether the cause was focus placement, depth of field, subject motion, camera movement, or light, then change one variable. That method is slower than copying a menu recipe once, but it produces settings that match a particular lens, working distance, and subject.
Diagnose softness before changing autofocus settings
Softness has several causes that look similar on the rear screen. If the background detail is sharp but the insect is not, the focus plane landed elsewhere. If no part of the frame is crisp and edges stretch in one direction, subject or camera motion is more likely. If the eye is sharp but the abdomen and wing tips are not, the camera probably focused correctly and the depth of field was simply too shallow. Diffraction and aggressive noise reduction produce a gentler loss of detail across the entire image.
Review at high magnification and look for the sharpest plane, not only the intended subject. A sharp hair just behind an insect tells you far more than a red focus box in playback. It confirms that the lens and sensor recorded detail, while focus placement missed. When nothing is sharp, repeat the frame with support, a faster shutter, or flash before changing AF area modes.
Use a controlled subject to establish a baseline. A textured coin, printed package, or small model placed at the usual working distance can reveal whether the lens needs a steadier technique, whether stabilization is behaving as expected, and how much depth an aperture provides. Mirrorless on-sensor autofocus avoids the traditional phase-detection calibration problem of a separate AF module, so repeated front or back focus is more often caused by target selection, movement, or lens behavior than a body adjustment.
Put the focus plane where the picture needs it
For insects, the nearest visible eye is usually the most defensible focus target. A sharp wing over a soft eye may demonstrate detail, but it rarely feels intentional. Use a small flexible spot or single point when the subject is resting. Place it on a high-contrast boundary around the eye rather than a smooth patch of shell. Subject recognition can help with larger insects against clean backgrounds, but it may prefer a flower edge, antenna, or patterned wing when the subject occupies little of the frame.
Continuous autofocus is useful when the insect or flower is swaying. It cannot solve a focus plane that is too thin, and it may jump to the background if the target leaves the selected area. Reduce that risk by keeping the AF area no larger than necessary and by using the lens focus limiter when available. A limiter prevents the lens from searching from minimum distance to infinity after a momentary loss of contrast.
Manual focus is often more predictable near maximum magnification. Set the approximate reproduction distance with the focus ring, magnify the live view, and move the camera slightly forward or backward until the eye becomes crisp. A focusing rail makes that movement more controlled on a tripod. Focus peaking is a navigation aid, not proof of critical focus: its colored outline can spread across contrast that is only nearly sharp. Confirm with magnification before making the exposure.
Separate depth-of-field failure from missed focus
Closing the aperture increases depth of field, but it does not turn a three-dimensional insect into a flat subject. At close distances, the useful sharp region remains narrow. Aligning the sensor more nearly parallel to the important body plane often gains more apparent sharpness than another stop of aperture. For a butterfly with open wings, move until both wings sit at a similar distance from the sensor. For a side view of a beetle, align the eye and the visible edge of the shell.
If only a narrow slice is needed, a wider aperture can keep shutter speed up and isolate a cluttered habitat. If the record shot needs antennae, eye, and wing detail, stop down and add light. Avoid assuming the smallest aperture is always best. Very small apertures soften fine texture through diffraction, and the extra flash power they demand can slow recycling. Make a short aperture series on a stationary subject, then judge the final output size rather than only a highly magnified crop.
Focus stacking can extend depth for a still subject, but the A9 III does not merge a finished stack in imagic and a moving insect will create alignment problems in any stacking workflow. Capture overlapping focus positions only when the subject, support, and light are stable, and combine them later in software designed for stacking. For active insects, choose one decisive focus plane instead of collecting a sequence that cannot align cleanly.
Control shutter speed according to the moving part
A global shutter records the frame at one moment, which prevents the bent shapes associated with row-by-row readout. It does not freeze motion by itself. Shutter time still determines how far a wing, antenna, leaf, or handheld camera can move during the exposure. A resting beetle may tolerate a moderate shutter speed, while a bee working a flower can require a much shorter exposure even when the body appears to pause.
Watch the smallest moving feature. If the body is sharp but antennae blur, the shutter is too slow for the picture you want. Raise shutter speed, add flash as the dominant light, or accept the blur as a sign of movement. Stabilization helps with photographer movement but cannot stabilize the insect or the plant. On a tripod, also check whether stabilization should be changed for the lens and support combination specified in the camera and lens manuals.
Very high drive rates are tempting on the A9 III, yet they can turn a simple focus error into many redundant files. Use a short burst around a behavior rather than holding the shutter through an entire visit to a flower. The goal is variation in wing position, eye visibility, or posture, not a larger set of identical misses.
Troubleshoot reflective highlights and dark backgrounds
Insects combine surfaces that expose differently: a matte body, glossy shell, translucent wing, and bright pollen can all occupy one small frame. If the camera meters from a dark background, a reflective patch may clip. If it meters from a pale flower, the insect can become too dark. Use the histogram and highlight warning as guides, then protect the brightest detail that must retain texture.
Manual exposure gives the most repeatable result when ambient light is stable. Set aperture for the needed depth, shutter for motion and ambient contribution, then adjust ISO or flash output. In changing natural light, manual shutter and aperture with Auto ISO can preserve the visual intent, provided an upper ISO limit and exposure compensation are chosen deliberately. Recheck after moving from open shade to direct sun.
LED lamps can create color or brightness variation because many pulse rapidly. A global shutter prevents within-frame rolling bands, but separate frames can still catch different points in a lamp cycle. If consecutive images vary, lengthen the shutter time enough to average the pulse, use a continuous source with reliable output, or switch to flash. Do not diagnose every brightness change as a camera fault before testing the light source.
Balance flash with the habitat instead of erasing it
Flash is effective at close range because a small source can be brought near the subject, but an undiffused speedlight produces hard reflections and a black background. Enlarge the apparent source with a diffuser positioned close to the lens axis, while leaving enough clearance not to strike vegetation. A bracket can keep the light above or beside the lens as the camera rotates.
Build the exposure in two parts. First set the ambient background with the flash disabled. It can be darker than the subject, but it should still carry the color and shape of the habitat unless a black field is intentional. Then add flash at low power and increase it until the insect has clean detail. Short flash duration at lower power can freeze small movements, while high output takes longer to recycle and may become the limiting factor in a burst.
The A9 III offers unusual flash timing flexibility, but compatible flash, trigger, power level, and camera settings still matter. Check the current Sony and flash-maker instructions before relying on a particular synchronization mode. More speed is not automatically better: an extremely short shutter can remove so much ambient light that the image looks detached from the scene.
Review bursts by cause, not only by score
After the session, group frames by insect visit or camera position. Compare the focus plane first, then gesture and composition. Local culling in imagic for desktop can score sharpness, exposure, closed eyes where relevant, and composition while grouping near-duplicates and bursts. The files remain on the computer, and rejected status does not delete the originals. That makes the first pass faster without turning the software verdict into the final artistic decision.
When a sequence is consistently soft, keep one representative failure long enough to diagnose it. Check metadata for shutter, aperture, ISO, lens, and focus mode. If sharpness improves exactly when flash was used, motion was probably the main issue. If the sharp plane moves from foreground to background while settings stay fixed, target tracking or body movement is more likely. The broader camera hardware guides can help place those findings in the context of other bodies and lenses.
A practical reset checklist
- Confirm the symptom: find the sharpest point and decide whether the failure is focus, depth, motion, or overall softness.
- Simplify the AF area: use a small point on the nearest eye and engage a lens limiter if one is available.
- Match the plane: reposition the camera so important features lie at similar distances.
- Set motion control: choose shutter speed for antennae, wings, and wind, not only the insect's body.
- Protect highlights: inspect reflective shell and wing detail rather than trusting average metering.
- Build flash gradually: establish the ambient background, diffuse the source, then add subject light.
- Limit each burst: release the shutter when behavior changes instead of creating uninterrupted duplicates.
- Record the fix: save the working setup for that lens and magnification, while treating it as a starting point.
Frequently asked questions
Does the Sony A9 III global shutter freeze insect wings?
No. It records all pixels at the same moment and avoids rolling-shutter shape distortion, but shutter time or flash duration still controls motion blur. Fast wings may require a shorter exposure or flash-dominant lighting.
Should autofocus or manual focus be used for macro insects?
Use a small AF area with continuous focus for a moving insect, and manual focus with magnified view for a still subject near maximum magnification. The more predictable method is the one that keeps the eye inside the intended focus plane.
Why is the insect sharp while the wings are soft?
The focus may be correct but the available depth of field may not cover the whole subject. Align the camera with the important body plane, close the aperture moderately, or choose which feature needs to be sharp.