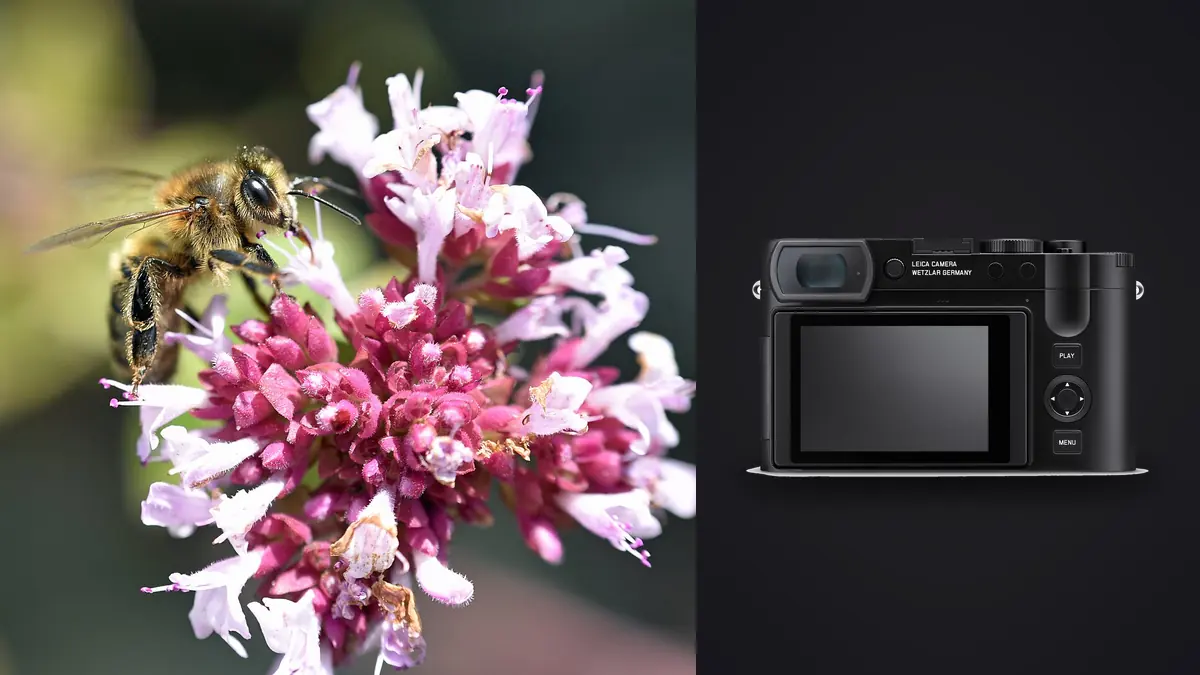
Every few weeks someone asks in a Leica forum thread whether the Q3 can "do macro." The honest answer is no, not in the way a 100mm macro lens does. The Q3 is a fixed 28mm f/1.7 camera built for street work, travel, and reportage. But a lot of people already own one, and not everyone wants to carry a second body and a dedicated macro lens into the garden just to photograph a hoverfly. So the real question isn't whether the Q3 is a macro camera. It's whether the close-focus mode it does have is worth using on something as small and twitchy as an insect. I've spent a few dozen mornings finding out, and the answer is a qualified yes, with some workflow changes you need to make going in.
What the Macro Switch Actually Does
The Q3 has a small tab on the lens barrel that toggles between focus ranges. In the standard position, the lens focuses from about 0.3m out to infinity, which is where it lives for 95% of normal shooting. Flip the switch and you get a close-focus range that pulls the minimum focus distance down to roughly 17cm from the sensor plane. That's not a true macro ratio in the classic 1:1 sense. It's closer to somewhere around 1:10, meaning a coin-sized subject fills a small fraction of the frame rather than the whole thing. If you've used a Leica Q2, this will feel familiar, because the optical formula and macro switch carried over largely unchanged.
What that means in practice: you're not going to fill the frame with a ladybird's face the way a proper macro lens would. You're getting a closer, more detailed version of what a normal lens would otherwise give you, and then you're relying on the sensor's resolution to do the rest of the magnification in post. More on that below, because it's the actual trick that makes this workflow viable at all.
The Working Distance Problem Nobody Mentions
Here's the part that surprised me the first time I tried this seriously. At 17cm from the sensor, the front element of the lens ends up sitting maybe 10 to 12cm from your subject. That is uncomfortably close for anything with wings, legs that sense vibration, or compound eyes that pick up movement. A dedicated 100mm macro lens gives you 30cm or more of working distance at the same magnification, because the working distance scales with focal length for a given reproduction ratio, not just proximity. A 28mm lens has to get physically close to achieve any magnification at all, and insects notice a lens barrel looming into their airspace a lot faster than they notice a longer lens hovering further back.
Practically, this means three things change about how you shoot:
- You'll spend more time losing subjects to flight response than you will actually framing shots. Bees and flies especially. Budget for it.
- Your own body casts a shadow over the subject at that range, which kills the ambient light you were relying on. You end up needing fill light from an angle, not from behind the camera.
- Camera shake at 10-12cm of working distance is magnified relative to shake at arm's length with a longer lens. The Q3's optical stabilization helps with your own hand movement, but it does nothing for the insect moving.
The workaround most people land on, myself included, is shooting early morning before insects have warmed up. Cold-blooded subjects (moths that landed overnight, damselflies still drying dew off their wings, beetles that haven't hit operating temperature) sit still for the fraction of a second you need. By 10am on a warm day, most of what's flying stays flying the second your shadow crosses it.
The Crop Modes Are Doing More Work Than the Macro Switch
This is the part of the Q3 that actually makes insect work feasible, and it has nothing to do with the macro switch specifically. The Q3's 60MP sensor is paired with in-camera digital crop framing that simulates 35mm, 50mm, 75mm, and 90mm fields of view, shown as frame lines in the EVF or on the rear screen. If you shoot JPEG, the crop gets baked in. If you shoot DNG (which you should, for this), the full 60MP sensor data is preserved regardless of which crop guide you had switched on. You're essentially previewing a tighter composition while capturing the whole frame.
That matters for insect photography because it changes your approach: rather than trying to physically get close enough to fill the frame with a small subject (which, as covered above, usually just scares it off), you can back off to a distance the insect tolerates, use the 90mm crop guide to judge framing, and then crop hard in post from the full-resolution file. You lose the true optical magnification a macro lens gives you, but you gain working distance, and a 60MP file gives you real room to crop before image quality falls apart. A shot that only fills a quarter of the frame at capture can still yield a respectable 15MP final image after cropping, which is plenty for web use and reasonably sized prints.
This isn't a substitute for actual macro glass if you're serious about insect photography as a discipline. It's a way to get usable, sometimes genuinely good, images out of a camera you already own and were carrying anyway.
Focus Range Settings and What They're Realistically Good For
| Switch / crop setting | Approx. distance to subject | Realistic insect subjects | Working distance reality |
|---|---|---|---|
| Normal range (0.3m to infinity) | 30cm+ | Perched dragonflies, large butterflies, praying mantises, anything you can shoot from a comfortable distance | Comfortable; most insects don't register you as a threat |
| Macro switch engaged | ~17cm from sensor, ~10-12cm working distance | Bees on flowers, moths, larger beetles that hold still | Tight; your shadow and breathing become real variables |
| Macro switch + 90mm digital crop guide | Same optical distance, cropped in-camera or later | Small ants, jumping spiders, anything under 1cm (only if you can hold focus) | Same working distance limits, but composition is more forgiving since you're not filling the frame optically |
Autofocus Struggles More Than You'd Expect
The Q3's hybrid autofocus is quick and generally reliable for street and travel work, but it starts hunting on small, low-contrast subjects sitting against busy backgrounds like leaf litter or grass. An insect's eye doesn't give the AF system much to lock onto compared to a human face or a high-contrast edge. What's worked better for me is switching to single-point AF, placing that point manually rather than trusting subject tracking, and using back-button focus so I can decouple focus from the shutter.
For genuinely small, still subjects, manual focus with the "focus and rock" technique beats autofocus outright. Pre-set the focus ring to the closest macro distance, get roughly into position, then physically rock your body forward and back a few centimeters until the subject snaps into sharpness through the viewfinder, firing a burst as it does. It sounds crude and it is, but it's the same technique macro shooters have used for decades with manual lenses, and it works because you're controlling the one variable autofocus struggles with at these distances: contrast is too low for the system to commit confidently, but your eye can see it happen through the EVF.
Settings That Actually Held Up in the Field
| Subject | Aperture | Shutter speed | Focus method | Notes |
|---|---|---|---|---|
| Perched dragonfly or damselfly, cool morning | f/8 | 1/250s | Single-point AF, macro switch on | Cold mornings are the single biggest advantage you have; the insect simply can't move fast yet |
| Bee actively working a flower | f/11 | 1/1000s or faster | Manual focus, rock technique, high-speed burst | Expect a low keeper rate; ten frames for one usable shot is normal |
| Ant, small beetle, or spider on a leaf | f/8 to f/11 | 1/320s | Manual pre-focus at closest macro distance | Crop hard afterward; the 60MP sensor has the headroom for it |
| Moth at night with a headlamp or torch for focus assist | f/5.6 to f/8 | 1/125s | Continuous AF with a constant light source aimed at the subject | ISO climbs to 3200-6400; grain is an acceptable tradeoff for a sharp shot at all |
None of these are rules, just starting points I've settled on after burning through a lot of frames. Stopping down to f/8 or f/11 isn't really about depth of field aesthetics here, it's survival: at 17cm working distance, depth of field is measured in millimeters even at narrow apertures, and an insect's antennae alone can be enough to fall outside the plane of focus that its eyes are sitting in.
Light Is the Constraint, Not the Lens
Because you're shooting so close, your own body blocks a lot of the ambient light that would otherwise be hitting the subject. A small reflector (even a folded white card) held at an angle below the subject bounces enough fill back in to matter. I'd avoid on-camera flash for this kind of work if you can help it; at 10-12cm, direct flash tends to blow out the parts of the insect closest to the lens while leaving the rest underexposed, and the flash itself is often enough to startle a subject that was already on edge. A small continuous LED panel, angled and diffused through a scrap of white fabric, has been more reliable for me than flash for both exposure and insect behavior.
Where the Workflow Actually Breaks Down: Culling
This is the part that doesn't get talked about enough when people discuss macro-adjacent shooting on a camera like this. Because the keeper rate is low and the technique leans so heavily on burst shooting and the rock method, you end up with an enormous number of frames that all look nearly identical at a glance, differing only by a few millimeters of focus shift. A single ten-minute session chasing one bee can easily produce 200 to 300 frames, and maybe six of them are actually sharp where it counts, on the eyes or the leading edge of the wing.
Scrolling through that manually in a normal RAW browser is where most people give up on this kind of shooting entirely, not because the technique failed but because the review process is exhausting. This is where I've started leaning on local sharpness scoring in imagic rather than eyeballing every frame at 100% zoom. It scores focus quality per frame and clusters near-duplicate burst sequences together, so instead of clicking through 40 nearly-identical shots of the same bee, you're looking at the two or three the software already flagged as the sharpest in that cluster. For a technique that lives and dies on burst volume, that's the difference between finishing the edit the same afternoon and never getting through the folder at all.
There's also a practical privacy angle worth mentioning if you photograph anything sensitive, like rare or protected species where location data matters. imagic processes everything locally rather than uploading your library to a cloud queue, so an unpublished folder of, say, an uncommon orchid bee or a species you'd rather not have geotagged and indexed somewhere stays on your own drive through the entire cull.
Once you've got your keepers narrowed down, if you shoot enough of these sessions you'll probably want your edits to look consistent across a folder that was captured under wildly different light (early morning shade versus a torch-lit moth at 11pm). Rather than manually matching grade to grade, imagic's apply_my_style feature learns from edits you've already made and applies that look across the rest of the folder, which saves a fair bit of time when you're trying to get a coherent set out of a session with such variable lighting conditions. If speed through a big batch is the goal generally, it's worth reading through a few workflow habits that cut editing time regardless of what camera produced the files.
Frequently Asked Questions
Is the Leica Q3 actually capable of true macro photography?
No, not in the strict 1:1 sense that defines true macro. The Q3's macro switch gets you to roughly 1:10 magnification at its closest focus distance. It's a genuinely useful close-focus mode, but if you need life-size reproduction of small subjects as a core part of your work, a dedicated macro lens on an interchangeable-lens body will outperform it every time.
How close can I physically get to an insect with the macro switch engaged?
The minimum focus distance is around 17cm measured from the sensor plane, which works out to roughly 10-12cm from the front of the lens to the subject. That's tight enough that many insects will react to the lens before you're in focus, which is the main practical limitation of this whole approach.
Should I add a screw-on close-up filter to get more magnification?
You can, since the Q3 kept the same filter thread as the Q2, but I'd go in with tempered expectations. A close-up diopter stacked on an already-fast f/1.7 lens tends to introduce softness at the edges of the frame and can worsen vignetting at wider apertures. If you do try one, stop down further than you normally would and expect to crop the edges out anyway.
Does the 60MP sensor make up for the lack of a longer macro lens?
Partially, and this is honestly the more useful workaround than the macro switch itself. Because the sensor has so much resolution, you can back off to a distance the insect tolerates, use the in-camera crop guides to frame roughly, and crop aggressively in post without the final image falling apart. It's not equivalent to real optical magnification from a longer lens, but for web-sized or moderately printed output it closes a lot of the gap.