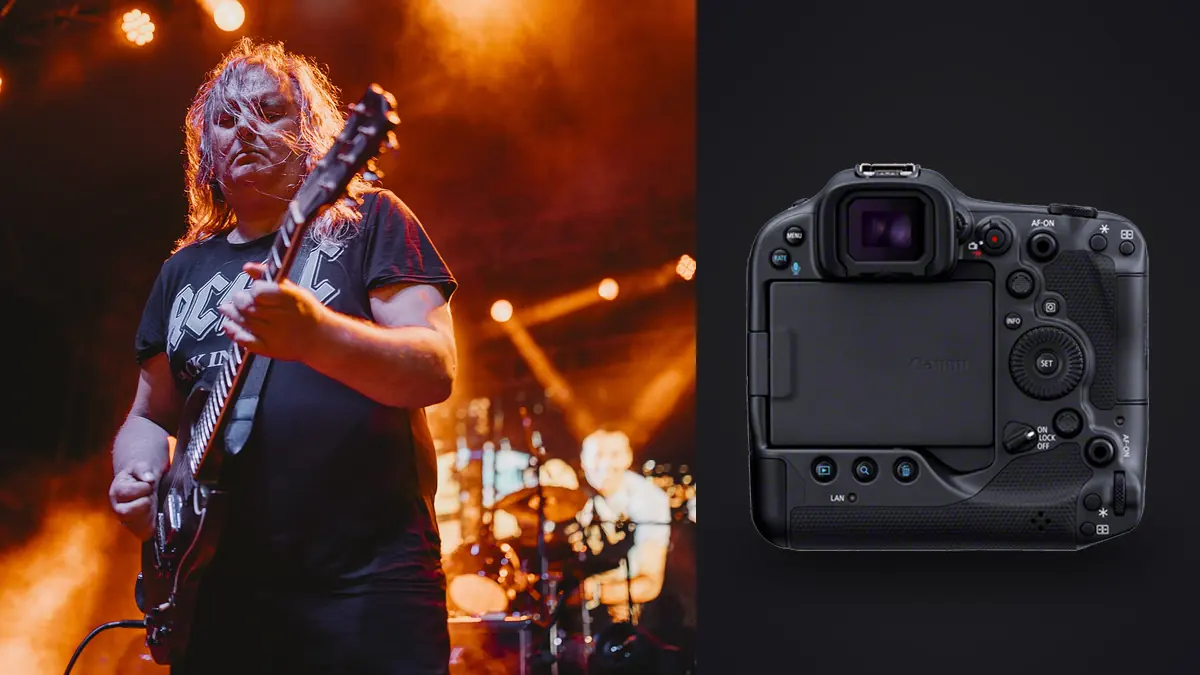
A Canon EOS R3 concert RAW Workflow should preserve the relationship between each CR3 file and the place, lens, lighting cue, performer, and access period that produced it. A barrier pit, theater aisle, club floor, and arena soundboard create different framing and exposure problems. If those differences are recorded at capture, ingest and selection can produce variety instead of an edit dominated by one easy viewpoint.
The R3 has an integrated vertical grip, a stacked full-frame sensor, RF mount, and two card slots that use different media. Adapted EF lenses can preserve an established Canon kit. The useful workflow assigns each lens and position a role, protects both cards, groups changing stage light coherently, and carries those distinctions through culling and export.
Turn access notes into RAW grouping metadata
Before choosing glass, obtain the venue rules: where photographers enter, which areas are approved, whether coverage is limited to selected songs, whether flash is prohibited, and whether a bag can stay nearby. Ask about risers, stairs, cable lanes, pyrotechnics, crowd movement, and security routes. A location map is also a safety document, not merely a composition plan.
Mark four useful distances: closest pit position, farthest pit position, a lateral or balcony option, and any fixed soundboard position. Note stage height and whether monitors block lower bodies. A high stage can make a normal lens feel tighter and can hide feet; a low club stage may allow wider environmental frames but increase the chance of crowd obstruction.
Study sightlines to the drummer, keyboard player, and performers away from center. The brightest singer is easy to plan for, while the musician behind cymbals or equipment often needs a narrow diagonal view. If movement between positions is restricted, assign each song or section a visual goal rather than wandering for variety.
Give each lens a recognizable file role
A standard zoom is the most flexible single-lens choice near a stage. It can move from a small group to a waist-up portrait without a lens change, and it handles sudden approaches to the barrier. A wide zoom adds crowd, lighting architecture, and venue context, but faces near an edge can stretch and an elevated stage may become visually dominant. Use width deliberately rather than simply fitting more into the frame.
A telephoto zoom is central from a theater aisle or soundboard. It isolates faces through microphone stands, compresses stage layers, and reaches performers who remain toward the back. From a close pit, the same lens may be too tight when an artist steps forward. Plan a second body or a safe switch point rather than backing into another photographer or the audience.
Fast primes help when light is limited and the photographer can control position. They also create a clear visual language, but a fixed viewpoint can turn a prime into a constraint. Assign a prime to a known scene, such as a side-stage profile or an environmental club frame. Do not carry several overlapping primes unless the access period allows calm changes.
Set crop limits before the RAW edit
The R3 uses a moderate-resolution sensor suited to many editorial, web, and print deliveries. It allows normal crop correction, but it is not a substitute for reach from a distant position. A full-stage soundboard frame cannot always become a detailed portrait, especially after haze, motion, and high-ISO noise reduce usable detail.
Estimate framing from the actual delivery. If the final set needs horizontal banners, vertical social crops, and close artist portraits, leave enough space selectively instead of capturing every frame loose. Use a rehearsal, support act, or empty stage to compare focal lengths from the approved position. Judge exported dimensions, not only a magnified screen view.
Teleconverters can extend compatible lenses, but they affect aperture, handling, and autofocus conditions. Their value depends on the light and the lens. A longer native focal length, a different position, or a high-resolution second body may be more practical. Any converter should be treated as part of a tested combination rather than an emergency item added in darkness.
Keep RF and adapted EF captures traceable
RF lenses provide native mounting and current control integration. Supported EF lenses can be used through Canon's adapter, which may make an established professional lens set more useful than replacing it. Check autofocus behavior, stabilization settings, flare, balance, and mount security with each exact lens and adapter. Stage light reveals ghosts and veiling flare that ordinary daylight may not expose.
Heavy telephotos change how the integrated grip feels. Attach the strap or harness to the correct load-bearing point, keep the combination from swinging into barriers, and verify that a rotating collar locks securely. A lens that is optically suitable may still be a poor fit if its balance makes repeated vertical framing tiring or blocks nearby people.
Carry front and rear caps in fixed pockets, fit hoods before entering the working area, and avoid lens changes where haze fluid, drinks, rain, or crowd contact can reach the sensor. If a change is unavoidable, step into an approved protected area. A two-body plan reduces changes but increases weight and collision risk, so practice how both cameras rest when neither is raised.
Cull pit positions for distinct pictures
Center position gives direct faces and symmetrical lighting, but microphone stands often bisect the frame. A slight lateral move can separate a face from the microphone and show hands on an instrument. From the side, backlight can outline a performer, while front light may fall away. Watch the lighting cue before committing an entire short access window to one angle.
Near the stage corner, a wider lens can include the audience and show connection. Protect faces near the edges and keep hands from appearing disproportionately large unless that energy is intentional. At the center barrier, a telephoto can isolate performers deeper on stage, but the field of view makes it easier to miss an artist entering close.
Coordinate respectfully with other photographers. Kneel only where safe, avoid raising a camera into another sightline for long periods, and do not occupy the only clean angle after making the needed frame. Position changes should follow venue directions. No photograph justifies stepping over cables, entering a marked lane, or blocking security.
Separate theater, balcony, and soundboard groups
A fixed theater seat or aisle rewards a telephoto with enough reach for close portraits and a shorter option for stage design. Silent requirements may affect shutter choice, while pulsing LEDs can affect electronic capture. The lens plan should leave time for a shutter check at the same focal length and light, because tight framing can make bands or distortion more obvious.
Balconies offer clean stage geometry and audience context. Railings can support composition but should not become improvised camera supports unless the venue permits it and vibration is controlled. A wide lens may emphasize architecture; a telephoto can layer performers with lighting. Confirm that standing does not obstruct ticket holders.
At an arena soundboard, reach dominates. Heat shimmer, haze, raised phones, and heads can reduce clarity even with a long lens. Search for a line above or between obstructions, and include wide frames that honestly describe scale. If the assignment expects tight portraits from that distance, identify the required lens before accepting the position rather than relying on deep crops later.
Read stage light from each planned angle
A light that shapes a face from center can become a rim from the side. Visit during a support set or soundcheck when authorized, and note where key lights cross. Watch for bright screens behind dark performers, moving beams that flare into the lens, and saturated washes that remove skin detail in one color channel.
Lens coatings and hoods help, but angle remains the strongest flare control. A small change can move a point light outside the glass or hide it behind a performer. Keep a protective filter only if it does not create doubled reflections. Clean front elements before entering, since haze and fingerprints spread bright sources across dark scenes.
Plan a manual exposure baseline for stable performer light and a flexible approach for movement between lighting zones. The lens aperture affects both light and the depth needed for a turned face or two-person interaction. A faster lens is useful, but shooting wide open throughout the show can leave the far eye, instrument, or collaborator outside the intended focus plane.
Route cards and backups by location
For a close pit, a two-body combination might pair standard and telephoto zoom roles, with a small wide option only if venue context is required. For a theater, prioritize a telephoto and a quieter support plan. For a soundboard, choose reach, a wide scene-setting alternative, and enough card and battery capacity to avoid changes during key moments.
The R3 accepts CFexpress Type B and SD media. Decide whether the slots provide duplicate files, separate formats, or overflow, then confirm that arrangement with the selected RAW and burst settings. Keep exposed cards physically separated from blank cards. A second slot helps only when the recording plan and card status are understood.
Pack hearing protection, credentials, rain protection if relevant, a cloth, spare batteries, and only the lens tools that solve a mapped need. Tape and accessories should follow venue rules. A compact, organized kit reduces dropped items and makes exit through a crowd easier when the access window closes.
Connect location planning to selection and delivery
At ingest, separate cameras or sets only when the naming scheme remains clear. Preserve CR3 originals, create a verified backup, and retain capture time so sequences from different bodies can be aligned. A location code in a folder or rating note can help ensure the final edit includes pit energy, side light, venue scale, and quieter details rather than twenty versions of the same angle.
imagic can locally score sharpness, exposure, closed eyes, and composition and can group bursts or near-duplicates. Those signals help reduce repetitive review, but they cannot know that the drummer received too little coverage or that a wide frame is required for the publication layout. Make the final selection against the planned shot list and artist priorities.
The local desktop workflow covers non-destructive processing and JPEG or TIFF export. Broader body and lens decisions are available in the Camera Hardware guides. Confirm the export destination and naming requirements before files are rendered, especially when several sets or outlets share a deadline.
Use a venue-to-delivery RAW checklist
- Access: record approved positions, songs, movement rules, and safety lanes.
- Distance: estimate closest, farthest, lateral, and elevated viewpoints.
- Roles: assign wide context, standard coverage, and tight portrait duties.
- Compatibility: verify every RF or adapted EF combination in stage-like light.
- Carrying: practice straps, vertical grip, hoods, and protected changes.
- Light: note front, side, rim, screen, and flare conditions at each position.
- Media: set slot routing and separate blank, exposed, and copied cards.
- Delivery: connect positions to required artists, orientations, and output sizes.
Frequently asked questions
What is the best single lens for an R3 in a concert pit?
A standard zoom is usually the most adaptable near a stage because it handles groups, portraits, and sudden changes in distance. A telephoto becomes more important when the pit is deep or performers remain far back.
Can an adapted EF lens be planned as a primary concert lens?
Yes, when the lens, adapter, autofocus, stabilization, balance, and flare behavior have been checked together. Treat the adapter as a critical part of the kit and inspect its seating before entering the venue.
Does a soundboard position always require the longest available lens?
No. Reach matters, but atmosphere, haze, framing stability, output size, and wide venue context also affect the plan. Choose the longest useful lens, then keep an option that shows the scale of the performance honestly.