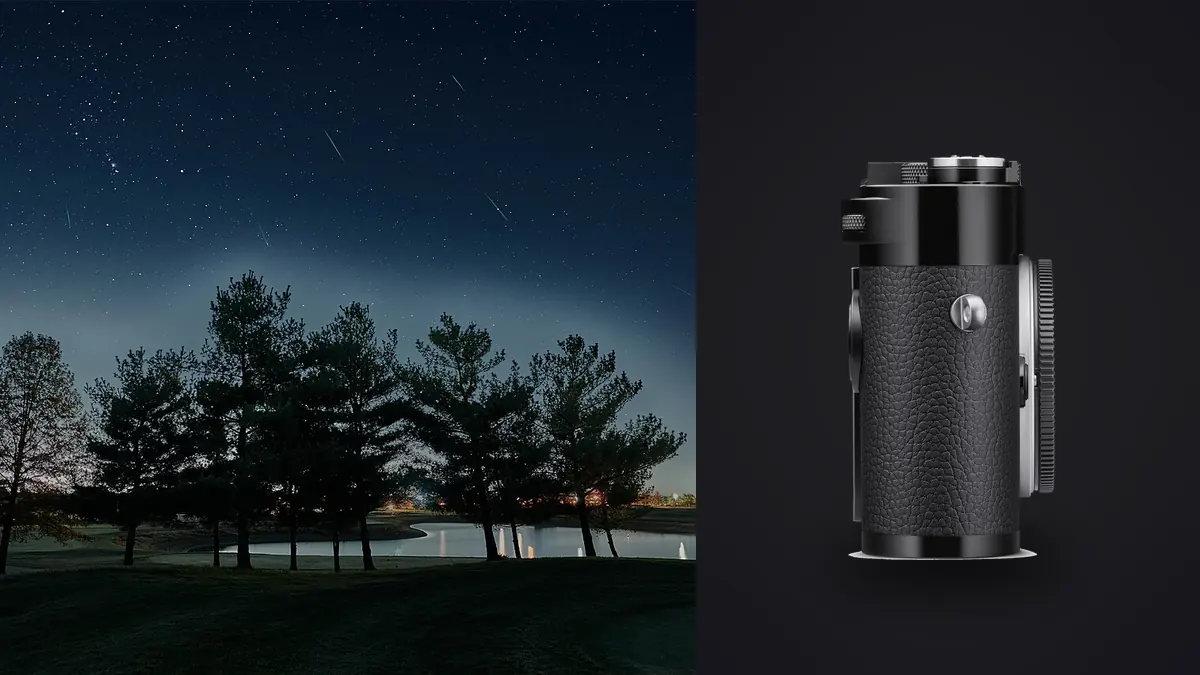
I took a Leica M11 up a fire road above Alamogordo, New Mexico last October specifically to see if star stacking was even a reasonable thing to attempt with it. It is not a camera anyone would design for this. No autofocus, no in-body stabilization, no built-in intervalometer, and a rangefinder patch that goes completely dark the moment you point it at anything dimmer than the moon. And yet the files it produces, once you get past the friction, are some of the cleanest 60-megapixel night sky frames I have stacked from any full-frame body. This is a write-up of what actually worked, what wasted an hour of a very cold night, and what I would tell a friend before they spend eight thousand dollars expecting an astro camera and get a rangefinder instead.
Why the M11 Is a Strange Choice for This in the First Place
Star stacking, in the nightscape sense rather than the deep-sky observatory sense, just means shooting a run of exposures of the same static composition and blending them afterward to average out sensor noise while keeping the stars sharp. It does not require a tracking mount if you keep individual exposures short enough to avoid trailing, which is good, because nothing about the M11 platform supports guided tracking anyway. What it does require is a camera that can hold a locked composition for thirty to sixty frames in a row, expose consistently, and produce raw files clean enough that stacking actually buys you something over a single long exposure.
The M11 does that last part well. The sensor is a 60-megapixel BSI CMOS with a base ISO of 64, and Leica's Maestro III processing chain writes 15-bit DNGs with a surprising amount of shadow recoverability. Where it falls down is everything upstream of the sensor: manual focus only, a mechanical infinity stop that drifts slightly with temperature on some lenses, and a menu system that has never once, in any M-series body I have used, offered a native interval timer. You are fighting the camera to get a usable sequence, then getting rewarded with excellent files once you have one.
Focusing on Infinity Without a Rangefinder Patch
The rangefinder coincidence patch is basically useless for stars. It works by overlaying a faint second image over the main viewfinder image, and by the time you are somewhere dark enough to see the Milky Way, that second image is too dim to register against a starfield unless you point it at Jupiter or the moon and get lucky. So focusing on stars with an M11 means abandoning the rangefinder mechanism entirely and using the rear screen or an EVF (I run a Visoflex 2) with focus peaking and 5x or 10x magnification punched in on a bright star near your intended frame.
Do not trust the hard infinity stop on the lens barrel, especially with older or budget M-mount glass. I focus-checked a Voigtlander 21mm f/1.4 against its own infinity hard stop on a night that dropped from 14C to 2C over three hours, and the point where stars snapped sharp on the magnified live view had crept measurably off the mechanical stop by the end of the session, almost certainly barrel contraction shifting the focus helicoid slightly. My routine now is: focus on a bright star or planet using magnified live view, take a test frame, zoom into the playback at 100%, adjust if needed, and recheck every 45 minutes to an hour if the temperature is dropping. It is tedious. It is also the only way I have gotten consistently sharp stars across a 40-frame sequence.
The Pixel-Pitch Problem: How Long You Can Actually Expose
The usual "500 rule" for maximum shutter speed before star trailing (500 divided by focal length) was built around lower-resolution full-frame sensors and does not hold up on a 60-megapixel body. The M11's pixel pitch is roughly 3.76 microns, tighter than most 24 to 45-megapixel full-frame sensors, which means star trails become visible at pixel level well before they would on a coarser sensor. In practice I found I needed to cut my usual exposure times by 30 to 40 percent compared to what I'd run on a 24-megapixel camera at the same focal length, or accept some softening in stars if I viewed the files at full resolution.
Here is what I settled on after a few sessions of trial and error, checking each result at 100% crop rather than trusting a formula blindly:
| Lens / Focal Length | Widest Aperture Used | Max Single Exposure Before Visible Trailing | ISO Used | Typical Subs per Stack |
|---|---|---|---|---|
| Voigtlander 15mm f/4.5 Super Wide-Heliar | f/4.5 | 22s | 8000 | 50-60 |
| TTArtisan 21mm f/1.5 | f/1.5 | 16s | 4000 | 35-45 |
| Leica Summilux-M 35mm f/1.4 ASPH | f/1.4 (shot mostly at f/2) | 9s | 3200 | 40-50 |
| 7Artisans 50mm f/1.1 | f/1.1 | 6s | 2500 | 50-60 |
| Leica Noctilux-M 50mm f/0.95 | f/0.95 (shot mostly at f/1.4) | 6s | 1600 | 40 |
Those exposure ceilings will feel conservative to anyone used to shooting deep-sky wide fields on a 24-megapixel body, and they are. That is the tradeoff for the extra resolution: you shoot more, shorter subs to hit the same total integration time, which means more frames to align and blend, which is where the M11's biggest practical weakness (no interval timer) starts to hurt.
Lenses Worth Actually Mounting for This
Coma control matters more than raw speed once you are shooting stars at the edges of a wide frame, and this is where the cheap M-mount third-party lenses genuinely surprised me. The TTArtisan 21mm f/1.5 has visible coma stretching in the corners wide open, but stopped to f/2 it settles down to something perfectly usable for a Milky Way arch composition, and it costs a small fraction of a comparable Leica optic. The Voigtlander 15mm is slower at f/4.5 but has almost no coma to speak of, which makes it my choice when I want pinpoint stars corner to corner over a fast wide field with softer edges.
The Leica Summilux-M 35mm f/1.4 ASPH is the lens I reach for most because 35mm sits in a comfortable middle ground for foreground-plus-sky nightscapes, though I nearly always stop it to f/2 for star work since coma at f/1.4 shows up as noticeable elongated points in the outer third of the frame. The Noctilux-M 50mm f/0.95 is, honestly, more of a curiosity for this use than a serious tool. It renders stars beautifully in the center of frame with almost no field flattening issues, but the vignetting and coma at the edges wide open are heavy enough that I only use it for tighter compositions where the corners do not matter, like a single foreground tree against a starfield rather than a full horizon-to-zenith Milky Way shot.
Building a Sequence Without a Built-In Intervalometer
This is the part that will frustrate anyone coming from a camera with a native interval timer. The M11 does not have one in the body menu. Your options are the Leica FOTOS app over Bluetooth or Wi-Fi, which lets you set a timed remote release but chews through battery noticeably faster and can be flaky with cold hands and gloves fumbling a phone screen, or a mechanical/electronic remote release through the M11's cable release socket paired with an external countdown timer. I have used both. FOTOS works fine on a mild night when your phone is warm in a jacket pocket between triggers; on a genuinely cold night I have had the app drop its Bluetooth connection twice in one session, which is not something you want happening mid-sequence.
One setting worth checking before you start: turn off the in-camera long exposure noise reduction. It is on by default in a lot of configurations, and it works by shooting a matching dark frame after every single light frame, which doubles your time per exposure and eats into the number of subs you can realistically capture before the sky rotates too far or you run out of patience. Shoot your light frames with it off, then shoot a batch of six to ten dark frames at the same ISO, shutter speed, and roughly the same ambient temperature at the end of the session (lens cap on), and let the stacking software handle dark frame subtraction during calibration instead.
From a Folder of DNGs to One Clean Frame
A single session at these settings produces somewhere between 35 and 60 raw files at roughly 75 to 90MB each, which adds up to three or four gigabytes of DNGs before you have even started processing. I run them through DeepSkyStacker or Sequator depending on whether I want a straightforward star-and-sky stack (Sequator handles this well and has decent noise reduction built in) or something with more control over foreground blending (Starry Landscape Stacker on the Mac side does a better job keeping a stacked sky married to a single sharp foreground frame). The M11's 15-bit DNGs open fine in current versions of both, though I would not assume an older install handles 60-megapixel files gracefully; check for an update before your first real session rather than finding out at 1am.
Before any of that stacking software even opens, though, I run the folder through imagic first. A 45-frame star sequence is, structurally, one enormous burst of near-identical images, and its duplicate and burst clustering groups the whole sequence together instead of leaving you to scroll through 45 thumbnails that look interchangeable at a glance. More useful still is the local sharpness and focus scoring: on a night where the temperature crept enough to drift my infinity focus, or a truck's headlights swept across a few frames on the fire road below, it flags the soft or compromised subs before I feed anything into the stacker, which matters because DeepSkyStacker will happily blend a few soft frames into an otherwise sharp stack and quietly drag the whole result down. All of that runs fully offline with nothing uploaded anywhere, which means a folder of several gigabytes of astro DNGs never has to leave the laptop, one less thing to think about when you are shooting somewhere with no signal to begin with. If you want the mechanics of how sharpness scoring actually works under the hood, this explainer on AI photo culling covers it in more depth than makes sense to repeat here.
After the Stack: Getting the Color and Grade Consistent
Once you have a stacked TIFF out of Sequator or DeepSkyStacker, the actual color grading is closer to normal landscape editing than anything specialized: pulling back the orange-brown light pollution cast, lifting shadow detail in the foreground without blowing out the star field, and usually a mild curve to keep the Milky Way core from looking artificially saturated. After doing this manually across a handful of sessions and converging on a look I actually liked, I started using imagic's apply_my_style feature, which is trained on your own past edits rather than a generic preset, to carry that grade forward automatically on new stacked frames instead of rebuilding the same curve and color balance from scratch every time. It is not a replacement for the actual stacking step, just a way to skip repeating the same fifteen minutes of grading on every outing once you know what you want the final image to look like. There is more detail on building that kind of consistent color workflow in this color grading guide if you have not settled on a look yet.
Where This Setup Actually Falls Apart
Be honest with yourself about what this rig cannot do. There is no tracking mount involved anywhere in this workflow, so anything requiring long guided exposures (galaxies, most nebulae beyond the brightest ones like Orion or Andromeda as a soft glow) is out of reach regardless of how many subs you stack. This is a nightscape and wide-field Milky Way workflow, not a deep-sky one, and no amount of stacking discipline changes that without a star tracker under the camera, which the M11's minimal control layout was never designed to interface with cleanly.
Battery life in the cold is a real problem. The BP-SCL7 loses charge fast below freezing, and I have watched a battery reading 60% at the start of a session drop to single digits after ninety minutes at -2C. Carry three or four spares and keep them in an inside jacket pocket, not in the camera bag sitting on frozen ground. There is also no night-vision-friendly screen mode, no dimmed red display option, nothing built in to protect your dark adaptation the way some newer mirrorless bodies offer. I manually drop screen brightness to its lowest setting and still find myself squinting and blinking spots away after checking focus. And it is worth saying plainly: the rangefinder mechanism you are paying a premium for is completely irrelevant to this entire workflow. You are buying a very good sensor and processing chain wrapped in a system that was not built with this use case anywhere near the design brief.
Frequently Asked Questions
Does the Leica M11's rangefinder help at all when photographing stars?
No, not directly. The coincidence patch is too dim to register against a starfield, so you are focusing entirely through the rear screen or an EVF accessory with magnification, the same way you would on a mirrorless body with no rangefinder at all. The rangefinder mechanism is essentially dead weight for this specific use.
Would the M11 Monochrom be a better choice for this than the standard M11?
It has real advantages worth knowing about even if you are not switching bodies for it: no color filter array means more light reaching each photosite and generally a stop or so of usable sensitivity advantage in low light. The tradeoff is obvious, you get monochrome files only, so any composition depending on the warm-to-cool color contrast between a light-polluted horizon and a dark zenith sky is off the table. For pure star detail and noise performance in black and white nightscapes it is genuinely appealing; for typical Milky Way color work the standard M11 is the more useful body.
What ISO should I actually trust for stacking on the M11?
I stayed in the 1600 to 8000 range depending on aperture and exposure length, and found the files held up well through stacking even at the top of that range since averaging multiple subs suppresses a lot of the read noise that would look rough in a single frame. Above ISO 10000 the DNGs start showing enough color noise in the shadow areas that stacking can only do so much to clean it up, so I treat that as a practical ceiling rather than pushing toward the M11's full ISO 50000 top end, which is there for emergency handheld situations, not planned astro sessions.
Do I still need a star tracker if I'm already stacking exposures for noise reduction?
Depends entirely on what you're photographing. Stacking untracked subs reduces noise and works fine for Milky Way arches, star fields with a foreground, and star trail composites, because you are keeping individual exposures short enough to avoid trailing in the first place. It does nothing to gather more total light on a faint deep-sky object the way a tracked, guided exposure does. If galaxies or nebulae beyond the brightest ones are the goal, a tracker is not optional, it is the whole point, and no amount of stacking untracked frames on the M11 substitutes for one.