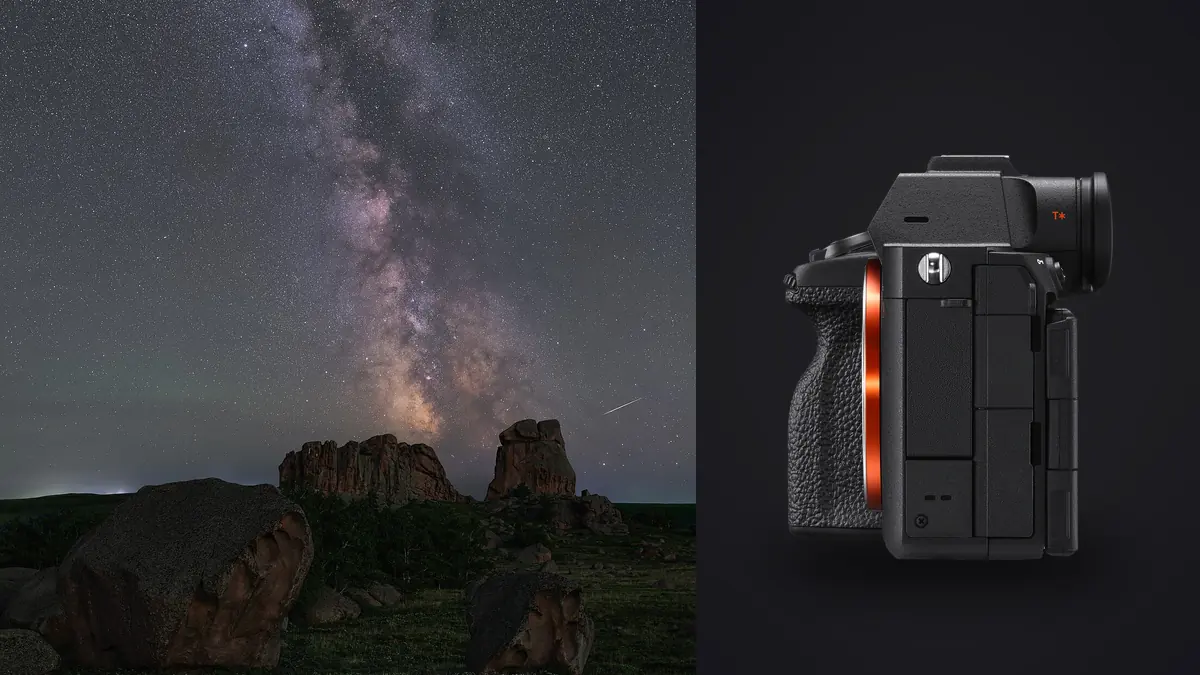
The Sony A7R V is a strange camera to bring out under a dark sky. It was built for landscape and studio resolution, not for chasing photons, and its 61-megapixel sensor punishes sloppy exposure math in a way lower-resolution bodies forgive. That said, once you understand what the extra pixels are actually doing to your shutter speed, the A7R V turns into one of the more capable stacking cameras on the market, mostly because of things Sony didn't design specifically for astro: the built-in interval function, Bright Monitoring, and a sensor that rewards averaging a lot of frames together.
This isn't a spec sheet rehash. It's the settings, mistakes, and workflow adjustments that matter once you're standing in a field at 1 a.m. with a camera that has more resolution than your stacking software's default settings expect.
Why the A7R V breaks the old exposure rules
Most people learn star exposure limits from the "500 rule": divide 500 by your focal length and that's roughly how many seconds you can expose before stars start to visibly trail. That rule was written for cameras with much larger pixels than the A7R V has. At 61 megapixels on a full-frame sensor, the A7R V's pixel pitch works out to about 3.76 microns, nearly half the pixel size of a 24-megapixel body. Smaller pixels mean a star's movement across the sensor becomes visible sooner, so the same 20-second exposure that looked pin-sharp on your old A7 III will show soft, slightly stretched stars at 100% on the A7R V.
The more reliable method is the NPF rule (it factors in aperture and pixel pitch, not just focal length), and the practical difference is large enough that it changes how you shoot. Here's what it looks like in the field at f/2.8, rounded to numbers I actually dial in:
| Focal length | NPF-rule max (A7R V, 61MP) | Old 500-rule estimate | What I actually shoot |
|---|---|---|---|
| 14mm | ~15s | ~36s | 13s |
| 20mm | ~11s | ~25s | 10s |
| 24mm | ~9s | ~21s | 8s |
| 35mm | ~6s | ~14s | 5s |
| 50mm | ~4s | ~10s | 4s |
Notice the gap. If you shot a 24mm lens at the old 500-rule number of 21 seconds, you'd get visibly elongated stars on this sensor, not the pinpoints you were expecting. This is the single most common complaint I hear from A7R V owners moving up from a lower-resolution body: "my stars are trailing and I didn't change anything." Nothing broke, the pixels just got smaller.
Two different things people mean by "star stacking"
It's worth separating these because they call for different camera settings and different software, and conflating them is where a lot of frustrated forum posts come from.
Star trails
Here you deliberately want the stars to move between frames, then blend dozens or hundreds of exposures with a lighten blend mode so their paths draw arcs across the sky. Individual exposures don't need to be tack-sharp on stars; they need consistent exposure and a stable frame so the arcs read smoothly. I run the A7R V's built-in interval shooting function for this (Shooting Mode > Interval Shoot Function), typically 15 or 20-second exposures back to back for 60 to 120 minutes, with the interval set a second or two longer than the shutter speed so the buffer never chokes.
Noise-reduction stacking of a static sky
This is the opposite goal: you want every sub-exposure to register stars in the same spot (or close enough that stacking software can align them) so you can average out sensor noise instead of accumulating it into one long exposure. You shoot a burst of exposures short enough to avoid trailing (using the table above), align and stack them in software, and end up with a much cleaner sky than any single frame could give you. This is where a tracked mount changes the equation entirely, because it lets you use exposures of 60 to 180 seconds at lower ISO instead of chaining together dozens of 8-second frames.
Settings I actually use, by scenario
These are starting points, not gospel, but they're closer to what works on this specific sensor than generic astro advice pulled from a 24-megapixel camera guide.
| Scenario | Shutter | ISO | Aperture | Frame count |
|---|---|---|---|---|
| Untracked nightscape stack (Milky Way, no tracker) | 8-10s (24mm) | 3200-6400 | f/1.8-2.8 | 15-25 subs |
| Star trails (interval mode) | 15-20s | 1600-3200 | f/2.8-4 | 150-400 frames |
| Tracked deep-sky (on a star tracker) | 60-180s | 800-1600 | f/2.8-4 | 20-40 subs |
Two things I always do regardless of scenario: switch to manual focus and disable in-body stabilization. IBIS on the A7R V is rated for around 8 stops handheld, and it's genuinely good glass-in-the-loop stabilization, but on a locked-down tripod it has nothing real to correct for and will occasionally hunt against its own vibration, softening long exposures. Turn it off in the menu (not just physically locking the tripod) whenever the camera is on a fixed mount for anything longer than a second or two.
Focusing on stars without wrecking your night vision
Autofocus doesn't reliably lock on a point source in near darkness, and even when it does, focus breathing between shots is a real risk over a long interval session. The trick that actually works on the A7R V is Bright Monitoring, buried in the display menu, which artificially boosts the live view gain so you can compose and see stars on the rear screen or in the EVF well before your eyes would adjust enough to do it unaided. Combine it with the focus magnifier: punch in on a bright star, switch to manual focus, rack focus until the star shrinks to its smallest point, then leave the lens alone for the rest of the session. Gaffer tape on the focus ring isn't overkill, it's cheap insurance against an elbow bump three hours into a shoot.
One feature that looks tempting but doesn't apply here: Pixel Shift Multi Shooting. It captures four or sixteen frames while shifting the sensor a sub-pixel distance between each one to build a massive composite, and on a static subject it's genuinely excellent. Stars are not a static subject at that timescale relative to the sensor shifts, so the composite falls apart, and the merge only happens afterward in Imaging Edge Desktop anyway, with no in-camera output. Skip it for anything involving the night sky.
Cards, batteries, and the parts of an all-night shoot nobody warns you about
An interval session shooting 300+ compressed RAW ARW files at 61 megapixels adds up fast, somewhere around 60MB per lossless compressed frame, more if you're on uncompressed. On the SD UHS-II side of the dual card slot, write speed can lag behind a tight interval and you'll see the buffer indicator creep up over an hour. If you're running short intervals back to back, put the CFexpress Type A card in the primary slot; it clears the buffer fast enough that you won't drop frames mid-sequence.
Battery life is the other quiet failure point. The NP-FZ100 is rated for roughly 530 shots under CIPA testing, but that number assumes room temperature and normal shooting cadence, not four hours of continuous live view with Bright Monitoring active in near-freezing air. Cold cuts effective capacity close to half in my experience. I keep a spare battery in an inside jacket pocket, body heat against the cell, and swap it in around the two-hour mark rather than waiting for a low-battery warning I might miss while I'm not looking at the screen.
Sorting the take before you touch stacking software
A star trail session leaves you with a folder of 200 to 400 nearly identical RAW files, and a tracked deep-sky session leaves you with fewer files that each matter more. Either way, feeding a bad frame into a stack causes real problems: a single frame that drifted out of focus from thermal contraction in the lens barrel, or picked up dew on the front element, or caught a plane crossing the frame, can smear or double a star across the whole composite if you don't catch it first.
This is the point where I stop reviewing files one at a time in a RAW converter and run them through imagic instead. Its sharpness and focus scoring runs locally on the machine, which matters here specifically because a night of A7R V ARW files at 61 megapixels each is a large batch you don't want sitting in a cloud upload queue at 2 a.m. when you just want to see which frames are usable and go to bed. It flags the two or three frames where focus drifted or a gust of wind moved the tripod, so they're easy to pull before they ever reach DeepSkyStacker or Sequator.
One thing worth knowing going in: its duplicate and burst clustering will look at a folder of 300 interval-mode star trail frames and, correctly, see a burst. That's fine for a normal continuous-shooting burst where you want the one best frame and can discard the rest, but it's the wrong instinct for a stacking sequence, where you actually want to keep the whole run. Treat the cluster as a sorting aid for finding the outliers (the soft one, the one with a stray flashlight beam, the one a car headlight lit up), not as a shortlist to cull down to a single keeper.
What happens after the cull
For untracked nightscape stacks I lean on Sequator or Starry Landscape Stacker to align on the stars, average out the sensor noise, and composite in a separately-exposed foreground shot at base ISO. For tracked deep-sky subs, DeepSkyStacker with a handful of dark frames (same shutter speed and ISO, lens cap on) pulls out hot pixels that would otherwise show up as fake stars in the final stack. Star trail sequences go through StarStaX with the lighten blend mode, which is close to a one-click process once the bad frames are already gone.
The A7R V's resolution actually pays off at this stage. Stacking N frames improves your signal-to-noise ratio by roughly the square root of N regardless of starting resolution, but starting from 61 megapixels means the final composite holds up at print sizes or crops that a 24-megapixel stack can't match. It's slower to process and eats more disk space per session (a 300-frame star trail sequence at 61MP will run past 15GB before you've even started stacking), but for anyone printing large or cropping into the Milky Way core, it's a real advantage over the smaller-sensor cameras usually recommended for astro work.
Once I've got a final composite I like, I run it through imagic's apply_my_style preset, trained on my own past edits, to get the color and contrast baseline consistent with the rest of my astro portfolio before I do the fine adjustments by hand. It saves the repetitive part of matching white balance and shadow lift across a season's worth of shoots without forcing a single fixed look on every image.
If you're regularly working through large interval sequences like this, it's also worth reading up on how AI photo culling actually works under the hood, since the sharpness detection that matters for star trail frames is the same mechanism you'd use to cull a wedding or sports burst. And if color consistency across a long-term project is part of your workflow, the guide to photo color grading covers the manual side of what apply_my_style is trying to shortcut.
Frequently Asked Questions
Do I need a star tracker to stack star photos with the A7R V?
No, not for wide nightscapes. Untracked stacking of short exposures (staying under the trailing limits in the table above) works well for Milky Way and wide-field shots and is what most nightscape photographers actually do. A tracker becomes necessary once you want longer exposures for close-in deep-sky targets like nebulae, where you need low noise at high magnification that untracked short subs can't deliver.
Why are my stars trailing at shutter speeds that used to work fine on my last camera?
The A7R V's 61-megapixel sensor has smaller individual pixels than most cameras the "500 rule" was designed around, so star movement becomes visible at shorter exposures. Use the NPF rule or the practical numbers in this article instead of the old 500-divided-by-focal-length shortcut, especially at 100% crop or for large prints.
Should in-body stabilization stay on for tripod astrophotography?
Turn it off. On a stable tripod there's no handheld shake for the IBIS system to correct, and it can occasionally introduce a small amount of blur by hunting against its own micro-vibrations during a long exposure. Disable it in the menu rather than relying on the tripod alone to make it irrelevant.
What's the fastest way to review a few hundred star trail frames before stacking?
Rather than scrubbing through RAW files one at a time, run the folder through a local sharpness and focus scoring tool like imagic to flag the frames that drifted out of focus or picked up dew, since processing happens on-device rather than through a cloud upload, which matters with large batches of 61-megapixel files. Pull the flagged outliers before they reach your stacking software, but keep the rest of the sequence intact rather than treating it like a normal burst to cull down.