
Some photographers search for "photo review and selection tools" rather than "photo culling software," and land on pages that were never written with that phrasing in mind. The two terms describe the same job: going through a shoot's worth of images and deciding which ones are actually worth keeping. This piece uses "review and selection" throughout and walks through what that pass actually looks like in practice, since the terminology gap is real even when the underlying task is not.
Why two names exist for the same job
"Culling" is the term that stuck inside professional photography circles, borrowed from the same word used for thinning a herd down to what is worth keeping. "Review and selection" is the more literal, plain-language description of the same task, and it tends to be the phrase people reach for when they are describing the job itself rather than using industry shorthand, or when they are coming from adjacent fields like video editing or stock photography where "select" is the more common verb. Neither term describes a different process. Both mean: look at everything from a shoot, and decide what survives to the editing stage.
The distinction matters for anyone building a search-driven workflow guide or comparing software, since a tool description written entirely around "culling" can read as unfamiliar or even irrelevant to someone searching "photo selection software" even when it is describing exactly what they need. Software vendors and review sites both tend to default to "culling" because it is the established term, which leaves a real gap for anyone who thinks of the task differently and does not immediately recognize the industry word as covering their own workflow.
What a review and selection pass is actually for
The point of a dedicated review pass, under either name, is separating two different decisions that get tangled together if you skip it: which images are technically usable (in focus, properly exposed, eyes open), and which images are worth the time to edit and deliver. Trying to make both calls simultaneously while also adjusting exposure and color slows everything down and produces worse decisions on both fronts. A clean review pass happens before any editing starts, on unedited or lightly rendered previews, specifically so the only question being answered is "does this frame survive," not "how good could this frame look after work."
A first pass: obvious rejects
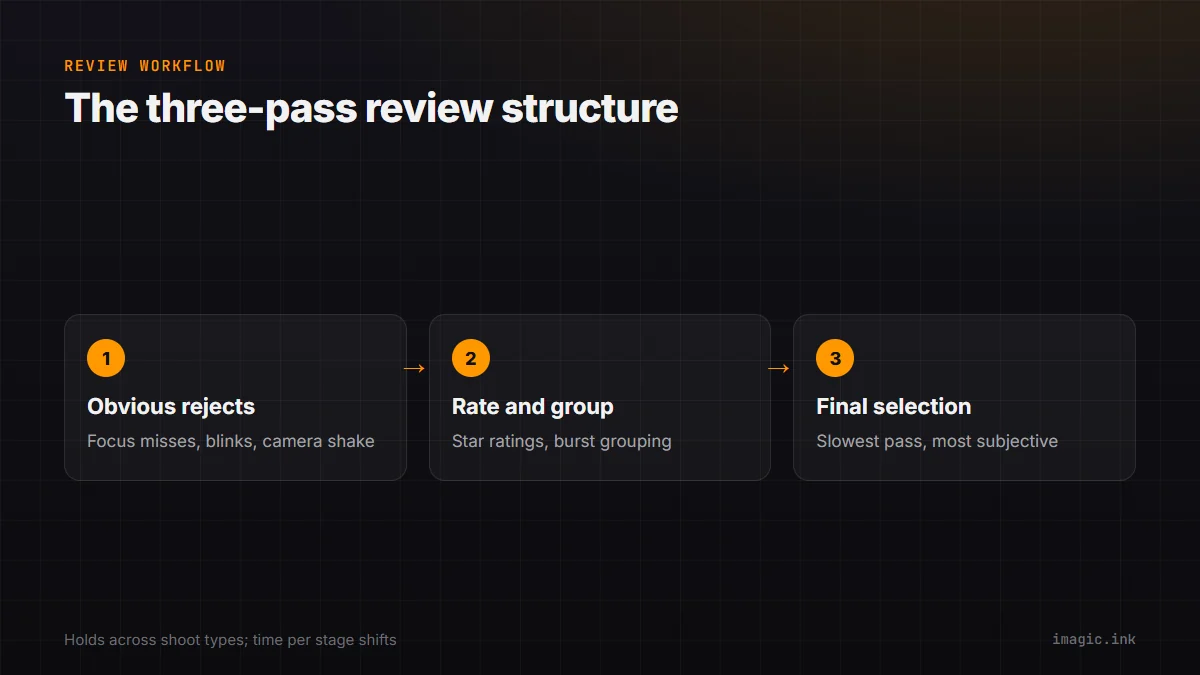
The first stage of any review and selection workflow is the fastest and least judgment-heavy: removing frames that fail on a technical basis alone, regardless of composition or moment. Focus misses, blown highlights or crushed shadows beyond recovery, closed eyes in a portrait, and camera shake are the standard categories. This pass should move quickly and lean toward rejecting when genuinely unsure, since a borderline frame that gets cut here rarely turns out to have been the shot you needed, and dwelling on close calls at this stage slows the whole review down for little benefit.
A second pass: rating and grouping
Once obvious technical rejects are gone, the second pass is about comparison rather than elimination: rating the surviving frames, usually on a star or flag system, and grouping near-duplicates and bursts so similar frames get judged against each other rather than in isolation. This is where quality scoring genuinely earns its place in a workflow, since comparing forty near-identical burst frames by eye is exactly the kind of repetitive, fatiguing task automated scoring handles well, while still leaving the final judgment call to a human reviewing the AI's shortlist rather than accepting it blindly.
The marking systems review tools actually use
Whatever software handles a review pass, the underlying marking vocabulary tends to be one of a few standard patterns. Star ratings, usually one to five, work well for the final subjective pass since they support fine-grained comparison between frames that are all technically acceptable. A simpler flag or pick-reject system, often just two or three states, suits the fast first pass better, since forcing a five-point judgment on a frame that is either obviously sharp or obviously blurred adds a decision step that does not actually change the outcome. Color labels are the third common pattern, often used to mark a specific reason for rejection or a specific delivery category, letting a reviewer distinguish "rejected for focus" from "rejected as a duplicate" without needing a separate note field for every frame. None of these systems is inherently correct; the right one depends on which pass is running and how much granularity that specific decision actually needs.
A final pass: the actual delivery selection
The last stage narrows the surviving, rated frames down to what actually ships to a client or gets edited for a portfolio. This pass tends to be the slowest per image and the most subjective, since it is no longer about technical pass or fail but about which moment, expression, or composition best represents the shoot. Some photographers do this pass against a target count (a wedding contract promising a range of finished images, for example), which changes the calculus from "is this good" to "is this better than what is already selected," a genuinely different and harder comparison.
Where automation fits without replacing judgment
Quality-scoring tools, imagic included, are built specifically for the first and second passes described above: flagging likely technical rejects and grouping duplicate or burst frames so a human reviewer spends less time on repetitive comparisons and more time on the final, genuinely subjective selection call. imagic runs sharpness, closed-eye, and composition scoring locally, with photos never leaving the machine, and groups visually similar frames so a burst gets reviewed as a set rather than frame by frame. None of that replaces the final pass; it removes the mechanical parts of the earlier passes so the final, judgment-heavy selection gets more of a photographer's actual attention instead of less.
What changes for different shoot types
| Shoot type | What the review pass emphasizes |
|---|---|
| Wedding or event | High volume, burst-heavy; duplicate grouping matters most |
| Portrait session | Closed-eye and expression checks dominate the first pass |
| Landscape or travel | Fewer frames, more time per image on the final subjective pass |
| Sports or wildlife | Very high burst volume; sharpness and peak-action timing lead |
The three-pass structure above holds across all of these, but the time spent on each stage shifts. A wedding shoot with several thousand burst frames spends most of its time in the first two mechanical passes; a landscape shoot with a few hundred deliberate frames spends most of its time on the final, purely subjective selection, since there is little technical rejection needed in the first place.
Common mistakes that slow a review pass down
A few habits turn a review and selection pass from a focused, fast task into an exhausting one. Reviewing at full editing zoom instead of a consistent, moderate preview size makes sharpness judgments inconsistent from frame to frame and slows the pass considerably. Making any editing decisions, even small exposure nudges, during the first two passes blurs the line between "is this frame usable" and "how good could this look," which is exactly the tangle a dedicated review pass is meant to avoid. And reviewing an entire shoot in one long, uninterrupted sitting invites decision fatigue: judgment quality on frame two thousand is measurably worse than on frame two hundred, which is a real argument for breaking a large shoot into smaller review sessions rather than pushing through in one pass out of habit.
A practical habit: separate technical review from creative selection
The single most useful discipline across all of this is keeping the technical review pass and the creative selection pass as genuinely separate sessions, not just separate mental categories within one sitting. Running the technical pass first, ideally with automated scoring doing the first sort, and only opening the creative selection pass once the technically-usable set is already settled, means the harder, more subjective decisions get made against a clean, already- filtered set rather than while still filtering out blinks and blur at the same time. Treating the whole shoot as one continuous scroll through every frame, technical and creative decisions tangled together, is the pattern most likely to produce both a slower pass and less confident final selections, simply because each frame is being asked to answer two different questions at once instead of one at a time.
How long a review pass should realistically take
There is no universal per-image time budget that holds across every shoot, since volume, frame similarity, and how much is riding on getting the selection right all change the honest answer. What does hold across shoot types is the shape of where time goes: the first, purely technical pass should be the fastest per frame by a wide margin, since it is a binary pass or fail decision with no real ambiguity most of the time. The second, rating and grouping pass takes longer per surviving frame, since it involves genuine comparison rather than a single judgment. The final delivery selection takes the longest per frame of all three, and that is expected, not a sign anything is going wrong; it is the one stage where the decision is genuinely hard and deserves the time it takes.
Tools built around ingest and review specifically
Some tools are built primarily around the review and selection step itself rather than full RAW development. Photo Mechanic, for instance, positions itself around fast ingest, rating, and captioning ahead of a separate editing app, which is the same review-first structure described above, just without the automated quality scoring imagic adds. Whichever tool handles this stage, the underlying three-pass shape, reject, rate and group, then finally select, holds regardless of the specific software or the specific term used to describe it.
For more on how automated scoring fits into this process, see what photo culling actually means and how to choose culling software for a broader comparison of tools built for this stage. Wedding and event photographers specifically may find imagic for wedding photography useful for the burst-heavy end of this workflow, and imagic vs Photo Mechanic covers the ingest-first alternative in more detail. The Tips & Workflow category has more on the stages around this one.
Frequently asked questions
Is "photo review and selection" different from "photo culling"?
No, they describe the same task: going through a shoot's images and deciding which survive to editing. "Culling" is the term more common inside professional photography; "review and selection" is the more literal, plain-language phrasing for the same process.
Should review happen before or during editing?
Before. Making technical keep-or-reject decisions on unedited previews, separately from editing judgment calls, is faster and produces more consistent results than trying to do both at once.
Can automated scoring replace the final selection decision?
Not the final, subjective pass. Automated quality scoring is built for the earlier technical-reject and duplicate-grouping stages, narrowing what a photographer has to review by hand, but the final call on which image best represents a moment still needs a human decision.