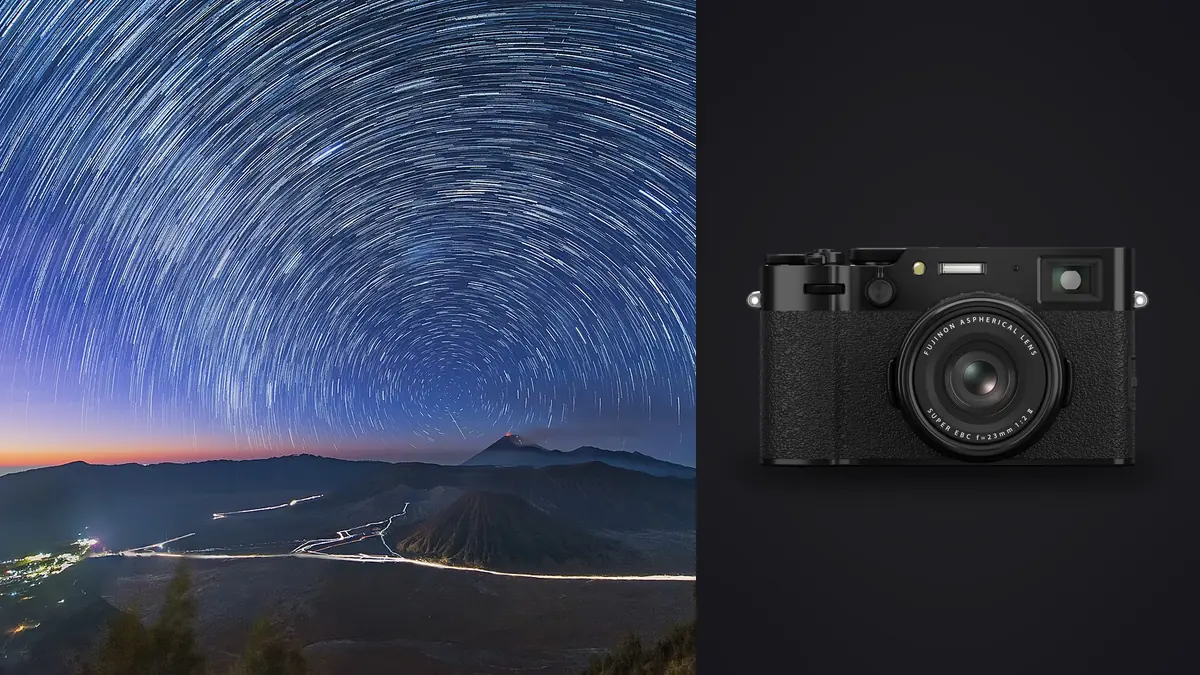
I didn't buy the X100VI for astrophotography. Nobody does. It's a street and travel camera with one lens welded to the body, and that lens tops out at f/2. But I spent three nights on a friend's farm in rural Portugal last month with nothing else in the bag but this camera, a cheap travel tripod, and a spare battery, and by the third night I had a usable star-trail composite and a Milky Way frame I was genuinely happy with. This is what I learned about making a fixed-lens 40-megapixel compact do a job it wasn't really built for, and where it quietly falls short of a dedicated astro rig.
The Honest Limitations Before You Pack the Bag
Let's get the bad news out of the way first, because every other astro guide for this camera skips it. The X100VI has a fixed 23mm lens (35mm equivalent on the APS-C sensor) with a maximum aperture of f/2. That's fine for a wide-angle nightscape but it's a stop and a third slower than the f/1.4 primes most Milky Way shooters reach for, which means either longer shutter speeds or higher ISO to hit the same exposure. There's no way around it and no accessory lens that fixes it; the WCL and TCL conversion lenses Fujifilm sells for this body change the focal length, not the aperture.
Then there's the framing problem. One focal length means one composition style. You can't reach for a 14mm for a sweeping horizon-to-zenith arch, and you can't reach for an 85mm to isolate a rising moon behind a ridge line. Everything you shoot with this camera at night is a 35mm-equivalent wide shot, full stop. If your astro ambitions run toward tight nebula framing or planetary detail, this isn't your camera and never will be. What it's actually good at is wide environmental starscapes: a barn under the Milky Way, a lone tree against a star-trail arc, a tent glowing under a dark sky. Know that going in and you won't be disappointed.
Focus in the Dark Actually Works, If You Do It Right
Autofocus hunts and gives up in anything darker than deep twilight, so don't bother with it once stars are visible. Switch to manual focus on the lever on the side of the lens barrel, then use focus peaking (set the highlight color to red or another color that stands off against a dark sky, not the default white) and zoom in digitally using the rear focus check button before you commit. I aim the peaking at a bright star near the frame edge rather than the center, because the center of the X100VI's lens resolves marginally better wide open and it's easier to judge a crisp point of light there.
Don't trust the hard infinity stop on the focus ring. On my copy, true infinity for stars sits a hair before the mechanical stop, and if you rack all the way to the end you get slightly soft, faintly bloated stars across the whole frame. It's a small enough error that you won't catch it on the rear LCD at night, only when you pull the files up on a real monitor the next morning, which is a miserable way to find out an entire night's stack is soft. Do the focus check once per session, not once per trip, because temperature swings shift the focus position slightly as the barrel contracts.
What Actually Changed With the VI: IBIS and the Built-In Intervalometer
Two things on this specific body matter more for stacking than anything else in the lineup. First, this is the first X100 with in-body stabilization, rated to roughly six stops. It's genuinely useful for handheld blue-hour shots on the walk to your spot, but turn it off entirely once the camera is on a tripod and you're running long exposures. IBIS on a static tripod shot can introduce a very faint smear or double-image artifact on long exposures as the stabilization unit hunts for movement that isn't there; it's subtle, but on stacked star frames it shows up as slightly mushy points instead of clean dots. Flip it off in the menu before your first frame, not after you notice a problem three stacks in.
Second, and more useful in practice: the built-in interval timer shooting mode. You can set frame count (up to 999), interval, and starting delay entirely in-camera, no external intervalometer or phone tether required. For a star-trail stack that means 150 to 200 frames of 20 to 25 seconds each, fired automatically while you sit in a camp chair with a thermos, which is the actual appeal of shooting trails this way instead of one absurdly long single exposure. Set the interval a second or two longer than your shutter speed so the buffer clears between frames; on the 40-megapixel raw files I found anything under a one-second gap started causing occasional dropped frames toward the end of a long sequence.
Exposure Math for a 40-Megapixel Sensor
Do the math with the 35mm-equivalent focal length and the old 500 rule and you land around 14 seconds before stars visibly smear. That rule was written for 12 to 16-megapixel full-frame files viewed at normal print sizes, though, not for a 40-megapixel APS-C file you're going to pixel-peep on a 27-inch monitor. In practice I start seeing elongation past 6 to 7 seconds at 100% crop on this sensor. If you need genuinely round stars for a detail shot, shoot 5-second frames and lean on ISO and stacking to fight the noise instead of stretching the shutter. If you're shooting for a star-trail composite, none of this matters because trailing is the entire point.
Here's roughly how I split exposure settings by what I'm actually trying to produce, based on three sessions and a fair amount of trial and error with frames that came out too noisy or too smeared to use:
| Stacking Goal | Frames Shot | Single Exposure | Aperture | ISO | Stack Method |
|---|---|---|---|---|---|
| Milky Way core, noise-reduced | 15-25 | 5 sec | f/2 | 3200 | Sequator, sky + ground blend |
| Star trails, continuous arc | 120-200 | 25 sec | f/2.8 | 800 | StarStaX, lighten blend mode |
| Star trails, gapless hybrid | 60 short + 1 long base | 20 sec / 8 min base | f/2.8 | 640 | StarStaX plus manual base layer |
| Blue-hour foreground blend | 1 sky + 1 ground | Varies by ambient light | f/4 | 400 | Manual layer blend in editor |
| Moon detail, cropped in | 1 sharpest of a burst | 1/250 sec | f/4 | 200 | Single frame, no stack |
Notice the aperture drops to f/2.8 for star trails rather than staying wide open at f/2. Wide open, coma smears the points at the corners of the frame into little wings, which is invisible on a single frame but gets ugly once you stack 150 of them into one continuous arc. Stopping down a third of a stop cleans it up noticeably.
Two Different Stacks, Two Different Goals
People new to this conflate two completely different techniques because both get called "stacking." A noise-reduction stack takes a burst of identical short exposures of a static sky and aligns the stars between frames (the sky drifts slightly between shots as the earth rotates, so alignment is mandatory) before averaging them together. The result is a single Milky Way frame with visibly less noise than any one input frame, with pinpoint stars, because the software rotates and shifts each frame to compensate for sky movement before blending. Sequator does this well and it's free.
A star-trail stack does the opposite: it deliberately does not align the frames. Each exposure captures the stars in a slightly different position as the earth turns, and the software (I use StarStaX, though there are others) blends every frame using a "lighten" comparison, so each pixel in the output takes the brightest value across the whole sequence. Stars that moved across the frame over two hours become continuous arcs. No alignment, no averaging, just picking the brightest pixel at every position across the whole stack. Confuse the two workflows and you'll either get noisy trails or motionless "star points" from a technique meant to trail them, and you'll waste an entire clear night finding that out.
Framing the Core Without a Second Lens
The one trick that partially answers the fixed-lens problem is the digital tele-converter, which crops in-camera to simulate 50mm or 70mm equivalent framing. Because the sensor has 40 megapixels to spare, a crop to 70mm equivalent still leaves you a file north of 18 megapixels, which is plenty for web use and a reasonable print. It's genuinely useful for tightening a composition around the galactic core without buying the accessory tele-conversion lens, though it's still a crop, not new resolving power, so don't expect it to reveal detail the base lens didn't capture. I use it mostly for framing decisions in the field rather than as a final-image tool; I'd rather shoot the full 23mm frame and crop deliberately later, where I have more control than the fixed 50mm or 70mm crop ratios the camera offers.
RAF Files and Stacking Software Compatibility
This is the part nobody warns you about. Fujifilm's X-Trans sensor uses a different color filter array than the Bayer sensors most stacking software was written around, and support has historically been inconsistent. Sequator handles RAF files directly now, but I still convert to 16-bit TIFF first through Lightroom before stacking anything I actually care about, because I've had a handful of frames where the direct RAF alignment produced faint color fringing around bright stars that simply wasn't there in the converted TIFF workflow. It costs a few extra minutes per stack; it's worth it for a file you might print.
DeepSkyStacker, if you're going that route for a more traditional astro workflow, wants its raw files converted through its own DCRAW-based pipeline and can be fussier still with X-Trans demosaicing on default settings. If your stacked results look softer or noisier than the individual source frames, that's usually the first thing to check, not your technique.
Culling a Few Hundred Frames Without Losing a Morning to It
A single trail sequence at 25-second intervals for two hours is close to 300 raw files. Add a few Milky Way bursts and a handful of test exposures while you're dialing in focus, and a productive night easily produces 400 to 500 frames, most of which you'll never use. Going through that by eye, at 1am with cold hands, is how good stars end up buried under mediocre ones you never got around to rejecting. I run the night's card through imagic before I touch anything else: its local sharpness scoring flags which frames in a burst are actually crisp (useful for catching the odd frame where a gust of wind nudged the tripod) and its duplicate and burst clustering groups the near-identical interval-timer frames together so I'm reviewing clusters instead of scrolling through 300 nearly identical thumbnails one at a time. If you haven't used AI-assisted culling for a burst-heavy workflow before, this breakdown of how AI photo culling actually works covers the mechanics in more depth than I will here.
It matters more for night photography than most other genres because everything runs offline anyway, out at a dark site with no signal. Nothing gets uploaded anywhere to be processed; the scoring and clustering all happen locally on the laptop I bring for exactly this reason. Once I've picked the actual keepers and built a stack in Sequator or StarStaX, I bring the composite back into imagic and apply the "apply_my_style" preset I trained on my own past astro edits, which saves rebuilding the same curve and color balance from scratch every single session. For anyone trying to shave time off a workflow that otherwise eats an entire rest day after a shoot, these workflow speed tips pair well with a culling pass like this.
Battery, Condensation, and Other Field Notes
The NP-W126S battery is not built for two-hour interval sequences in cold air. I get roughly half my usual shot count out of a charge once the temperature drops below 5°C, and I now carry two spares in an inner jacket pocket rather than the camera bag, since a warm battery swapped in mid-session outperforms a cold one that's been sitting in a bag all night. Dew is the other silent killer: the built-in ND filter glass and the front element both fog up fast once humidity climbs after midnight, and there's no lens hood by default to slow it down. A rubber band and a chemical hand warmer wrapped around the barrel is an ugly but genuinely effective fix; I've lost more frames to a fogged lens than to any exposure mistake.
One more thing worth flagging: leave the built-in ND filter off. It's easy to forget it's engaged from a daytime shoot, and a 4-stop ND at night will either force absurd ISO values or just black out your frame entirely depending on your other settings. Check it's disabled before your first test shot, every time.
Frequently Asked Questions
Can the Fujifilm X100VI shoot the Milky Way without a star tracker?
Yes, within limits. A star tracker lets you extend exposure time indefinitely without trailing because it counter-rotates with the sky, which means far lower ISO and cleaner single frames. Without one, you're capped around 5 to 7 seconds per frame before trailing shows on this sensor, so you lean on stacking multiple short exposures to build up signal instead. It works, and the results hold up well at normal viewing sizes, but a tracked full-frame camera will still out-resolve it on fine detail in the core.
Should I turn off in-body stabilization for star stacking?
Yes, always, once the camera is on a tripod. IBIS is built to correct for handheld movement it detects through the sensor and gyros, and on a genuinely static long exposure it can introduce a faint artifact as the system searches for motion that isn't happening. Leave it on for handheld dusk shots on the walk in, then switch it off in the menu before your first tripod exposure of the night.
Is the digital tele-converter useful for astrophotography, or does it just crop and lose quality?
It's a genuine crop, not computational zoom, so you're not gaining new resolving power, but because the base sensor is 40 megapixels there's real resolution left over even after cropping to the 70mm equivalent setting. It's handy for framing decisions in the field. I'd still rather shoot the full frame and crop later in post, where I have finer control than the camera's two fixed crop ratios, but it's not a bad option if you want to see the tighter composition in the viewfinder before you commit.
What software actually stacks X100VI RAF files well?
Sequator handles RAF files directly for noise-reduction stacks and StarStaX handles trail stacks from either RAF or converted TIFF frames. I still convert to 16-bit TIFF through Lightroom before stacking anything I plan to print, since I've run into occasional color fringing around bright stars with direct RAF alignment that didn't show up after conversion. It costs a few minutes per session and saves a reshoot.