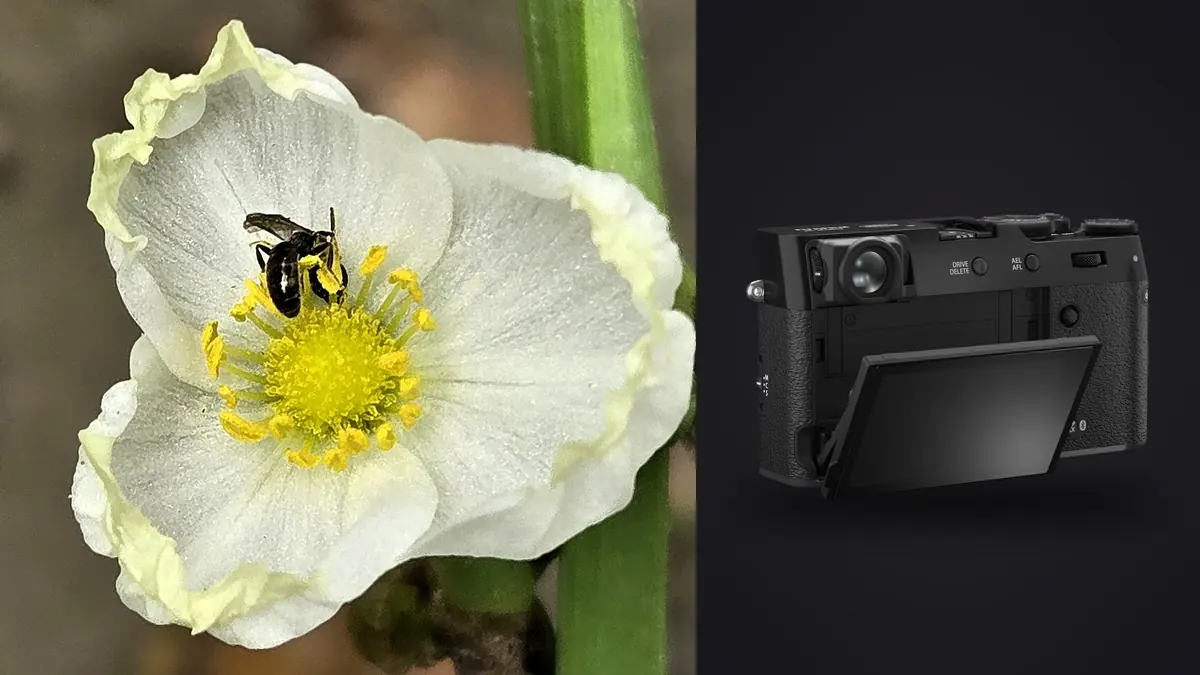
The Fujifilm X100VI is a fixed-lens compact with close-focusing ability, not a dedicated macro system. Its 23mm f/2 lens gives a 35mm-equivalent angle of view, so small insects remain environmental subjects unless the camera is brought close or an optical accessory is added. That limitation can become a useful style: the habitat, flower, and surrounding light stay part of the picture instead of disappearing behind extreme magnification.
An advanced approach begins by respecting working distance and subject behavior. The camera can focus close, but a lens placed near an insect may cast a shadow, disturb the plant, or trigger flight. This checklist covers how to make deliberate close-ups without pretending that resolution and cropping replace a true macro lens in every situation.
Define close-up rather than promising macro
True macro commonly refers to recording a subject at life size on the sensor, expressed as a 1:1 reproduction ratio. The X100VI's built-in lens does not reach that type of magnification on its own. It can photograph a larger insect, flower detail, spider in a web, or small object at close range, with the final framing often refined by a crop.
That distinction matters for planning. A butterfly on a flower can fill a useful part of the frame while retaining context. An ant's eye or the scales on a tiny moth wing require greater optical magnification than the native lens provides. Do not approach a protected habitat or stress an animal merely to compensate for the lens.
Choose a finished image size before relying on a heavy crop. The high-resolution sensor provides latitude, but cropping discards pixels, magnifies focus error, and exposes noise or diffraction. A technically possible crop is not automatically a satisfying close-up.
Use the electronic view for close distances
The X100VI's hybrid finder is a defining feature, but the optical view and lens see from different positions. At close range that parallax becomes important: the frame seen through the optical window does not precisely match what the sensor records. Electronic view or the rear display shows the sensor framing and is the safer choice for exact edge placement.
Enable a simple grid and keep the live image clear of unnecessary overlays. Magnify the focus area for a resting subject. Focus peaking can reveal where contrast approaches the plane, but it is broader than critical sharpness. Confirm the nearest eye or other chosen feature with magnification.
If the subject is moving, continuous autofocus with a restricted area can follow small distance changes. The insect may be too small for reliable subject recognition, so place the area yourself. For a still subject, single autofocus or manual focus prevents the plane from jumping to a leaf after it has been established.
Manage working distance without crowding the subject
Approach in small arcs rather than directly from above. Avoid casting a sudden shadow and do not touch the plant supporting the insect. Early, cool periods often produce calmer subjects, but weather and species behavior vary. Observe first, identify a safe escape route for the insect, and stop if repeated movement shows distress.
The wide-normal perspective means background arrangement changes rapidly with camera position. A movement of a few centimeters can place a bright stem behind the insect or open a clean patch of distant foliage. Solve that background before closing the last distance. The most detailed frame is not necessarily the best if it appears cramped or disruptive.
Use the tilting screen to lower the camera without kneeling onto vegetation. Keep straps, sleeves, and the lens cap from brushing the scene. A compact body helps access, but it does not grant permission to leave a path or damage habitat.
Add magnification only with a tested optical plan
A compatible filter adapter allows accessories to be mounted without placing stress directly where it does not belong. A close-up diopter can increase magnification by reducing the available focusing range. Optical quality, working distance, and corner behavior depend on the diopter strength and construction, so test the exact combination before a field session.
Stronger magnification makes depth of field thinner and camera movement more visible. It can also leave only a narrow band of usable focus distances. Practice finding that band on a static object and note how close the front accessory comes to the subject. A lens hood or large diffuser may block light at that distance.
Fujifilm conversion lenses intended for the X100 system change angle of view, but compatibility and close-focus behavior should be confirmed in current manufacturer documentation. Do not stack several pieces of glass simply to achieve a number. Each surface can add flare, reduce contrast, or complicate handling.
Place depth of field through camera angle
At close range, closing the aperture alone cannot cover every part of a three-dimensional insect. Align the sensor with the feature plane that matters. For open wings, move toward a parallel view. For a side profile, align the eye and body edge. For a frontal portrait, decide whether the eyes or forward appendages deserve priority.
Make a short aperture series on a cooperative stationary subject. A wider setting isolates the insect but may leave only one small plane sharp. A moderately closed aperture carries more habitat detail. The smallest aperture introduces diffraction that can reduce fine texture, particularly after a crop. Judge the whole output rather than chasing theoretical depth.
Focus stacking requires a still subject and later software that can align and blend multiple planes. The X100VI and imagic do not provide a layer-based stack merge for this workflow. Capture a stack only when subject welfare, stability, and the intended post-production route make it realistic.
Control movement with shutter and timing
In-body stabilization helps reduce camera movement, but it cannot freeze an insect or a swaying stem. Choose shutter speed from the fastest visible feature. A perched beetle may be still while its antennae move; a bee may pause its body while wings continue. Inspect these parts separately when diagnosing blur.
Use short bursts around a behavior such as takeoff, feeding, or a turn. The leaf shutter is quiet, which can support a discreet approach, but rapid repeated operation and body movement can still disturb a subject. Anticipation produces more varied frames than holding the shutter through an entire visit.
For intentional wing blur, keep the eye and body as stable anchors. A slower shutter can communicate activity, but it needs a deliberate camera position and enough attempts to select a readable gesture. Do not confuse an accidental soft frame with expressive motion merely because it is difficult to repeat.
Use flash as shaped fill, not a white wall
The X100VI's leaf shutter can support flexible flash use within compatible settings, but the close subject distance creates a lighting problem. Bare on-camera flash can produce a small hard reflection, deep shadow, and rapid falloff. Diffuse the light and move the apparent source closer to the subject while keeping the apparatus clear of vegetation.
Expose the ambient background first. Then add enough flash to reveal the insect without turning distant foliage black unless that is the intended style. Low flash power recycles quickly and can have a short light duration, but the exact behavior depends on the flash. Verify synchronization, trigger, and output with the current manuals.
The built-in neutral-density filter is intended to reduce incoming ambient light, not to increase flash power. It can help maintain a chosen aperture in bright conditions, but it also changes the ambient-to-flash balance. Confirm whether it is active before diagnosing an unexpectedly dark frame.
Protect highlights and natural color
Glossy shells and translucent wings can clip before the surrounding plant. Use the histogram and highlight alert, then inspect the brightest meaningful texture. A small point reflection may remain white, while a broad wing or shell area should preserve color if detail matters.
Automatic white balance can shift as a colorful flower fills more of the frame. A fixed daylight or custom value gives a consistent sequence, while RAW capture keeps adjustment latitude. Avoid making every green background neutral; reflected habitat color is part of the light, though excessive casts can be corrected carefully.
When flash and daylight mix, use a flash modifier or gel that produces a manageable relationship. A cool subject against a warm background can look artificial even when each region is technically exposed. Make a reference frame without flash to understand what the added source changes.
Review crops and bursts at the intended output
Compare frames first for eye focus and gesture, then for background and crop. A high-resolution file can support refinement, but do not crop until antennae, legs, and wing edges feel accidentally severed. Leave space toward the insect's gaze or movement when the composition calls for it.
imagic can process Fujifilm RAF files locally, assess sharpness and exposure, and group near-duplicate bursts without uploading the photographs. It can help identify the strongest technical candidates, while species behavior and composition still need human review. See the tips and workflow guides for related field habits and the desktop page for the local non-destructive route to JPEG or TIFF export.
Advanced close-up field checklist
- Set the goal: environmental close-up, behavior, or fine detail, with a realistic crop.
- Protect habitat: stay on permitted ground and stop when the subject reacts repeatedly.
- Use sensor view: switch to EVF or rear display to avoid close-range parallax.
- Control the plane: put the nearest eye or chosen feature inside the useful depth.
- Watch motion: choose shutter speed for antennae, wings, and plant movement.
- Shape light: preserve ambient context and diffuse any added flash.
- Check accessories: confirm adapter security, optical quality, and working distance.
- Review honestly: inspect focus before cropping and judge the final display size.
Adapt the checklist to weather and species
Wind may be the dominant technical problem even when the insect is still. Shelter the camera position with the terrain, wait for pauses, and avoid holding or clamping a live plant in a way that damages it. After rain, watch for water on the front element and increased reflections from leaves.
Learn enough about the subject to avoid harmful disturbance. Do not cool, bait, relocate, or restrain an insect merely to make the camera easier to use. Nesting, mating, feeding, and newly emerged insects can be especially vulnerable. A natural behavior frame made from a respectful distance is more valuable than a larger image produced by interference.
Keep location records at an appropriate level. Exact coordinates for a rare species or fragile habitat may not belong in public metadata. The camera workflow should support observation and conservation rather than turning sensitive sites into directions.
Frequently asked questions
Is the Fujifilm X100VI a true macro camera?
No. Its fixed lens can focus close, but it does not provide native 1:1 reproduction. It is better treated as an environmental close-up camera unless a tested accessory supplies more magnification.
Should the optical viewfinder be used for insects?
The electronic finder or rear screen is more accurate at close distance because it shows the sensor's actual framing. Optical-view parallax can shift composition around a small subject.
Can stabilization freeze a moving insect?
No. It reduces camera movement but cannot stop wings, antennae, or a swaying flower. Use appropriate shutter time, flash duration, and behavior timing for subject motion.