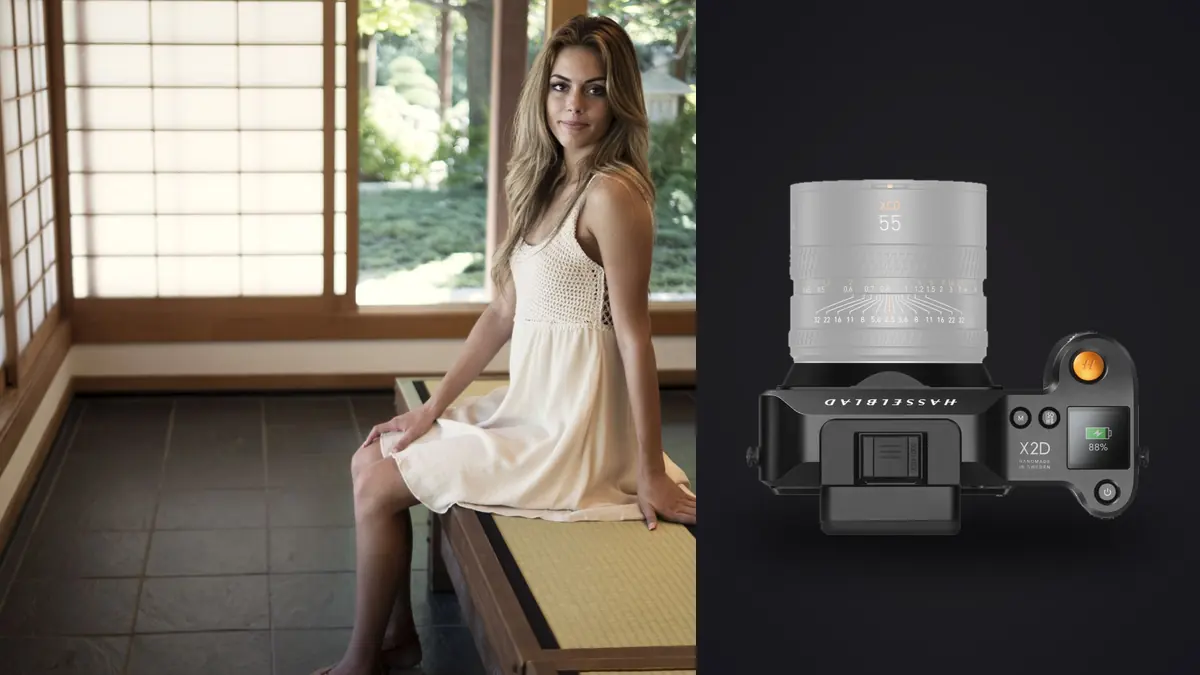
The Hasselblad X2D 100C can render subtle skin tone, fabric, and controlled light with remarkable detail. That detail also exposes small failures. Focus placed on lashes rather than the iris, a reclining pose outside the depth of field, a clipped highlight on satin, or a color conflict between window and lamp becomes obvious in a 100-megapixel file.
Troubleshooting this camera in a boudoir session should be calm and evidence-based. Find what is sharp, locate the brightest important tone, identify each light source, and change one cause at a time. The subject should experience clear direction, not a stream of technical uncertainty.
Find where focus landed before changing modes
Inspect a missed portrait at the eye, then scan forward and behind it. Sharp lashes or hair across the face indicate a competing target. Sharp fabric closer to the camera shows a forward plane. Detail behind the head suggests the focus point or subject moved backward. Uniform softness suggests motion, support, or processing.
Use face or eye detection when it identifies the intended eye reliably, but constrain the active region when mirrors, hair, or another person competes. Confirm the displayed target. For a still close portrait, a small focus area followed by magnified inspection may be more dependable than broad tracking.
Avoid locking focus and rotating the camera at close distance. The sensor plane changes relative to the eye during recomposition. Move the focus point to the final location or keep continuous focus active while the subject settles. Make a confirmation file after every major distance change.
Diagnose shallow depth in high-resolution files
Large-format depth of field can be narrow at portrait distance. A pose that angles the face, shoulder, hand, and body away from the sensor may exceed it even when the chosen eye is perfectly sharp. This is not an autofocus defect. It is a geometry and aperture decision.
Bring important features closer to one plane. Turn the face slightly, move the hand back, or adjust camera position. Then stop down enough to cover what the client needs. A blurred far shoulder can be intentional; a blurred product, garment detail, or second eye may not be.
Judge the file at delivery size as well as full resolution. The sensor invites extreme inspection, but clients view complete photographs. Use magnification to verify the intended plane, not to demand identical sharpness from every pore and fabric thread.
Separate subject movement from camera movement
In-body stabilization reduces movement from the photographer. It cannot stop breathing, a turning face, moving hair, or fabric. If the background is sharp and a hand smears, raise shutter speed or time the exposure at the end of the gesture. Do not change autofocus first.
A uniformly directional blur across face and set suggests camera movement. Improve stance, use stabilization, or place the camera on a stable support. A tripod is useful for a repeated composition, but it should not become a barrier in the subject's movement path.
Guide movement toward a known endpoint. Ask for a slow turn or fabric adjustment, then capture when the body settles. The X2D is more comfortable with deliberate transitions than long rapid bursts. A short sequence around a prepared moment creates enough choice without overwhelming the review.
Protect skin highlights and bright fabric
Expose for the brightest important skin area, not the room average. Forehead, cheek, shoulder, pale bedding, satin, and jewelry can exceed the sensor's usable highlight detail while dark furnishings pull the meter upward. Use a test frame, histogram, and clipping warning.
When highlights are too hard, change the light. Increase diffusion, feather the modifier, move the subject, adjust reflector angle, or remove a direct practical source. Lowering exposure alone can leave most skin too dark while the reflection remains harsh.
Do not underexpose every portrait simply because the RAW file is flexible. Heavy lifting can reveal noise and make skin color less stable. Give the subject enough exposure while preserving the areas that need texture. Small specular points may remain bright without becoming a broad clipped patch.
Use leaf-shutter flash deliberately
XCD lenses place a leaf shutter in the lens, enabling flash synchronization across a broad range of shutter speeds within the lens and flash specifications. This is useful for balancing window light or darkening an ambient background while maintaining controlled flash on the subject.
Confirm the exact camera, lens, trigger, and light combination. Flash duration, trigger delay, recycle time, and power all affect consistency. Make a sequence at the intended cadence and look for changing brightness. A high sync capability does not mean every flash delivers equal power at every interval.
Use the shutter to control ambient contribution and aperture, ISO, distance, or flash power to control the flash-lit subject. The variables interact, but that distinction makes diagnosis faster. If the room changes while skin stays stable, ambient is moving. If skin changes with a stable room, inspect flash and distance.
Resolve mixed daylight and practical lights
Window daylight, warm lamps, green LEDs, and colored walls can place several hues on the same skin. A global white balance cannot make overlapping sources neutral. Turn off unnecessary lights, gel or replace sources, block daylight, or separate colors into intentional zones.
Set a fixed white balance once the key light is chosen. Auto white balance can react to wardrobe and background changes, producing inconsistent skin through a set. Capture a neutral reference at the subject position after any major lighting change.
If a warm practical lamp belongs in the composition, keep its direct spill away from the face unless the mixed color is part of the concept. Move it deeper into the background or flag it. Preserve atmosphere without making skin correction impossible.
Check for flicker and electronic-light bands
Continuous LED fixtures may cycle or shift color when dimmed. Photograph a plain wall at the working shutter and inspect several frames. Bands or inconsistent brightness indicate a light and shutter interaction, not random exposure error.
Change shutter speed, use a different shutter mode where available, adjust the fixture to a stable output, or replace the source. Test silent operation before choosing it for an intimate atmosphere. Clean files matter more than avoiding a modest shutter sound.
Screen brightness can hide subtle bands in a dark room. Keep it consistent and inspect the full frame, not only the face. If the pattern appears after ingest, isolate all files made under that source before applying batch edits.
Handle mirrors, glass, and high-resolution reflections
Mirrors can reveal stands, photographer position, screens, windows, and personal items outside the intended frame. Inspect all edges and reflections before the subject enters. Move the camera or flag the reflection rather than planning to retouch every mistake.
High resolution makes dust, fingerprints, and fabric fibers visible. Clean surfaces with permission and appropriate materials. Texture on skin is not a technical defect, and capture should not be built around erasing it. Lighting direction can describe form without exaggerating every surface.
A polarizer may affect some reflections, but it changes light unevenly and can alter skin or fabric sheen. Rotate it while viewing the whole composition. Often a small camera movement solves the reflection more naturally.
Check lens and body behavior with a controlled test
If focus inconsistency persists, photograph a detailed flat target in good light with the camera supported. Make several autofocus frames and a magnified manual-focus reference at the working distance. Repeat with another lens if available. Consistent test sharpness points back to subject movement or target choice.
Check lens contacts, firmware, stabilization settings, and support. Do not perform speculative calibration based on one moving portrait. The X2D is mirrorless, so a repeated systematic problem should be documented with files and discussed through official service guidance.
For exposure, photograph a neutral surface and bright textured fabric in the exact lighting. Change one variable at a time and confirm predictable histogram movement. This creates a reliable baseline before returning to the session.
Keep private review technically useful
Agree on who can see proofs, where review occurs, and how files will be retained. Keep working images on controlled storage and avoid casual automatic transfers. A private photograph should not spread across devices merely to make culling convenient.
A Windows or macOS desktop app such as imagic can analyze sharpness, exposure, closed eyes, and composition locally while grouping duplicate or burst frames. The photos remain on the workstation. Human review must decide consent, expression, pose, and final inclusion.
Use non-destructive adjustments and export only approved JPEG or TIFF files. The AI and technology guides provide more context for local workflow tools. Delete or retain files according to the agreement, not an improvised deadline.
Apply a one-variable troubleshooting order
- Locate the sharp plane and identify movement.
- Confirm the selected eye and required depth.
- Protect important skin and fabric highlights.
- Separate ambient exposure from flash exposure.
- Remove or control mixed color sources.
- Test LEDs and shutter mode for bands.
- Verify one processed reference at delivery size.
Record the corrected settings and light positions before continuing. A repeatable baseline keeps the rest of the session focused on expression rather than recovery.
Coordinate posing with the X2D's deliberate pace
Give each pose a clear entry, settled shape, and release. The subject should not hold tension while the photographer studies magnified focus. Prepare camera height and light first, guide the body into place, confirm the near eye, and make a small number of intentional frames.
When changing from standing to reclining, rebuild depth rather than carrying the previous aperture automatically. Hands, knees, face, and garment can spread across a much deeper axis. Align the important features, stop down if needed, and check the file that represents the new geometry.
Use verbal confirmation before moving a light, camera, or reflector closer. The slower medium-format rhythm can support trust when it is explained and organized. It becomes uncomfortable only when technical delays are unpredictable or boundaries are assumed rather than checked.
Mark the approved camera and subject positions for repeated series. Consistent distance makes focus behavior, proportions, and light easier to compare, while still allowing expression and gesture to change naturally.
At each marked position, note the aperture that covered the approved pose. That small record prevents a later variation from returning to an unnecessarily shallow setting simply because the lens remained wide open.
Frequently asked questions
Why is one eye sharp and the rest of the pose soft?
The pose likely extends beyond the available depth of field. Align important features more closely, stop down, or decide which elements may soften intentionally.
Can X2D stabilization freeze a moving portrait subject?
No. It reduces camera movement. Use a suitable shutter speed, flash duration, or a natural pause to control movement from the subject.
Why are skin tones different across the same frame?
Mixed daylight, practical lamps, LEDs, or colored bounce may overlap on the skin. Separate or match the sources because one global white balance cannot neutralize every region.