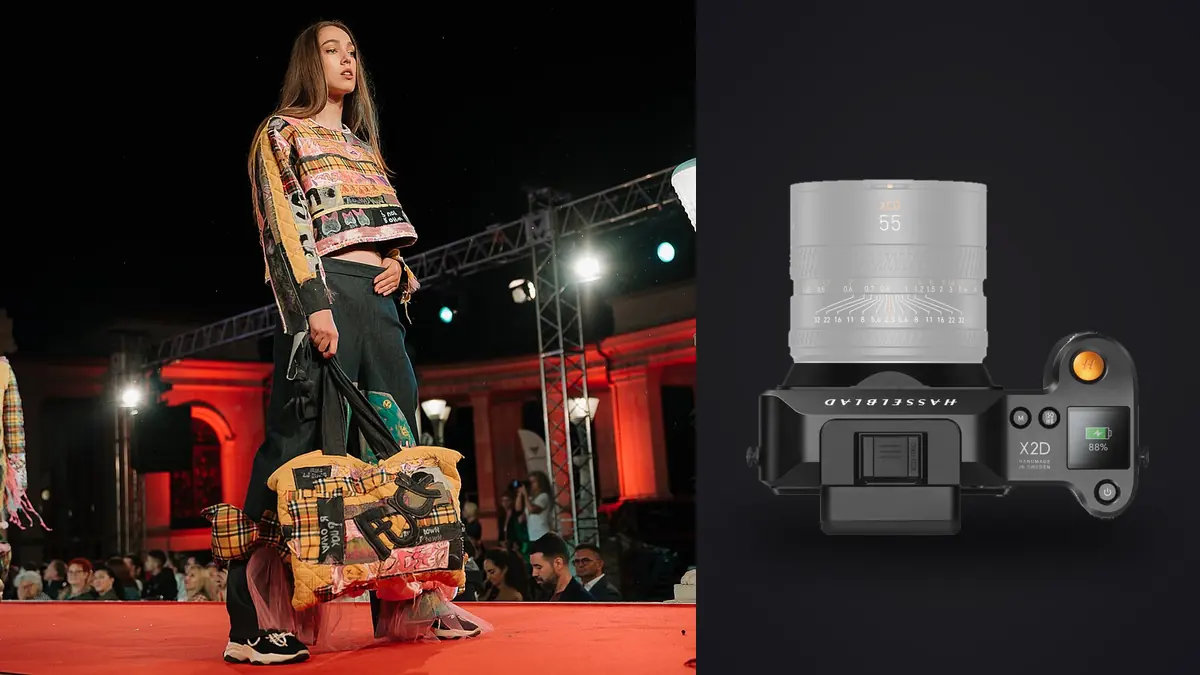
A commercial lookbook needs repeatability. Garments must remain recognizable across poses, skin color should not drift from frame to frame, and the focus should land where the product story requires. The Hasselblad X2D 100C brings a 100-megapixel medium-format sensor, in-body stabilization, phase-detection autofocus, and internal SSD storage to that job. Its files are generous, but generous files do not excuse uncertain capture.
Most failures on an X2D lookbook fall into a few categories: the focus plane sits behind the intended detail, subject motion defeats stabilization, pale fabric clips before skin looks bright enough, mixed sources shift color between angles, or the lens shutter and flash timing are configured inconsistently. Diagnose the visible symptom first, then change one cause. Randomly adding light, shutter speed, and focus adjustments together makes the next frame harder to understand.
Follow a controlled lookbook diagnosis sequence
Troubleshooting is most reliable when the set remains unchanged long enough to reproduce the fault. Start with a neutral standing frame at the marked camera and subject positions. Verify the intended eye and garment detail at high magnification, inspect the brightest fabric channel, compare two consecutive flash frames, and check a gray reference under the active lights. Then introduce movement. This order distinguishes autofocus placement from insufficient depth, subject blur from camera movement, clipping from an unsuitable light ratio, and color drift from a source that changes over time. Record the correction so the same garment family can be photographed consistently after a break or lighting reset.
When the eye is sharp but the garment is not
Eye autofocus answers a portrait question, not always a catalog question. If the key feature is embroidery on a near shoulder, a buckle forward of the face, or a layered neckline, focusing on the eye may place that product detail outside the usable plane. Decide which detail carries the frame and place a controlled autofocus point there when necessary.
Medium format depth of field becomes narrow at close distance. A three-quarter portrait made with a wide aperture may not hold the nearer sleeve and the eyes together. Increase camera distance, stop down, or rotate the model so the garment surface sits closer to the sensor plane. The last option often preserves the desired background softness without forcing a very small aperture.
If focus varies across an otherwise static sequence, check whether the camera is reacquiring a different feature after every exposure. Face detection may alternate between an eye, hair edge, or another face on set. Use a smaller area, keep the target within it, and ask for a brief still point at the end of each pose. Magnify a fresh frame after any meaningful distance change.
Distinguish camera shake, subject motion, and focus error
In-body stabilization corrects camera movement. It does not stop fabric swinging, a model walking, or hair moving under a fan. A stabilized view can appear calm while the recorded garment edge blurs. Raise shutter speed for the subject, then let stabilization handle the photographer's residual movement.
The shape of blur gives clues. Double edges across the whole frame suggest camera movement. A sharp background with blurred hands or hems points to subject motion. A crisp ear with a soft nearer eye indicates focus placement. High-resolution review makes these distinctions visible, but inspect at a useful output size as well as at full magnification. A tiny movement visible at 100 percent may not matter in the final layout.
For walking sequences, establish marks and direction. Ask the model to cross the same plane, use continuous autofocus, and release short sequences around a repeatable stride. If the camera continues to miss, widen depth of field slightly before increasing the number of frames. More exposures of the same unstable setup create a larger problem, not a safer one.
Recover highlight control on pale and reflective clothing
White shirts, satin, sequins, and polished accessories can clip while the overall histogram still looks conservative. Enable highlight warnings and inspect the actual product, not only the graph. Specular reflections may be allowed to reach pure white, but broad areas of woven fabric should usually retain structure.
When the face looks too dark at a safe garment exposure, change the light ratio. Bring fill closer, enlarge the source, use a reflector, or flag a reflection that is making the clothing disproportionately bright. Raising total exposure does not solve an excessive ratio. It simply moves both values toward clipping.
Keep the base sensitivity low when the lighting and schedule allow, but do not trade a sharp garment for an unnecessarily low ISO. A moderate ISO with correct exposure and motion control is preferable to a cleaner file blurred by movement. Evaluate noise after the intended crop and output, not as an isolated number.
Why exposure can change during a simple turn
A garment that rotates toward a large source presents a different reflective angle. Satin and coated materials can become much brighter even though the light output is unchanged. Lock manual exposure for consistency, then adjust the light, pose, or flag when the reflection itself is the problem.
Fix mixed-light color before building a grade
A lookbook should let viewers compare garments. Auto white balance can shift when one frame contains more backdrop and the next contains more skin or fabric. Set a fixed white balance for each lighting scene and record a neutral reference. That reference need not dictate the final aesthetic; it provides a stable point from which to depart.
Window light combined with practical lamps often creates separate color zones across the model. Turning off the practical, gelling a flash, or blocking part of the window is usually cleaner than trying to neutralize every zone globally. If the warm-cool split is intentional, keep it in the background and avoid letting it divide a face or a product whose color must be represented accurately.
Some fabrics shift under different spectra, particularly when LED sources lack smooth color output. Compare a test frame under the chosen lights with the physical garment in neutral viewing conditions. If a critical color cannot be matched consistently, change the source before photographing the full run.
Use lens shutters and flash consistently
Compatible XCD lenses use a central shutter, which supports flash synchronization across their available shutter range. That flexibility can darken ambient light while keeping flash exposure, but it still requires the flash and trigger to complete their output within the chosen timing. At high power, some flashes have a longer duration and slower recycle.
If alternate frames are underexposed, first check recycle status. Reduce flash power and move or enlarge the source, raise ISO modestly, or slow the shooting rhythm. Do not assume the camera has changed exposure when the light simply was not ready. Audible ready signals can be intrusive, so use a visible indicator or a paced count.
Keep shutter mode, trigger channel, and lens settings consistent across bodies if more than one camera is in use. An electronic shutter may not behave like the lens shutter with flash and can introduce rolling-shutter artifacts under some continuous lights. Record a setup frame showing the intended camera and lighting state before production begins.
Correct autofocus problems methodically
| Symptom | Probable cause | Next action |
|---|---|---|
| Focus behind the near eye | Target shifted to lashes, hair, or far eye | Use a smaller point and verify at magnification. |
| Garment detail soft, face sharp | Eye AF chose the portrait priority | Place focus on the product detail or align planes. |
| Walking frames vary | Movement crosses depth too quickly | Add a floor mark, stop down, and shorten bursts. |
| Whole frame has double edges | Camera movement | Improve support or raise shutter speed. |
| Only moving fabric blurs | Subject movement | Raise shutter speed or change the action. |
Reset to a plain single-point test if the cause remains unclear. Photograph a high-contrast static target at the model's position, then compare handheld and supported frames. Once static focus is sound, reintroduce face detection and motion separately. A controlled test of the setup is different from claiming a benchmark; it isolates the failed variable on the current set.
Keep a lookbook consistent through selection
Ingest from the internal SSD or card into a job folder and verify the copy before clearing either source. Group files by look, not merely by capture time, and keep a visual reference from the approved lighting and color setup at the start of each group.
Selection should cover the brief before expression variants. Confirm that every look has required front, back, detail, horizontal, and vertical frames. Then compare poses within those requirements. A local tool such as imagic can score sharpness and exposure and group near-duplicates without uploading the photos, but garment visibility, brand accuracy, and required coverage need a human checklist.
Apply corrections non-destructively, keep product color anchored to the reference, and export the requested JPEG or TIFF set only after filename and crop checks. The desktop editing overview explains a local route from RAW to export. Additional problem-solving articles appear under Guides.
Troubleshoot repeating fabric patterns separately
Fine grids, woven checks, mesh, and closely spaced stripes can produce false color or moire when the pattern approaches the sampling frequency of the sensor and the lens resolves it clearly. The effect may appear only at one distance, aperture, or output scale. It is not the same as ordinary color noise, and global noise reduction is a poor first response.
Inspect problem garments early at the expected crop. If interference appears, make a small physical change before photographing the whole look: alter camera distance, adjust focal length, change aperture slightly, or rotate the fabric relative to the sensor. These changes modify how the repeating pattern lands on the pixel grid. Keep one reference frame from each variation and compare at both full detail and delivery size.
RAW software may offer local moire correction, but it can reduce real textile color and detail. Apply it only to the affected area and compare against the physical garment. A correction that cleans a jacket while smearing its weave defeats the commercial purpose. Record which looks required intervention so exports receive the same treatment across orientations.
Check the final resized proof as well as the full-resolution file. A pattern that looks clean at full detail can interfere after downsampling for a web catalog, while another may disappear at print size. Export one representative garment at every required output dimension before approving the production treatment.
A fast diagnosis order for the next set
- Confirm the required product detail and put the focus plane there.
- Check whether blur belongs to the camera, the subject, or the focus point.
- Protect broad fabric highlights before adjusting overall brightness.
- Lock white balance and compare the garment under the actual source.
- Verify flash recycle and shutter mode before changing camera exposure.
- Review one full look against the shot list before moving to the next.
Frequently asked questions
Should eye autofocus always be used for a fashion lookbook?
No. It is valuable when the face leads the frame, but a commercial image may require a nearer garment detail to be the sharpest point. Choose focus according to the brief.
Does the X2D stabilization freeze a walking model?
No. It counters camera shake. Increase shutter speed, control the movement path, or add depth of field when the subject itself is moving.
Why do white clothes clip before skin looks bright?
The clothing may be more reflective or angled directly toward the source. Reduce the light ratio with fill, flags, source placement, or pose rather than raising the entire exposure.
Can automated culling confirm product accuracy?
No. It can help identify technical candidates and duplicate groups, but a person must verify garment coverage, true color, required details, and brand-approved styling.