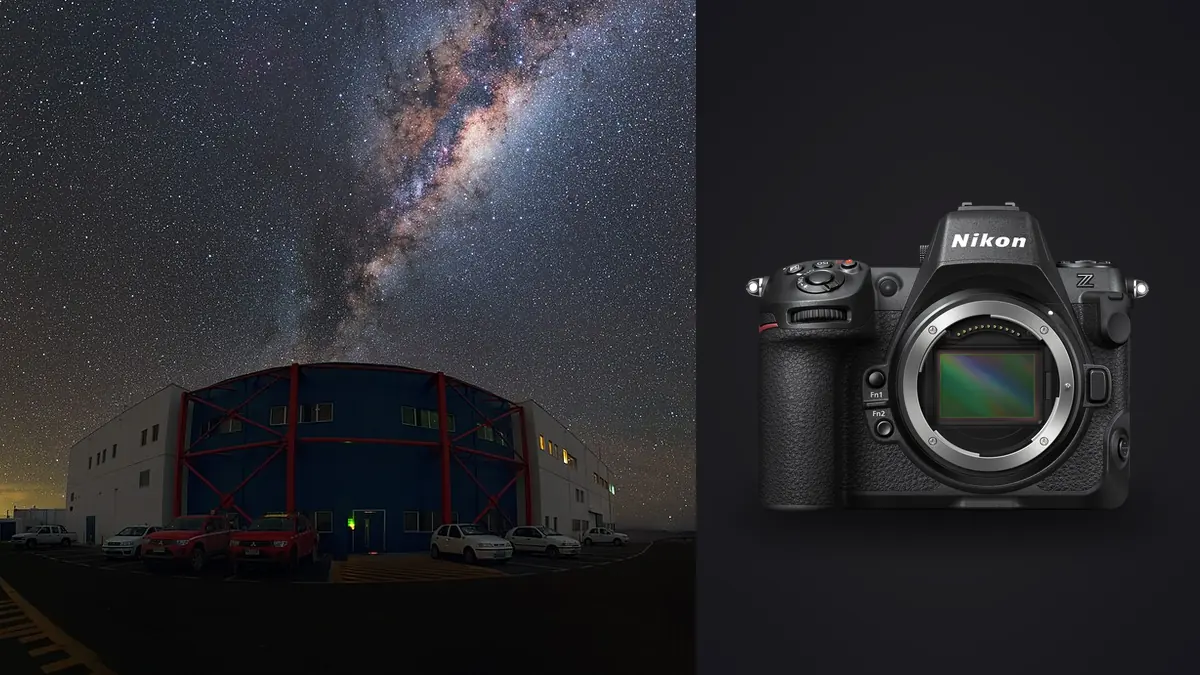
The first time I put a Z8 on a tripod under a genuinely dark sky, I made the same mistake I'd made with every high-resolution body before it: I used the exposure settings I'd been running on a 24-megapixel camera for a decade and wondered why every frame in the stack had slightly bloated, trailing stars when I zoomed to 100%. A 45.7-megapixel sensor doesn't forgive sloppy shutter-speed math the way a lower-resolution one does, and star stacking punishes that kind of sloppiness across every single frame you feed into the stack, not just one. This is a workflow guide built around that lesson: how to actually set up a Z8 for a night of star stacking, what in the menus matters and what doesn't, and what happens to the 200 to 400 raw files you'll walk away with once the sky work is done.
The sensor math nobody explains at the trailhead
Every camera forum has a version of the "500 rule": divide 500 by your focal length and that's roughly how many seconds you can expose before stars turn into short streaks instead of points. It's a fine rule of thumb for a 12-megapixel camera viewed at a sane print size. It falls apart on the Z8, because the rule was never actually about the sky, it was about how many arcseconds of star movement your sensor's pixel pitch could hide before the smear became visible. The Z8's sensor pitch works out to roughly 4.35 microns, tighter than almost anything else in Nikon's full-frame lineup, which means it resolves star trailing that a 24 or 30-megapixel sensor would simply blur past.
The more useful version is the NPF rule, which factors in aperture and pixel pitch instead of just focal length. It gives a shorter, more honest number, and once you've shot a season of stacks on this body you stop bothering with the 500 rule entirely. Here's what that difference actually looks like in practice, using f/2.8 as a baseline since that's what most of my wide astro lenses live at:
| Focal length | "500 rule" max exposure | NPF-adjusted max (Z8, f/2.8) | What I actually dial in |
|---|---|---|---|
| 14mm | 35.7s | 16.3s | 13s |
| 20mm | 25.0s | 11.4s | 10s |
| 24mm | 20.8s | 9.5s | 8s |
| 35mm | 14.3s | 6.5s | 6s |
| 50mm | 10.0s | 4.6s | 4s |
| 85mm | 5.9s | 2.7s | 2.5s |
The last column is a fudge factor I've settled on after enough ruined stacks: shave another 10 to 15 percent off the NPF number, because wind, a slightly uneven tripod head, or a lens that isn't perfectly collimated will eat into that margin. It costs you a bit of extra read noise per frame since you're compensating with ISO, but a stack of 200 slightly noisier pinpoint-star frames averages out cleaner than a stack of 200 frames with visible elongation, which no amount of stacking software will fix after the fact.
Menu settings I actually change before it gets dark
I do this part with a headlamp on red mode while there's still enough ambient light to see the buttons, because doing it blind later is how you end up shooting an entire sequence with the wrong card slot active.
- Electronic front-curtain shutter, or fully silent electronic shutter. Either kills the small mechanical shock that a mechanical first curtain introduces at these shutter speeds. On a body this sharp it's an easy, free win. I default to fully silent unless I'm worried about banding under specific streetlight sources near the horizon, in which case EFCS is the safer middle ground.
- Long exposure noise reduction, off. This one trips people up. LENR takes a dark frame after every exposure roughly equal in length to the exposure itself, which on a night of 10-second frames doubles your total session time and, worse, leaves gaps in an interval sequence that stacking software has to work around. I shoot with it off and either take a handful of dedicated dark frames at the end of the session or let the stacking software's own noise handling do the work.
- Raw format: lossless compressed 14-bit, not High Efficiency. High Efficiency RAW* saves card space and the files look fine for a lot of daylight work, but star fields are exactly the kind of low-contrast, high-frequency detail that compression artifacts show up in first. Full lossless compressed raw is worth the extra card space for anything going into a stack.
- Exposure delay mode, roughly 1 second. Even with EFCS active, giving the body a beat to settle after you trigger it (or after mirror-up settles, though the Z8 obviously has none) removes one more variable.
- Interval timer shooting, not a remote intervalometer app. The Z8's built-in interval timer is buried three menus deep in the photo shooting menu and the UI for it is not intuitive the first time you use it, but once it's set it's completely self-contained: no phone, no app draining its own battery, no Bluetooth connection dropping in the cold. I set the interval a full second longer than my exposure time to give the buffer room to breathe, and let it run for however many frames I've decided I want in the stack.
Focusing when there's nothing to focus on
Autofocus on a star field is inconsistent at best. What I actually rely on is Starlight View, Nikon's low-light live view mode that brightens the EVF and rear LCD enough to compose and manually confirm focus on a genuinely dark night, something that was much harder on earlier Z-series bodies. I still do it manually: zoom the live view in on Sirius or Vega or whatever's brightest and available, rack focus with focus peaking active until the star shrinks to its tightest point, then tape the focus ring down with a strip of gaffer tape so a stray glove or gust of wind doesn't nudge it mid-sequence. I've lost entire sequences to a focus ring that drifted half a millimeter three-quarters of the way through 300 frames, and it's a genuinely miserable thing to discover the next morning.
Running the actual sequence
For a fixed-tripod Milky Way or wide nightscape stack, I'm usually aiming for somewhere between 20 and 40 light frames at the settings from the table above, ISO 3200 to 6400 depending on how dark the site actually is, plus a dozen dark frames shot with the lens cap on at the same shutter speed and ISO once the sequence ends. That's a modest, manageable stack. Star trail composites and any Starry Landscape Stacker-style "stack for noise, not trails" approach is where the frame count balloons, because you're deliberately shooting 150 to 400 short exposures back to back over 20 or 30 minutes rather than a handful of longer ones.
Cold weather changes the math too. The EN-EL15c holds up better in the cold than older EN-EL15 variants, but I've still watched a battery reading 40 percent at the start of a January session drop to nothing by the two-hour mark on a night below freezing. I carry a warm spare in an inside jacket pocket and swap it before the first one dies rather than after, because an interrupted interval sequence mid-stack is a wasted trip.
Dual card slots matter more here than in most other genres. I run CFexpress Type B in slot one as primary and overflow to the UHS-II SD in slot two, which means a full session's worth of 14-bit raw frames doesn't fill either card individually, and if the CFexpress card has a bad write (it happens, rarely, but it happens) I've still got the SD card as a backup rather than a hole in the middle of my stack.
Sorting a few hundred nearly identical frames the next morning
This is the part of astro work that nobody warns you about before you get into it. A 30-frame stack is manageable to review by eye. A 300-frame star trail sequence, or a night where you ran two or three different stacks at different locations, is not something you want to click through one at a time in a raw browser at 2am with cold hands, and it's genuinely not something you want to do the next afternoon either, because by frame 40 your eyes stop reliably telling the difference between a sharp frame and one that got nudged by wind.
This is where I actually use imagic rather than my usual raw browser. It runs entirely local on the laptop, no cloud upload, which matters more than it sounds like it should when you're processing a card full of files at a remote site with no signal and want the culling done before you break camp. Its sharpness scoring flags the handful of frames in a sequence where a gust or a passing headlamp beam introduced motion the eye might miss at thumbnail size, and because a star sequence is essentially one long burst, the duplicate and burst clustering groups the whole interval run together automatically instead of leaving you to scroll past 300 nearly-identical thumbnails one by one. I still make the final call on which frames actually go into the stack, but getting from "here's a memory card" to "here are the 40 frames worth stacking" in a few minutes instead of an hour is a real difference on a morning when you'd rather be asleep. If you haven't looked at how automated culling actually scores sharpness versus just flagging blur, this breakdown of how AI photo culling works covers the mechanics in more depth than I will here.
Stacking software and blending in the foreground
Once the frames are sorted, the actual stacking is software work, not camera work, and I won't pretend the Z8 does anything special there. For a fixed-tripod nightscape where I want a clean sky and a sharp, separately-exposed foreground, Sequator handles the star alignment and noise averaging well and is free, though it's Windows-only. Starry Landscape Stacker does a similarly good job on the Mac side and handles foreground masking a little more gracefully in scenes with complicated horizon silhouettes like tree lines or mountain ridges. DeepSkyStacker is overkill for wide nightscape work, it's really built for narrower-field deep-sky imaging with a tracker, but if you've mounted the Z8 on a star tracker like a Star Adventurer or SkyGuider Pro for a tighter framed shot, it's worth the extra learning curve.
One thing worth saying plainly: the Z8 has no built-in astro tracker or sky-tracking mode. Some competing bodies from other brands build a basic star-tracing exposure mode into the IBIS system. Nikon didn't do that here, so if you want pinpoint stars at exposure lengths longer than the table above allows, you need an external tracking mount. That's not a knock on the camera exactly, IBIS-based star tracking tends to be a rough approximation anyway, but it's a real gap if you were hoping the Z8 would replace a tracker outright.
Getting a consistent look across a season of night shoots
The other thing that's easy to underestimate is how much your edit style drifts between astro sessions if you're doing the color and contrast work from scratch every time. A Milky Way core shot in July looks different from one shot in November purely from the season, and after a stack comes out of Sequator or Starry Landscape Stacker it still needs the same kind of tone and color decisions any other raw file needs, decisions that are easy to make slightly differently every single time you sit down. Once I had a handful of stacked nightscapes edited the way I actually wanted them to look, I trained imagic's apply_my_style feature on those edits, and now a new batch of stacked outputs gets a first pass that's already close to my own baseline before I touch anything manually. It's not doing the astro-specific work, the tracking, the stacking, the masking, that's still software built for that job. It's just saving me from re-inventing my own color decisions from a blank slate every time a new batch of frames lands on the drive, which after enough sessions was eating more time than the actual shutter-clicking part of the night.
Where this actually falls short
I'd be doing a disservice if I made this sound like a flawless system. The interval timer menu is genuinely clunky, three taps deeper than it should be for something you'll use on every single night session. Buffer depth is excellent with CFexpress but drops noticeably if you're shooting High Efficiency raw on the SD overflow slot alone, so don't run a long interval sequence to SD-only unless you've tested your specific card's write speed first. And without a tracker, you're capped by the pixel-pitch math in that table no matter how good the sensor's high-ISO performance is, there's no getting around the physics of a 45.7-megapixel sensor resolving Earth's rotation faster than a lower-resolution one would.
Frequently Asked Questions
Do I need a star tracker for the Z8 to get good stacked results?
Not for wide nightscapes and Milky Way arch shots at 14 to 24mm, where the exposure times in the table above are short enough that a fixed tripod and a solid stack of 20 to 40 frames gets you a clean result. For tighter framing on a specific target, like a nebula or a close crop of the galactic core at 50mm or longer, you'll hit the exposure ceiling fast without a tracker, and a Star Adventurer or similar mount becomes close to essential.
Is the Z8's high ISO performance actually better than older Nikon bodies for this kind of work?
Noticeably, yes, particularly compared to the D850 generation. The stacked sensor design carries over from the Z9 and holds detail at ISO 6400 in a way that older 45-megapixel sensors couldn't without turning the sky into mush. That said, stacking multiple frames at a moderate ISO still beats pushing a single frame to a very high ISO and hoping, because averaging across frames reduces random noise in a way no single-shot high-ISO capability can match on its own.
How many frames do I actually need for a clean star stack versus a star trail?
For noise-reduction stacking where you want pinpoint stars and a cleaner sky, 20 to 40 frames at the shutter speeds from the table above is a reasonable target, more helps but with diminishing returns past 40 or so. For a star trail composite, you're deliberately going the other direction, often 150 to 400 short frames shot back to back over 20 minutes to an hour, stacked with lighten-blend rather than averaging, so the star positions build into visible arcs instead of canceling out.
What's the fastest way to go through a few hundred frames from a single session without losing an afternoon to it?
Skip the manual scroll-and-zoom approach entirely once you're past about 50 frames. I run the card through imagic first, since its sharpness scoring and burst clustering handle exactly this situation, a long sequence of very similar frames where a handful got knocked out of focus range by wind or minor vibration, and it runs entirely offline so there's no upload wait even on a card full of 14-bit raw files. From there it's a much smaller, manageable set to actually look at by eye before they go into stacking software. For anything beyond a single night's astro session, these workflow habits are worth adopting more broadly, they weren't written for astro specifically but most of them apply.