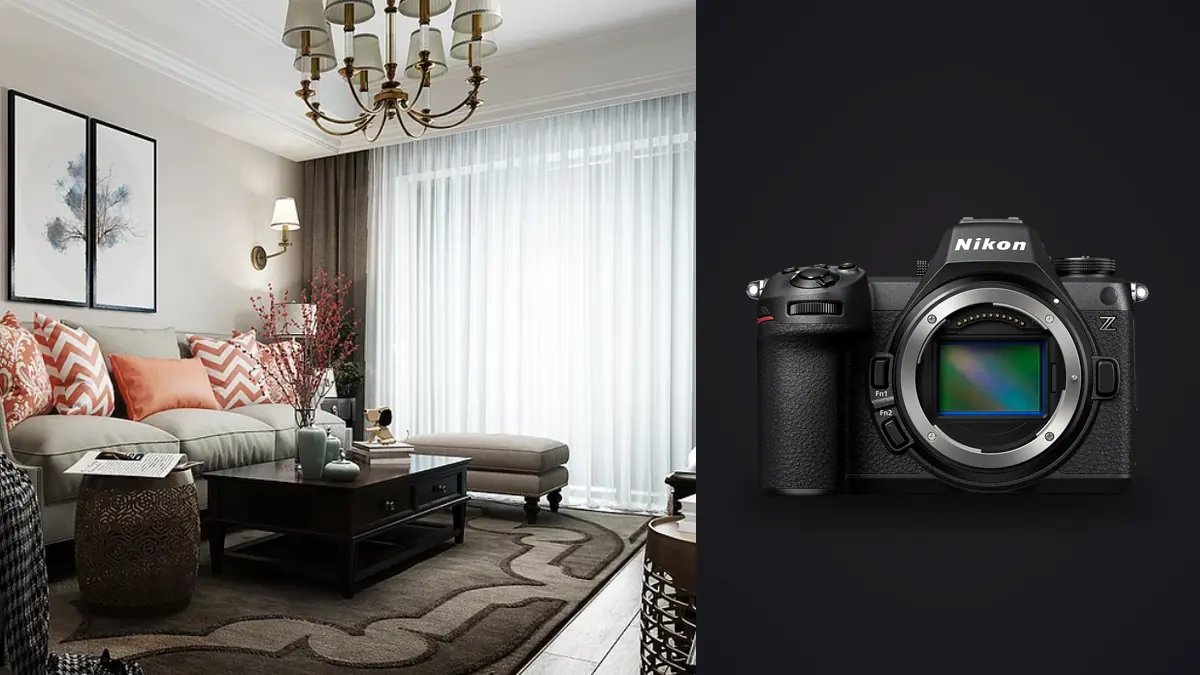
Architectural and interior work is a different sport from most of what a mirrorless camera gets designed for. Nobody needs 3D subject tracking on a marble countertop. Nobody needs 20 frames a second of a staircase. What you actually need is a sensor that can hold a bright window and a shadowed corner in the same frame without falling apart, a viewfinder and screen you can trust at odd angles, and a body that survives six hours of tripod work, ladder climbing, and carrying gear through a house without complaint. The Nikon Z6 III was not marketed as an architecture camera. It was marketed as a hybrid stills and video body for event and wedding shooters. But a fair amount of what makes it good at that job also makes it good at this one, and after using it on several interior design and small commercial architecture jobs, I think it deserves more attention from this side of the industry than it's getting.
This isn't a spec sheet reprint. I want to walk through what actually matters when you point this camera at rooms and buildings instead of people, where the lens lineup helps or hurts you, how the bracketing workflow holds up over a long shoot day, and what happens after you get home with a memory card full of near-identical exposure sets.
The sensor trade-off nobody mentions in the launch material
The Z6 III uses a partially stacked 24.5 megapixel sensor, which is new territory for this price tier at Nikon. The stacking is what gives it a genuinely fast readout, somewhere in the range that all but eliminates the rolling shutter smear you'd get from a conventional BSI sensor when using the fully electronic shutter. For architecture that matters more than people assume. Interiors often have ceiling fans running, curtains moving in an open window, or a client walking through the frame while you're composing. A slow rolling shutter turns a spinning fan blade into a curved smear across the image. On the Z6 III it's close to a non-issue, and that lets you leave the electronic shutter on by default, which also means zero mechanical shutter noise while you're working around a design team who are trying to have a conversation about paint swatches ten feet away. The trade-off, and it is a real one, is dynamic range. The Z6 III does not quite match the dynamic range headroom of its predecessor, the Z6 II, at base ISO. It's not a dramatic gap, maybe the better part of a stop in the deepest shadows once you push recovery hard, but interior work is exactly the genre where that stop shows up. A room with a bright window wall and a dim reading nook is asking the sensor to do its hardest job. In practice this pushed me toward bracketing more deliberately than I used to with the Z6 II, rather than leaning on single-frame raw recovery and hoping for the best. More on that in a minute.
24.5 megapixels is not the limitation you think it is
Every time a new architecture-adjacent camera comes up, someone asks whether the resolution is "enough" for print. For nearly all interior design and residential architecture work, 24.5 megapixels is plenty. A double-page magazine spread at 300 dpi needs roughly 20 megapixels to fill the page cleanly, and most of what interior photographers deliver ends up on a website, a portfolio, an Instagram carousel, or a single printed page in a portfolio book, not a wall-sized architectural print. If you're shooting for a firm that does gallery-scale prints of building facades, sure, go look at something in the 45+ megapixel range. For the bread-and-butter work of documenting a renovated kitchen or a boutique hotel lobby for a design firm's website and pitch deck, the file size difference buys you almost nothing except slower transfers and bigger backups.
Verticals: the problem Nikon still hasn't fully solved on Z mount
Here's my actual gripe with building a Z-mount architecture kit in 2026: Nikon still has not released a native Z-mount perspective control lens. If you want true optical shift correction rather than software correction, you're either adapting an old F-mount PC-E lens through the FTZ II adapter, which works but adds bulk and loses you some of the native lens communication, or you're buying third-party. The Laowa 15mm f/4.5 Zero-D Shift is the one I've actually put in a bag and used, and it's a genuinely good, affordable way to get real shift movement on a Z body without an adapter tax. Most working interior photographers, myself included, correct verticals in post more often than we shift optically, because a wide zoom with clean rectilinear rendering plus a five-second Upright correction in Lightroom gets you 90% of the way there with a fraction of the setup time. But shooting a genuinely wide interior at an angle that needs heavy correction costs you resolution at the edges, and there are still situations, tight stairwells, narrow hallways shot straight on, where you want the shift lens because software correction alone starts to look stretched. Here's how the realistic Z-mount lens options break down for this specific kind of work:
| Lens | Focal length | Max aperture | Approx. price | Where it earns its keep |
|---|---|---|---|---|
| Nikkor Z 14-24mm f/2.8 S | 14-24mm | f/2.8 | $2,400 | Tight rooms, cramped bathrooms, anywhere you need the widest angle with the least distortion |
| Nikkor Z 14-30mm f/4 S | 14-30mm | f/4 | $1,350 | Full-day handheld walkthroughs where 300g less lens weight actually matters by hour five |
| Nikkor Z 20mm f/1.8 S | 20mm | f/1.8 | $1,050 | Dim interiors where you'd rather raise the aperture than push ISO past 1600 |
| Laowa 15mm f/4.5 Zero-D Shift | 15mm | f/4.5 (manual) | $950 | True optical vertical correction, stairwells and narrow hallways shot square-on |
| Nikkor Z 24-70mm f/2.8 S | 24-70mm | f/2.8 | $2,300 | Detail shots: tablescapes, fixtures, material close-ups for the design portfolio |
If I were building this kit from nothing, I'd start with the 14-30mm f/4 for the walkaround work, add the Laowa shift lens for the jobs that demand it, and pick up a mid-range zoom for details rather than the 24-70mm f/2.8 S, honestly, since detail shots on a tripod rarely need f/2.8's light gathering.
Bracketing for real rooms, not test charts
The dynamic range trade-off I mentioned earlier means bracketing isn't optional on most interior jobs with this camera, it's the baseline. The Z6 III's built-in exposure bracketing goes up to 9 frames with adjustable EV spacing, and combined with the electronic front-curtain or fully electronic shutter, you can run a bracket sequence with essentially no vibration from shutter slap. What changes shot to shot is only the light. The settings I actually use vary a lot by room, and I've stopped trying to use one bracket preset for everything. A room with a huge window wall at midday needs more frames and wider spacing than a dim evening interior lit by lamps.
| Scenario | Bracket count | EV spacing | Base ISO | Notes |
|---|---|---|---|---|
| Bright window wall, midday sun | 7 frames | 1.0 EV | 100 | You need the full range from blown sky to shadowed interior corner |
| Evening room, lamp-lit | 3 frames | 1.3 EV | 800-1600 | Contrast is lower, fewer frames blend cleanly without banding |
| Mixed daylight and tungsten | 5 frames | 1.0 EV | 200-400 | Extra frames give you room to fix the color mix in post per light source |
| Overcast day, even light | 3 frames | 1.0 EV | 100 | Often you don't even need to blend these, one frame is close to enough |
Nine-frame brackets sound excessive until you do the math on a real job. A typical residential interior shoot covers ten to fifteen rooms and angles. At five to seven frames per setup for the tricky rooms and three for the easy ones, you're routinely coming home with 800 to 1,200 raw files from a single house. That's before you count the safety frames you shoot because a light fixture flickered or someone walked into frame.
What the tilt screen and electronic level are actually for
The Z6 III has a four-axis tilting screen, which sounds like a gimmick until you're setting up low against a baseboard to get a floor-level shot of a herringbone floor pattern, or shooting a doorway in portrait orientation from a tripod at chest height. Standard vari-angle screens flip out sideways and become awkward in portrait orientation on a tripod; this one tilts up and down in both landscape and portrait without the screen swinging off to the side of the camera. It's a small thing that saves real time across a dozen setups a day. The built-in electronic level, shown as a horizon and pitch indicator in the viewfinder or on the screen, is not a luxury for this work, it's closer to a requirement. Architecture is unforgiving about tilted verticals in a way that portrait or event photography just isn't. I keep it on the display at all times and treat a level reading of zero on both axes as a precondition before I trip the shutter, not an afterthought I fix in post.
Tethering and working alongside a design team
A meaningful chunk of interior design photography happens with a stylist, designer, or client standing in the room while you shoot, wanting to see the frame before you move on. USB-C tethering to a laptop works reliably with the Z6 III through Capture One, and the silent electronic shutter means you can fire test frames without interrupting whatever conversation is happening about whether the throw pillows need adjusting. That combination, silent shooting plus fast tethered preview, changes the dynamic of the shoot day. You spend less time asking people to freeze and more time working while the room stays alive around you.
After the shoot: what a thousand near-identical files actually costs you
This is the part nobody talks about in camera reviews, and it's the part that eats the most time on a real interior job. You come home with 900 raw files from twelve rooms, most of them exposure brackets that look nearly identical at a glance but differ by a fraction of a stop, plus a handful of safety frames where the tripod got bumped or someone's shadow crept into the corner. Sorting that manually, room by room, bracket by bracket, is the least interesting part of the job and the part most likely to make you miss the one frame in a seven-shot bracket where a slight vibration softened the far wall. This is where I've started leaning on imagic instead of doing it by eye. It runs entirely on the machine, no upload, which matters more than it sounds like it should when you're handling interiors for a client project that hasn't been publicly announced yet, a hotel renovation before opening day, a house not yet listed. The sharpness scoring catches the soft frame in a bracket set (tripod knocked slightly by a passing foot, or a gust through an open door) faster than scrubbing through 900 thumbnails at 100% zoom ever would, and the duplicate and burst clustering groups each exposure bracket together automatically instead of leaving you to remember which seven frames belong to the living room versus the kitchen. Once the culling pass is done, I run the apply_my_style preset, which is trained on my own past edits rather than some generic architecture look, across the selects before sending a first proof set to the designer. It gets everything to roughly where I'd take it by hand, and I finish the handful of hero frames manually. For a shoot that produces a thousand files, cutting the sorting and first-pass grading down from most of an evening to under an hour is the difference between delivering proofs the next morning or three days later. If you want the mechanics of how that sharpness and clustering process actually works under the hood, there's a fuller breakdown at how AI photo culling works.
Where it actually annoys me
No camera is a clean win, and I'd rather list the real friction points than pretend this is flawless for the job. The lack of a native Z-mount shift lens is the biggest one, already covered above. Second, the dynamic range dip versus the Z6 II means you genuinely cannot get lazy with single-frame exposure the way you could on the older body, which costs shooting time on jobs with a tight room-count quota for the day. Third, if you're relying on the SD card slot rather than CFexpress for your second card, buffer clearing on long bracket bursts is noticeably slower, and on a job where you're firing seven-frame brackets every ninety seconds for six hours, that adds up. I'd also have liked a slightly deeper default bracket EV-spacing range in the menu without diving into custom settings, since the factory default steps don't match what a bright window room actually needs. None of these are dealbreakers. They're the kind of thing you learn in the first two or three jobs and then just build into your settings and kit list. For general workflow habits that make any of this faster regardless of camera body, these workflow tips cover a lot of the same ground I've settled into on interior jobs specifically.
Frequently Asked Questions
Do I actually need a tilt-shift lens for interior work, or is software correction good enough?
For most rooms shot at a reasonable working distance, software correction (Lightroom's Upright tool or manual transform) gets you close enough that clients won't notice the difference. Where it falls apart is tight, symmetrical spaces shot straight-on, stairwells, narrow hallways, some bathrooms, where heavy digital correction visibly stretches the edges of the frame. For those specific setups a shift lens like the Laowa 15mm earns its place in the bag. I'd say most interior photographers can go a long time without one and only pick it up once they hit a specific job that demands it.
Is 24.5 megapixels enough resolution for architecture and interior design clients?
Yes, for the overwhelming majority of design firm and residential architecture deliverables. It covers web galleries, social carousels, and standard magazine spreads comfortably. Only step up to a higher-resolution body if you're regularly delivering large-format gallery prints of building exteriors, which is a different and smaller market than interior design documentation.
How many bracketed exposures should I shoot per room?
It depends entirely on the contrast in that specific room, not a fixed rule. A bright window-lit room at midday genuinely needs five to seven frames spaced roughly a stop apart to hold both the exterior view and the interior shadow detail. An evenly lit overcast-day room or a lamp-lit evening interior often needs only three. Shooting nine frames for every single setup out of habit just multiplies your culling workload for no real gain in image quality.
Does the Z6 III's video capability matter if you only sell stills to design clients?
It's worth knowing it's there even if you don't plan to use it immediately. A growing number of interior design and boutique hospitality clients now want a short walkthrough reel alongside the stills for social media, and having a body that can produce clean 4K footage from the same setup without renting a second camera is a real convenience on jobs where you're already booked for the day. It's not a reason to buy the camera on its own, but it's a reason not to discount it if stills-only work later grows into a video add-on.