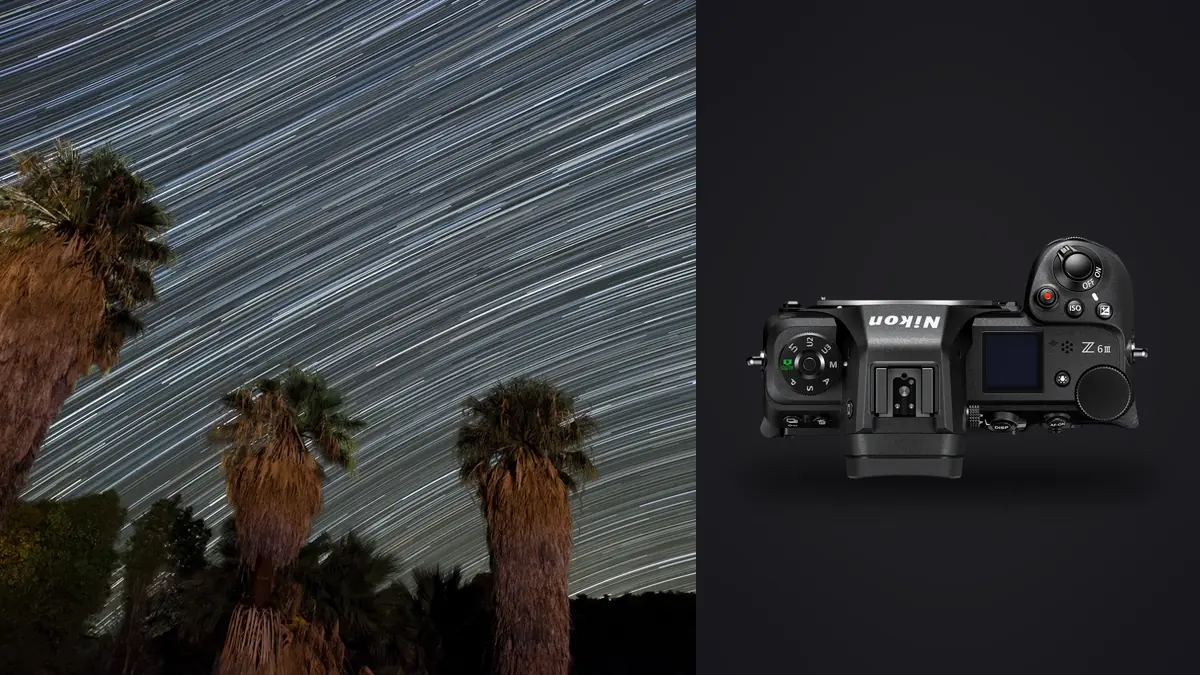
Astrophotography rewards a camera that is prepared before darkness, but the body is only one part of the plan. With the Nikon Z6 III, focal length determines how quickly star movement becomes visible, how much foreground fits, and how accurately a tracker must be aligned. The location controls access, horizon, artificial light, weather exposure, and whether the scene remains safe after the last visitor leaves.
This Lens and Location Guide connects the 24.5 megapixel full-frame Z6 III to wide Milky Way landscapes, tighter constellations, static stacks, and tracked sky frames. It does not promise a universal exposure. Instead, it builds a repeatable way to choose a lens, scout a legal site, separate foreground and sky requirements, and bring home sequences that stacking software can actually use.
Define the sky subject before selecting a focal length
A broad Milky Way arch, a vertical galactic core, an aurora over a landscape, and a single constellation need different framing. Use a planetarium or sky-planning application to identify azimuth, elevation, moon position, astronomical darkness, and the time the subject clears local obstructions. Confirm those predictions at the actual coordinates rather than relying on a regional forecast.
Decide whether the image is primarily a landscape with stars, a sky study with a small foreground, or a stitched panorama. The same 20mm lens can feel expansive on an open coast and cramped beneath trees. A 35mm or 50mm lens can reveal more sky detail but narrows the composition, shortens untracked exposure tolerance, and increases the number of panels required for a wide view.
Mark the intended output ratio and orientation in the scout frame. Leave room for rotation, lens correction, stack alignment, and any panorama overlap. A composition that barely contains a mountain at capture may lose its summit when several sky frames are registered.
Assign each Z lens one night-sky role
| Lens class | Useful scene | Planning demand |
|---|---|---|
| Ultra-wide prime or zoom | Large sky, close foreground, confined viewpoint | Corner stars, filter fit, and foreground distortion |
| Moderate wide prime | Milky Way core with a clear landscape anchor | More precise focus and shorter static frames |
| Normal fast prime | Constellations, mosaics, and detailed sky panels | Accurate tracking or many short exposures |
| Short telephoto | Large deep-sky regions and compressed layers | Mount capacity, alignment, and atmospheric stability |
| General wide zoom | Flexible scouting and foreground alternatives | Slower aperture may require a different sequence |
A fast aperture gathers more light in a given exposure, but wide-open corner performance, coma, vignetting, focus shift, and field curvature differ by lens. Make a controlled star-field test before travel. Compare the center and all four corners at the aperture likely to be used, then decide whether stopping down provides a worthwhile improvement for the required output.
Manual focus feel matters in the dark. An electronically coupled ring may not preserve a marked position after power cycling, while a mechanical manual lens may offer a repeatable hard scale but no automatic aperture or metadata. Learn the exact lens behavior, disable any setting that resets focus if possible, and tape nothing until the correct position has been confirmed on stars.
Check hood, heater strap, filter holder, and tripod plate together. A heater placed over a focus ring can move it. A thick filter can change focus and produce corner color shifts, particularly on a wide lens. Test the complete optical path rather than adding a filter at the remote site for the first time.
Choose darkness that also has lawful access
A dark map is a starting point, not permission to enter. Verify road hours, gates, parking, overnight restrictions, tripod rules, shoreline tides, fire closures, wildlife limits, and commercial permits with the responsible land manager. A turnout may close after sunset, and a remote path may cross private land even when the viewpoint itself is public.
Assess local light sources from the intended camera direction. A distant town behind the camera may help illuminate a foreground without entering the sky, while one nearby security lamp can flare across a wide lens. Visit after dark if safely possible, or examine recent night reports and satellite information. Seasonal businesses, construction, snow, haze, and stadium events can change the glow.
Do not equate remoteness with quality. A slightly brighter site with a clear horizon, stable ground, reliable access, and shelter from wind may produce a more coherent session than a darker location reached by an unsafe road. Record a backup site with a different horizon and simpler exit.
Scout foreground geometry in daylight
Arrive while every edge and hazard is visible. Walk the route from parking to camera position, note cliffs, water, loose rock, animal tracks, uneven ground, and the line needed for other visitors to pass. Place the tripod on durable ground without damaging vegetation or archaeological features. Save the exact return route offline.
Frame the foreground with the selected lens and a level camera. Check whether the sky subject will pass behind a tree, tower, ridge, or building at the planned time. A foreground that works toward the south may be unusable for a subject rising northeast. Record compass direction, tripod height, focal length, and a phone image of the leg positions.
Decide how the foreground will be exposed. Blue-hour capture can preserve natural detail but requires the tripod to remain unmoved for later sky alignment. A night foreground can maintain temporal consistency but may need longer frames, careful light painting, or a stack. Artificial lighting must be legal, low-impact, and considerate of wildlife and other visitors.
Separate the technical plan from the truth of the final image. If sky and foreground are captured at materially different times, from different positions, or under different conditions, retain notes and disclose the composite where editorial context requires it. Do not imply a documentary single exposure when the construction matters.
Match static or tracked capture to the composition
A static tripod keeps the sky and ground aligned within each exposure, making it the straightforward choice for a landscape stack. Exposure length must be short enough for the selected focal length, pixel density, sky position, and output. Formula estimates are only starting points. Enlarge a test star near the center and corner, then shorten the frame if elongation exceeds the intended look.
A tracker follows the sky and allows longer sky exposures, but the ground blurs while tracking. The workflow therefore needs separate foreground frames or a composition without a close terrestrial element. Polar alignment becomes more demanding as focal length grows. Confirm that the head, tracker, camera, lens, heater, and cables remain within rated capacity and can rotate without a collision.
Level and balance the support before darkness. Hang no loose bag where wind can swing it. If the ground is sand, snow, or soil, settle the legs and recheck framing after the equipment reaches thermal equilibrium. A small shift between a foreground series and a tracked sky series can create avoidable masking work.
Plan around moon, transparency, cloud, and moisture
The moon can obscure faint sky detail, light a foreground attractively, or become the subject. Check its phase, rise, set, altitude, and angular relationship to the frame. A low moon behind the camera may describe a ridge; a bright moon near the lens can reduce contrast. There is no single correct phase for every night photograph.
Cloud percentage alone is not enough. High thin cloud can spread distant light, while low gaps may reveal stars briefly. Transparency affects faint detail, seeing affects fine star structure at longer focal lengths, and humidity predicts dew risk. Compare several forecast sources, then observe conditions on arrival instead of defending a plan against the sky.
Fit a dew heater before condensation begins and power it from a secured source. Route the cable so it cannot tug the focus ring or snag during tracker movement. Keep caps dry, avoid breathing onto cold glass, and place the camera in a sealed bag before returning to a warm humid interior so condensation forms outside the equipment rather than within it.
Build a stack that has clean boundaries
Use manual exposure, fixed white balance, fixed focus, and a stable aperture for one sky set. Record enough matching light frames to reduce random noise without allowing the composition or conditions to drift beyond what the software can register. Begin and end each set with a slate, hand frame, or voice note that identifies lens, aperture, exposure, orientation, and tracker state.
Inspect the first few files at high magnification. Confirm star shape, corner focus, clipping, flare, and foreground intrusion. The Z6 III's live view can help with focus, but a bright display can hide subtle trailing and disrupt night vision. Lower brightness and use a red task light only where it is safe and permitted.
Calibration frames are software and method dependent. If dark, flat, or bias frames are part of the chosen process, learn their temperature, focus, aperture, and illumination requirements before the trip. Random frames made at dawn may not match the lights. Keep each calibration set labeled so it cannot be mistaken for a failed sky capture.
For panoramas, maintain sufficient overlap and a consistent sequence direction. Complete one row before conditions change, and consider extra overlap where stars or dark sky provide few alignment features. Do not adjust focus or zoom midway through a row.
Make the night field kit safe and recoverable
Carry redundant navigation, a charged phone, headlamp, spare light, warm clothing, water, and a first-aid plan appropriate to the site. Tell someone the exact route and return time. Work with a companion near cliffs, water, snow, wildlife, or unfamiliar remote roads. Weather can make a safe daylight trail hazardous at night.
Use dim markers or reflective tape on tripod legs without creating litter or distracting other observers. Keep bags closed, batteries insulated from cold, and cards in fixed pockets. The Z6 III has CFexpress Type B and SD storage; confirm whether the chosen recording mode duplicates or separates files and estimate capacity from real NEF settings before departure.
Set a hard turnaround time. Fatigue degrades balance, driving, focus checks, and file handling. A forecast improvement after the safe exit is not a reason to remain beyond access hours or cross a closed gate.
Keep NEF sets intact through local review
Copy each card to two verified locations before formatting. Preserve filenames and folder order, then add a simple manifest for light frames, foregrounds, panoramas, tracker runs, and calibration sets. Do not discard apparently black components until the stacking workflow confirms their role.
imagic desktop can scan supported NEF files before local analysis, group similar frames, and assign reversible culling statuses without deleting originals. It does not align stars, merge stacks, stitch panoramas, or combine tracked sky with foreground. Those selected sequences must move to appropriate specialist software.
Reselecting only re-ranks stored scores. Check score freshness and reanalyze stale photos if an old verdict is questionable. A learned style profile must exist before style application, and export applies stored edits to new JPEG or TIFF files. Keep neutral master files for stack inputs; aggressive per-frame adjustments can make integration inconsistent. Related equipment planning is available in Camera Hardware.
The Z6 III is a capable night platform when focal length, sky geometry, lawful access, and sequence discipline are designed together. A darker site cannot compensate for an obstructed horizon, unsafe route, moving tripod, or unlabeled stack.
Frequently Asked Questions
Which focal length is easiest for Z6 III astrophotography?
A moderate wide lens is forgiving for many sky landscapes because it includes context and tolerates longer static exposures than a normal or telephoto lens. The correct choice still depends on the sky subject and foreground geometry.
Does a star tracker remove the need for stacking?
No. Tracking reduces apparent star movement during a frame, while stacking can still improve signal or reject artifacts. A tracked sky also requires a separate plan for any stationary foreground.
Should focus be set to the infinity mark?
Use the mark only as a starting point. Magnify a suitable star, focus carefully with the complete filter and heater setup attached, then recheck after temperature changes.