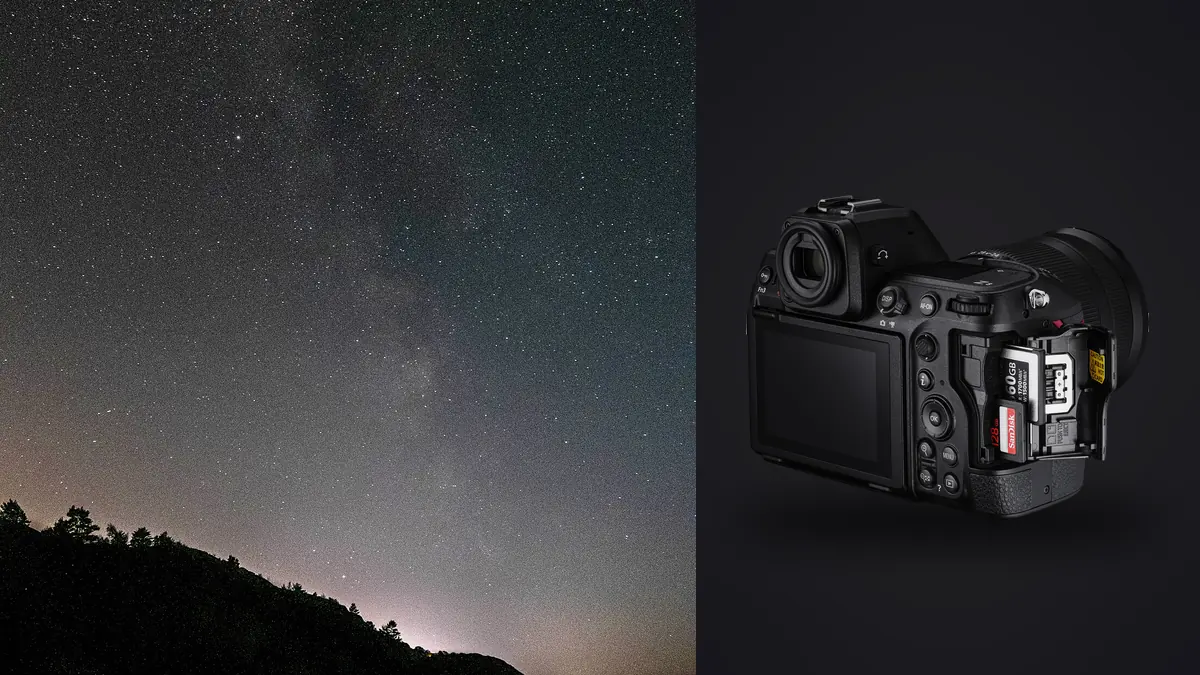
The first time I tried star stacking with a Z8, I did what most people do: I read the spec sheet, saw 45.7 megapixels, and assumed more resolution automatically meant a cleaner night sky. It doesn't, not on its own. It means tighter tolerances on focus, exposure length, and tripod stability than I was used to on my old D750, and it took a couple of frustrating nights on a dirt turnout above Joshua Tree before I stopped fighting the sensor and started working with it. This is the workflow I've settled into since, including the parts that didn't go the way the manuals suggested they would.
Why the sensor changes the math before you even open the intervalometer menu
The Z8 uses the same 45.7-megapixel stacked, backside-illuminated sensor as the Z9, which puts the pixel pitch at roughly 4.35 microns. That's noticeably smaller than the 5.9-micron pitch on the 24-megapixel Z6 line, and it matters for one specific reason: at 100%, star trails show up sooner on a high-resolution sensor than they do on a lower-resolution one, even with the identical lens and exposure time. The stars aren't moving any faster across the sky. You're just sampling that movement with more pixels, so a trail that was invisible at 24 megapixels becomes an obvious smear at 45.7.
The upside is real too. Because the files hold so much resolution, you can afford to downsample the final stacked image and get back some of that trailing tolerance, plus you get cleaner detail in the Milky Way's dust lanes once you stack enough frames to beat down the shot noise. The sensor also runs dual gain, with a second, cleaner readout stage kicking in somewhere around ISO 400 to 500. Practically, that means shooting at ISO 3200 or 6400 on the Z8 doesn't cost you nearly as much as it did on older Nikon bodies, which changes how you'll want to balance ISO against shutter speed later in this piece.
Focus and framing when you can't see either
Getting infinity focus you can actually trust
I don't use the lens's infinity hard stop, because on every Z-mount lens I own it's slightly past true infinity focus, enough to soften pinpoint stars if you rely on it. Instead I find the brightest star or planet in the frame, punch in with the rear LCD's magnification (hold the OK button, then scroll the zoom in), and turn the focus ring by hand until the star collapses to its smallest point. It takes maybe thirty seconds once you've done it a few times, and I do it fresh at every new location rather than trusting a focus mark from a previous night, because temperature swings shift focus by a hair on most Nikkor Z primes.
Composing without seeing the foreground
Boosting ISO to something absurd like 25600 for a few seconds just to preview composition and then dialing back down for the real exposure works better than squinting at a dim live view. I'll take a throwaway 2-second frame at ISO 25600 f/1.8, check the histogram and horizon line, adjust the tripod head, and repeat until the framing is right before dropping ISO back to whatever the actual stack calls for.
The exposure math I actually use, not the 500 rule
The old "500 rule" (500 divided by focal length equals your max shutter speed) was written for film-era resolution and doesn't hold up on a 45.7-megapixel sensor. The NPF rule accounts for aperture and pixel pitch as well as focal length, and it gives a more honest answer, though I still round the result down a couple of seconds because pixel-peeping these files is unforgiving. Here's what that looks like in practice with the lenses I actually carry:
| Lens / focal length | NPF-suggested cap | What I actually shoot | ISO | Frames per stack |
|---|---|---|---|---|
| Sigma 14mm f/1.4 DG DN | ~14s | 10s | 3200 | 40-50 |
| Nikkor Z 20mm f/1.8 S | ~10s | 8s | 3200-4000 | 50-60 |
| Nikkor Z 24mm f/1.8 S | ~8s | 6s | 4000-5000 | 60-80 |
| 50mm f/1.4, tracked (Star Adventurer GTi) | 120s+ | 90s | 800-1600 | 15-20 |
Notice the pattern: shorter individual exposures paired with more frames, rather than one long exposure. Stacking forty short frames instead of shooting four long ones gets you the same total light without the trailing risk, and it also gives you room to reject the handful of subs where a plane crossed the frame or a gust nudged the tripod, without losing the whole session.
What "star eater" actually looks like on Z8 files
Nikon's long-exposure noise reduction has a history, going back through the D810 and into the early Z6/Z7 bodies, of quietly suppressing faint stars along with hot pixels when it processes exposures in certain shutter speed ranges. I went looking for it on my own Z8 files by shooting a fixed composition at 5, 10, 20, and 30 seconds with long exposure NR forced on, then comparing star counts against the same frames with NR off. I could see a faint thinning of the dimmest stars in the NR-on frames, though it was subtler than what older Z7 threads described, not the aggressive smearing some people reported years ago. My conclusion, for what it's worth: turn long exposure NR off entirely for stacking work. You don't need it, because dark frame subtraction in your stacking software does the same hot-pixel cleanup without touching real stars, and it doesn't cost you the extra dead-time between frames that in-camera NR adds (which, on a 10-second exposure, effectively doubles your time per frame and cuts your stack count in half for the same session length).
Shoot a set of eight to ten dark frames at the same ISO, shutter speed, and temperature as your light frames, with the lens cap on, right after or before the sequence. Most stacking programs will use these automatically to knock out hot pixels and amp glow along the sensor edges.
Culling the take before you stack anything
A single night can easily produce three or four separate stacks of fifty-plus frames each, and at 14-bit lossless-compressed NEF that's roughly 3GB per stack. Not every frame in that pile is usable. Wind shifts a foreground juniper mid-exposure, dew creeps onto the front element around 2am, a satellite streaks through a couple of subs. Scrolling through two hundred nearly-identical star fields on a laptop screen at a trailhead, half-frozen, is exactly the kind of task I don't want to do by eye anymore.
I run the whole card through imagic before anything touches stacking software. Its local sharpness and focus scoring flags the frames where dew fogged the glass or the tripod caught a gust, and because everything processes on-device with no cloud upload, that culling pass works the same two hours from the nearest cell tower as it does at home. It's also worth knowing what it doesn't do here: for a two-hundred-frame star trail sequence, the duplicate and burst clustering doesn't try to lump those consecutive subs into one throwaway group the way it would with a rapid-fire wildlife burst, since each frame is its own light-gathering exposure that needs to survive into the stack. You still get to scan through and pull the two or three frames with a plane trail without the tool trying to "helpfully" collapse the whole sequence for you.
Stacking software and the final blend
For wide-field Milky Way work I use Sequator on Windows, mostly because its sky-versus-ground masking handles a horizon-heavy composition without much manual intervention. For deep-sky targets shot through the tracker, DeepSkyStacker with proper dark, bias, and flat frames gets me further, though it's a rougher interface. Mac-based photographers I know lean on Starry Landscape Stacker for the same wide-field work Sequator handles here.
The foreground almost always comes from a separate exposure, shot at the same framing but with a longer shutter and lower ISO to bring up shadow detail without the noise penalty of the sky frames, or from an even longer blue-hour frame if the composition allows waiting around for one. I blend the stacked sky onto that foreground in layers rather than trying to get a stacking program's built-in blend to do it for me; the masks are never quite clean enough straight out of the box.
Once the blend is flat and I'm happy with the composite, I run it through imagic's apply_my_style preset, trained on roughly eighty of my own past astro edits. That keeps the color balance consistent between a session shot in the Mojave in January and one shot in the Scottish Highlands eight months later on completely different white balance settings, without me having to remember exactly how I graded the last one.
Battery, cards, and other things that ruin a night if you skip them
The EN-EL15c holds up reasonably well in the cold, but I've watched it drop from 80% to 40% in about ninety minutes at minus six Celsius without a hand warmer strapped against the grip. I carry two spares on any winter session and keep them in an inside jacket pocket, not in the bag. On the card side, CFexpress Type B is the one I trust for a night of repeated stacks; a single 50-frame stack of compressed RAW eats close to 3GB, and a night with four or five different compositions will chew through a 128GB card faster than you'd expect. I don't bother with the second SD slot for astro work since backup-while-shooting isn't worth halving my write speed on files this size.
Frequently Asked Questions
Do I need a star tracker for the Nikon Z8, or is stacking on a static tripod enough?
Depends on what you're after. For wide-field Milky Way shots at 14-24mm, a static tripod and a stack of forty to sixty short frames gets you plenty clean, and it's a lot less gear to carry up a trail in the dark. A tracker earns its weight when you're reaching for longer focal lengths, 50mm and up, where untracked exposures get too short to gather meaningful light before trailing sets in. I bring the tracker maybe one session in four.
What ISO actually makes sense for stacked frames on this camera?
Given the Z8's dual gain switch lands around ISO 400 to 500, I try to stay at or above that threshold rather than dropping to base ISO and stretching the file in post, which reintroduces the read noise you were trying to avoid. In practice that puts most of my untracked wide-field work in the ISO 3200 to 5000 range, and tracked, longer exposures down around ISO 800 to 1600 since the extended shutter time is already doing the light-gathering work.
Should I leave long exposure noise reduction switched on for a stacking session?
I turn it off. It doubles your time per frame on anything longer than a couple of seconds, which cuts your usable frame count roughly in half over a fixed session length, and a proper set of dark frames handles the same hot-pixel and amp-glow cleanup during the stack without eating into faint star data the way in-camera processing has historically tended to.
How many raw frames does a genuinely clean stack need?
For wide-field Milky Way work I rarely go below forty subs, and I'm happiest around sixty. Deep-sky targets through a tracker can look reasonably clean with fifteen to twenty longer exposures because each frame is already gathering more light. The honest answer is that stacked noise reduction follows a square-root relationship, so doubling your frame count only buys you a modest, not doubled, drop in visible noise. Past about eighty frames on a wide-field shot, you're mostly trading battery life for diminishing returns.
None of this is complicated once you've run it a few times, it's just a lot of small decisions strung together in the cold and the dark, which is exactly when it's easiest to skip a step. Get the focus and dark frames right at the start of the night and the rest of the workflow, culling included, takes care of itself.