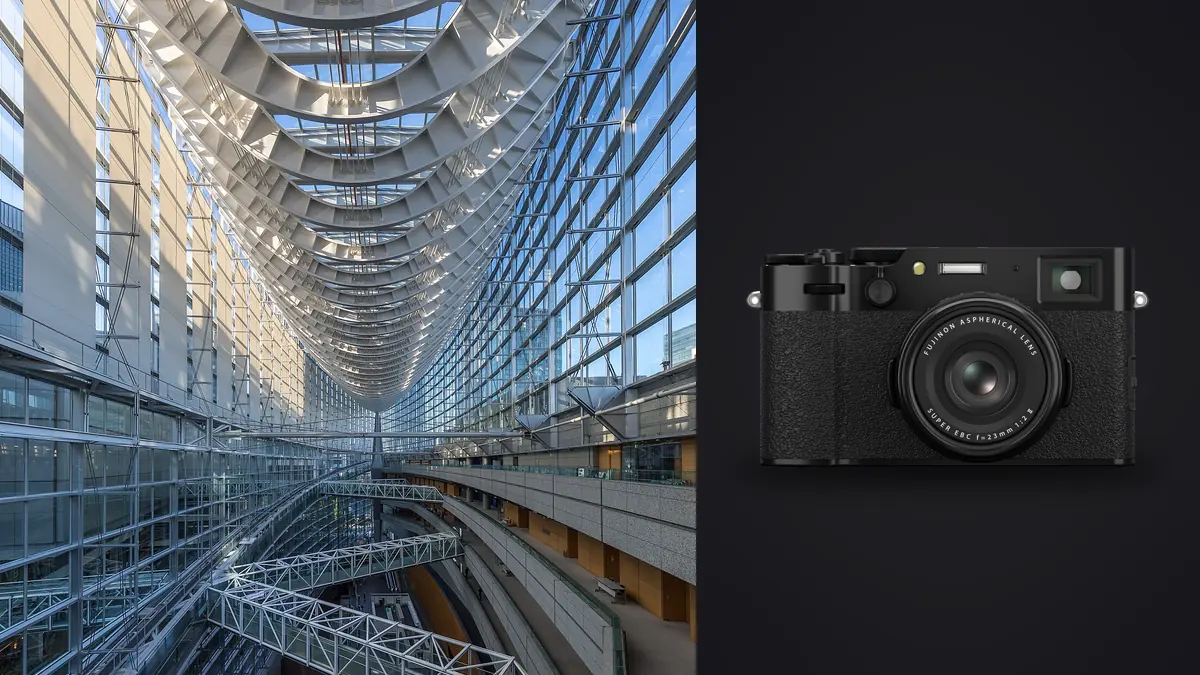
An unlikely tool for a specialist genre
Architectural and interior photography has traditionally been a tilt-shift-lens, full-frame, tripod-and-cable-release kind of job. So when I started seeing more interior designers, small architecture studios, and even a few real estate photographers carrying a Fujifilm X100VI on site visits, it seemed worth actually testing rather than dismissing. The short version: it is not going to replace a Canon TS-E 17mm on a technical camera for a magazine spread, and Fujifilm never designed it to. But for the huge volume of architectural and interior work that happens outside of that top tier, the walkthroughs, the concept documentation, the portfolio content, the quick client updates, it turns out to be a genuinely useful body. This is a rundown of where it earns its place and where it does not, from actually using one on residential and small commercial interiors over the past several weeks (imagic's Fujifilm X100VI page has the full spec sheet if you want that first).
The lens problem nobody mentions in the marketing copy
The X100VI has one lens: a 23mm f/2, which works out to roughly 35mm full-frame equivalent. For street photography and documentary work, 35mm is close to a universal focal length. For architecture and interiors, it is a compromise you feel immediately the first time you walk into a small bathroom or a narrow hallway and realize you physically cannot back up far enough to get the shot.
Professional architectural photographers typically live in the 16mm to 24mm full-frame-equivalent range specifically because rooms are small and walls do not move. At 35mm equivalent, the X100VI simply cannot capture a full room in one frame unless that room is unusually large or you are shooting from a doorway or corner. I ended up reframing how I approached most interiors: instead of wide establishing shots of an entire living room, I shot more vignettes, material details, corner compositions, and layered foreground-background arrangements. That is a different photographic language than what architecture clients often expect, and it is worth setting that expectation before the shoot, not during the edit.
Fujifilm does sell the WCL-X100 II wide conversion lens, which brings the effective focal length down to roughly 28mm equivalent and is compatible with the X100VI. It helps, and I would consider it close to mandatory if you are doing this work regularly. But 28mm still is not 17mm, and it will not solve a genuinely tight room. If a client specifically needs full-room real estate style coverage of small spaces, this is the honest limitation to flag before you show up with only this camera.
Converging verticals and the lack of in-camera correction
Point any 35mm-equivalent lens upward in a room with a low ceiling and you get converging verticals, the walls leaning inward toward the top of the frame. Some competing systems now offer in-camera perspective or keystone correction; the X100VI does not. You either keep the sensor plane dead level and accept a lot of empty ceiling or floor in the frame, or you shoot slightly tilted and fix the verticals in Lightroom or Capture One afterward using the geometry or transform tools.
In practice I do the second almost every time. The 40.2-megapixel X-Trans 5 sensor gives enough resolution headroom that a modest vertical correction, which crops in from the edges, still leaves a file large enough for print or a design portfolio spread. Just know going in that this is a two-step process (shoot, then correct) rather than the one-step process some other systems now offer.
Where the leaf shutter actually earns its keep
This is the part of the X100VI that surprised me most on interior jobs. The leaf shutter inside the lens is close to silent, and it syncs with flash at any shutter speed instead of being capped at a standard sync speed the way a focal-plane shutter is. On an occupied residential interior shoot, where the homeowner or their kids are still in the house, or on a design studio site visit where people are working around you, a camera that does not clunk with every frame changes how the shoot feels for everyone in the room.
The flash sync advantage matters more than it sounds. Interiors routinely have a huge dynamic range problem: bright daylight coming through windows against a comparatively dim interior. Being able to sync a small flash or strobe at 1/2000s or faster lets you pull the window exposure down to something reasonable while still filling the room, without resorting to a heavy multi-flash setup. It is not going to replace a proper lighting kit for a big commercial interior, but for a single room with one off-camera flash, it is a real practical advantage that a DSLR at 1/200s sync speed does not give you.
Settings I actually use, room by room
After a few shoots I stopped guessing and settled into a rough set of starting points depending on the space. These are not rigid rules, but they saved me time dialing in from scratch in every new room.
| Space type | Effective focal length | Aperture | Shutter mode | Notes |
|---|---|---|---|---|
| Small bathroom / closet | 28mm (with WCL-X100 II) | f/5.6-f/8 | Electronic, silent | Even with the converter you're often shooting from the doorway; watch for your own reflection in mirrors and tile. |
| Living room / open kitchen | 35mm native | f/4-f/5.6 | Mechanical or electronic | Bracket 3 frames at +/-1.3EV for window/interior contrast; blend later. |
| Material and texture details | 50mm (digital tele) | f/2.8-f/4 | Electronic | Digital teleconverter crop still holds up well at this megapixel count for web and portfolio use. |
| Furniture / product vignette | 70mm (digital tele) | f/2.8 | Electronic | Shallower depth of field separates the piece from a busy background; check corner sharpness at 100%. |
| Exterior facade | 35mm native | f/8-f/11 | Mechanical, leaf shutter flash sync if fill needed | Built-in 4-stop ND filter is genuinely useful for balancing a bright sky against a shaded facade. |
The digital teleconverter deserves a specific mention because it is more useful here than it sounds on paper. Rather than a simple digital crop applied after the fact, it changes the framing you see live in the viewfinder to 50mm or 70mm equivalent, which makes composing detail shots (door hardware, a specific tile pattern, a light fixture) much faster than cropping later in software. Image quality does soften slightly compared to native resolution, but for anything destined for a website gallery or social content, it holds up fine.
Bracketing, confidentiality, and not drowning in near-duplicate frames
High-contrast interiors push most photographers toward exposure bracketing, and I shot the X100VI's built-in AE bracket (3 or 5 frames, adjustable spacing) constantly on this project. The problem with bracketing every composition in every room of a house is obvious the moment you get back to your desk: a two-hour shoot easily produces 800 to 1,200 near-identical frames, three or five versions of nearly every angle, plus the inevitable duplicate attempts where you nudged the tripod or reframed slightly.
This is where I lean on imagic rather than scrolling through everything manually. Its burst and near-duplicate clustering groups those bracketed sets and repeated attempts automatically, so instead of eyeballing five nearly identical exposures of the same kitchen corner, I get them grouped together with the sharpest frame flagged, which is what I actually want to grab for the HDR blend. On a shoot with this much bracketing, that alone probably saves an hour of sorting per project.
There is a second reason imagic fits this particular kind of work well: a lot of interior and architectural photography happens under an NDA before a project is publicly announced, a house that hasn't sold yet, an interior design concept a studio hasn't revealed to a client's own social following yet. Because imagic processes everything locally on the machine rather than uploading images to a cloud service to run its culling and scoring, there's no version of the workflow where unreleased project photos pass through a third-party server. For anyone shooting under a confidentiality agreement, that is not a minor feature, it is the difference between a workflow you can actually use for that client and one you cannot.
Once the shortlist is narrowed down, I've also set up an apply_my_style preset in imagic trained on my own past interior edits (a fairly neutral white balance, slightly lifted shadows, warmer wood tones), so the first pass on a new set of interior files already looks close to my finished style before I open Lightroom, rather than starting from a flat baseline every time.
What this camera cannot do for you
I want to be direct about the limits, because I think a lot of gear write-ups gloss over them. The X100VI cannot do true perspective control the way a tilt-shift lens can, where you physically shift the lens element to keep verticals parallel without cropping or software correction. It cannot go wider than 28mm even with the conversion lens, which rules it out for genuinely tight interiors, small bedrooms, compact kitchens, cramped bathrooms, without a lot of vignette-style reframing instead of a full-room shot. And because the lens is fixed, there is no swapping to a longer lens for a distant facade detail; the digital teleconverter's 70mm equivalent is roughly where the usable reach ends.
If your work is primarily large residential exteriors, commercial architecture for a design firm's marketing materials, or anything requiring precise verticals straight out of camera, this is not your primary tool, and I would not try to make it one. Where it earns a place in the bag is as the second camera: the one you carry into a client meeting or a quick site walk when a full tripod-and-tilt-shift setup would be overkill, and the one that produces genuinely good, print-ready files (that 40-megapixel sensor is not a toy) without drawing attention to itself in an occupied space. For photographers whose work leans more toward listings than design portfolios, imagic's real estate photography workflow page covers the volume side of that genre in more depth.
Frequently Asked Questions
Is the Fujifilm X100VI wide enough for interior design photography without an accessory lens?
Not reliably. At 35mm equivalent you can shoot larger rooms and corners comfortably, but small bathrooms, closets, and narrow hallways will often be too tight to fit in one frame. The WCL-X100 II wide converter brings you to roughly 28mm equivalent, which helps meaningfully but still falls short of the 16-24mm range most dedicated architecture lenses cover.
Does the X100VI's in-body stabilization matter for interior shooting?
Yes, more than I expected going in. In-body stabilization was new to the X100 line with this model, and it lets you handhold interior shots in dim rooms or shaded corners at shutter speeds where you'd previously have needed a tripod or a bump in ISO. It doesn't eliminate the need for a tripod on precise architectural work where you want dead-level verticals, but for quick walkthroughs it noticeably extends how late in the day or how far into a shadowed room you can keep shooting handheld.
Can I use flash with the X100VI for interior fill light?
Yes, and this is one of its genuine strengths for this use case. Because the lens uses a leaf shutter rather than a focal-plane shutter, it syncs with flash at any shutter speed rather than being limited to a standard sync speed. That makes it much easier to balance a bright window against a dim interior with a single off-camera flash than it would be on most interchangeable-lens bodies.
How should I handle the volume of bracketed exposures from a full interior shoot?
Plan for it before you shoot, not after. A typical two-hour interior shoot with 3-to-5-frame AE bracketing on most compositions can easily produce over a thousand files. Rather than scrolling through them one by one, running the set through imagic's burst and duplicate clustering groups the bracketed sequences and flags the sharpest frame in each, which cuts the manual sorting time down substantially before you ever open your editing software.