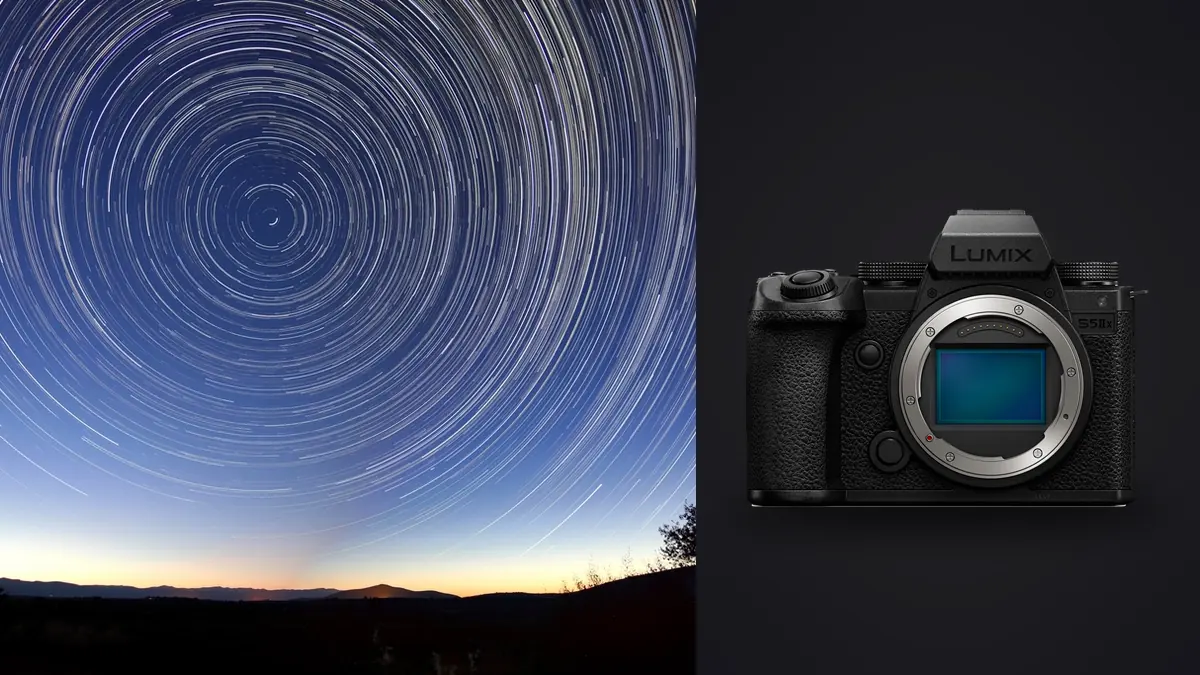
I've dragged the S5IIx out to three different dark sky sites this year: a scrubby ridge two hours outside where I live, a friend's farm with a horizon flat enough to see the galactic core rise cleanly, and one miserable night on a beach where the wind never let up and half my subs went straight in the bin. None of that is really about the camera. Star stacking punishes bad technique long before it cares what body you're using. But after enough nights out there, the S5IIx has earned a specific place in my kit for this kind of work, not because it does anything magical with stars, but because of a handful of unglamorous things: how the sensor behaves at the ISOs you actually use for wide-field night sky, how long it runs before it starts complaining about heat, and how much of the tedium of an eighty-frame sequence I can hand off to software afterward instead of doing it by eye at 2am with cold fingers.
This isn't a spec sheet regurgitation. It's the settings, the lens choices, and the actual capture plan I use to get a stack that holds together, plus the points where the process usually falls apart.
What the sensor and the fan actually buy you here
The 24.2-megapixel full-frame sensor in the S5IIx isn't the headline story on paper. Panasonic sells it mostly on video specs, phase-hybrid autofocus, and the internal ProRes recording the plain S5II doesn't get. None of that matters much for a static tripod shot of Cygnus. What does matter is the dual native ISO gain step the sensor uses. Panasonic built it primarily for V-Log shooters chasing dynamic range, but the practical effect for stills is that the jump up to the second native gain point doesn't cost you the extra read noise you'd expect from just cranking a single-gain sensor. For faint nebulosity and Milky Way core detail, that means I can push exposure to ISO 3200 to 6400 on wide-field frames without the shadows turning to mush the way they would on an older single-gain full-frame body.
The active cooling fan is the part nobody mentions in the same breath as astrophotography, and it should be. It exists so the S5IIx can record long 4:2:2 10-bit video without shutting itself down, but the side effect for stills work is that a ninety-minute stacking session, firing every 15 to 20 seconds continuously, never trips a thermal warning. I've had other bodies throw sensor-temperature errors after forty minutes of continuous shooting on a warm night. The S5IIx just keeps going.
Turn stabilization off. Five-axis in-body stabilization is genuinely good on this camera for handheld work, but on a locked-down tripod for a 10 to 20 second exposure it has nothing to correct, and it can occasionally introduce a faint wobble of its own hunting for movement that isn't there. Menu, that toggle, off, every time I set up.
Cold kills batteries faster than it kills camera electronics. The DMW-BLK22 holds up fine at room temperature, but at freezing you'll watch the percentage drop fast, especially with the rear screen lit for framing. I run a USB-C power bank into the side port on anything past an hour and let the internal cell ride as backup, which also means I'm not swapping batteries mid-sequence and knocking my framing off.
Weather sealing matters more here than almost anywhere else you'd use it. Dark sky sites are cold, often damp, and dew forms on anything left sitting out for two hours, including the camera body. The S5IIx's sealed magnesium alloy shell has shrugged off condensation on every trip I've taken it on. I still strap a lens hood and a hand warmer to the barrel with a rubber band to fight dew on the front element, because no amount of body sealing stops the glass itself from fogging.
Glass that keeps stars as points, not smears
The S5IIx uses the L-mount, shared with Leica, Sigma, and Panasonic's own lineup, and for astro that's a genuinely good position to be in because Sigma builds some of the sharpest, best coma-corrected wide primes on the market and sells them natively in L-mount.
My go-to is the Sigma 14mm F1.4 DG DN Art. At f/1.4 it's usable, but I shoot it at f/1.8 to f/2 for star points, because wide open the corners still stretch pinpoint stars into little seagull shapes, an artifact of coma that gets worse the closer you are to the edge of frame. Stopped down half to a full stop it cleans up dramatically. The Sigma 20mm F1.4 DG DN Art is my second choice when I want a slightly tighter field for a foreground subject that needs more presence, same coma behavior, same fix.
If you're not ready to buy into f/1.4 primes, the Lumix S 14-28mm F4-5.6 is a legitimate budget option for wide astro. You lose two-plus stops of light gathering compared to the primes, which means either longer exposures (more trailing risk) or higher ISO (more noise to fight in the stack), but it's sharp corner to corner and it's the lens I hand to anyone asking how to get into this without spending prime-lens money.
Whatever you use, focus it manually. None of the autofocus systems on any current mirrorless camera, including the S5IIx's phase-hybrid setup, reliably locks onto a star field in the dark. Switch to manual, punch in digital zoom on the brightest star you can find, and turn the ring until the point tightens to its smallest size. Focus peaking gets you close, but the zoomed-in view is what actually nails it. Re-check every 20 to 30 minutes if the temperature is dropping, because glass drifts out of focus over a long session more often than people expect.
Timing the shoot: the moon and your site matter more than any camera setting
None of the settings below fix a bright moon washing out the Milky Way core, so plan the date before you plan the exposure. I aim for the window roughly four days either side of new moon. Outside that window I'll still shoot if the moon sets or rises at a convenient hour, but I check moonrise and moonset times specifically rather than just the phase percentage, since a 40 percent moon that's up for your whole session does more damage than an 80 percent moon that sets before you arrive.
Light pollution matters just as much as moonlight and it's easier to plan around, since it doesn't change night to night. I scout sites on a light pollution map before committing a whole evening to the drive, looking for anything Bortle 4 or darker for a core shot with real contrast. A Bortle 6 or 7 site near town will still get you a stack, but you're fighting orange sky glow in every sub instead of just the ones with the moon up.
Core visibility season runs roughly February through October in the northern hemisphere, with the core rising later in the night in the shoulder months and climbing higher, earlier, by mid-summer. Planning apps that show azimuth and altitude for a given time and location save a wasted drive more reliably than memorizing any of this by season.
Settings that keep every sub usable
I shoot everything for a stack in manual exposure, manual focus, RAW only (the compressed RAW option on this camera is fine here, you don't need uncompressed file sizes for star fields), and either electronic shutter or a 2-second timer to kill any shutter shock. Aperture sits wide open or one click down depending on the lens, as above. ISO and shutter speed both come down to how much trailing you can tolerate on an untracked tripod, and that's a function of focal length, not personal taste.
Untracked exposure limits by focal length
These are the numbers I actually use in the field, worked out over enough soft, trailed subs to trust them. I'd rather undercut exposure time by a second or two than deal with trailing I can't fix in post.
| Focal length | Aperture | Max single exposure (untracked) | Subs for ~20 min total integration |
|---|---|---|---|
| 14mm | f/1.8 | 20s | ~60 |
| 20mm | f/1.4 | 14s | ~85 |
| 24mm | f/1.4 | 12s | ~100 |
| 35mm | f/1.8 | 8s | ~150 |
| 50mm | f/1.8 | 5s | ~240 |
If you're running a star tracker (a Move Shoot Move or a Sky-Watcher Star Adventurer, say) all of this changes: exposures can stretch to 60 to 120 seconds each because the mount compensates for Earth's rotation, and you need dramatically fewer subs for the same total integration time. I still keep tracked exposures shorter than the mount technically allows, because a slightly imperfect polar alignment shows up as slow drift over a 90-second sub and you won't notice it until you're looking at 100 percent crop on a monitor at home.
Set the built-in interval shooting menu to fire the sequence automatically rather than triggering each frame by hand. Interval equal to exposure time plus a one-second buffer, shot count set high (I usually overshoot by 10 to 15 frames and cull the wind-shake casualties later), then walk away and let it run while you shoot foreground frames or just stand there freezing and looking up.
Building a stack that actually has data to work with
A stack is only as good as its weakest inputs, and the biggest beginner mistake I see (made it myself for a full season) is trying to get away with too few subs because standing around in the cold for two hours sounds miserable. Twenty subs stacked will look better than one exposure at the same total time, but nowhere near as clean as eighty. Noise reduction in a stack scales with the square root of frame count, so going from 20 frames to 80 buys roughly twice the noise reduction, not four times, which is worth knowing before you talk yourself into six hours out there chasing diminishing returns.
I always shoot a matching set of dark frames: same ISO, same shutter speed, roughly the same temperature, lens cap and body cap on, 15 to 20 of them. These get subtracted from the light frames during stacking and are the easiest way to kill amp glow and hot pixels that show up on longer exposures, especially once the sensor's been running for over an hour and has warmed up slightly from continuous shooting. Skip darks and you'll see it in the stack as odd colored blotches in the corners that no amount of noise reduction fixes cleanly.
The foreground gets its own separate exposure, usually with a headlamp or a slow pass of light painting, blended in manually afterward rather than folded into the star sequence itself. Stacking software aligns on star movement, not landscape features, so including a sharp foreground in the same sequence as your sky subs just gets you a smeared foreground in the finished composite.
Where imagic actually earns its spot in this workflow
Eighty raw files from a 24-megapixel sensor is a lot to sort through by eye, and they all look nearly identical at thumbnail size, which is exactly the problem. After a session I pull the card into imagic and run its sharpness scoring across the whole sequence before touching a stacking app. It catches the frames where the tripod got bumped by wind or where focus drifted over the course of the night, the kind of soft-focus sub that's genuinely hard to spot by eye at midnight but that will visibly drag a stack down if it sneaks in. The burst and duplicate clustering groups the whole sequence together automatically instead of leaving eighty separate thumbnails to click through one at a time, which after a few of these sessions is the difference between a ten-minute review and a forty-minute one. If you want the mechanics behind how that scoring and clustering actually work, I've gone into more detail in how AI photo culling works.
It matters more than it sounds like for this specific kind of shooting, because dark sky sites tend to be places with no signal at all, and you're often working off a laptop battery with nothing to upload to even if you wanted to. imagic runs the whole culling pass locally with no cloud round trip involved, which is one less thing to worry about when you're three hours from the nearest town and the files are sitting on a card you'd rather not lose.
Once the stack itself is built and I've got a finished composite, if I'm running a batch of shots from the same trip through a color grade I lean on the apply_my_style preset, trained on my own past edits, to get a consistent starting point across the set instead of re-deriving white balance and contrast decisions from scratch on every finished frame from a night that produced six or seven final composites.
Stacking software and pulling it together
For the actual alignment and stacking I split my workflow depending on which machine I'm near. Sequator (Windows, free) does a solid job on wide-field untracked sequences and has a sky-versus-ground separation tool that handles a real horizon reasonably well without much fuss. On the Mac side, Starry Landscape Stacker does the same job and is worth the license fee if you shoot foreground-inclusive compositions often, since its masking for trees and rooflines against a moving star field beats anything free. DeepSkyStacker is where a lot of people start and it's genuinely capable, though the interface shows its age next to the other two.
Whichever tool handles the alignment, the output comes back into your usual raw processor for the actual edit, and this is where I'd point you toward treating a star stack like any other night shot rather than some separate category with its own rules for color and contrast. If your grading process already leans on a consistent workflow across a shoot, that carries over cleanly to a finished star stack. The general approach I use across every edit regardless of subject is laid out in the color grading guide, and none of it changes just because the subject happens to be a sky full of stars instead of a wedding or a landscape.
Frequently Asked Questions
Do I need a star tracker to get good stacked results with the S5IIx, or is a stationary tripod enough?
A stationary tripod is enough for wide-field Milky Way and star field shots, which is most of what this guide covers. The dual native ISO gain step and the sensor's noise floor at ISO 3200 to 6400 are clean enough that a stack of 60 to 100 short untracked subs holds up well at normal viewing and print sizes. A tracker becomes worth the extra setup time once you're chasing deep sky targets, nebulae or galaxies, at longer focal lengths where even a few seconds of exposure shows trailing without one. For a first season, skip the tracker and learn the untracked workflow first.
Will the S5IIx overheat if I run a two-hour stacking sequence?
I haven't managed to trigger a thermal shutdown shooting stills sequences with it, even on warmer nights running continuously for over ninety minutes. The active cooling fan exists for video recording, but it benefits any long continuous-shooting session too. Battery life is the bigger practical limit, which is why I run external power on anything past an hour.
Should I bother with the camera's high-resolution multi-shot mode for star fields?
No. High-resolution mode works by shifting the sensor a fraction of a pixel between several exposures and combining them for more detail, which is great for a static landscape but wrong for a moving star field. The stars shift position relative to the sensor between sub-exposures for the same reason they trail in a single long exposure, and the multi-shot algorithm has no way to tell that apart from genuine detail. You'll get smeared, doubled stars. Shoot normal single-frame RAW exposures and do your compositing in stacking software instead.
How many subs is actually enough before I stop seeing improvement?
Diminishing returns set in earlier than people expect, because noise reduction scales with the square root of frame count. Going from 20 to 80 frames roughly doubles noise reduction, not quadruples it. In practice I find 60 to 80 clean subs, after culling out the soft or wind-shaken ones, gets a wide-field shot to a point where a fourth or fifth doubling of frame count isn't worth another hour standing in the cold. If your subs are noticeably noisy going in (high ISO, short focal-length-limited exposures), lean toward the higher end of that range.