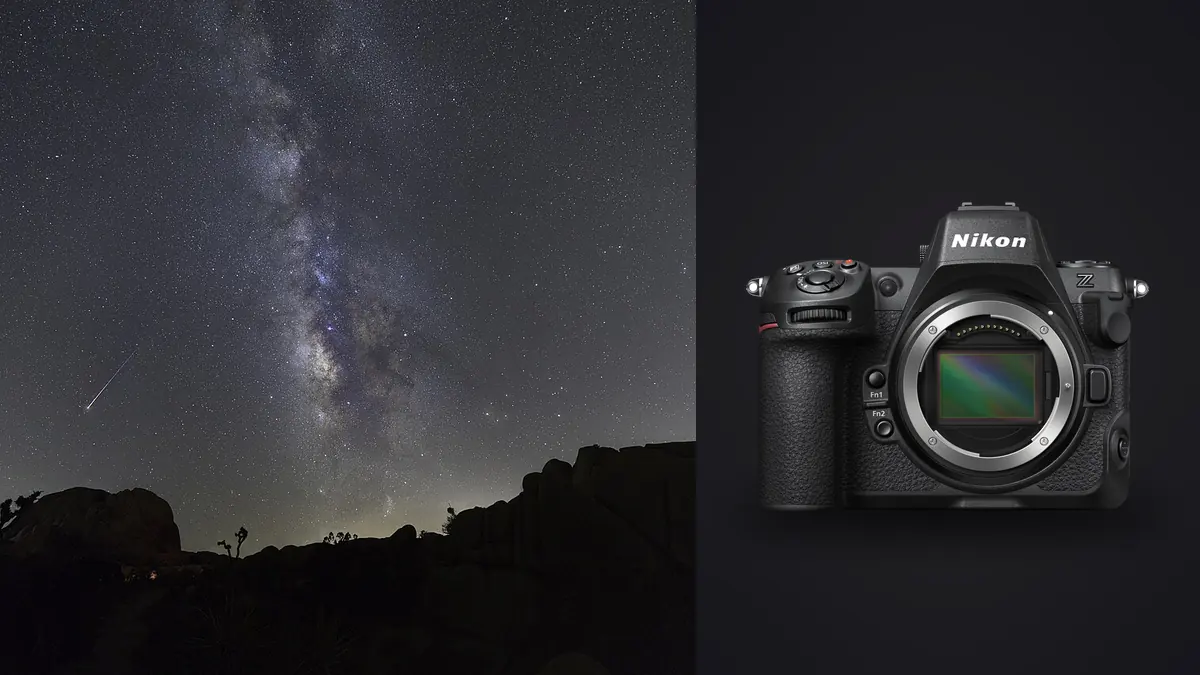
The first time I pointed a Nikon Z8 at a genuinely dark sky, out past Alamogordo where the Milky Way core sits almost overhead in June, I expected the file quality to be the story. It wasn't. The story was how much time I got back. A camera with a fully electronic shutter, a deep buffer, and a sensor that behaves at ISO 3200 the way a lot of older DSLRs behaved at ISO 800 changes how many usable subframes you can pull in a three hour window. Star stacking is a numbers game before it's anything else. More clean subs, aligned and stacked correctly, beats any single "hero" exposure almost every time.
This isn't a spec sheet rundown. It's the settings, sequencing, and post-processing order I actually use when I take a Z8 out for a stacked Milky Way or wide-field deep-sky shoot, along with the mistakes that cost me frames the first few times I tried it.
Why the sensor readout matters more than the megapixel count
The Z8 carries the same stacked, backside-illuminated 45.7MP sensor and EXPEED 7 processor as the Z9, just in a smaller body. For astro work, the number that actually changes your evening isn't resolution, it's readout speed. A stacked sensor reads out fast enough that Nikon skipped a mechanical shutter entirely on this camera. There's no shutter curtain to fire at all, which means no shutter shock softening pinpoint stars at the shutter speeds where DSLRs used to get mushy, and no mirror slap to worry about because there's no mirror. For a genre where the entire point is resolving stars as tight, round points rather than fuzzy blobs, removing one more source of micro-vibration is not a minor thing.
The other practical benefit is buffer depth. Interval timer shooting on the Z8 is built in (no external intervalometer needed, which is one less cable and battery to manage in the cold), and paired with a fast CFexpress Type B card in the primary slot, the camera keeps writing subframes back to back without stalling between shots. On a DSLR-era body I've had sequences stutter because the buffer filled and the camera paused to catch up, which throws off your dithering rhythm. I haven't had that happen with the Z8 shooting 45MP raw at 5 to 10 second intervals.
Locking exposure before the sky goes fully black
I set exposure while there's still a hint of blue in the sky, using a bright star or planet to check focus and framing, because doing all of this from scratch in true darkness wastes twenty minutes you don't get back. The starting point is always a balance between aperture wide enough to gather light, ISO high enough to get a usable histogram, and shutter speed short enough that stars stay as points instead of short trails. On a 45.7MP sensor, pixel pitch is tighter than on a 24MP body, which means trailing shows up sooner than the old "500 rule" would suggest. I lean on the NPF-style guidance below rather than the simpler rules of thumb.
| Lens | Working aperture | Max single exposure (static tripod) | Starting ISO | Field notes |
|---|---|---|---|---|
| Nikkor Z 14-24mm f/2.8 S | f/2.8 | ~13 sec | ISO 3200 | Widest trailing margin of this group, coma stays controlled wide open |
| Nikkor Z 20mm f/1.8 S | f/2.0 | ~9 sec | ISO 2500 | Stopping down a third of a stop cleans up corner coma noticeably |
| Nikkor Z 24mm f/1.4 S | f/1.8 | ~7-8 sec | ISO 2000 | Brightest option here, watch corner stars wide open, better at f/1.8-2 |
| Nikkor Z 50mm f/1.8 S | f/2.2 | ~4 sec | ISO 3200 | Fine for star clusters, but this focal length really wants a tracker |
These are practical starting points from actual sessions, not a formula output, so treat them as a place to begin rather than gospel. Once the histogram shows data sitting comfortably off the left edge without clipping stars themselves, I lock those three values and stop touching them for the rest of the sequence unless clouds roll in.
Focusing on stars in the dark
Autofocus struggles badly on point sources at night, so this is manual focus territory. I zoom the live view display to maximum magnification on the brightest star I can find, nudge the focus ring until it collapses to the smallest, tightest point I can get, then back off a hair and confirm with focus peaking turned on. The Z8's peaking overlay is sensitive enough to flicker around a properly focused star even in a dim viewfinder, which is the confirmation I look for. Once that's dialed in, I tape the focus ring down. Z-mount focus rings have almost no resistance, and a stray bump while swapping a battery or adjusting the tripod head is enough to soften an entire sequence without you noticing until you're home reviewing files at full size.
If there's no bright star handy, a Bahtinov mask on a distant streetlight or a planet works, but honestly, on clear nights I rarely need one with the Z8's live view magnification. It's precise enough on its own.
Building the actual subframe stack
For a wide-field Milky Way composite I'm typically shooting 40 to 80 light frames at the settings above, back to back, with the interval timer set to fire as fast as the buffer allows. Between subs I nudge the tripod head a few millimeters, or if I'm on a tracker, I let the mount's periodic error do the dithering for me. Dithering matters because it shifts hot pixels and fixed-pattern noise to different positions in each frame, which the stacking software then averages out instead of reinforcing.
I turn off in-camera long exposure noise reduction entirely for this. It doubles the time between subs (the camera takes a dark frame after every light frame at matching exposure length), which cuts your total sub count roughly in half for the same time on the mountain, and stacking software does a better job of noise reduction across dozens of frames than the camera can do with one dark frame per light frame anyway. Instead, I shoot a batch of 15 to 20 dark frames separately, lens cap on, same ISO and shutter speed and roughly the same ambient temperature, either right before or right after the light sequence. Flats I only bother with if there's obvious vignetting from a wide aperture lens, which for the 14-24mm f/2.8 S is rare enough that I mostly skip it for wide starfields.
Tracked versus untracked sequences
Everything above assumes a static tripod, where you're fighting Earth's rotation with shutter speed alone. Put the Z8 on a star tracker (I've used a Star Adventurer GTi and, more recently, an iOptron SkyGuider Pro) and the math changes completely. Suddenly you can push individual subs to 60, 90, even 120 seconds at ISO 800 to 1600 instead of ISO 2500 to 3200, which means dramatically less noise per frame and a cleaner stack overall. The tradeoff is weight and setup time. The Z8 body with a 24mm f/1.4 S isn't heavy by DSLR standards, but polar alignment eats fifteen minutes you don't get back, and it's one more thing that can go wrong at 2am when your hands are cold. For a quick single-night outing I still often shoot untracked and lean on frame count to make up the difference.
Culling hundreds of subframes without losing the whole next morning
Here's the part nobody mentions in the exposure-settings articles: an 80-frame stacking sequence at 45.7MP produces a genuinely large batch of raw files, and not all of them are usable. Wind gusts move the tripod a fraction of a degree mid-exposure. A plane or satellite streaks through a frame. On a tracker, a brief guiding hiccup smears every star in that one sub just enough to matter. Scrolling through eighty 45MP raw files at 100% zoom on a laptop at a campsite, or worse, the next morning when you'd rather be sleeping, is not how I want to spend my time.
This is where I've leaned on imagic for the culling pass. It scores sharpness locally, frame by frame, so the handful of subs where a gust or a guiding blip softened the stars gets flagged before I ever load the sequence into stacking software, rather than after I've already run a two-hour stack and wondered why the result looks slightly mushy. Because it's running entirely on the machine, there's no upload step for a folder of raw astro files, which matters more than it sounds like when you're working off a laptop at a dark site with no signal anyway. If you want more background on how sharpness-based culling actually distinguishes a soft frame from an intentionally out-of-focus one, this breakdown of how AI photo culling works covers the mechanics in more depth than I will here. And if the broader question of tightening up a night photography workflow interests you beyond just astro, these workflow tips apply just as well to a folder of star stacking subs as they do to a wedding take.
Stacking and blending with the foreground
For actually combining the culled subs, I use Sequator on the Windows side of things, or Starry Landscape Stacker when I'm on a Mac, both of which handle the sky-versus-foreground masking automatically well enough that I rarely need to hand-mask a horizon line myself. The workflow is: stack the sky frames together for noise reduction and star sharpness, expose and process one clean frame separately for the foreground (often lit only by starlight or a brief low-power flashlight pass, sometimes a longer separate exposure at base ISO), then blend the two in Photoshop or Affinity with a luminosity mask along the horizon.
One thing worth knowing about the Z8 specifically here: because the electronic shutter reads the full sensor without a mechanical curtain, there's no shutter-shock softening on either the stacked sky frames or that separate foreground exposure, which keeps the two elements consistent in sharpness when you blend them. That consistency is more noticeable than I expected the first time I compared a Z8 blend to older files shot on a body with a conventional shutter.
Finishing the edit
Once the stack and blend are flattened into a single file, the finishing work is mostly color: pulling the Milky Way core's natural warm-to-cool gradient back out from whatever the stacking software's automatic processing did to it, controlling green and magenta color casts in the sky (a common byproduct of light pollution filters and certain white balance settings), and adding just enough local contrast to the core without turning the whole frame into a fake-looking nebula poster. If color grading night sky images specifically is new territory for you, this color grading guide covers the underlying principles that apply here too, even though it isn't astro-specific.
When I've got a run of composites from the same multi-night trip that all need the same color treatment, I've started using imagic's apply_my_style feature once I've hand-finished the first one. It trains on the edit I actually made rather than a generic preset, so applying it across the rest of the batch gets me most of the way to a consistent look across a whole trip's worth of stacked files in a fraction of the time, without every frame needing the same manual color pass from scratch. It's not magic on frames with genuinely different sky conditions, but for a batch shot over consecutive clear nights at the same site, it holds up well.
Frequently Asked Questions
Do I need a star tracker for the Z8, or can I stack untracked frames successfully?
You don't need one to get a usable result. Untracked, static-tripod stacking with 40 to 80 subframes at the exposure limits in the table above produces genuinely clean Milky Way composites, and it's how I shoot most of the time when I'm not carrying extra gear up a trail. A tracker mainly buys you longer individual exposures at lower ISO, which shows up as cleaner shadows and finer detail in nebulosity, but it adds setup time and one more point of failure in the field.
Does the Z8's electronic-only shutter cause any issues at the high ISOs used for astro?
Not in my experience. The concern people sometimes raise with electronic shutters is rolling shutter distortion on moving subjects, which simply doesn't apply to a static tripod pointed at the sky. What you do get is the absence of shutter-induced vibration, which for pinpoint star sharpness is a net positive rather than a tradeoff.
How many subframes do I actually need for a clean stack?
For a decent Milky Way composite from a reasonably dark site, 30 to 40 usable light frames is a workable minimum, and I aim for 60 to 80 when conditions allow, since stacking software's noise reduction improves with more data to average. The bigger factor than raw count is how many of those frames are actually sharp, which is exactly why culling before you stack matters. Twenty tack-sharp frames stack cleaner than fifty with a handful softened by wind or guiding error thrown in.
Should I bother shooting RAW plus in-camera long exposure noise reduction, or just RAW alone?
RAW alone, with in-camera long exposure noise reduction switched off. Stacking dozens of frames does a better noise reduction job than the camera's single matched dark frame can, and leaving LENR on roughly doubles the time each sub takes, which cuts how many usable frames you can capture in a given window. Shoot your lights, then shoot a separate batch of dark frames at the same settings and let the stacking software handle calibration.