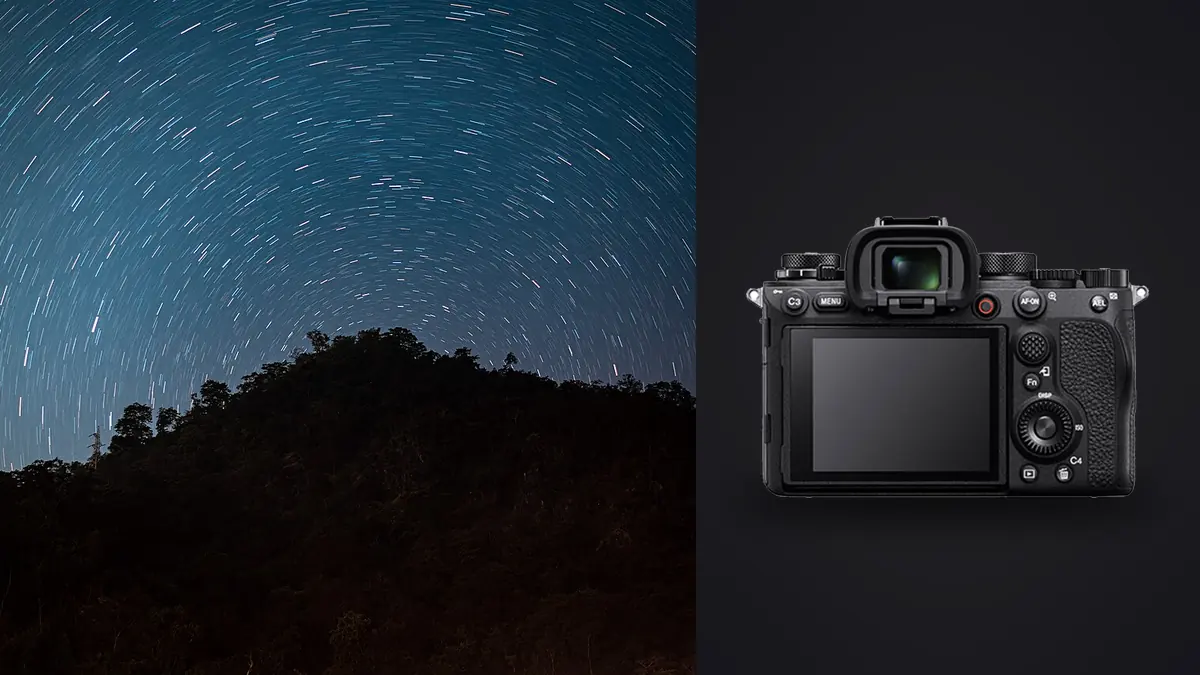
I spent three nights at a farm outside Presqu'ile before I got a Milky Way frame off the Sony A1 that I was actually happy with, and none of the three failures came down to the camera. Two were dew on the front element that I didn't catch until I got home, and one was me forgetting to switch off in-body stabilization on a tracked mount, which fought the tracker's slow pan all night and turned every star into a faint comma instead of a dot. The A1 is a genuinely strong body for star stacking, but it rewards a rigid, slightly boring setup routine more than it rewards its own spec sheet. This is that routine, along with the settings and pairings that have actually held up across a season of clear nights.
What the sensor is actually doing for you
The A1's 50.1MP stacked sensor gets talked about mostly for its readout speed and 8K video, which is not where it earns its keep for star stacking. Two other things matter more. First, the dual base ISO design means the second, low-noise gain stage kicks in a little above ISO 500, so shooting at ISO 3200 or 6400 for tracked sub-exposures doesn't cost you nearly as much read noise as it would on a single-gain sensor. Second, the resolution itself is a stacking advantage that people underrate: 50 megapixels gives you enough headroom to downsample the final stack to something like 24 or 30 megapixels for output, and that downsampling alone knocks down luminance noise before you've even touched a noise reduction slider.
The tradeoff is pixel pitch. At 4.4 microns per photosite, individual pixels on the A1 gather less light than the 5.9-micron pixels on something like an a7 IV, so a single unstacked frame at high ISO looks noisier side by side. Stacking twenty or thirty frames erases that gap and then some, but if you only ever shoot one frame per composition and call it a night, a lower-resolution body might actually look cleaner straight out of camera. That's worth knowing before you commit to this specific workflow.
Two different things people mean by "star stacking"
It's worth being precise here because the camera setup is different for each. Noise-reduction stacking takes many short-to-moderate exposures of the same static (or tracked) sky and averages them in software to suppress random noise while keeping the signal, which is how you get a clean Milky Way core without smearing stars into trails. Star trail stacking does the opposite on purpose: it takes a long sequence of exposures, usually 30 seconds each, over an hour or more, and blends them with a lighten mode so the stars draw arcs across the frame as the earth rotates. Both use the same camera and often the same lens, but the interval settings, ISO, and whether you're on a tracker are completely different, so decide which result you're after before you start dialing in exposure.
Lenses and mounts that have actually worked
For untracked wide-field Milky Way work I've had the best luck with the Sony 14mm f/1.8 GM, mostly because f/1.8 lets you keep exposure times short enough to avoid star trailing without pushing ISO into the 6400+ range. The 24mm f/1.4 GM is my second choice when I want more foreground presence in a composition; at 24mm you need a tracker to get anywhere near the same exposure length before stars start to smear. For tracked, tighter framing on nebulae or star clusters, the 135mm f/1.8 GM is sharp enough wide open that I rarely stop down past f/2.8, though at that focal length you're leaning hard on the tracker's accuracy and autoguiding starts to matter past about 90 seconds per sub.
On the mount side, I've run the A1 on both a Sky-Watcher Star Adventurer GTi and an iOptron SkyGuider Pro. Both are rated for roughly 5kg of payload without a counterweight, and the A1 body alone is 737g, so with the 135mm GM (about 950g) plus a plate and L-bracket you're well within limits, but the balance point matters more than the raw weight. Get the lens hood centered over the mount's rotation axis or you'll see periodic error show up as slightly elongated stars even on a tracker that's otherwise well polar-aligned.
Sub-frame settings by scenario
These are the settings I actually use, not textbook numbers. They assume a moonless night at a Bortle 3-4 site, which is roughly what you get an hour outside most mid-sized cities in North America or western Europe.
| Scenario | Lens | Aperture | ISO | Shutter | Frames stacked | Notes |
|---|---|---|---|---|---|---|
| Untracked Milky Way, wide | 14mm f/1.8 GM | f/2.0 | 3200 | 10s | 20-30 | NPF rule keeps stars close to pinpoint at 14mm |
| Tracked Milky Way core | 24mm f/1.4 GM | f/2.2 | 1600 | 90s | 15-20 | Track at half sidereal rate as a safety margin against drift |
| Tracked nebula/telephoto | 135mm f/1.8 GM | f/2.8 | 800 | 120s | 40-60 | Autoguiding recommended past roughly 90s at this focal length |
| Star trail sequence | 20mm f/1.8 G | f/4.0 | 800 | 30s | 200-400 | Lighten-blend in StarStaX rather than in-camera composite |
Two things stand out when you run this side by side. Dropping ISO and lengthening exposure once you're tracked isn't just about cleaner files, it's fewer total frames to manage afterward, which matters a lot once you're culling. And the star trail row uses a lower ISO and smaller aperture than any of the noise-reduction rows, because with 200+ frames stacked you're building up signal through sheer volume rather than through per-frame exposure. I walk through a slightly different set of exposure combinations, useful if these don't quite match your own lens kit, in an earlier A1 star-stacking write-up.
Interval shooting and seeing what you're framing
The A1 has a built-in interval shooting function in the shooting menu, which removes the need for an external intervalometer for both the deep-sky sequences and the star trail runs. I set start delay, shooting interval, number of shots, and exposure time all in-camera, then just watch the first two or three frames on the rear screen to confirm nothing is clipping before I walk away from the tripod for forty minutes. One genuinely useful firmware addition over the past couple of years has been Bright Monitoring, which artificially brightens the live view feed so you can actually see your composition and check focus in near-total darkness instead of guessing from a black rectangle. It doesn't affect the recorded exposure, it's purely a viewing aid, but it's saved me from more than one badly framed sequence that I wouldn't have caught until I got home.
Battery and cards on a long session
A single NP-FZ100 is rated around 430 shots under CIPA testing, but that number assumes room temperature, and a three-hour interval sequence at freezing temperatures will eat through a battery noticeably faster than that rating suggests. I carry two spares and keep them in an inner jacket pocket rather than in the camera bag, because a cold battery reads lower voltage and can cause the camera to shut down early even with charge left. On the card side, I record RAW to both slots (CFexpress Type A in one, SD UHS-II in the other) for anything longer than about 100 frames. It's not really about card failure, which is rare, it's that if you accidentally format or overwrite one card back at the hotel, you've still got the whole sequence on the other.
From memory card to finished stack
A single trail sequence can leave you with 300 nearly-identical RAW files, and a night of tracked deep-sky work across a few compositions often adds up to 150-200 more. Going through all of that by eye is where a lot of astro sessions quietly die. I run the folder through imagic first: its local sharpness scoring flags the frames where a wind gust nudged the tripod or where the tracker briefly lost step, and its burst clustering groups the near-duplicate interval frames so I'm reviewing clusters instead of scrolling through every single exposure one at a time. Since it runs entirely on the laptop with no upload step, that's also handled it at a rented cabin with no signal, which is more common at good dark-sky sites than anyone driving out there wants to admit. For a broader look at how automatic culling handles bursts like this, this piece on how AI photo culling works covers the mechanics in more depth than I have room for here.
Once the keepers are sorted, the actual stacking happens outside imagic, since that's not what it's built for. For untracked wide-field frames I use Sequator, which handles star-versus-ground separation well without much manual masking. For tracked sequences, DeepSkyStacker or Starry Landscape Stacker (Mac only) both do a fine job aligning on stars and rejecting outlier frames automatically. Star trails go through StarStaX with the lighten comet mode if I want a gradient fade rather than a hard trail. After stacking, I bring the flattened TIFF back into my normal editor and apply my saved imagic preset, built from my own past edits, as a starting point for color and contrast rather than editing every stack from a blank slate. It's not perfect for astro specifically since it was trained on general landscape and portrait work, but it gets the white balance and shadow lift close enough that I'm usually only nudging a handful of sliders per image instead of grading each stack independently.
Where the routine still breaks
Dew is the biggest recurring problem and it has nothing to do with the camera. A USB-powered dew heater band around the lens barrel solves it almost completely; I lost two nights before I bought one and haven't lost one since. Focus drift is the other quiet failure mode, particularly with metal-barreled lenses like the GM primes: as the barrel cools over the first half hour outside, the focus point can shift enough to soften stars slightly, so I re-check focus on a bright star every 30-40 minutes rather than trusting the lock from setup. And wind is worse with the 135mm on a small tracker than with anything wider; even a light gust shows up as a faint double-star smear at that focal length, so on breezy nights I've started weighting a compact windbreak over the tripod legs rather than fighting it with faster shutter speeds that would just mean more frames and more ISO.
Frequently Asked Questions
Do I actually need a tracker for the A1, or can I get away with untracked stacking?
Depends entirely on focal length and how tight you want the final crop. At 14-20mm, untracked stacking with 10-15 second subs gets you a clean, print-worthy Milky Way frame with no tracker at all, and that's genuinely my default for wide compositions. Past about 35mm, star trailing within a single exposure becomes visible enough that you either need very high ISO and short exposures (noisy) or a tracker (more gear to carry and align). For anything telephoto, a tracker isn't optional.
Why do my stacked stars still look a little soft after running DeepSkyStacker?
Almost always one of three things: focus drift partway through the sequence that the software can't fully correct for, a tracker with poor polar alignment causing slight elongation that averages into softness rather than obvious trailing, or stacking software applying its default sharpening/interpolation on alignment in a way that's a bit too aggressive. I've had better luck disabling the automatic sharpening step in DeepSkyStacker and doing it manually afterward with more control.
Does the A1's silent (electronic) shutter cause any issues for long exposures at night?
Not for the exposures themselves, but I still shoot mechanical shutter for anything longer than a couple of minutes, mainly out of habit from banding issues on older stacked-sensor bodies rather than anything I've specifically measured on the A1. For rapid interval sequences under 30 seconds per frame, like star trail runs, electronic shutter is fine and reduces wear on the shutter mechanism over a run of 300+ actuations.
How many sub-exposures do I actually need before the improvement becomes noticeable?
Noise drops roughly with the square root of frame count, so the jump from 5 to 20 frames is dramatic and the jump from 20 to 80 is much more subtle. In practice I stop adding frames once I hit somewhere around 20-30 for tracked deep-sky work, because past that point the time cost stops being worth the marginal noise reduction for anything I'm printing under about 24 inches wide.