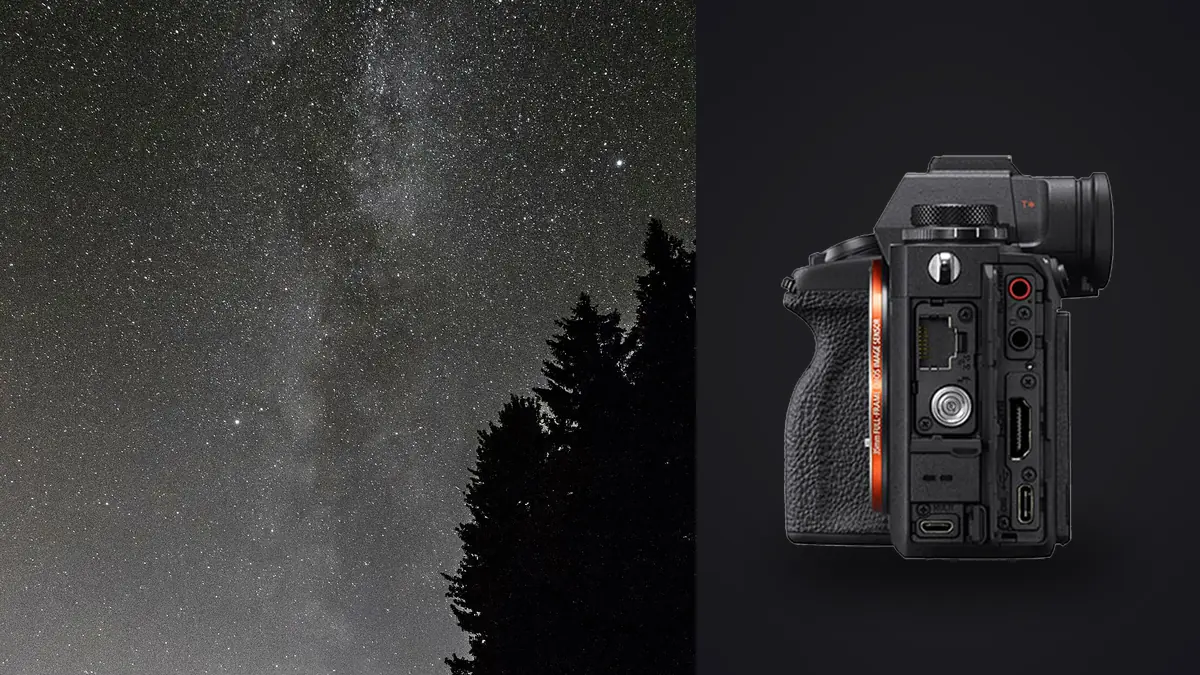
The first time I dragged the A1 out to a dark site, I expected the stacked sensor to be the headline feature, the way it is for sports or birds. It isn't, not for this. What actually matters at 2am on a ridge with dew forming on your lens hood is pixel pitch, buffer behavior, and whether the noise reduction pipeline is going to quietly erase your faintest stars before you even get to stack anything. None of that shows up in the marketing copy, so most of what follows comes from actually doing this over a few dozen sessions rather than reading a spec sheet.
What the Stacked Sensor Actually Buys You Here
Sony leans on the A1's readout speed for its flagship burst rate, and for astro work that speed is mostly irrelevant, you're not shooting 30fps at a star field. Where it helps in a roundabout way is rolling shutter suppression if you ever use the electronic shutter for a silent, vibration-free release on a tripod that's already marginal in the wind. In practice I still shoot mechanical shutter for star stacks, for reasons I'll get into below, so this benefit mostly goes unused on a night shoot.
What does matter is the 50.1MP resolution sitting on a full-frame sensor, which puts the pixel pitch at roughly 4.1 microns, notably tighter than the a7S III's 8.4-micron pixels or even the a7 IV's 5.9-micron pixels. Tighter pixels mean more resolved detail per star but also a shorter window before a star smears across more than one pixel and starts reading as a short streak instead of a point. That single fact drives almost every exposure decision in this guide. The dual base ISO architecture helps offset some of the extra read noise from the smaller photosites, and in the field I find the noise floor stays reasonably flat up to around ISO 3200 to 4000 before it climbs noticeably, which is usable but not in the same league as a dedicated low-light body.
The Star Eater Issue, and Whether It Still Applies
Anyone who's shot Sony bodies for night work since the early a7 series has run into "star eater," the informal name for a pattern noise reduction step that gets applied to raw data on exposures above roughly 3.2 seconds, regardless of whether long exposure noise reduction is switched on. It works by comparing adjacent pixels and smoothing outliers, which is exactly what a single bright star against a dark sky looks like to that algorithm. Fainter stars get flattened out entirely.
On the A1 the behavior is present but less punishing than it was on the original a7R II or a7S. I've compared 15-second single subs against 3-second bursts stacked to equivalent integration time, and the difference in faint star retention is real but modest, maybe a stop of effective depth lost in the worst case. For star stacking specifically this matters less than it does for single long exposures, because your individual subframes are already short (more on the exposure math below), and any star eater loss on one 10-second sub gets partially recovered when you stack twenty or thirty of them. If you're shooting a single long exposure nightscape rather than a stack, it's worth staying under that 3.2-second threshold per frame where your composition allows it, or accepting the small hit.
Lens Pairings and the Exposure Math I Actually Use
Forget the rule of 500, it was written for lower-resolution sensors and it will let stars trail visibly on a 50MP file. The numbers below come from checking subframes at 100% on the A1 across a season of shooting, not from a formula. They're the point where I start seeing elongation at pixel level, so I usually shoot a second or two under these to leave margin.
| Lens | Aperture used | Typical ISO | Max single-frame exposure before trailing | Frames per stack |
|---|---|---|---|---|
| Sony FE 14mm f/1.8 GM | f/2 | 3200 | 13-15 sec | 25-35 |
| Sigma 14mm f/1.4 DG DN | f/2 | 3200 | 13-15 sec | 25-35 |
| Sony FE 20mm f/1.8 G | f/2 | 4000 | 9-10 sec | 30-40 |
| Sony FE 24mm f/1.4 GM | f/1.8 | 5000 | 7-8 sec | 35-45 |
| Sony FE 35mm f/1.4 GM | f/2 | 6400 | 5-6 sec | 45-60 |
The pattern is obvious once you see it laid out: longer focal lengths need shorter subs and higher ISOs to hit a usable total integration time, which pushes noise higher per frame and makes the stack lean more heavily on frame count to average it back down. On a 50MP body that trade gets steeper than it would on, say, a 24MP a7 III, which is the honest tradeoff for the extra resolution.
Field Settings I Actually Use
A few menu choices make a real difference over a full session:
- Mechanical shutter, not silent/electronic. I've had inconsistent banding show up in electronic shutter frames under certain light pollution spectrums (sodium vapor streetlight glow bouncing off haze), and it complicates dark frame subtraction later since the noise pattern doesn't always match between shutter modes.
- Long exposure NR off. You're going to shoot your own dark frames and let the stacking software handle calibration, so in-camera NR just burns time between shots and can interact unpredictably with the star eater smoothing.
- Manual focus with focus magnifier. Zoom to the maximum digital magnification on the brightest star in frame, nudge the ring until it's a tight point rather than a blob, then tape the focus ring down. Autofocus, even in low-light AF modes, is not reliable on point sources this dim.
- Built-in interval shooting. The A1's interval function (under the shooting menu) handles the sequence without a separate remote. Set the interval slightly longer than your exposure plus expected buffer clear time so you don't stack up a missed-frame gap partway through.
- CFexpress Type A if you have it. With subs in the 10-15 second range the buffer clears comfortably even on a fast SD card, but on colder nights write speeds can lag and I've had SD cards fall behind on very long sequences.
Tracked vs. Untracked
The A1 body is 737g, and something like the 24mm f/1.4 GM adds another 445g, so a typical wide astro setup comes in well under 1.5kg all in. That's comfortably inside the payload rating of a small star tracker like a Star Adventurer 2i or an iOptron SkyGuider Pro, both rated around 5kg. Putting the A1 on a tracker changes the whole calculation: instead of 30-40 short subs fighting Earth's rotation, you can run 60-120 second subs with pinpoint stars, hit the same total integration time with a fraction of the frame count, and pull the ISO down substantially, which does more for final image quality than anything in the camera menu. If you're only ever shooting wide milky way frames with a static foreground, untracked is simpler and the table above will get you a clean result. Once you're chasing anything smaller in the frame, a tracker earns its weight fast.
Getting the Frames Off the Card and Into a Stack
A single A1 raw file runs 50-60MB compressed, more if you shoot lossless compressed or uncompressed. A stacking session with 30-40 light frames plus a matching set of darks, flats, and bias frames adds up to several gigabytes before you've even opened stacking software, and that's one session. Do this across a season and you're managing hundreds of gigabytes of nearly-identical star field frames, which is a different kind of organizational problem than culling a wedding or a wildlife burst.
The part that actually eats time is finding the two or three subframes out of forty that got a satellite trail through them, drifted slightly out of focus as the sensor cooled overnight, or picked up dew fog on the front element halfway through the sequence. Scrolling through visually near-identical star frames at 100% to catch that is exactly the kind of tedious sorting task I now offload to imagic's local sharpness scoring, since it flags which subs actually lost focus without me eyeballing forty thumbnails one by one. It runs entirely on-device, which matters here specifically because I'm not interested in uploading gigabytes of raw astro sequences to a cloud culling tool just to identify three soft frames (background on how that kind of scoring works is in how AI photo culling works, and the broader case for building culling into a night-shooting routine is in 10 tips for a faster photo workflow).
After stacking in whatever software you prefer and blending in a separately exposed foreground, the grading pass is where I lean on imagic's apply_my_style preset, trained on my own prior edits, to get a consistent color response across a season's worth of stacked files without rebuilding the same curve and color balance adjustments from scratch every time I get back from a shoot.
One more thing specific to this camera: because the A1 has no sensor cooling, ambient temperature drift over a long session shows up as dark frame mismatch if you shoot your darks the next morning instead of right after the lights. I shoot a set of dark frames at the end of the session, cap still on, same ISO and exposure length, before packing up, while the sensor is still at roughly the temperature it was shooting at.
Frequently Asked Questions
Does the A1's pixel shift multi shooting help with star stacking?
No, and it's worth explaining why since the feature sounds relevant on paper. Pixel shift mode assumes a completely static scene between the four or sixteen sub-exposures it captures, shifting the sensor by sub-pixel increments to build a higher-resolution composite. Stars move continuously across the frame due to Earth's rotation, so the shifted captures don't align the way the algorithm expects and you get smeared, doubled star points instead of a clean composite. Regular manual exposure stacking with dedicated stacking software is the correct tool here, not the in-camera pixel shift feature.
Do I need to turn off every noise reduction setting for star stacks?
Long exposure NR should be off, since you're shooting your own darks for calibration and letting it run in-camera just adds a wait between frames without adding accuracy. High ISO NR only affects the in-camera JPEG preview when shooting raw, so it doesn't touch your actual pixel data, but I turn it off anyway so the histogram and playback preview reflect the real exposure while I'm checking frames in the field.
Is 50MP actually a disadvantage for astro compared to something like the a7S III?
For per-pixel noise performance, yes, the a7S III's larger photosites gather more light per pixel and produce a visibly cleaner file at high ISO before any stacking happens. But once you're averaging 25-40 frames in a stack, a lot of that per-frame noise advantage gets equalized out, and you're left with the A1's resolution advantage largely intact for the final print or crop. If you shoot mostly single long exposures and rarely stack, the a7S III's sensor is the easier tool. If stacking is your normal workflow, the A1's extra resolution stops costing you as much.
Can I use the A1 for star stacking without a tracker and still print large?
Yes, within reason. A well-executed untracked stack from the exposure table above, at 50MP native resolution, holds up fine to a 24x36 print or larger when the noise reduction and stacking alignment are done properly. Where untracked stacking runs out of road is small, dim subjects like nebulae that need the longer per-frame exposures only a tracker can give you without trailing. For wide milky way and landscape astro work, untracked is a completely viable permanent setup, not just a starting point before buying a tracker.