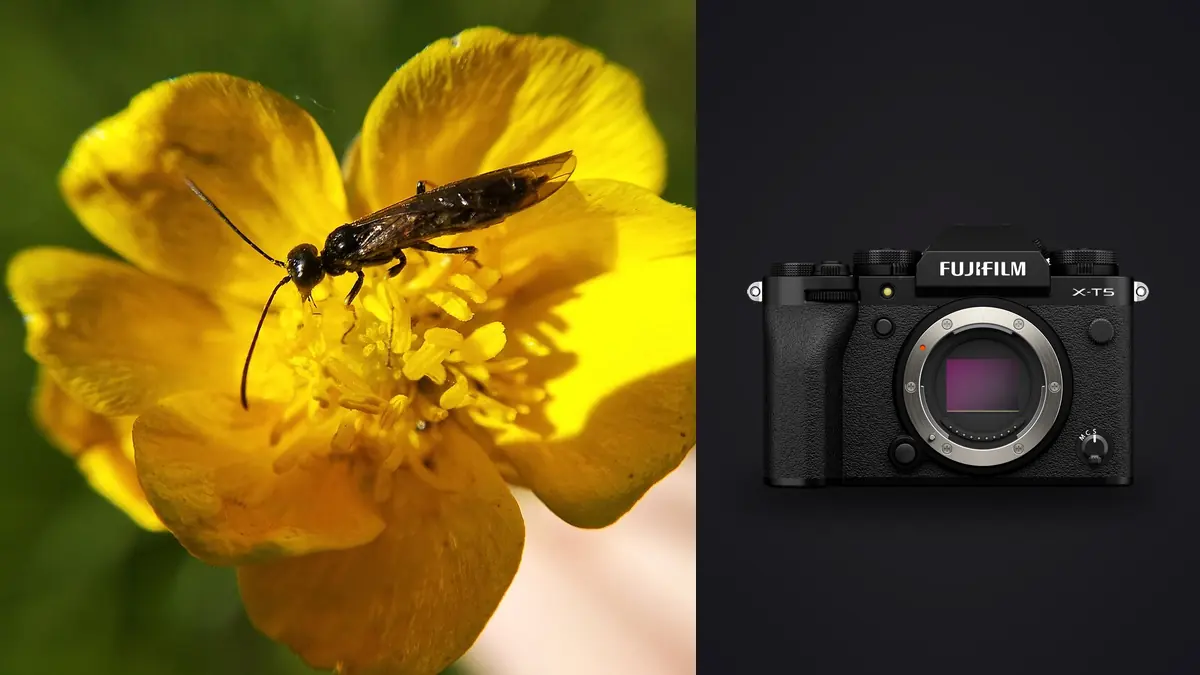
I spent most of last June kneeling in wet grass at 5:30am trying to get a damselfly's compound eyes sharp before the sun burned off the dew and every insect in the meadow warmed up and scattered. The camera doing that work was a Fujifilm X-T5, and it took me about three failed mornings to stop fighting it and start using it the way it actually wants to be used for this kind of shooting. This isn't a spec-sheet review. It's what changed in my bag, my technique, and my expectations once macro insect work became the main thing I pointed this camera at.
Why this sensor is a reasonable starting point for bugs
The X-T5's 40.2MP X-Trans CMOS 5 HR sensor gets talked about mostly in terms of landscape and studio resolution, but for insect work the number that matters more is pixel density on an APS-C frame. Because the sensor is smaller than full frame, a given focal length frames tighter, which means you can back off a little and still fill the frame with a jumping spider's face. That matters more than people expect once you're dealing with subjects that flee the moment your shadow crosses them.
The catch is that 40 megapixels also means you can't hide behind resolution the way you could on an older 24MP body. Every focus miss, every trace of shutter shock, every bit of diffraction softening is more visible at 100% than it used to be. This camera is unforgiving about technique in a way that rewards deliberate shooting and punishes sloppy handheld snapshots of things that move.
In-body stabilization is rated at up to 7 stops depending on the lens, and it genuinely helps you hold the camera steady for framing and for video, but I want to be clear about what it doesn't do: it does not freeze a bee's wingbeat or stop an ant's antennae from twitching mid-exposure. IBIS solves camera shake, not subject motion, and at high magnification even a light breeze moving the leaf a subject is sitting on will out-move whatever stabilization is doing for you. Shutter speed and light are still the actual answer to sharpness on a living subject; IBIS is what keeps your composition steady while you get there.
Lens choices, and why working distance decides more than magnification does
Fuji's native macro lineup gives you two very different personalities. The XF30mm F2.8 Macro is small, sharp, and true 1:1, but it focuses so close that the working distance from the front element to a live subject is only a few centimeters at maximum magnification. That's fine for a caterpillar on a leaf that isn't going anywhere. It's nearly useless for a dragonfly, which will lift off the second your lens hood enters its field of view.
The XF80mm F2.8 Macro is the lens I now default to for anything that can fly, jump, or bite. It's heavier and pricier, but the extra working distance, roughly 9cm or more at 1:1, is the difference between getting the shot and watching your subject leave. It also carries its own optical stabilization that works alongside the body's IBIS, which matters because you're often shooting handheld at awkward angles where a tripod just isn't practical.
For genuinely tiny subjects, ant heads, mite-sized jumping spiders, the compound structure of a fly's eye, I've been reaching for a Laowa 65mm f/2.8 2x Ultra Macro. It's fully manual, no autofocus and no electronic aperture control, and at 2x magnification the working distance shrinks back down to a handful of centimeters. It's a specialist tool, not a walkaround lens, but nothing else in the Fuji ecosystem gets you past 1:1 without stacking extension tubes or a teleconverter that isn't really built for the job.
Extension tubes (Fuji's own MCEX-11 and MCEX-16, or cheaper Kenko equivalents) are the honest budget entry point. Screw one onto a lens you already own and you get closer focusing at the cost of a stop or so of light and the ability to focus to infinity. I still keep an MCEX-16 in the bag for days when I want macro capability without carrying a dedicated lens, but I wouldn't build a serious insect kit around tubes alone.
| Lens / Setup | Max Magnification | Working Distance at MFD | Autofocus | Best For |
|---|---|---|---|---|
| XF30mm F2.8 Macro | 1.0x | ~3-4cm | Yes | Stationary subjects: caterpillars, resting moths, static plant detail |
| XF80mm F2.8 Macro | 1.0x | ~9cm | Yes, with OIS | Dragonflies, bees, anything skittish or defensive |
| Laowa 65mm f/2.8 2x Ultra Macro | 2.0x | ~4-5cm | Manual only | Very small, cooperative subjects: ants, mites, eye detail |
| Kit zoom + MCEX-16 tube | Varies (roughly 0.3-0.5x) | Depends on host lens | Yes, reduced light | Testing whether insect macro is worth investing in further |
The aperture argument nobody agrees on
At true macro magnifications, depth of field collapses to fractions of a millimeter even at f/11. Insect photographers end up choosing between two bad options: shoot wide open and get an eye in focus with everything else, including the rest of the same eye, dissolving into blur, or stop down hard and lose sharpness to diffraction. On this sensor, diffraction starts showing up in pixel-level detail somewhere around f/8, and by f/16 you can see it clearly if you pixel-peep. I shoot most single-frame insect macro between f/8 and f/11, which is a compromise, not an ideal, and I stop worrying about diffraction entirely once I'm stacking frames, because the stack recovers depth without needing any single frame to carry the whole subject in focus.
That's the real answer for anything that holds still long enough: don't try to solve depth of field with aperture alone. Solve it with multiple frames.
Focus bracketing, and why it changes what subjects are worth attempting
The X-T5 has an automatic focus bracketing mode built into the shooting menu, capable of firing up to 999 frames at a step size and interval you set yourself, walking the focus point through a range and letting you stack the result later in something like Helicon Focus or Zerene Stacker. For a resting butterfly or a beetle that's settled on a flower head, this is the single biggest quality jump available on this camera. A 40-60 frame bracket at f/8, stacked, gets you full depth across an insect's entire body at a resolution no single exposure could match, without the diffraction penalty of stopping down to f/22 and still not getting there.
The obvious limitation is that bracketing only works on subjects that hold still for the two or three seconds a sequence takes to fire. It's useless on a hunting dragonfly and only occasionally useful on bees, which move constantly even when technically "at rest" on a flower. Where it earns its keep is dew-cooled mornings, when insects that were active the previous afternoon are still too cold to fly and will sit through a full bracket without moving more than a leg.
Pixel shift multi-shot is a separate, less useful tool for this genre. It composites up to 20 frames into a very high resolution file, but it needs the subject to be completely static across the whole sequence and the camera on a tripod, which rules out almost every living insect. I've used it exactly once, on a dead cicada shell caught in a spiderweb, and the detail was genuinely excessive for anything short of a gallery print.
Bracket sequences generate a lot of near-duplicate frames fast, and sorting a 60-shot stack by eye to find where focus actually landed sharpest is tedious. This is where I've leaned on imagic's local sharpness scoring to flag which frames in a bracket are actually usable before I hand the sequence to stacking software, rather than importing all 60 frames into Helicon and hoping the stack ignores the soft ones on its own.
Light: what actually works when you can't move the sun
Natural light at f/8-f/11 macro magnifications is thin on the ground even in daylight, because you're working within centimeters of the subject and often shading it with the lens barrel itself. Most serious insect shooters end up on some kind of flash, whether that's a dedicated ring flash, a twin-flash bracket like Godox's MF12 pair, or a small diffused speedlight bounced off a reflector card held in the other hand.
I use a twin-flash setup on a bracket around the XF80mm, diffused through a piece of translucent white plastic cut from a takeout container, which sounds cheap because it is. The point isn't the gear, it's that direct on-axis flash on an insect's exoskeleton produces a hard specular highlight that reads as a distracting white blob in the final image, and diffusion softens that into something that looks like the insect was actually lit by the scene rather than by a device bolted to your lens.
Early morning shooting solves two problems at once: insects are slow because they're cold, and the light is soft because the sun is low. I'd rather shoot underexposed ambient at dawn with fill flash than fight harsh midday sun with a diffuser trying to undo it.
Getting close without getting noticed
The X-T5's electronic shutter goes up to 1/180000s and is completely silent, which matters more for insects than most photographers expect. Butterflies and dragonflies react to shutter clatter, and a fully mechanical shutter slap at close range will spook a resting subject before you've even confirmed focus. I stalk in silent electronic mode and switch to mechanical only for the actual capture on faster subjects, since the electronic shutter's rolling readout can smear fast wing motion into a slight skew that a mechanical shutter avoids.
Pre-shot ES, the mode that buffers frames before you fully press the shutter and lets you pull frames from just before your reaction time caught up, is genuinely useful on anything that startles into flight the instant it decides to leave. I've recovered sharp launch-frame shots of dragonflies this way that I would have missed by the normal quarter-second of human reaction lag.
The tilting rear screen helps more than I expected for ground-level subjects, ants and beetles working through leaf litter, since you can shoot from a low angle without lying flat in wet grass every time. It only tilts, though, not a full vari-angle flip-out, so awkward vertical compositions from ground level still mean twisting your neck rather than the screen. Weather sealing rated to -10°C has been the quieter win: dawn insect photography means kneeling in dew-soaked grass regularly, and I've stopped thinking about the camera body as something I need to protect from that.
What the shoot looks like once you're back at the desk
A productive morning produces an uncomfortable number of files: a dozen failed approach attempts per subject that actually held still, several focus brackets of 40-60 frames each, and a handful of flash-lit single frames from subjects that never sat still long enough to bracket. None of that is exaggeration; a two-hour session regularly leaves me with 800-1,200 RAW files, most of which are near-duplicates of each other from continuous AF bursts fired while stalking a subject that kept shifting half a centimeter.
I run that through imagic before touching Lightroom. The duplicate and burst clustering groups the stalking sequences so I'm reviewing one representative frame per attempt instead of every single shot, and because everything runs locally on the machine rather than uploading RAW files anywhere, I'm not waiting on a cloud queue to sort a shoot before I can start editing it. Once I've picked the keepers, I apply a preset trained on my own past insect edits through imagic's apply_my_style feature, which gets color and contrast into the right neighborhood before I do the finer, subject-specific adjustments by hand. It's not a replacement for judgment on which frames actually work, but it removes the mechanical sorting that used to eat the first hour after every shoot. If you're curious how that kind of automated culling actually decides what counts as sharp versus soft, this breakdown of how AI photo culling works covers the mechanics in more depth than I will here.
None of this replaces field technique. A camera and a culling tool can only work with what you actually captured, and macro insect photography punishes photographers who think gear substitutes for patience. But cutting an hour of manual sorting out of every shoot session is the difference between editing three mornings' worth of shooting in a weekend and never getting through the backlog at all.
Frequently Asked Questions
Is the X-T5 actually a good choice for insect macro, or would a full-frame body do this better?
For this specific genre, the APS-C crop is more asset than liability. You get tighter framing at a given focal length, which translates to a bit more working distance for the same composition, and the 40MP sensor gives enough resolution headroom to crop in further during editing on frames where you couldn't physically get as close as you wanted. Full-frame bodies win on high-ISO noise and shallow-depth-of-field portrait work, neither of which matters much when you're shooting insects at f/8-f/11 in daylight or with flash.
Do I need the XF80mm Macro, or can I start with extension tubes on a lens I already own?
Start with tubes if you're not sure insect macro is a genre you'll stick with. An MCEX-16 on a kit zoom will get you photographing cooperative subjects like caterpillars and resting moths for under the cost of a dedicated lens. The moment you start chasing dragonflies, bees, or anything defensive, the working distance limitation of tubes and the XF30mm becomes the bottleneck, and that's when the XF80mm's extra clearance earns its price.
How many frames should a focus bracket actually use for a typical insect subject?
It depends on subject depth and how close you're shooting, but I generally start around 40 frames for something like a resting butterfly at 1:1 and adjust the step size based on the preview after a test shot. Too few frames and you get visible focus banding between planes in the stack; too many just wastes time and battery on overlap you don't need. Watching the first attempt in stacking software tells you quickly which direction to adjust.
What's the single biggest mistake photographers make moving into insect macro with this camera?
Trying to solve everything with aperture. Stopping down to f/16 or f/22 chasing more depth of field on a single frame just trades motion blur risk and diffraction softening for a marginal DOF gain that a focus bracket would have delivered without either penalty. The mental shift that actually improves results is treating the camera's bracketing mode as the default tool for anything that isn't actively moving, and reserving wide-open single frames for subjects too skittish to bracket at all.