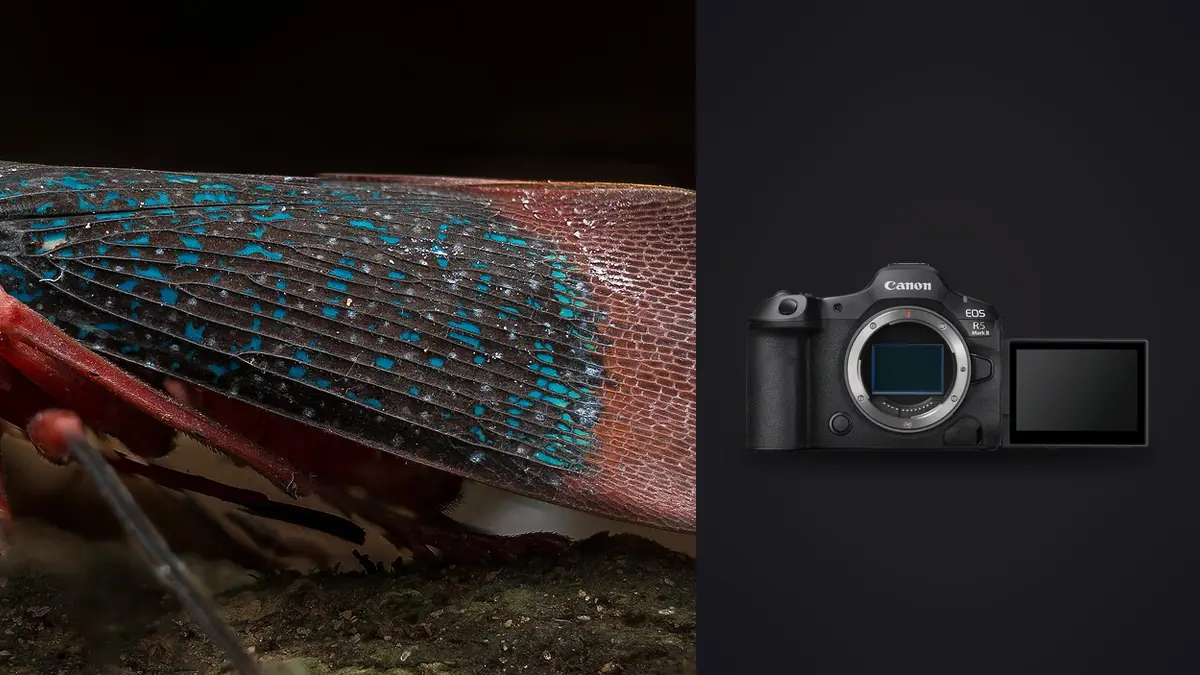
I picked up the EOS R5 Mark II mostly for bird work, then ended up using it for something I hadn't planned on: chasing hoverflies and damselflies around a wildflower meadow. That changed how I think about the camera. Macro insect work punishes a system in ways bird photography never does, tiny depth of field, subjects that flinch at shutter noise, and light that's usually running out by the time you've found your angle. Six months and a few thousand frames later, here's what actually matters about this body for bugs, and what doesn't.
The Stacked Sensor Matters More Than the Megapixels
Everyone talks about the 45-megapixel count when the R5 Mark II came out, and for macro that resolution is genuinely useful (more on that below), but the part that changed my keeper rate was the stacked, back-illuminated sensor and what it does for the electronic shutter. On the original R5, electronic-first-curtain and full electronic shutter modes had enough rolling shutter skew that a fast-moving wing tip or a dragonfly turning its head mid-frame would smear or warp slightly. On the Mark II, that skew is close enough to a non-issue for anything short of a hummingbird hawk-moth in full flight.
That matters because insects hate mechanical shutter clatter. A worn bumblebee working a lavender spike will tolerate a few clicks before it moves off, but run a burst of ten shots with a mechanical shutter and you've usually lost it. Switch to full electronic and you can sit at 20 or 30fps in near silence and just wait the subject out. I shoot electronic shutter for probably 80% of my insect frames now, reserving mechanical for backlit subjects where I'm worried about banding under LED continuous lights.
Autofocus: Good, Not Magic, for Anything Under a Centimeter
I want to be straightforward about this because I've seen it oversold: Canon's subject detection on the R5 Mark II covers people, animals (dogs, cats, birds, horses) and vehicles. There is no dedicated insect-recognition mode, and at true macro magnifications (anything past about 0.5x) the depth of field is so thin that even excellent general-purpose AF struggles to land exactly where you want it. A damselfly's compound eye might be two millimetres wide in the frame; the camera doesn't know that's what you're after unless you tell it precisely.
What works in practice: I run single-point AF, sized down to the smallest spot available, and I move that point onto the eye manually rather than trusting the camera to guess the subject. For genuinely static or barely-moving insects (cold mornings are your friend here, insects are sluggish before the sun warms them), I switch to manual focus entirely and rock the whole camera forward and back on a focus rail or just my own body weight, letting the in-body stabilization steady the frame while I chase the plane of focus with my feet. Eye Control AF, which Canon carried over from the R3, is a neat party trick for portraiture but I've found it too imprecise for macro; my eye can't reliably fixate on a target that small in the viewfinder.
The one AF feature that's genuinely transformative is focus bracketing. Set a starting point, a step increment (I typically use increments of 2 to 4 out of the available range for anything around 1:1, finer for the MP-E 65mm at higher magnifications), and a shot count, and the camera will rack focus through a sequence automatically. For a still subject like a preserved specimen or an insect resting in cool morning air, I'll fire 25 to 60 frames and either let the camera build an in-camera depth composite or export the RAW sequence to stack manually later. It's not fast, and it does nothing for a subject that's moving, but for controlled setups it replaces what used to require a geared focus rail and a lot of patience.
Matching Glass to the Job
The camera is only half the story. Which lens (or lens-plus-accessory combination) you put in front of it changes the whole character of the work, and the three setups below cover most of what I actually reach for in the field.
| Setup | Magnification | Working distance at max mag. | Approx. street price | Where it earns its keep |
|---|---|---|---|---|
| RF 100mm F2.8L Macro IS USM | 1.0x (1.4x with Spherical Aberration control ring dialed in) | ~13cm (5.1in) | $1,399 / £1,350 | General insect work, everyday carry, doubles as a portrait lens |
| Canon MP-E 65mm f/2.8 1-5x | 1x to 5x, no infinity focus | 4cm at 5x, 10cm at 1x | $1,050 / £950 | Extreme close-up detail on cooperative or dead/pinned subjects only |
| RF 100-400mm + RF 25mm extension tube | ~0.5x to 0.6x at 400mm | ~55cm (21.6in) | $1,700 lens + $199 tube | Skittish subjects, dragonflies and butterflies that won't let you get close |
The RF 100mm Macro is the one I'd tell a beginner to start with, full stop. It focuses fast enough to keep up with a bee moving between flower heads, the built-in stabilization pairs with the body's IBIS for a combined rating that lets you hand-hold at surprisingly slow shutter speeds when you're not chasing motion, and the working distance is close enough to fill the frame but not so close that you're casting a shadow over every subject.
The MP-E 65mm is a specialist's tool and I mean that as a warning as much as a recommendation. There's no autofocus, no infinity focus at all, and at 5x magnification your working distance is measured in centimetres, meaning your lens hood is essentially touching the subject. It is spectacular for detail shots of specimens that aren't going anywhere, wing scales, mouthparts, the texture of a beetle's elytra, but I have never once used it successfully on a live insect that had any inclination to move. Pair it with a good macro flash bracket; ambient light alone won't get you a usable shutter speed at these magnifications.
The extension tube approach on the 100-400mm surprised me. It's not true macro (you're topping out around 0.5-0.6x rather than 1:1), but the working distance advantage is enormous, over half a metre versus 13 centimetres, and that's the difference between a dragonfly perching calmly and one that bolts the second your shadow crosses it. I reach for this combination for anything with wings that's prone to flushing.
Settings I Actually Dial In
A few numbers that took me longer than I'd like to admit to settle on:
- Shutter speed: 1/1000s minimum for anything with visible wing movement I want frozen (damselflies, most flies), and I'll push to 1/2000s or faster for bees and wasps whose wingbeats blur even at 1/1000s. For static subjects under flash, shutter speed barely matters since the flash duration is doing the freezing.
- Aperture: this is where macro physics bites. At 1:1 magnification, your effective aperture is roughly the marked f-number multiplied by (1 + magnification), so f/8 behaves like f/16 in terms of diffraction and light loss. I rarely go past f/11 marked on the 100mm Macro for that reason; anything smaller and diffraction softening eats the extra depth of field you gained. On the MP-E 65mm at 3-5x, this effect is severe enough that f/5.6 marked can already behave like f/22 or smaller.
- ISO: I let it float freely, up to 6400 without much hesitation, since the sensor's noise performance combined with a bit of noise reduction in post holds up fine at web and even moderate print sizes. Underexposing to protect a shadow area is a worse trade than a bit of luminance noise.
- Continuous shooting: for anything airborne I use the pre-continuous shooting mode (Canon's RAW burst with pre-capture buffer), which starts recording a rolling buffer the moment you half-press, so a dragonfly's takeoff is already captured by the time you've reacted and fully pressed the shutter. It's saved more flight-launch sequences for me than any reflex ever could.
What 45 Megapixels Actually Buys You Here
The resolution argument for macro isn't really about big prints, it's about cropping room. Even with the RF 100mm Macro at 1:1, a lot of insects, especially anything smaller than a housefly, only fill a modest portion of the frame once you account for a safe working distance. Having 8192 x 5464 pixels to crop into means a mediocre framing decision in the field can still yield a usable, detailed final image, where the same crop on a 24-megapixel body would leave you with a soft, pixelated result. I treat the extra resolution as insurance against the reality that you rarely get a second attempt at a moving subject's ideal composition.
The Part Nobody Warns You About: Volume
A single serious macro outing with this camera, mixing focus-bracketed sequences with bursts chasing live insects, routinely leaves me with 2,000 to 4,000 frames. A focus stack alone might be 40 near-identical images of the same subject at different focus depths, and a five-second burst at 20fps chasing a bee is another 100 frames where maybe three are genuinely sharp on the eye. Sorting that by hand used to eat an entire evening per outing.
This is the part of my workflow where imagic actually earns its place. I run the day's card through it before anything else: the local sharpness scoring flags which frame in each focus-bracket sequence or burst is actually critical-sharp on the subject's eye, which matters enormously at macro magnifications where the plane of focus is measured in millimetres and a frame that looks fine at thumbnail size can be visibly soft once you check it at 100%. The duplicate and burst clustering groups those 40-frame stacks and 100-frame bursts together automatically instead of leaving me to scroll through a flat filmstrip trying to remember which sequence was which. Because it runs entirely on the laptop with no upload step, I can do this culling pass in the car or at a picnic table at the reserve, right after the shoot, while the framing decisions are still fresh in my head, which lines up with most of the advice I'd give anyone trying to get through a shoot faster, see our notes on tightening up a photo workflow for the broader version of that argument.
Once I'm down to the actual keepers, I lean on imagic's apply_my_style preset feature to carry a consistent color and contrast treatment across a whole insect series. Macro subjects photographed across different light (morning meadow light versus a diffused flash setup versus overcast midday) can end up looking like they belong in different projects if you grade each one from scratch; training a preset on a handful of edits I'm happy with and applying it across the batch keeps a set looking like one coherent piece of work rather than a grab-bag. If you haven't looked at how the underlying culling logic works, it's worth a read: how AI photo culling actually works covers the sharpness and clustering approach in more depth than I can here.
Battery, Heat, and Other Practical Annoyances
Two smaller things worth knowing before you commit a full day to this. First, the LP-E6P battery handles a normal day of stop-start macro shooting fine, but focus-bracket sequences with in-camera depth compositing chew through power noticeably faster than plain stills, since the camera is processing a stack immediately after capture; I carry two spares on any day I know I'll be stacking. Second, the articulating rear screen turns out to matter more for insect work than I expected going in. So much macro subject matter (anything on low foliage, anything on the ground) demands shooting from a low angle, and being able to flip the screen out rather than lying flat in wet grass has saved both my knees and a fair number of trousers.
Frequently Asked Questions
Does the EOS R5 Mark II have a dedicated insect autofocus mode?
No. Canon's subject-detection categories on this body are people, animals (dogs, cats, birds, horses) and vehicles, with no insect-specific recognition. For macro work you'll get more consistent results running a small single AF point placed manually on the subject's eye, or switching to manual focus entirely for static or slow subjects, rather than relying on automatic subject detection to find something as small as an insect's eye.
Is the jump from the original R5 to the R5 Mark II worth it just for macro and insect photography?
If insects and macro are your main subject, the stacked sensor's near-elimination of rolling shutter distortion in electronic shutter mode is the single biggest practical gain, since it lets you shoot silently at high frame rates without wing tips or fast-moving limbs skewing. The resolution bump from 45 to a similar 45 megapixels isn't the differentiator here (the original R5 was already 45MP); it's the sensor readout speed and the pre-continuous shooting mode that change how you can work with flighty subjects.
What aperture should I actually use for full-body insect shots at 1:1?
Somewhere between f/8 and f/11 marked is the practical sweet spot on the RF 100mm Macro at life-size magnification. Because effective aperture increases with magnification (roughly f-number times 1 plus magnification), going smaller than f/11 at 1:1 usually costs you more sharpness to diffraction than it gains in depth of field. If you need more depth than that, focus stacking a static subject beats stopping down further.
Can I skip a dedicated macro lens and use the RF 100-400mm with extension tubes instead?
You can, and for skittish flying subjects it's genuinely a good call, since the working distance advantage (roughly half a metre versus 13cm on the 100mm Macro) keeps you far enough back that dragonflies and butterflies don't flush the moment you approach. The trade-off is that you'll top out around 0.5-0.6x rather than true 1:1 magnification, so extreme close-up detail shots aren't really on the table with this combination.