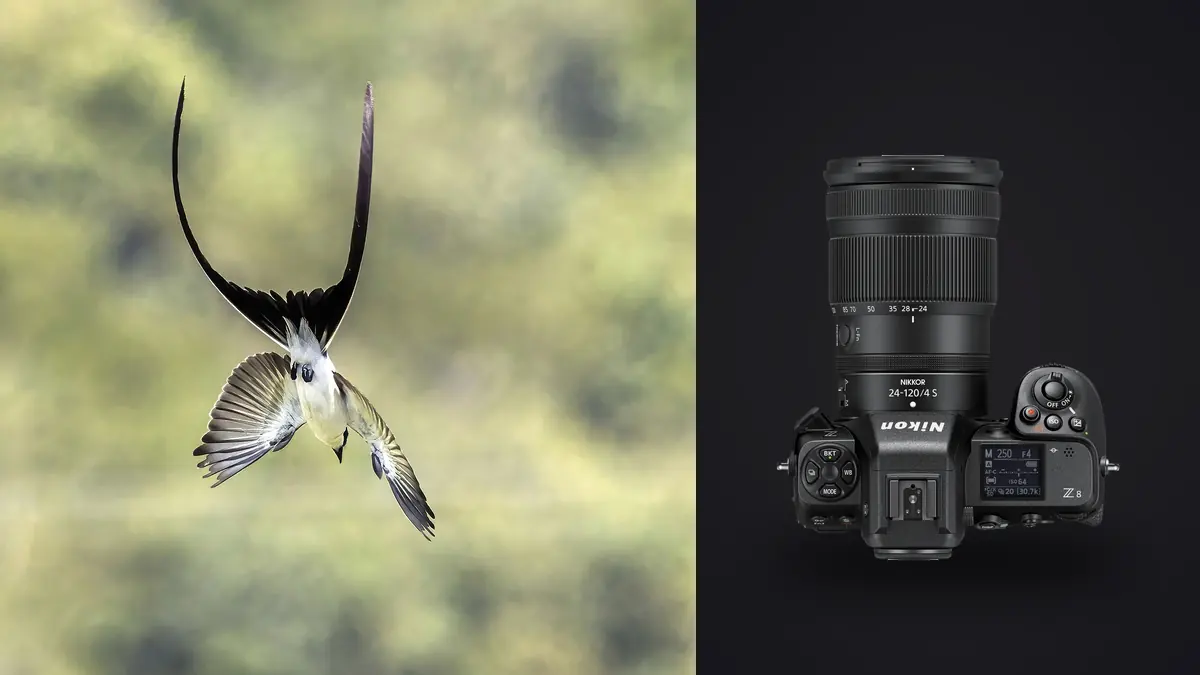
The first morning I brought a Nikon Z8 out to a heron rookery, I burned through eleven gigabytes before the light was even good. That is the honest starting point for this camera and this subject: the Z8 will hand you more usable frames per pass than almost anything you have shot birds with before, and it will also hand you a genuinely large card dump to sort through afterward. Both halves of that trade matter if you are deciding whether this body is the right tool for flight photography, and both get glossed over in most gear reviews that stop at "great autofocus, buy it."
Autofocus That Actually Holds a Bird Against Sky, Water, or Reeds
The Z8 carries the same stacked 45.7-megapixel sensor and dual EXPEED 7 processing as the Z9, which means the autofocus system that made the Z9 a legitimate alternative to Canon and Sony's flagship sports bodies is sitting inside a smaller, lighter shell. For birds in flight specifically, the part that matters is subject detection with a dedicated Bird category under Animal detection. It looks for the eye first, then the head, then falls back to the body outline when the eye is turned away or too small in frame.
In practice this works best on a single bird crossing open sky or water. An osprey circling before a dive, a heron gaining altitude off a shoreline, a raptor riding a thermal: the system locks the eye and holds it through fairly aggressive banking turns. Where it gets less reliable is dense clutter. A bird flushing out of reeds, or a gull lifting off from a crowded roost with a dozen other gulls in frame, will sometimes cause the camera to grab the nearest or largest shape instead of the one you actually want. When that happens I switch out of Auto-area with subject detection and drop to 3D-tracking, place the focus point on the bird's head manually before it takes flight, and let 3D-tracking follow that specific point rather than trusting the algorithm to pick correctly.
Two custom AF menu settings are worth setting before you ever leave the house. Custom setting a2 (Blocked shot AF response) should go toward the "quick" end for flight work, since intervening branches or a second bird crossing the frame should not cause the camera to hunt back to infinity. Custom setting a3 (Focus tracking with lock-on subject motion) should sit closer to "erratic" for swallows, terns, and anything doing unpredictable aerobatics, and closer to "steady" for a soaring buteo or a heron on a fixed flight line, since "erratic" on a predictable flier makes the AF twitchier than it needs to be.
Frame Rate and Buffer: What the High-Speed Modes Actually Cost You
The Z8 offers more frame-rate options than any camera really needs, and it's easy to pick the wrong one for the situation. The two extended-speed modes (C30 and C120) sound tempting for wing-freeze shots, but they come with a tradeoff that matters a lot once you're back at your desk sorting files: no RAW.
| Mode | Frame Rate | File Type | Resolution | RAW Available | Best Use in the Field |
|---|---|---|---|---|---|
| Mechanical shutter (S/CL/CH) | Up to 10 fps | RAW or JPEG | 45.7MP full frame | Yes | Perched birds, slow gulls, situations where you want the shutter sound for timing |
| Electronic shutter, H+ | Up to 20 fps | RAW or JPEG | 45.7MP full frame | Yes | The default setting for real flight sequences; blackout-free viewfinder keeps the bird framed through the burst |
| High-Speed Frame Capture+ C30 | 30 fps | JPEG only | ~25.6MP (DX-equivalent crop) | No | Fast dives and strikes where you want one extra frame between 20fps intervals; treat the output as disposable proofs, not keepers |
| High-Speed Frame Capture+ C120 | 120 fps | JPEG only | ~11MP (further crop) | No | Extreme wingbeat freeze on hummingbirds or small passerines; almost never what you edit, more a diagnostic of exact wing position |
| Pre-Release Capture | Matches chosen mode | Matches chosen mode | Matches chosen mode | Yes, if paired with H+ | Buffers roughly a second before you fully press the shutter, useful for catching the exact moment a bird launches off a perch |
For nine out of ten flight sequences I stay on electronic H+ at 20fps with 14-bit lossless compressed RAW. That gives full resolution, full RAW flexibility for exposure and white balance recovery on a backlit bird, and no viewfinder blackout, which is the part that actually helps you keep a fast-moving subject framed. I reserve C30 for split-second strike moments (a kingfisher hitting water, an osprey's talons at the point of contact) where I genuinely just want more temporal samples and I'm willing to accept JPEG-only output for that one burst.
Lens Pairings That Make Sense on This Body
The Z8's in-body stabilization is rated around 6 stops with a compatible lens, but for flight work you're shooting fast shutter speeds anyway (1/2000 and up for most birds, faster for small fast fliers), so IBIS matters less here than it does for handheld low-light perched shots. What matters more is autofocus speed at the lens's own focus motor, and reach without pushing your teleconverter combo past what the AF system handles comfortably.
- Nikkor Z 100-400mm f/4.5-5.6 VR S: the most versatile option if you're also shooting perched birds, habitat shots, or anything closer than 15 meters. Pairs cleanly with the 1.4x teleconverter for 560mm at f/8 without AF dropping off noticeably.
- Nikkor Z 180-600mm f/5.6-6.3 VR: not an S-line lens, noticeably cheaper, and the one I'd actually recommend to someone buying their first long lens for this body. Slower to rack focus from near to far than the 100-400, but at typical BIF working distances that difference mostly disappears.
- Nikkor Z 600mm f/4 TC VR S: the built-in 1.4x teleconverter (a flip lever, not a separate element to attach) is the real selling point for flight work, since you can go from 600mm to 840mm mid-sequence without breaking your grip or losing the bird in the viewfinder.
- F-mount glass via the FTZ II adapter: older 500mm f/5.6E PF and 600mm f/4E FL lenses still autofocus well on the Z8, but initial acquisition from a defocused state is measurably slower than native Z glass. Fine for a bird already in frame, worse for snap-focusing on a bird that just entered from the edge.
RAW Format Choices for a Week of Actual Birding
This is the part that gets skipped in most Z8 coverage, and it's the part that determines how much of your evening gets eaten by sorting instead of editing. The Z8 gives you a choice between 12-bit and 14-bit RAW, and between Lossless Compressed and High Efficiency (HE and HE*) compression. For birds in flight, where a single productive outing can mean 2,000 to 4,000 frames, the file size difference is not academic.
14-bit Lossless Compressed RAW files from the 45.7MP sensor run somewhere in the 55-70MB range depending on scene detail. High Efficiency* at 14-bit drops that to roughly a third smaller with compression artifacts that are genuinely hard to see even when pushing shadows on a backlit wing. For a body of work where most frames are heavily cropped anyway (birds in flight rarely fill the frame edge to edge unless you're using serious reach), I shoot HE* for the vast majority of a session and reserve full Lossless Compressed for situations with tricky exposure, like a bird crossing between sun and shade where I know I'll be pulling detail back in post.
Card slot strategy matters here too. The CFexpress Type B slot clears the buffer fast enough to sustain 20fps bursts without the camera stalling; the SD UHS-II second slot is meaningfully slower and will bottleneck you if you set it as an overflow destination during active flight sequences rather than a backup written after the fact. I keep RAW going to CFexpress only during a shoot and let the SD card handle JPEG backups, which keeps buffer clearing off the slower card entirely.
Where this connects to actual workflow: a day like that, 2,000+ RAW frames from repeated flight passes, is exactly the situation where manual culling stops being realistic. I run those card dumps through imagic before touching Lightroom, because its local sharpness and focus scoring catches the fraction of every burst where the AF genuinely nailed the eye versus the frames where wingtip motion blur or a half-second focus lag made the shot soft, without me squinting at 100% crops for an hour. It also clusters near-duplicate frames from the same pass, which matters enormously with birds in flight since a 20fps burst of a gull banking through a turn produces a dozen frames that are 90% identical and only two or three that are actually the best wing position and eye contact. All of that scoring runs on the machine itself, which is worth mentioning specifically for this kind of shooting: a lot of birding happens somewhere without reliable upload bandwidth, a lodge, a research station, a truck at a wildlife refuge with no signal, and not needing to push RAW files to a cloud service before you can even see your keepers is a real, not theoretical, advantage. If you want the mechanics of how that scoring actually works, this breakdown of AI photo culling goes into more depth than I will here.
Field Settings Worth Setting Before You Leave the House
Back-button focus is close to mandatory for flight work on this body. Separating AF activation from the shutter button means you can release AF-On to briefly recompose or check a different bird without the camera hunting to refocus the instant you touch the shutter again. I map AF-On to the standard rear button and leave the shutter button doing exposure metering only.
I also assign a quick toggle between Wide-area AF (Animal detection) and 3D-tracking to one of the Fn buttons near the lens mount, since I'm switching between those two multiple times per outing depending on whether a bird is isolated against sky or lifting out of clutter. Auto ISO with a minimum shutter speed floor set manually rather than the camera's own "auto" calculation is worth the extra setup time too; the camera's automatic floor tends to undershoot for erratic small birds and overshoot (wasting ISO headroom) for slow, steady soarers.
One setting people skip: turning on the electronic level in the viewfinder overlay, even though it seems irrelevant for a subject that isn't going to hold still for a level horizon. For flight sequences shot from a boat or a hide with a slight cant, having that reference visible helps you correct your own stance mid-burst rather than discovering a five-degree tilt across 40 frames back at your desk.
After the Shoot: Getting From Card Dump to Finished Edits
The volume problem doesn't end after culling. Once you've identified the sharp, well-composed frames out of a burst, birds in flight tend to need consistent treatment across a shoot: similar backlighting on a shoreline, similar water tones, similar sky gradients from one pass to the next. I've trained an apply_my_style preset in imagic on a set of heron and osprey edits I was happy with, feather detail, shadow recovery on the underside of the wing, a specific way I pull blue out of overcast sky, and applying that automatically across a new batch from the same location cuts a genuinely large chunk of repetitive editing time compared to adjusting each keeper from scratch. It's built from your own edit history rather than a generic filter, so it holds up specifically for the kind of light and color you actually shoot in, not a preset pack built for someone else's location.
If you're trying to tighten the whole pipeline, from card import through to final export, rather than just the culling step, this workflow guide covers adjacent ground worth reading alongside this one.
Frequently Asked Questions
Is the 45.7-megapixel sensor overkill for birds in flight, or genuinely useful?
It's genuinely useful, but not because you need 45.7 megapixels of a bird that fills the frame. Most flight shots, even with 600mm or 840mm of reach, still leave the bird occupying a modest fraction of the frame. The extra resolution gives you room to crop hard in post without falling below a usable output size, which matters more than most people expect until they actually try to crop a bird shot in from 300mm equivalent down to a tight composition.
Should I use the DX crop mode instead of cropping later?
DX crop (19.4MP from the center of the sensor, giving roughly 1.5x additional reach) is worth using when you know in advance you'll want the extra magnification and you'd rather see the tighter framing live in the viewfinder than crop blind later. The tradeoff is you're locked into that crop for the whole card unless you switch back manually, and if the bird turns out to be closer than expected, you've thrown away sensor area you can't get back. I use it selectively for known-distant subjects like raptors on a fixed perch across a valley, and shoot full frame for anything unpredictable.
Does the electronic shutter cause any real problems with fast wingbeats?
Because the sensor is stacked, sensor readout is fast enough that rolling shutter distortion on wingtips is rarely visible in practice, even on quick fliers like teal or shorebirds. Where you can occasionally see it is with something spinning very fast at close range, like a hummingbird's wings from a few feet away, where you might catch a slight skew on individual feathers. For the vast majority of birds in flight at typical shooting distances it's a non-issue and the blackout-free viewfinder benefit outweighs the theoretical risk.
Is 20fps actually necessary, or would a slower body be enough for most birding?
It depends heavily on what you're shooting. For soaring raptors and large wading birds with slow, predictable wingbeats, 10fps on the mechanical shutter is often plenty, and it produces a smaller, more manageable set of frames to review afterward. For small, fast, erratic fliers, terns, swallows, kingfishers mid-strike, the extra frames at 20fps meaningfully raise your odds of catching the exact wing position and head angle you want. The honest answer is that 20fps is more valuable for the subjects that need it and mostly just adds to your sorting workload for the subjects that don't, which is part of why culling software earns its keep on this camera specifically.