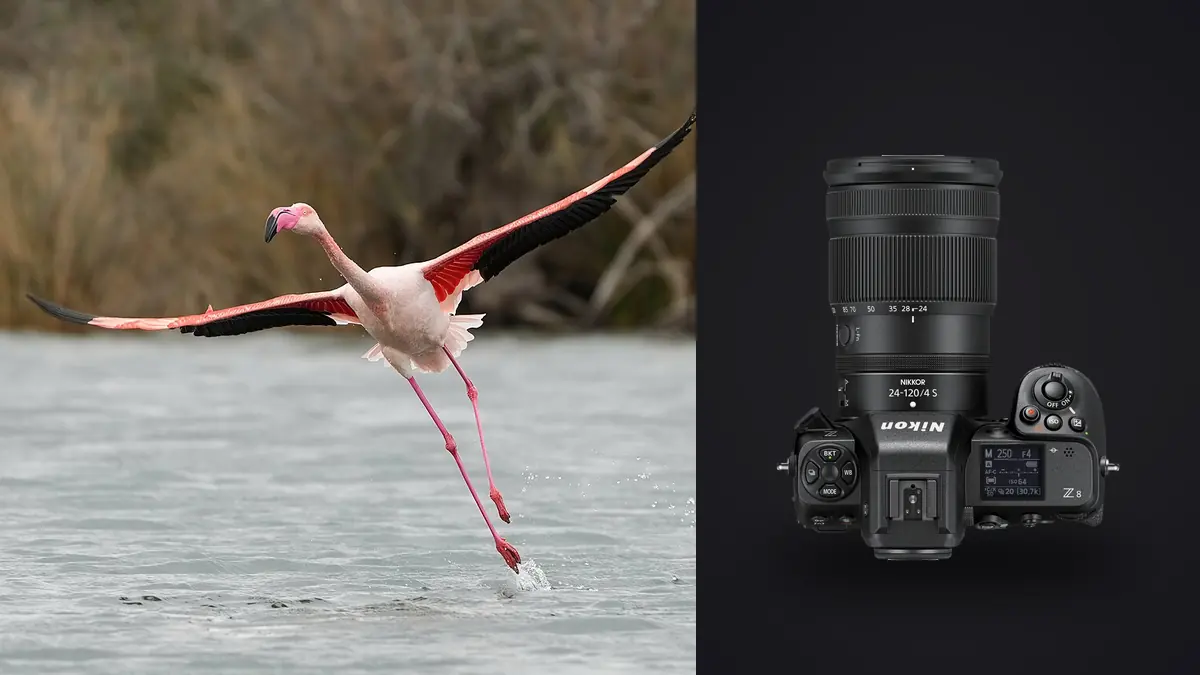
A useful Nikon Z8 bird-in-flight setup is not one perfect autofocus mode. It is a small set of configurations that can be reached without taking the eye from the finder. A bird against open sky, a bird weaving through branches, and a bird launching from a known perch present different targeting problems. The control layout should make those transitions immediate.
The Z8 combines a high-resolution stacked sensor, subject detection, 3D-tracking, customizable wide areas, and rapid capture options. Those tools are effective only when exposure, focus area, and burst behavior remain understandable in the field. Start simple, assign direct alternatives, and validate them on actual files.
Create separate banks for open sky and clutter
Use one shooting bank or custom recall setup for birds against open backgrounds. A broad autofocus area with bird subject detection can find and follow the subject when little else competes. Pair it with a fast shutter, continuous autofocus, a useful burst rate, and Auto ISO. Save the setup only after checking that all linked settings recall as expected.
Create a second configuration for branches, reeds, shorelines, and groups. A smaller wide-area box or a controlled tracking start point reduces the chance that the camera chooses foreground contrast. The goal is not to disable intelligence, but to define where it may look. Place the box over the bird before asking the system to track.
A third option can serve static wildlife or perched portraits with a small point and single-frame drive. It prevents a quiet subject from producing an unnecessary burst. Assign these alternatives to controls that feel distinct under gloves, and rehearse switching while following a moving object.
Separate focus activation from area choice
Back-button focus can keep shutter release and autofocus activation independent. One rear control can start the default flight area, while a function control temporarily recalls a narrower area or 3D-tracking. Nikon's customization options are broad, so document the layout and avoid assigning multiple controls whose roles are hard to distinguish.
3D-tracking is useful when a subject has been acquired cleanly and moves across the frame. It is less magical when the initial target is a branch, wing edge, or neighboring bird. Establish the starting box on the intended head or body, then follow. If tracking jumps repeatedly, reduce competing content or switch to a constrained wide area.
Keep manual focus override accessible for a bird behind fine branches or at a known distant perch. Turning the focus ring can bring the lens near the correct distance before autofocus engages. This reduces a full-range search from foreground to infinity. A focus limiter on a telephoto lens provides the same kind of help.
Set shutter speed for the behavior
Bird size, distance, direction, and wingbeat change the required shutter. A large gliding bird crossing side-on can tolerate a slower speed than a small bird flying toward the camera. Begin fast enough to protect the head and eye, then slow deliberately when the purpose is wing blur or a panned background.
Manual exposure with Auto ISO is a practical field baseline. Shutter speed controls motion, aperture provides the needed lens performance and depth, and Auto ISO follows changing light. Set an upper sensitivity based on processed files at the final output size, not on a number copied from another photographer.
Keep exposure compensation directly available because bright sky, dark trees, white plumage, and backlight can shift the needed result. Watch highlight warnings on pale feathers. When the background changes rapidly but light on the bird remains stable, full manual exposure may produce more consistent sequences.
Choose the shutter mode after testing the scene
The Z8's electronic shutter supports quiet, rapid shooting and avoids a mechanical view interruption. Fast movement can still interact with readout, and artificial lights can band. For outdoor birds under natural light, those concerns are often smaller, but wing and propeller-like motion should still be checked for unnatural shape.
High-speed frame modes can generate large sequences, and some pre-release functions use JPEG rather than RAW. Confirm the file type, image size, and behavior before relying on them for a critical launch. A feature that records before full press can be useful at a known perch, but only if its output meets the assignment.
Configure release feedback so it is obvious when the camera is recording. With a silent electronic shutter, accidental pressure can create a long sequence unnoticed. Use visible indicators and a burst rate that matches the event, then stop as soon as the action passes.
Tune autofocus behavior with field evidence
Do not change tracking response after every missed frame. First inspect the miss: did the active box begin on the bird, did an obstacle cross, did the lens start at the wrong distance, or did the bird leave the selected area? Each cause has a different correction. Random menu changes make results harder to interpret.
Practice on common, non-sensitive subjects in varied backgrounds. Follow gulls against sky, pigeons near buildings, or waterfowl crossing reflective water while maintaining an ethical distance. Record which area was used and compare sequences at the eye. The exercise is about control fluency, not collecting portfolio images.
When multiple birds overlap, subject detection may switch. Decide which individual matters and use a smaller starting area to establish it. If the composition depends on the group rather than one eye, stop down enough for useful depth and select the frame by shape and separation.
Configure the viewfinder and review tools
Use a viewfinder display that shows exposure compensation, shutter, aperture, ISO, drive, and focus area without covering the bird. Remove indicators that are not needed in flight. A clear frame helps the photographer anticipate entry space and background hazards.
Set image review so it does not interrupt every burst. Review after a meaningful sequence or lighting change, not after every pass. Assign magnification to jump quickly to the focus area if possible, then inspect eye detail and motion. The full thumbnail is not enough for a high-resolution file.
Enable highlight warnings and use the histogram as evidence, while remembering that the preview reflects camera rendering. RAW files provide flexibility, but important white feathers should retain texture at capture. Adjust exposure before the next pass rather than planning to repair every frame.
Manage bursts and cards deliberately
Use short bursts around takeoff, banking, feeding, or landing. Release the button when wing position collapses or the bird exits clean framing. This lets the buffer clear and keeps the card organized into meaningful groups. A lower rate can make small posture changes easier to compare.
Choose cards that meet the camera's requirements and verify remaining capacity before reaching the location. Format only after verified backup. If using two cards, confirm whether they are redundant, sequential, or split by file type. The choice should match the risk policy rather than being left at a factory default.
At ingest, imagic can analyze sharpness, exposure, closed eyes, and composition locally, then group duplicates and bursts on Windows or macOS. Bird eye and wing position still require human review. Use automation to navigate the sequence, not to decide wildlife behavior or ethics.
Run a field setup check before the first subject
- Recall: load the open-sky bank and confirm the alternate clutter control.
- Exposure: verify shutter, aperture, Auto ISO, and compensation.
- Focus: set continuous AF, bird detection, and the intended area.
- Drive: choose a burst rate and confirm any pre-release file type.
- Lens: check limiter, stabilization, hood, and secure mount.
- Cards: verify routing, capacity, and previous backup.
- Test: photograph a moving subject and inspect the focus point.
Repeat the short check when light, habitat, or lens changes. More practical field systems are available in the workflow and editing guides.
Match the control setup to the telephoto lens
Long lenses differ in focus limiter, stabilization controls, function buttons, zoom travel, and balance. Set the limiter for the expected distance so the lens does not search through a close range that the bird cannot occupy. Confirm that a recalled camera focus mode does not conflict with a lens switch left from the previous outing.
Program lens function buttons only when they serve the same logic as the body controls. A button near the left hand can recall the clutter focus area or activate autofocus while the right hand maintains framing. Avoid giving the lens and body similar buttons different meanings; that confusion appears exactly when action accelerates.
Balance the lens on a monopod or gimbal for fixed positions, and keep rotation smooth without leaving locks dangerously loose. Handheld, support the lens rather than the body and keep elbows relaxed. Stabilization can steady the finder, but a strained grip makes tracking uneven and shortens useful field time.
After adding a teleconverter, confirm maximum aperture, autofocus behavior, focus limiter, and image quality at the expected distance. The subject becomes larger in the frame, but light and focus margin change. Make the choice from a processed field test rather than reach alone.
Adapt the setup to weather and wildlife welfare
Rain covers can obstruct lens controls and make custom buttons harder to find. Fit the cover at home, then rehearse changing focus area and compensation through it. Keep a dry cloth accessible and avoid opening card or battery doors in blowing rain unless shelter is available.
Cold reduces practical battery endurance and stiffens gloves. Carry charged spares close to the body, enlarge the time allowed for control changes, and use buttons that remain distinct by touch. Heat can create shimmer over long distances, so a focus miss may come from moving air rather than the autofocus setup.
No focus configuration justifies crowding a nest, blocking a feeding route, or repeatedly provoking flight. Choose a position that the animal accepts, use reach and patience, and leave when behavior changes. Ethical distance often makes flight paths more predictable because the bird is responding to its environment rather than escaping the photographer.
After a wet or dusty session, leave the field setup recorded until equipment has been cleaned and checked. Confirm lens contacts, front element, card doors, and control movement before changing the saved bank. A physical problem can imitate poor autofocus, so the next practice sequence should begin only after the optical path and mounts are clear.
Frequently asked questions
Which Nikon Z8 autofocus area is best for every bird?
None. Broad areas work well against clean sky, while constrained wide areas or a deliberate tracking start point help in clutter. Assign direct access to both.
Should the Z8 always use its fastest burst for flight?
No. Use enough rate to cover the behavior, then release. Lower rates reduce near-duplicates and may make wing-position comparison easier.
Can pre-release capture replace anticipation?
No. It can help with a known launch, but file type and output must be confirmed, and the camera still needs correct focus, exposure, and framing before the bird moves.