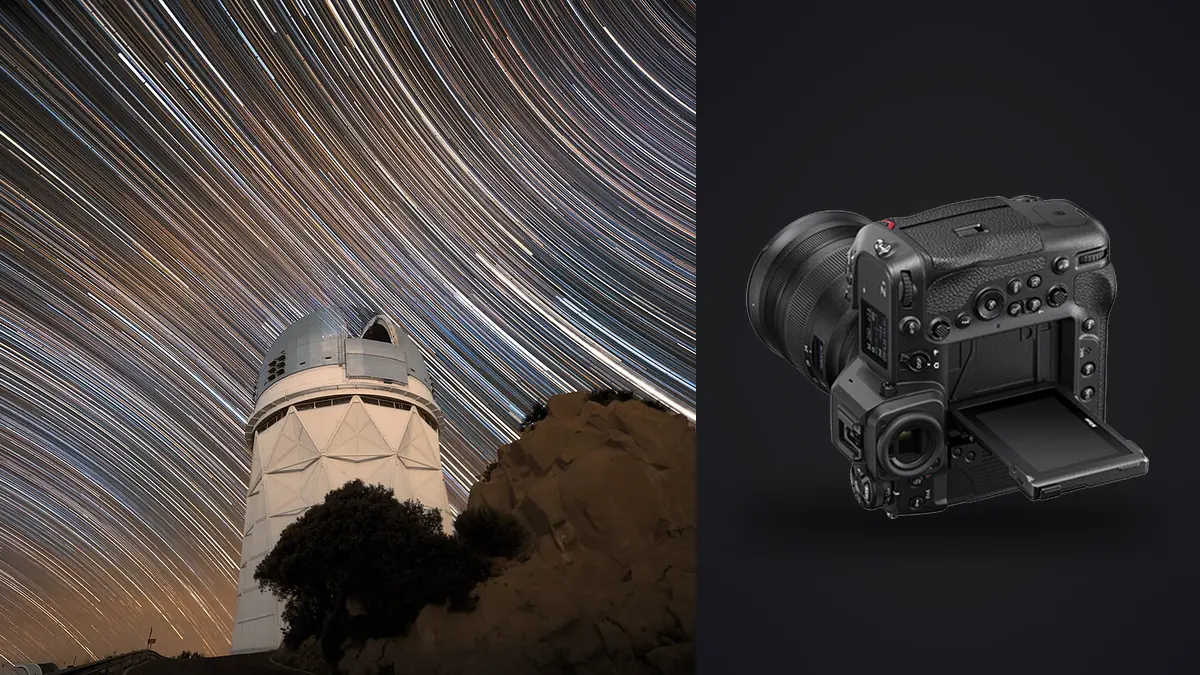
I spent three nights this spring under a Bortle 3 sky in the Cairngorms with a Z9 bolted to a cheap star tracker, mostly to answer a question I kept seeing in gear forums: does a 45.7MP stacked sensor actually change how you should shoot a star stack, or is it just a higher-resolution version of the same D850 workflow everyone already knows? The short answer is it changes more than people expect, mostly in ways that have nothing to do with megapixels and everything to do with how Nikon built the shutter and the autofocus system.
The sensor math you're actually fighting
Star stacking exists because a single long exposure has to compromise between two things that pull in opposite directions: enough signal to beat the read noise floor, and a short enough shutter time that stars stay as points instead of arcs. The Z9's sensor has a pixel pitch of roughly 4.35 microns, the same spacing as the D850 and Z7 before it. That's tighter than a 24MP full-frame body, which means star trailing becomes visible at the pixel level sooner than it would on a lower-resolution sensor at the same focal length. If you're used to the old "500 rule" from a 24MP camera and you carry that same exposure time over to the Z9 expecting identical results, you'll see slightly elongated points when you zoom in, even though the frame looks fine at a glance on the rear screen.
In practice this means dialing back single-frame exposure times by a couple of seconds compared to what you'd get away with on a lower-res body, and leaning harder on the stack itself to recover signal-to-noise rather than trying to brute-force it with one long frame. That's the whole point of stacking anyway: twenty 8-second frames at ISO 3200 average out read noise far better than one 160-second frame ever could, and they don't ask the sensor to sit at temperature building up amp glow for nearly three minutes straight.
The other sensor-level thing worth knowing is that the Z9 has no mechanical shutter at all. It's the first Nikon body built that way. For a stacking sequence that means zero shutter-shock vibration between frames and a completely silent camera while it fires, which matters more than you'd think when you're at a public dark-sky site at 2am and don't want to be the person with a camera clacking away every eight seconds.
Camera settings I actually use in the field
Manual mode, manual white balance (I leave it at 3800K and fix it properly in raw later), and 14-bit lossless compressed raw. Auto ISO has no business being on for a stack; every frame needs to be exposed identically or the stacking software has to normalize brightness across the set, which introduces its own noise.
Vibration reduction, both in-lens and in-body, gets switched off. This trips people up because it feels backwards: VR is supposed to help. On a locked-down tripod it doesn't have real camera shake to correct, so it starts hunting against imaginary movement and can actually introduce a very fine jitter into long exposures. Every VR system I've used, Nikon's included, recommends this for tripod work, and it matters more on a body like the Z9 that people trust to just handle things automatically.
Long exposure noise reduction stays off too, and this one is specific to running an interval sequence rather than a single shot. With it on, the Z9 fires a dark frame after every light frame and doubles your total session time, which on a multi-hour star trail sequence means you lose half your usable window and end up with gaps in the trail where the camera was busy taking a black frame instead of tracking the sky. I'd rather shoot my own set of dark frames at the end of the session, with the lens cap on and the same ISO and shutter speed, and let the stacking software subtract them in post.
Focus is still the part people get wrong most often, camera generation aside. Nikon added a Starlight view AF mode to the Z9 through firmware that Nikon rates down to roughly -9 EV, which is genuinely useful for locking onto a bright star or planet before you fine-tune manually. In my testing it'll grab Vega or Jupiter without much fuss but starts to struggle on dimmer targets, so I still finish every focus check by punching into 100% magnification on a bright star in live view and nudging the ring until the point is as small and hard as it'll get. The illuminated buttons on the Z9 body are a small thing that matters a lot here, because you're doing this fine focus work by red headlamp light and being able to glance down and actually see which dial you're touching saves a lot of fumbling.
Building the interval sequence without babysitting the shutter
The interval timer shooting menu is where the actual sequence gets built: interval length, number of shots, and whether exposure smoothing is on. Turn exposure smoothing off for stacking work, it's meant for time-lapse video where a gradual auto-exposure ramp looks pleasant, and it will quietly shift your ISO or shutter speed frame to frame in a way that breaks stack consistency.
Dual CFexpress Type B slots mean write speed basically never becomes the bottleneck, even running back-to-back 8-second raw exposures for two or three hours. That wasn't guaranteed on older bodies where a big buffer of raw files could bottleneck against a slower card and start dropping intervals. Battery life is the other practical concern on a long session, and the EN-EL18d is a genuinely large cell. On a below-freezing night in the Cairngorms I ran a four-hour interval sequence and still had over 40% left at the end, though I keep a spare in an inside jacket pocket out of habit since cold always eats into capacity eventually.
Exposure and frame-count reference for common focal lengths
These are the settings I actually land on for untracked, tripod-only star stacks with the Z9, judged by zooming to 100% and checking for elongation rather than trusting the rule-of-thumb math. Tracked sequences let you push exposure times much longer per frame, but this table assumes a static tripod, which is still how most people shoot foreground-inclusive nightscapes.
| Focal length / aperture | Max single exposure before visible trailing | ISO I shoot at | Frames per stack |
|---|---|---|---|
| 14mm, f/2.8 | 15 sec | ISO 3200 | 20-25 |
| 20mm, f/1.8 | 10 sec | ISO 2000 | 25-30 |
| 24mm, f/1.8 | 8 sec | ISO 2000 | 30-35 |
| 35mm, f/1.8 | 5 sec | ISO 2500 | 40-50 |
| 50mm, f/1.2 | 3 sec | ISO 3200 | 50-60 |
The pattern here isn't unique to the Z9, it's just more visible at 45.7MP than it would be on a 24MP body, where you could get away with an extra 3-4 seconds per frame before trailing showed up at normal viewing sizes. Notice the trade too: shorter exposures at the long end of that table mean more frames needed to reach an equivalent total integration time, which is exactly why a fast sequence and a big buffer matter as much as the sensor itself.
Turning three hundred sub-frames into one clean image
A three-hour session at these settings can easily produce 200-400 light frames plus darks and flats, and at roughly 55-65MB per 14-bit raw file on the Z9, that's a genuinely large folder to manage before you've even opened stacking software. I run mine through Sequator for the actual star-and-foreground stack (it's free, handles sky/ground separation reasonably well, and doesn't need a tracked mount), though DeepSkyStacker and PixInsight both do the job if you want more control over rejection algorithms.
Before any of that, though, the folder needs a pass to pull out the frames that shouldn't be in the stack at all: a satellite streak through the middle of the frame, a plane's strobe light, a gust that nudged the tripod, condensation creeping onto the front element two-thirds of the way through the session. Doing that by eye across four hundred nearly-identical thumbnails is genuinely tedious, and it's the one part of a night session I've offloaded to imagic. It clusters the interval sequence by how similar the frames are and flags the outliers instead of making me scrub through every single one, which on a folder this size is a real time saver rather than a nice-to-have. It also runs entirely on the machine, no upload step, which matters more than it sounds like it should when you're processing a session shot somewhere with no signal and don't want an editor stalling on a sync queue.
Once the stack is built and I've got a single clean composite, the last step is color grading, and that's the other place imagic earns its spot in the workflow: I trained its apply_my_style preset on a batch of astro edits I was happy with, and it gets the composite most of the way to my usual look (the cooler shadow tone, the way I hold back magenta in the Milky Way core) before I do final adjustments by hand. It's not a replacement for judgment on an image this specific, but it saves rebuilding the same curve and color balance moves from scratch every time.
Where I've wasted clear nights
- Forgetting flat frames. Fast wide primes at f/1.8-f/2.8 vignette noticeably, and without flats to correct it, the stack's corners come out darker and slightly color-shifted in a way that's hard to fix after the fact. A white t-shirt over the lens with a phone flashlight behind it, shot at the same aperture and focus distance, takes two minutes and saves a redo.
- Trusting autofocus to hold between frames. Even with Starlight view AF nailing initial focus, I always switch to manual focus for the actual sequence. A single AF hunt mid-session on a dim area of sky will soften every frame after it.
- Shooting the whole session at one ISO because that's what worked last time. Cloud thinness, moon phase, and how far you are from the nearest town all shift the noise floor enough that the exposure that was clean last week can be noisy and clipped this week.
- Not checking the histogram on the first few frames. The Z9's rear screen looks bright enough in the dark to trick you into thinking you're exposed well when you're actually a stop under, especially with the screen brightness left on auto.
None of this is Z9-specific advice dressed up as gear coverage, most of it applies to any modern mirrorless body shooting a stack. But the Z9's particular combination of resolution, a genuinely capable low-light AF mode, and zero shutter vibration does shift where the real risk in a session sits, away from mechanical failure and toward exposure discipline and frame management. For more on tightening up that kind of raw-heavy shooting workflow generally, our piece on speeding up a photo workflow covers a lot of the same culling logic applied to sports and event shoots, where the frame counts get just as large.
Frequently Asked Questions
Do I need a star tracker if I'm stacking with the Z9?
No, and most of my untracked stacks with foreground included come out cleaner than a single tracked exposure would for a nightscape anyway, since tracking blurs the ground unless you shoot it separately. A tracker earns its place once you want longer per-frame exposures for deep-sky targets with no foreground, where you're trying to pull faint nebulosity rather than a Milky Way band over a landscape.
Is Starlight view AF reliable enough to skip manual focus entirely?
It's good for getting close fast, especially on a bright star or planet, but I've never trusted it as the final word for a stacking sequence. I use it to get roughly there, then confirm and fine-tune with 100% magnification live view before locking to manual focus for the whole session.
Does the Z9's 45.7MP sensor mean noisier stacks than a lower-resolution body?
Per-pixel, individual frames can look a touch noisier at high ISO next to a lower-megapixel sensor viewed at the same zoom level, but once you stack twenty or more frames and downsample for output, that difference mostly disappears and you're left with more resolved detail in the final image instead.
What's the fastest way to cull hundreds of sub-frames before stacking them?
Manually scrubbing a few hundred near-identical raw files is where most people lose an evening after the shoot is already done. Grouping the sequence by similarity and pulling out the outliers (satellite trails, wind-nudged frames, condensation) rather than reviewing every frame individually is the difference between a twenty-minute pass and a two-hour one; that's the specific problem burst clustering in tools like imagic is built to solve, and it's worth reading how the underlying AI culling process actually works if you're deciding whether it fits your workflow.