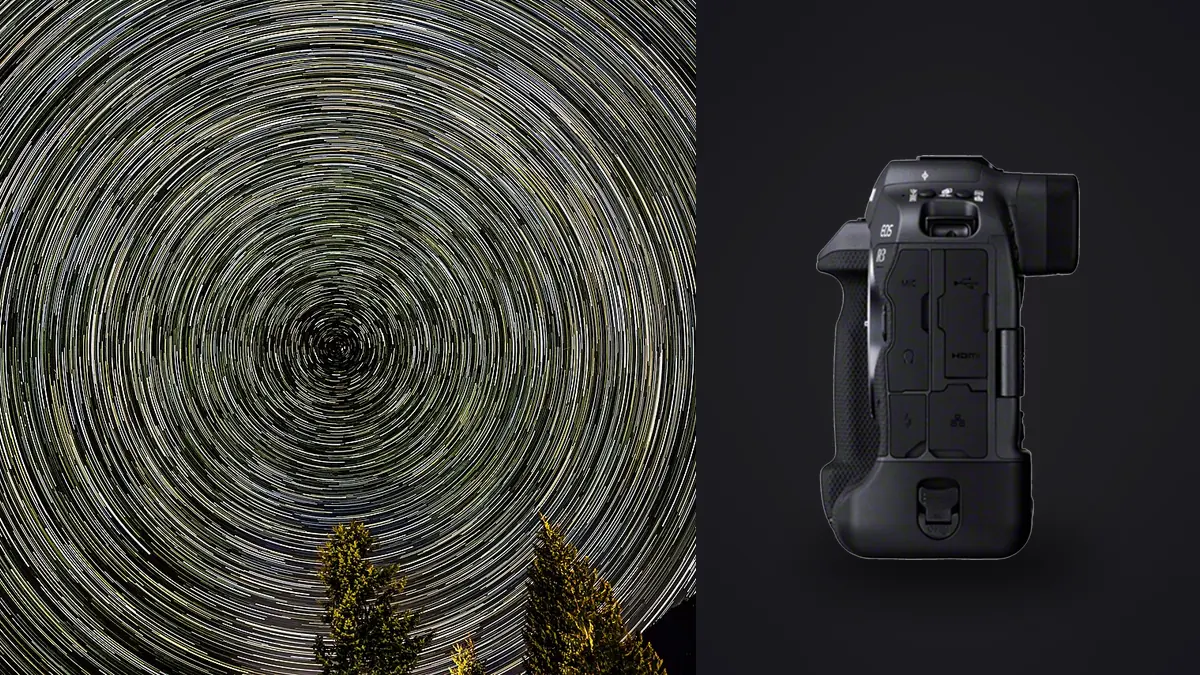
I took the EOS R3 to a dark sky reserve for the first time expecting the eye-control autofocus and the 30fps burst mode to be the party tricks worth writing about. They weren't. What actually mattered that night was how the camera behaved at 2am with dew on the front element, a battery losing charge faster than the spec sheet promised, and four hundred exposures sitting on a CFexpress card that needed sorting before sunrise. Star stacking with this body is entirely doable and the results hold up against cameras with a stronger low-light reputation, but only if you work around a few things Canon didn't design the R3 to do.
The sensor is built for speed, not necessarily for the dark
The R3's 24.1MP stacked BSI sensor is the same lineage of hardware that made Sony's a9 line famous for tracking sports and birds without rolling shutter distortion. Stacking a sensor means adding a layer of memory right behind the photodiodes so data reads out almost instantly, which is why the R3 can hit 30fps in electronic shutter with barely any skew. That architecture is fantastic for autofocus speed and readout, but it isn't automatically the same thing as a sensor optimized purely for noise floor at high ISO. In my side-by-side test frames against a Sony a7S III shooting the same target at ISO 6400, the R3 files needed slightly more noise reduction in post to reach a comparable clean look, though the gap is smaller than internet arguments make it sound.
Where the R3 actually helps is pixel pitch. At roughly 6 microns per photosite, it's a more forgiving sensor for star point size than a 45MP body like the R5. Coarser pixels mean a star's motion across the frame during a long exposure has to travel farther before it visibly smears into an oval, so you get a little more exposure time headroom before trailing shows up at 100% crop. That's a real, usable advantage for anyone shooting untracked wide-field frames, even if it never shows up in a spec sheet comparison.
Getting focus right when there's nothing to autofocus on
Canon rates the R3's Dual Pixel CMOS AF II down to -7.5 EV with an f/1.2 lens, and that number is not just marketing filler. Point the center AF point at Vega or Sirius on a clear night and the R3 will genuinely lock focus on the star itself, something plenty of older mirrorless bodies simply refuse to attempt below -3 or -4 EV. It's not reliable on dimmer stars or through any haze, and I still confirm every lock with manual focus magnification before starting a sequence, but it saves real time compared to hunting through live view zoom on a body that can't autofocus in the dark at all.
My actual field process is a hybrid: autofocus lock on a bright star to get close, then switch to manual, zoom the rear screen to 10x on that same star, and nudge the focus ring until the point is as small and tight as it'll get. I mark the ring with a strip of gaffer tape once it's dialed in for a given lens and temperature, because focus can drift a hair as the barrel cools over the course of an hour outside. If your lens has focus breathing, verify sharpness again after the first ten minutes rather than trusting the initial lock for the whole session.
Field settings that actually produced usable stacks
These are the combinations I've landed on after several sessions with the RF 15-35mm f/2.8L and the RF 24mm f/1.8 Macro IS STM, both used at their widest aperture for star work. Your numbers will shift with sky darkness and moon phase, but this is a real starting point rather than a generic exposure chart.
| Target | Lens / focal length | Aperture | Single-sub shutter | ISO | Subs stacked |
|---|---|---|---|---|---|
| Milky Way core, untracked wide | RF 15-35mm at 15mm | f/2.8 | 10 sec | 3200 | 15-20 |
| Milky Way core, tighter framing | RF 24mm f/1.8 | f/1.8 | 5 sec | 4000 | 20-25 |
| Star trails, single blended file | RF 15-35mm at 15mm | f/4 | 20 sec x ~270 frames | 800 | 270+ |
| Tracked deep sky (star tracker) | RF 100-300mm at 135mm | f/4 | 90 sec | 800 | 40-60 |
| Nightscape foreground blend | RF 15-35mm at 15mm | f/4 | 90 sec (foreground only) | 1600 | 1 (blended with sky stack) |
The single-sub exposure for the untracked Milky Way frames comes from the NPF rule rather than the old 500 rule. The 500 rule was designed for film-era resolution expectations and it lets full-frame digital sensors show visible star trailing well before the calculated shutter limit. NPF factors in the camera's actual pixel pitch, the lens aperture, and the declination of what you're shooting, and on the R3's roughly 6-micron pixels it consistently lands a couple of seconds shorter than 500-rule math would suggest at 15mm.
Two settings that feel like they should help and don't
In-body stabilization is the obvious one. The R3's IBIS is rated up to 8 stops with certain RF lenses and it's genuinely excellent for handheld twilight shots, but leave it on with the camera locked to a tripod head and you risk introducing a very slow, very subtle drift as the stabilization system hunts for movement that isn't there. On a 10-second exposure this is rarely visible. On a tracked 90-second deep sky sub it can be the difference between round stars and faintly smeared ones. Turn it off the moment the tripod legs are locked down, every time, not just for the long exposures.
The other is drive mode. I default to electronic (silent) shutter for stacking sequences now, mostly because 270 mechanical shutter actuations in one star trail run is real wear on a part rated for roughly 500,000 cycles, and because it removes shutter-induced vibration from the very first fraction of a second of each frame. It won't rescue a windy night or a wobbly tripod, but on a calm one it's a small, free improvement, and the R3's stacked sensor makes electronic shutter viable here without the rolling shutter artifacts that would rule it out on a non-stacked body.
What does help and gets overlooked is the built-in intervalometer. You don't need an external trigger cable on the R3; the interval timer shooting menu handles start delay, exposure count, and interval spacing natively, and it will run through a 300-frame sequence without you touching the camera again once it starts, which matters when your hands are numb by frame 150.
Battery and card realities nobody puts in the spec sheet
The LP-E19 is a genuinely large battery and Canon's rated shot count looks generous on paper, but cold nights are unkind to it in a way CIPA ratings don't fully capture, since long-exposure night shooting keeps the sensor and processor active far longer per frame than the burst-shooting scenario the rating is based on. On a sub-freezing session I've watched the percentage indicator drop faster than the frame count would suggest, and I now carry a second battery in an inner jacket pocket rather than in the bag, because a cold battery recovers noticeably once it warms back up against your body.
Card-wise, shooting a 270-frame star trail sequence in RAW on a 24.1MP body eats through storage fast, and CFexpress Type B write speed only matters if your card is actually fast enough to keep the buffer clear between long exposures, since a full buffer mid-sequence means a dropped frame in your stack. I keep the SD UHS-II slot as backup RAW rather than JPEG overflow, purely so a corrupted CFexpress card doesn't end the night.
Sorting hundreds of subs before you can even start stacking
A single successful star trail sequence hands you 250 to 300 nearly identical RAW files, and somewhere in there are a handful with a plane crossing the frame, a satellite streak, a gust of wind that softened three consecutive frames, or a stray headlamp beam from another photographer down the ridge. Going through that many frames one at a time in a standard browser is the part of astrophotography nobody enjoys, and it's exactly the kind of repetitive visual check that eats an entire morning after a night shoot.
This is where I actually use imagic rather than my usual editor. Its local sharpness scoring flags the handful of subs where focus drifted or wind moved the tripod, which matters more here than in normal photography because stacking software averages sharpness across the whole sequence, so a few soft frames measurably drag down the final composite even though no single frame looks obviously bad on its own. The burst and near-duplicate clustering also groups the sequence visually so I can scan for the plane-trail frame or the satellite streak in seconds instead of clicking through three hundred thumbnails individually. If you want the mechanics of how that focus scoring actually works under the hood, there's a longer explanation at how AI photo culling works.
Everything runs locally on the machine, which matters more for astro work than it does for a wedding shoot. Dark sky sites are dark for a reason, usually because they're far from anything, including cell signal, so a cloud-dependent culling tool is useless exactly when you need it, sitting at a picnic table at 4am trying to clear card space before the drive home.
Stacking the survivors
Once the sequence is clean, the actual stacking happens in dedicated software, not in a general photo editor. For untracked wide-field Milky Way frames I run DeepSkyStacker or Sequator, both of which align on star patterns rather than pixel position and handle the slight rotation between frames from Earth's movement. For star trail sequences the process is different: no alignment needed since you want the trails, just an additive blend that layers every frame's light data into one file, which is what turns 270 individual 20-second exposures into what reads as one continuous multi-hour trail. Tracked deep sky subs get calibrated against dark frames and flat frames first, since a star tracker mount holds the stars still enough that sensor noise patterns and vignetting become the dominant thing you're correcting for rather than star movement.
The output of any of these tools is a single flattened file, usually a 16-bit TIFF, that still needs a real edit pass: curves, color balance, noise reduction beyond what stacking already removed, and often a blend with a separately exposed foreground since a 90-second sky exposure and a correctly exposed landscape rarely share the same settings.
Getting a consistent look across a season of night shoots
The color cast from a dark sky varies more than people expect, shifting between sessions with humidity, light pollution direction, and how much airglow is present, and it's easy to end up with a folder of Milky Way shots that all look like they were graded by different people. I built an apply_my_style preset in imagic from a handful of night shots I'd already finished by hand, and running new stacked composites through it gets me most of the way to a consistent starting point before I fine-tune white balance for that specific sky. It's not a substitute for judgment on a file with an unusual color cast, but for the routine sessions it cuts a repetitive part of the edit down to a couple of clicks. If your current workflow is still doing that grading pass manually every single time, it's worth reading through ways to speed up a photo workflow for other spots where the same kind of repetition can be trimmed.
Frequently Asked Questions
Do I need a star tracker to get good results from the R3, or is untracked shooting enough?
Untracked wide-field shots of the Milky Way work well and are what most people mean by "astrophotography" in a landscape context. A star tracker is only necessary once you're chasing deep sky targets like nebulae or galaxies at longer focal lengths, where the exposure times needed to gather enough light are far beyond what the NPF rule allows before stars trail visibly.
Is the R3's high ISO performance actually a limitation for astro work?
It's a mild one, not a dealbreaker. The stacked sensor architecture prioritizes readout speed over the absolute lowest noise floor, so files at ISO 6400 and above need a bit more noise reduction than a body like the a7S III would require at the same setting. Stacking multiple subs largely compensates for this since averaging frames reduces noise regardless of the source sensor, which is the whole point of the technique.
What's the single most common mistake people make shooting star trails with this camera?
Leaving IBIS switched on with the camera mounted on a tripod. It rarely ruins a short exposure but on longer subs, especially tracked ones, it can introduce a faint drift that only becomes obvious once you stack the sequence and see soft, slightly elongated stars instead of clean points.
How many subs do I actually need for a clean stack, and is more always better?
For untracked wide-field Milky Way shots, 15 to 25 subs is a reasonable range where noise reduction gains start to flatten out. Beyond that you're mostly fighting diminishing returns against battery life and card space, and for star trail work the count is really dictated by how long you want the trail to run rather than by noise, since you're blending for length, not averaging for cleanliness.