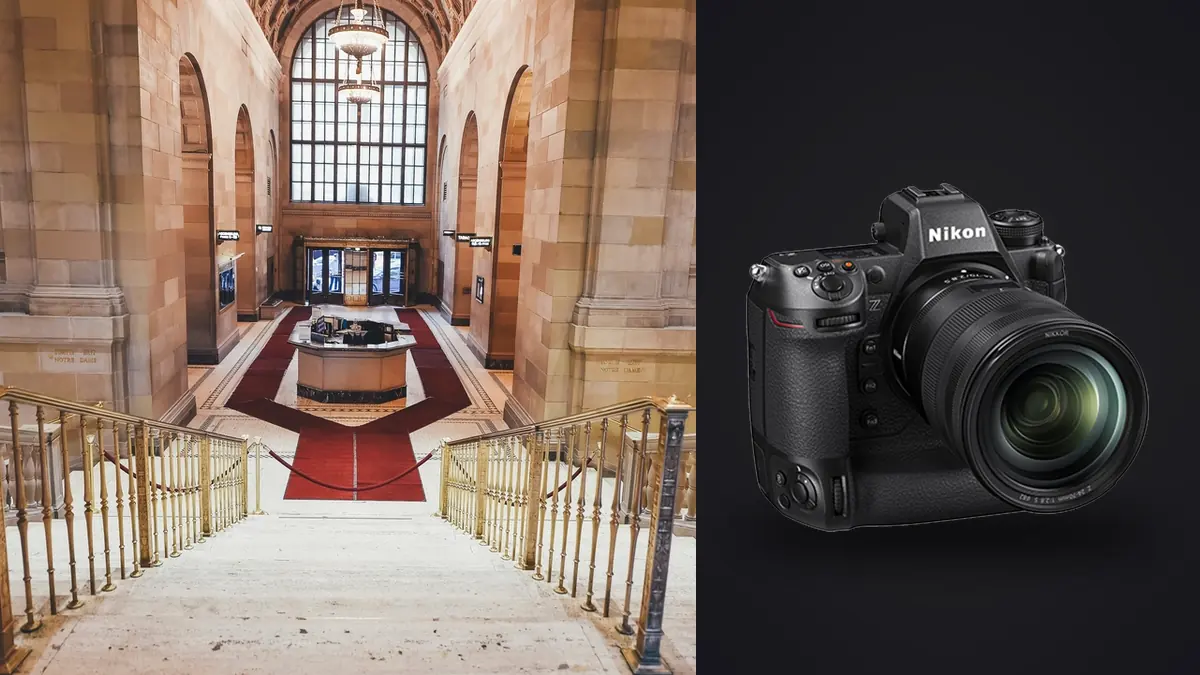
Picture a first interiors job with a Z9: a renovated 1960s house a small architecture firm wants documented before the client moves back in. Empty rooms, hard afternoon light through big steel-frame windows, and a designer standing in the doorway asking how much longer each setup would take. That last part matters more than most gear reviews admit. Architectural and interior photography is as much about working quietly and predictably around other people's schedules as it is about resolving detail in a cornice. The Z9 is a strange but genuinely useful fit for that kind of day, for reasons that have very little to do with megapixels.
It is not the obvious choice, and that is worth saying up front
If you ask ten architectural photographers what body they reach for, most won't say a 1,340 gram flagship built for sports and wildlife. The Z9's integrated vertical grip, its dual EN-EL18d cell, its 20 fps stacked sensor readout, none of that is what interior work usually needs. You're not chasing a receiver across a field. You're on a tripod, at f/8, waiting for a cloud to move.
What the Z9 brings instead is a set of side effects from that sports-and-wildlife design brief that happen to solve real problems on a shoot with an occupied building, changing light, and a client hovering nearby. No mechanical shutter. A sensor with genuinely wide dynamic range at its native ISO. Dual CFexpress Type B slots that never seem to choke on a long bracket sequence. None of that shows up on a spec sheet as "good for architecture," but it changes how a day on location actually goes.
The tilt-shift gap nobody mentions until you hit it
Here's the part that catches people switching from Canon or from an older Nikon DSLR kit. Nikon has not released a native Z-mount perspective control lens. If you built your interiors workflow around the F-mount PC-E 24mm f/3.5D ED or the 19mm PC lens, you're adapting through the FTZ II, manually focusing a lens that was never designed with this mount in mind, and losing the tactile shift mechanism feel that made those lenses fast to use handheld against a doorframe.
Most of the Z9 shooters I know doing interiors have settled into one of two camps. Some keep an old PC-E adapted and accept the extra ten seconds per setup for manual focus confirmation. Others have basically given up on physical shift and lean on the 14-24mm f/2.8 S or 14-30mm f/4 S, shoot level with the horizon, and correct verticals digitally in post. The second approach only works because of the 45.7MP sensor. Correcting a strong keystone digitally throws away real pixels at the edges of the frame, sometimes 15-20% of your resolution, and a 24MP sensor can't absorb that loss the way a 45.7MP file can. That's the honest trade you're making with this body: it doesn't fix the lens problem, but it gives you enough resolution headroom that the workaround is survivable for print-sized architectural deliverables.
Window light is where the sensor actually earns its keep
Interior work lives and dies on the gap between a bright window and a shadowed interior corner, and that gap is usually four to seven stops on a sunny day. The Z9's dual-gain architecture at base ISO 64 genuinely holds more into the highlights before clipping than the D850 did, and recovering shadow detail at ISO 64 introduces less banding than I expected coming from older Nikon bodies. That doesn't mean you skip bracketing. It means you need fewer frames to cover the same range.
On most interior setups I'm running a 5-frame bracket at 1.3 EV spacing rather than the 7 or 9-frame brackets I used to shoot on a D810. Fewer frames means less time standing in someone's living room waiting for the sequence to clear, and it means less to sort through afterward. Auto exposure bracketing on the Z9 is straightforward to program into a custom button bank, which matters when you're switching between a west-facing room at noon and a north-facing room twenty minutes later and don't want to dig through menus each time.
One thing worth flagging for anyone shooting rooms with LED under-cabinet lighting or fluorescent troffers: because the Z9's electronic shutter reads the full sensor differently than a mechanical shutter did, flicker banding from cheap LED drivers is a real risk at certain shutter speeds. The camera's flicker reduction setting helps, but I still test a frame at full resolution before committing to a bracket sequence in any kitchen with mixed lighting. It's a five-second check that saves a reshoot.
No mechanical shutter changes how a shoot day actually feels
This is the feature I undersold before I used it regularly. Interior and architecture shoots frequently happen in spaces that are still being lived in, staged, or worked on. A stylist adjusting a throw pillow six feet away, a client on a phone call in the next room, a real estate agent walking a buyer through mid-shoot. A DSLR mirror slap or shutter clack every few seconds is a constant, low-level interruption in that environment. The Z9's fully electronic shutter is silent, and there's no shutter shock to worry about at the slow speeds long-exposure interior work often needs on a tripod.
The tradeoff is rolling shutter. If anything moves through frame during a longer bracket exposure, a ceiling fan, someone walking past a doorway, a curtain in a draft, you'll see it as a skew or a partial ghost rather than a clean blur. On a tripod shooting static rooms it's rarely an issue. On a walkthrough with people in frame for video capture, it's something to plan around rather than ignore.
Focus shift stacking instead of stopping all the way down
For tight rooms where you need sharpness from a foreground chair arm to a window twelve feet back, the instinct is to stop down to f/16 or f/18. On a 45.7MP sensor, diffraction softening starts showing up well before that, and you're trading real resolution for depth of field you didn't need to sacrifice. I've had better results running the Z9's focus shift shooting mode at f/7.1 or f/8, capturing 8 to 10 frames across the focus range, and blending them in post. It takes longer to set up than a single stopped-down frame, and it's overkill for a wide room shot from a corner, but for tight vignettes and detail compositions where foreground material texture matters as much as the background, it holds detail a single small-aperture frame just can't match.
Settings I actually dial in, by scenario
This is roughly what a settings sheet for a residential interiors day looks like on the Z9, adjusted per room as I move through a house:
| Scenario | Aperture | Base ISO | Bracket / stacking | Notes |
|---|---|---|---|---|
| Empty room, single strong window | f/8 | ISO 64 | 5 frames, 1.3 EV apart | Electronic shutter, tripod, 2-sec self-timer |
| Staged living space, mixed tungsten + daylight | f/7.1 | ISO 100 | 3 frames, 1 EV apart | Gel or flag practical lamps if color clash is bad |
| Kitchen, LED under-cabinet + window | f/8 | ISO 64 | 7 frames, 1 EV apart | Check for flicker banding at 1/60 and slower first |
| Twilight exterior, interior lights on | f/9 | ISO 100-200 | 3-frame bracket, remote release | Start 20 min before civil twilight ends, work fast |
| Material or fixture detail | f/7.1-f/8 | ISO 64 | Focus-shift stack, 8-10 frames | Blend in post rather than stopping to f/16+ |
Card slots and buffer matter more than the spec sheet suggests
Dual CFexpress Type B slots sound like a minor convenience until you're seven brackets into a room and the card fills without warning. On architecture jobs, write RAW to both cards simultaneously rather than overflow, which costs storage but means a card failure mid-shoot doesn't cost a reshoot on a job where the client has already left the building. The buffer itself basically never becomes a limiting factor for bracket-and-pause interior shooting, which wasn't always true on older bodies once you got into 14-bit lossless compressed RAW at high resolution.
Getting through the take without losing the day to sorting
A single house, shot properly with 5 to 7-frame brackets across 20-30 setups, easily produces 1,000 to 1,800 RAW files. That volume is the part of interiors work that doesn't show up in gear reviews but eats real hours at the desk. What I actually do is run the take through imagic first, before touching Lightroom. Its duplicate and burst clustering groups each bracket sequence together automatically, and the local sharpness scoring flags which frame in a stack is genuinely the sharpest rather than just the one I happened to pick by eye at 100% zoom on a laptop screen at 11pm. For unreleased commercial interiors under an NDA, and a fair number of residential clients don't want work-in-progress renovation photos leaking either, the fact that all of that culling happens locally rather than through a cloud upload can matter when a client asks directly whether their files ever leave your machine.
Once the take is culled down from 1,500 files to the 150 or so that are actually going in the edit, I lean on the apply_my_style preset, trained on a batch of my own previously graded interior work, to get a consistent starting tone across every room in the house before I do room-specific adjustments. A kitchen shot at 10am and a bedroom shot at 4pm shouldn't look like they came from two different photographers, and getting that baseline consistency automatically instead of manually matching white balance and contrast room by room saves real time on delivery day. If you're building out a faster culling routine for a shoot this size, the workflow ideas in 10 tips for a faster photo workflow and the mechanics covered in how AI photo culling actually works are both worth a look before your next big interiors job.
Where the Z9 stops making sense
I wouldn't recommend this body to someone shooting exclusively MLS-standard real estate listings on a volume schedule, twenty houses a week, in and out in fifteen minutes each. For that work a lighter Z6III or even a Z8 with the same sensor in a smaller shell makes more sense, especially once you're handholding through a walkthrough video segment and the Z9's weight starts to matter in your wrist by house number twelve. The price gap over a Z8 is hard to justify too, if the vertical grip and the extra battery capacity aren't things you actually use.
Where it does make sense is the slower, higher-stakes end of the work: architecture firm documentation, high-end residential and hospitality interiors, anything where you're on a tripod more often than not, shooting long bracket sequences, and where a full day of shutter cycles without ever hearing a mechanical click is a genuine quality-of-life improvement around clients and staging crews.
Frequently Asked Questions
Do I need a tilt-shift lens to shoot architecture on a Nikon Z9?
Not strictly. Nikon doesn't currently make a native Z-mount PC lens, so most Z9 shooters either adapt an old F-mount PC-E lens through the FTZ II or shoot with the 14-24mm f/2.8 S or 14-30mm f/4 S and correct verticals digitally afterward. The 45.7MP sensor gives you enough resolution to survive that digital correction without the final file looking soft, but a native shift lens will always give you a cleaner starting frame if that workflow matters to your client's deliverables.
Is the Z9 too heavy for interior and real estate walkthroughs?
For tripod-based stills, no, the weight is a non-issue since the camera isn't in your hands most of the day. For handheld walkthrough video or gimbal work, the roughly 1,340 gram body plus a wide zoom adds up fast over a multi-hour shoot, and a Z8 in the same sensor class but a smaller shell is the more comfortable choice if that's most of your day.
What ISO and bracket settings work best for bright window interiors?
Base ISO 64 is where the sensor's dynamic range is widest, so that's the starting point for nearly every static interior setup. Bracket count depends on the contrast in the room: a 5-frame bracket at roughly 1.3 EV spacing covers most rooms with one dominant window, while a room with several light sources at very different intensities (a kitchen with both a window and LED task lighting, for example) benefits from 7 frames at tighter 1 EV spacing.
Does the electronic shutter cause problems with LED or fluorescent lighting?
It can. Some LED drivers flicker at frequencies that create visible banding with a fully electronic shutter at certain shutter speeds, more so than a mechanical shutter would show. The Z9's flicker reduction setting mitigates this in most cases, but it's worth shooting a test frame at full resolution in any room with mixed or budget LED lighting before committing to a full bracket sequence.