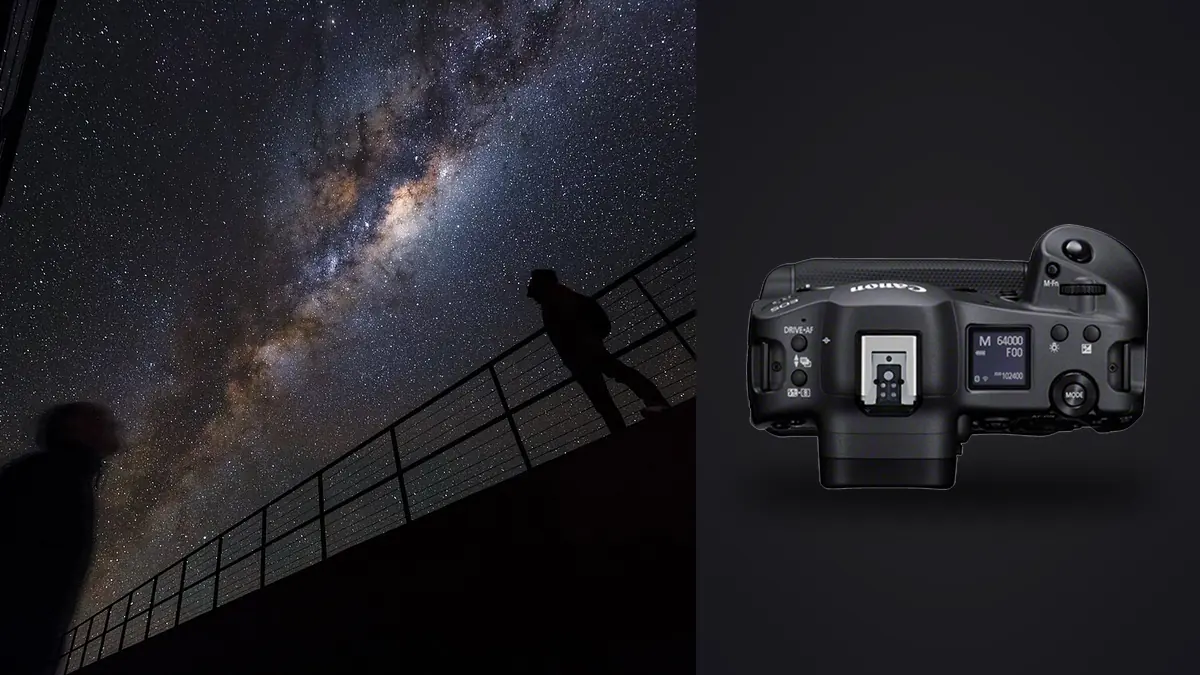
The EOS R3 was never pitched as a night sky camera. Canon built it for sports and wildlife shooters who need 30 frames per second and eye-controlled autofocus tracking a goalkeeper's face across a penalty box. None of that matters once the sun goes down and you're standing in a field with three lenses, a star tracker, and a battery that's already three hours into a session. What does matter, and what nobody mentions in the marketing copy, is the sensor underneath all that speed. I've run the R3 through four separate Milky Way seasons now, plus a handful of tracked deep-sky nights with a small star tracker, and the parts of this camera that make it good at sports are mostly irrelevant at 2 a.m. The parts that make it good at night are almost accidental.
The Sensor Story Nobody Talks About With This Camera
The R3 uses a 24.1-megapixel stacked, back-illuminated full-frame sensor. Canon built the stacked design for readout speed (that's how you get 30fps with a fully electronic shutter and no blackout), but the same architecture happens to help with dark-frame noise. A back-illuminated sensor puts the wiring behind the photodiodes instead of in front of them, so more of each pixel's surface is actually collecting light. At 24 megapixels on a full frame sensor, the R3's pixels are also physically larger than what you get on the 45MP R5, which means each one gathers more photons before you touch ISO at all.
In practical terms: I can push this camera to ISO 6400 for a 15-second wide shot and still get a clean core in the histogram, with chroma noise that cleans up in one pass of Lightroom's noise reduction slider without eating fine star detail. I would not say the same about ISO 12800, where color noise in the shadows starts fighting with faint stars for the same pixels. My working ceiling for anything I plan to stack is 6400, and for anything I'm keeping as a single frame, I'll drop to 3200 and accept a slightly thinner core rather than fight noise later.
Building the Exposure Before the Milky Way Even Rises
Star trailing at the pixel level happens faster than most people expect on a 24MP sensor, because "24 megapixels" sounds forgiving until you remember it's spread across a 36x24mm sensor. I stopped using the 500 rule (500 divided by focal length) years ago because it consistently gives shutter speeds that show trailing when you pixel-peep at 100%. What I actually do in the field is start from a rough NPF-style number, then chimp the first frame at 100% zoom on the rear screen and adjust down from there.
Here's what that looks like across the three things I actually shoot with this body, based on real nights rather than a spec sheet:
| Technique | Lens / Focal Length | Aperture | Shutter | ISO | Frame Count |
|---|---|---|---|---|---|
| Untracked Milky Way (stacked) | RF15-35mm f/2.8L @ 15mm | f/2.8 | 10s | 4000 | 20-25 lights + 15 darks |
| Untracked Milky Way (single frame) | RF15-35mm f/2.8L @ 20mm | f/2.8 | 13s | 6400 | 1 |
| Tracked deep-sky target | RF100-400mm @ 300mm | f/8 | 90s | 1600 | 40-60 subs |
| Star trails (blended) | RF24-70mm f/2.8L @ 24mm | f/4 | 30s x ~2hrs | 800 | 220-240 |
Two things about that table surprise people who've only shot star trails on a crop-sensor body. First, the tracked row uses a stopped-down aperture (f/8 instead of wide open) because at 300mm even a well-polar-aligned consumer tracker introduces enough periodic error that shooting wide open just makes any tracking drift more visible against a softer background; f/8 buys a bit of forgiveness at the edges of the subs. Second, the untracked single-frame row pushes ISO higher than the stacked row on purpose. If I'm not stacking, I need the extra light gathered at capture time because there's no averaging-out of noise happening later.
Manual Focus Is Still Manual, No Matter What the Spec Sheet Promises
The R3's autofocus is genuinely good in low light, rated down to about -7.5 EV with a fast lens, and Dual Pixel CMOS AF II will occasionally lock onto a bright planet or a first-magnitude star if you point the AF point right at it. But I don't trust it for actual astro focus, and neither should you. What I do instead, every single time: switch to manual focus, point at the brightest star or a distant light on the horizon, punch in with the 5x or 10x digital zoom in live view, and turn the focus ring until the point of light shrinks to its smallest, tightest size. Then I take one frame, zoom into the playback image at 100%, and check again. Temperature swings enough over a four-hour session that I'll recheck focus at least twice a night, usually after a lens has been sitting in dropping temperatures for an hour or two and the focus-by-wire ring has crept slightly.
The vari-angle screen actually earns its keep here in a way it doesn't during daytime work. Pointed near zenith on a low tripod, I can flip the screen out and down to check focus and framing without lying on the ground, which after the third or fourth check of the night matters more than it sounds like it would.
Star Trails Versus a Real Stack: Two Different Files, Two Different Failure Points
The single long exposure
The R3 has a built-in bulb timer buried in the shooting menu that lets you program an exposure length beyond 30 seconds without an external intervalometer, up to just under 100 hours if you're patient enough to type it in. I've used it for single 8 to 10 minute trail exposures at low ISO (400-800) on cooler nights, and the stacked sensor's readout keeps thermal noise more manageable over long single exposures than I expected going in, though hot pixels still show up past the 6-minute mark and need a dark frame subtracted to clean up.
The blended sequence
For anything longer than about 15 minutes of trails, I don't trust a single exposure. Too much can go wrong, a headlamp sweeps across the frame, a plane crosses the sky, dew starts creeping onto the front element two hours in and ruins the last third of the shot. Instead I use the built-in interval timer to fire 30-second frames back to back for two hours, then blend the good ones in StarStaX later. This is where the R3's dual card slots earn their place: CFexpress in slot one for write speed during the shoot, SD as a mirrored backup, so a card failure at 1 a.m. two hours from the car doesn't cost the whole session.
Pairing the R3 With a Star Tracker
The R3 has an integrated vertical grip built into the body, unlike the R5 or R6 where you'd bolt one on separately. On a tripod that's a nice-to-have. On a small star tracker rated for a modest payload, it changes what you can put on top of it. A body-plus-grip combo weighs noticeably more than a smaller mirrorless body without a grip, and once you add a 400mm telephoto and a counterweight, you're closer to a tracker's rated capacity than the spec sheet makes it feel. I keep my tracked setups to shorter telephotos (300mm or under) rather than pushing toward 600mm, partly because of weight and partly because periodic error gets a lot less forgiving the longer the lens.
Polar alignment through the R3's live view at 10x zoom works fine for rough alignment, but for anything past about 200mm of focal length I still use a separate polar scope on the tracker itself. The camera's screen is bright enough to wash out faint alignment stars even with brightness turned all the way down, which is a small but real annoyance on a moonless night.
Cold Nights, the LP-E19, and Card Choices
The LP-E19 battery (shared with the 1D X Mark III) is rated for roughly 860 shots under CIPA testing, but that number means almost nothing on an astro night where you're not firing 860 quick frames, you're holding the shutter open and leaving the screen lit for review between exposures. In practice I get a full night, four to five hours in temperatures around freezing, off a single battery if I keep screen brightness low and don't chimp every frame. Below freezing I carry a spare in an inside jacket pocket and swap it around the two-hour mark regardless of the indicator, because cold batteries read their charge state inaccurately and I'd rather swap early than have the camera die mid-sequence on a tracked target I can't easily restart from the same alignment.
On cards: for interval sequences and tracked subs I use CFexpress Type B for the write speed, not because buffer depth matters at 30-second intervals, but because a fast card finishes writing and returns to a ready state faster, which matters when you're trying to keep an interval timer running tight without dropped frames.
What Happens After Sunrise: Sorting a Few Thousand Frames
A single blended star trail sequence produces 200 to 250 nearly identical RAW files. A tracked session across two targets can easily produce 500 subs before you've stopped for the night. None of this is exciting to sort by hand at 6 a.m. with cold fingers, and it's exactly the kind of pile where I've come to rely on local AI culling instead of scrubbing through a filmstrip. I run the whole night's take through imagic before I ever open a stacking program: the sharpness scoring catches the frames a gust of wind or a passing truck's vibration blurred just enough to weaken a stack, and duplicate and burst clustering groups the near-identical tracked subs together so I'm comparing five similar frames against each other instead of five hundred frames against the whole folder. Because it processes everything locally, none of that few-hundred-gigabyte night gets uploaded anywhere before I've even decided which frames are worth keeping.
The other place it saves real time is after stacking, once I've graded the finished composite in Lightroom. I'll build the apply_my_style preset off that one graded file and run it against the handful of single frames and time-lapse stills from the same night that need a matching look, rather than manually matching white balance and curve adjustments across a dozen files by eye. It's a small thing, but on a night that started at 9 p.m. and ended with sorting at sunrise, small time savings in the editing stage are the ones I actually notice. For anyone trying to shrink the gap between shooting all night and having a finished image, that stage of the workflow is worth looking at closely; I wrote more about tightening the whole pipeline in this rundown on faster photo workflows.
Mistakes That Cost Me Frames
A few things I got wrong before I got them right. I shot my first few tracked sessions with image stabilization left on out of habit; with the camera on a moving tracker mount, IBIS has nothing stable to reference and actively worked against sharpness on a couple of subs before I caught it and switched it off. I also learned the hard way that the electronic shutter, while silent and vibration-free, defaults to a rolling readout that can show subtle banding under certain artificial light sources near the horizon (a distant sodium streetlight was enough to do it on one otherwise clean frame), so for anything with a light-polluted horizon in frame I switch back to the mechanical shutter even though the R3's electronic readout is fast enough that I usually wouldn't bother. And more than once I've trusted the in-camera histogram at 2 a.m. without checking focus one more time, which is how I ended up with ninety perfectly exposed, gently soft star trail frames that no amount of sharpening fixed.
Frequently Asked Questions
Does the Canon EOS R3 need an astro modification to shoot nebulae well?
Like almost every unmodified full-frame body, the R3's stock IR-cut filter suppresses a meaningful amount of the deep red H-alpha wavelength that gives emission nebulae their color. You can still capture star clusters, galaxies, and the Milky Way's structure with excellent results straight out of the box. For red emission nebulae specifically, a modified body or a clip-in filter will pull out more of that color than the stock sensor can see.
Is the R3's electronic shutter reliable for long star exposures?
Yes for most situations, and it's genuinely useful since it eliminates any shutter-induced vibration entirely. The one caveat from my own shooting is banding under certain artificial light sources at the edge of frame, which is rare but worth checking your test frames for if you're shooting anywhere near a town.
How many light frames does a Milky Way stack on the R3 actually need?
For a noticeable noise reduction without diminishing returns, 15 to 25 light frames at matched settings has been my sweet spot, paired with an equal-ish set of dark frames shot with the lens cap on at the same ISO and shutter speed. Beyond about 30 frames the improvement flattens out fast relative to the extra stacking and storage time.
Can the built-in interval timer replace an external intervalometer for star trails?
For most sequences, yes. The R3's menu-based interval timer handles frame count and interval spacing without extra hardware. The one thing it won't do that a dedicated external unit sometimes will is trigger complex bulb-ramping exposure changes mid-sequence, which only matters if you're shooting a blue-hour-to-full-dark transition in one continuous take rather than starting the interval once full darkness has settled in.