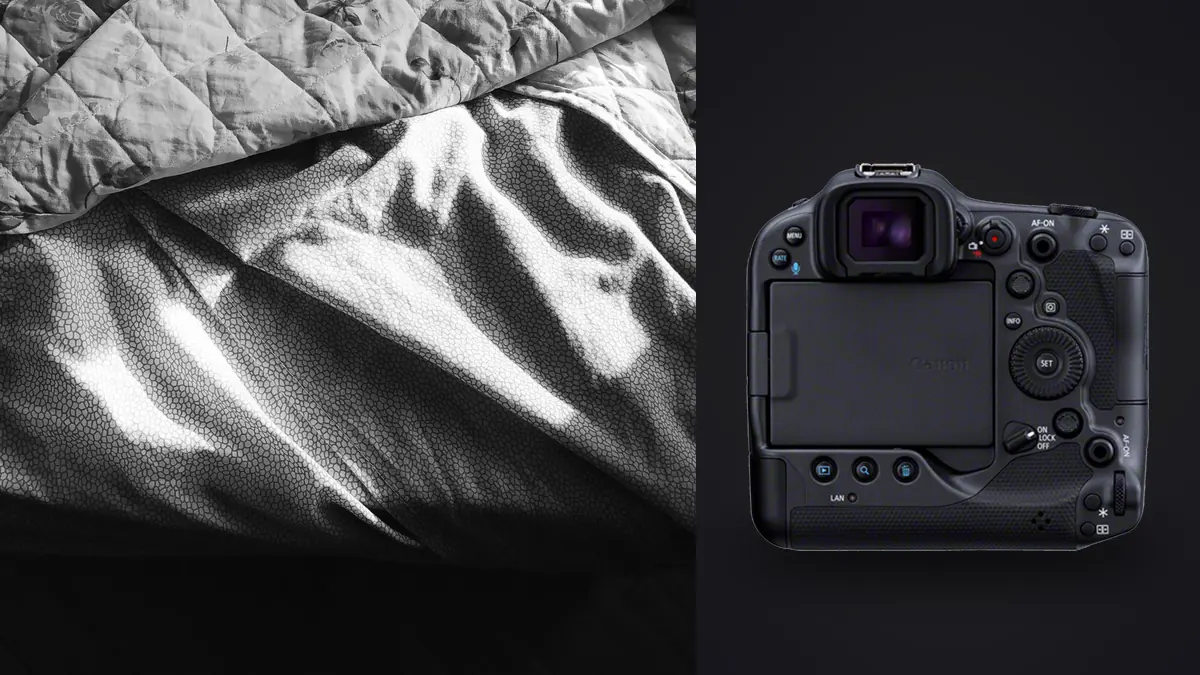
The Canon EOS R3 is designed around speed, subject recognition, and dependable handling, but boudoir photography asks for a quieter kind of precision. The useful features are not the maximum burst rate or the largest possible file count. They are confident eye focus, direct control access, an articulating screen, a robust body, and a stacked sensor that can support quiet capture when the room light permits it.
Advanced technique in this genre is less about complexity than coordination. Focus, light, pose, communication, privacy, and file handling need to support the same intention. The following approach turns the R3 into a responsive portrait tool while keeping the subject's comfort and control central.
Design the session around consent and visual boundaries
Before discussing settings, agree on image scope. Clarify wardrobe range, poses that are in or out, who will be present, whether any images may be shared, and how the subject can pause or withdraw a setup. Consent should remain active during the session. Agreement to one pose or level of coverage is not blanket approval for every variation.
Create a private set. Close blinds where appropriate, control access, remove unnecessary monitors, and disable casual transfers. If an assistant, stylist, or makeup artist is present, everyone should know the boundaries. Keep the rear screen positioned so only intended viewers can see it. The R3's articulating display makes that easier at low angles and during collaborative review.
A concise shot outline reduces improvisation under pressure. Organize it by lighting setup or story rather than by increasingly intimate poses. Begin with easier movement and familiar framing, then progress only if the subject is comfortable. Technical efficiency creates more space for communication, which is the real foundation of a strong portrait.
Use Eye Control AF as a selector, not a promise
The R3's Eye Control AF can move the autofocus pointer according to where the photographer looks in the viewfinder. In a portrait session, that can be useful when a face sits away from the center or when two people occupy the frame. It should be calibrated for the photographer and current viewing conditions before the session, not introduced during a critical pose.
Separate pointer selection from autofocus confirmation in your mental model. Looking toward an eye can nominate the area, while the autofocus system still has to acquire and track the subject. Confirm the displayed target. Hair, a shoulder, mirror edge, or high-contrast garment can compete, especially when the face turns away.
Keep a conventional fallback assigned. A direct button should return to a small area or known focus mode when Eye Control AF becomes distracting. Advanced operation means recovering instantly, not insisting on one feature. For close portraits with a shallow focus plane, move the point to the near eye and avoid rotating the camera after focus.
Shape depth by arranging the pose
Depth of field should be solved partly with posing. If the face, hand, and shoulder are meant to read together, bring them closer to one plane. A hand extended toward the lens may become intentionally soft, but it should not accidentally block the eye or attract focus. Ask for small angle changes and watch how they alter distance.
The R3's 24-megapixel output is ample for many portrait deliveries and encourages accurate framing rather than excessive cropping. Leave enough space for the final aspect ratio and for natural body lines. Do not cut at joints carelessly. A lower camera position can lengthen form, while a higher position can simplify foreground, but either can distort proportions if pushed without intent.
Choose aperture after inspecting the complete pose. A close face may support a wide aperture; a reclining diagonal or paired portrait often needs more depth. Take a magnified confirmation frame whenever camera-to-subject distance changes substantially. The strongest expression is not useful if the required eye falls outside the focus zone.
Build a repeatable two-light logic
A simple key and controlled fill can create many looks without moving every piece of equipment. Place the key to define face and body shape, then use a reflector, dim source, or room surface to set shadow density. Turning the subject a few degrees changes contrast more predictably than adding another light.
For a darker, sculpted frame, use negative fill on the shadow side. A black panel close to the subject absorbs room bounce and gives the key clearer direction. For a softer frame, increase the apparent size of the key and bring the reflector closer. Keep stands outside movement paths and weight them safely.
Watch the background separately. A bright bed sheet, mirror, or lamp can pull attention from the face. Change camera position, flag spill, dim practical light, or let the background fall darker. Light meters and histograms measure exposure, but visual hierarchy decides whether the portrait feels intentional.
Combine movement with a prepared focus zone
Movement can make a session feel natural when it has a clear endpoint. Ask the subject to turn toward the key, settle into a seated position, adjust fabric, or take one slow step. Demonstrate the path in neutral terms, establish where the face will stop, and position the focus area there. Capture a short sequence around the transition.
Use continuous autofocus for motion and switch to single autofocus for settled, exact poses if that gives clearer confirmation. A moderate burst can cover expression and fabric movement without creating hundreds of near-identical frames. Stop shooting when the intended moment is complete, then give the next direction.
Stabilization handles photographer movement, not the subject. Set shutter speed for hair, hands, fabric, and breathing. If the goal is a crisp face with moving fabric, light duration or shutter choice must protect the face while allowing the fabric to move. Make one safe sharp frame before experimenting with deliberate blur.
Control highlights on skin and reflective fabric
Expose from the brightest important skin area. Shoulder, cheek, forehead, satin, and jewelry can clip before darker room elements look properly exposed. Use the histogram and highlight alert, then inspect the relevant channel when saturated light is involved. A bright specular point may be acceptable; a broad patch without texture usually is not.
Modify the source before lowering the entire exposure. Increase diffusion, change the angle of incidence, move reflective material, or feather the light so its center misses the brightest skin. These changes reduce contrast at the cause. Underexposing the subject and lifting everything later can make color and noise harder to manage.
Set a fixed white balance under controlled light. If warm practical lamps remain visible, keep their spill off the key skin area unless mixed color is intentional. Capture a neutral reference after changing the main lighting setup. It helps establish consistency without dictating the final creative warmth.
Test silent shutter under the actual lights
Quiet capture can support a calm room, but electronic shutter must be tested with LEDs and dimmed fixtures. Look for broad bands, partial-frame color changes, or uneven brightness. The R3's stacked sensor handles readout efficiently, yet no camera is immune to every artificial light interaction.
If a problem appears, change shutter speed, remove the offending source, or use mechanical shutter. A soft mechanical sound is preferable to an entire set with hidden bands. Also consider flash compatibility and synchronization when selecting shutter mode. Confirm the complete camera, trigger, and light combination before the subject arrives.
Disable focus-assist illumination and unnecessary sounds when they interrupt the mood. Keep display brightness modest, but not so low that exposure errors disappear. The room should feel controlled rather than technically theatrical.
Review, cull, and protect the files
On-set review should answer specific questions: is the near eye sharp, is skin protected, is the pose within agreed boundaries, and does the subject approve when collaboration is part of the plan? Avoid scrolling casually through previous private images. Use a clean card and job folder for each session.
After verified ingest, a local Windows or macOS app such as imagic can score sharpness, exposure, closed eyes, and composition, then group duplicates and bursts. The files stay on the machine. Automated review cannot judge consent, body language, or personal comfort, so those remain human decisions during every selection pass.
Apply edits non-destructively and export only the approved set. Keep private proofs, final JPEG or TIFF files, and source RAWs under the retention agreement. For more local review practices, see the AI and technology workflow guides.
Use a three-stage practical checklist
Before the subject arrives
- Confirm consent boundaries, access, privacy, and review expectations.
- Calibrate the viewfinder controls and assign a conventional AF fallback.
- Test shutter mode, flash synchronization, LED flicker, cards, and backup body.
- Secure stands, remove trip hazards, and prepare the first comfortable setup.
During the session
- Confirm the selected eye and depth whenever distance or pose changes.
- Direct movement toward a known endpoint and use short sequences.
- Check important skin highlights and mixed-light spill after each setup change.
- Pause immediately when requested and reaffirm boundaries before variations.
Before closing the job
- Verify file copies before cards are formatted or reused.
- Separate technical ratings from consent and delivery approval.
- Inspect exported files and remove metadata according to the agreement.
- Store or delete materials according to the documented retention policy.
Coordinate wardrobe changes with camera checks
A wardrobe change can alter more than color. Reflective fabric may clip, pale material may increase room bounce, dark lace may need more exposure, and a high collar may interfere with face detection. Make one technical frame when each new look reaches the set, then confirm eye focus, highlight texture, and the intended silhouette before beginning movement.
Keep camera distance and height marked when the series needs consistent proportions. If footwear or pose height changes, adjust the framing deliberately rather than tilting the camera from the same spot. Recheck depth when hands, fabric, or accessories extend toward the lens.
These brief pauses also give the subject and stylist a clear transition. The photographer can verify that the new setup remains inside agreed boundaries while the team corrects straps, labels, and folds. A repeatable changeover protects both visual continuity and consent.
Keep the first approved frame from each wardrobe setup flagged as its technical reference. Later selects can be compared against it for exposure, skin tone, and framing without reopening unrelated private images.
Frequently asked questions
Is Eye Control AF required for Canon EOS R3 boudoir work?
No. It can speed target selection after calibration, but standard area selection and eye detection remain reliable alternatives. Keep a direct fallback available.
Should silent shutter always be used in an intimate session?
No. Test it under the room's LEDs and with any flash equipment. Use mechanical shutter if silent capture creates banding, color variation, or synchronization problems.
How many frames should be made during a moving pose?
Use a short sequence around the prepared endpoint, then stop and redirect. The aim is to cover meaningful changes in expression and gesture, not to create volume without purpose.