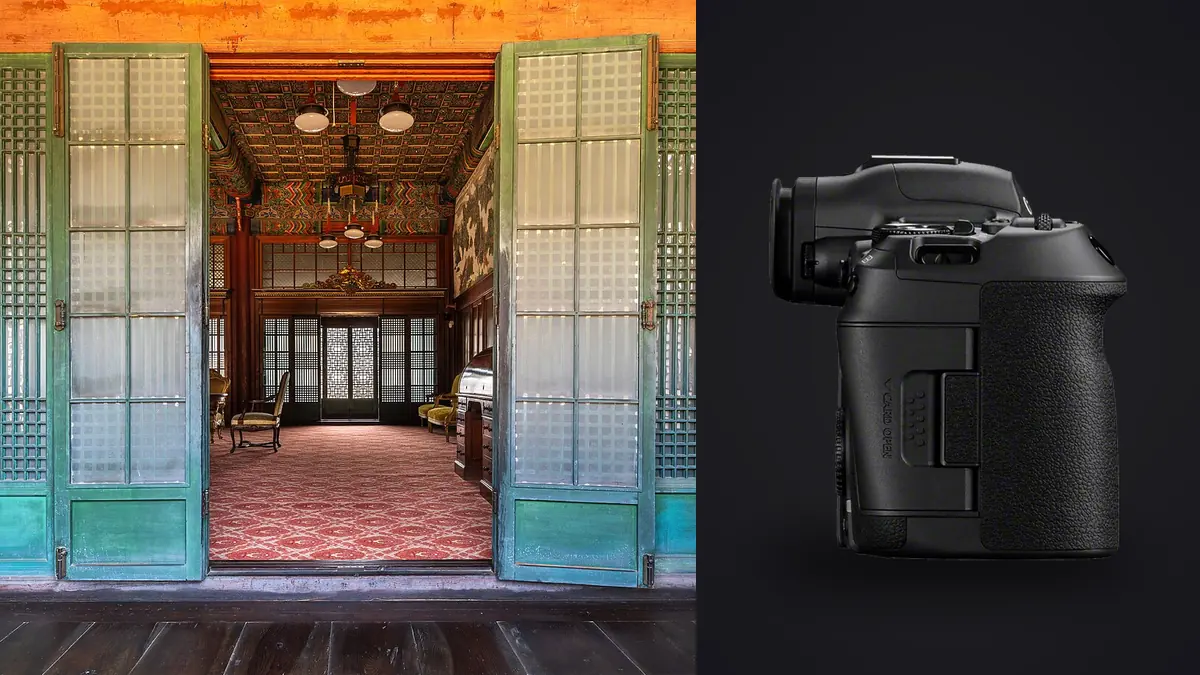
Most of the marketing around the Canon EOS R5 Mark II is aimed at sports and wildlife shooters: eye-controlled autofocus, 30 fps electronic shutter bursts, pre-capture. None of that is why an architecture or interior photographer would buy this body. The reasons that actually matter for shooting rooms, facades, and finished construction sit lower in the spec sheet: sensor readout speed, focus bracketing depth, the electronic level, and how the files behave when you push shadows and highlights fifteen minutes after the shoot ends.
This isn't a full review. It's a look at the specific things that change (or don't) when you point this camera at a lobby, a kitchen, or a building elevation instead of a moving subject, and what that means for the file pile you bring home.
The stacked sensor solves a problem you didn't know you had
The R5 Mark II moved to a back-illuminated, stacked 45 megapixel sensor, up from the non-stacked 45 megapixel sensor in the original R5. For sports shooters that stack is about readout speed and rolling shutter suppression during fast panning. For interior work it solves something different: banding under mixed or flickering light sources.
Interiors are rarely lit by daylight alone. Offices run on LED panels, retail spaces mix tungsten accents with fluorescent troffers, and a lot of commercial fit-outs use dimmable LED drivers that flicker at frequencies a camera sensor can catch mid-readout. On the original R5, shooting with the electronic shutter under that kind of lighting could produce faint horizontal banding, especially at faster shutter speeds. The stacked sensor in the Mark II reads out far quicker, which narrows the window where that banding shows up, and the camera's flicker detection can time the exposure to the light source's peak brightness when using the mechanical or electronic first curtain shutter. It's not a total fix for every LED driver out there, but it's a real, measurable improvement if you shoot a lot of retrofitted commercial interiors.
Lenses: you're still adapting for tilt-shift
The RF mount still doesn't have a native tilt-shift lens as of this writing, so architecture shooters who want true perspective and plane-of-focus control are adapting Canon's EF tilt-shift glass (the TS-E 17mm f/4L, TS-E 24mm f/3.5L II, or the macro-oriented TS-E 90mm) through the EF-EOS R mount adapter. That works fine mechanically, the adapter passes the manual shift and tilt movements through without issue, but it means manual focus and manual aperture for every shot, which slows a shoot down compared to shooting native RF glass.
For a lot of real estate and interior work, you don't actually need the shift. The R5 Mark II's electronic level (both pitch and roll, shown as a live overlay) combined with a grid in the viewfinder gets you close enough in-camera, and vertical convergence on wide shots can be corrected in post using the lens's geometry profile plus a manual transform. Where a shift lens earns its keep is on tall exterior elevations, when you need the sensor plane kept perfectly parallel to the building face without cropping into a wider focal length and losing resolution at the edges. If your work is mostly interiors and smaller commercial exteriors, an RF 16-35mm or RF 24-70mm with careful leveling covers most jobs. If you're regularly shooting six-story facades from street level, budget for the adapted tilt-shift kit.
Focus bracketing depth and buffer, side by side
Interior shots close to a foreground subject (a countertop, a piece of furniture, a doorway) at wide apertures often need more depth of field than one frame at f/8 can deliver without diffraction eating into the far end of the shot. Focus bracketing is the practical answer, and this is a spec that's easy to overlook when comparing bodies.
| Spec (relevant to interior/architecture shooting) | EOS R5 Mark II | EOS R5 (original) | EOS R6 Mark II |
|---|---|---|---|
| Sensor | 45.0 MP, back-illuminated, stacked CMOS | 45.0 MP CMOS, non-stacked | 24.2 MP CMOS, non-stacked |
| Native ISO range | 100-51200 | 100-51200 | 100-102400 |
| IBIS (CIPA rating) | Up to 8.5 stops | Up to 8 stops | Up to 8 stops |
| Max shots per focus-bracket sequence | 999 | 999 | 999 |
| Rolling shutter / banding risk under flicker | Low (fast stacked readout) | Moderate (slower non-stacked readout) | Moderate (slower non-stacked readout) |
| Card slots | CFexpress Type B + SD UHS-II | CFexpress Type B + SD UHS-II | Dual SD UHS-II |
The R6 Mark II is worth including here because plenty of interior photographers deliberately choose the lower-resolution body. Twenty-four megapixels is plenty for web listings and most print sizes below a two-page magazine spread, the files are roughly half the size on disk, and the faster non-stacked readout on a smaller sensor still handles most flicker situations acceptably. Where the R5 Mark II earns its resolution premium is large-format print work, tight crops on wide establishing shots, and clients who want to run their own crops later without you having reshot the angle.
Settings that actually change your keeper rate
- Electronic first-curtain, not fully electronic, for anything under continuous LED lighting. Fully silent shooting is nice for not disturbing an occupied office, but electronic first-curtain shutter combined with flicker detection gives more consistent exposure across a bracket set than the fully electronic shutter does on tricky light sources.
- Set focus bracketing increment based on aperture, not habit. At f/8 on a wide lens shooting a kitchen island four feet away, an increment around 3-4 out of the camera's scale is usually enough for a clean stack; going tighter than that just multiplies your frame count for no visible gain.
- Bracket exposure, not just white balance, for window-heavy rooms. A three or five-frame AEB set at 1.5 to 2 stops apart gives you real highlight recovery for the exterior view through the glass without pushing the interior shadows into noise. Blending that manually or with an HDR merge later beats trying to nurse a single RAW file's dynamic range past what it actually has.
- Turn on the electronic level overlay and leave it on. It sounds obvious but it's the single fastest way to cut down on correction work later, especially on a tripod where a half-degree of tilt is easy to miss through the viewfinder but obvious once you're looking at vertical lines on a 27-inch monitor.
What comes home: the file volume problem
A single well-covered room, shot properly, is rarely one frame. Between a base exposure, an AEB bracket for the windows, and a focus-bracket stack for foreground detail, one angle can easily produce eight to fifteen RAW files, and a modest interior shoot covering ten rooms or spaces adds up fast. At 45 megapixels, that's a lot of data to page through on a laptop screen, and it's exactly the kind of set where the frames look nearly identical at a glance but only one or two per stack are actually the ones you want to keep.
This is where I run the folder through imagic before it goes anywhere near a catalog. It scores sharpness locally on each frame so the sharpest exposure in a focus-bracket sequence gets flagged instead of me squinting at eleven near-identical thumbnails, and it groups the bracket sets and near-duplicate frames together so I'm reviewing clusters instead of a flat grid of a thousand files. All of that runs on the machine, nothing gets uploaded anywhere, which matters when the shoot is an unreleased office fit-out or a property that hasn't hit the market yet.
Once the culling pass is done, the actual folder you're editing from is a fraction of what came off the card, which is the difference between a two-hour edit session and an all-afternoon one.
Consistency across a multi-property day
Real estate and commercial shoots rarely mean one location. A typical day might be three listings or two office suites, each with different ambient light, different wall colors bouncing color casts around, and different white balance needs. Keeping a consistent look across all of it while still adjusting for what each room actually needs is the tedious part of the edit, not the interesting part.
I lean on imagic's apply_my_style feature for the first pass on days like that. It's trained on my own past edits rather than a generic preset pack, so it applies tone and color adjustments that already match how I finish a room, and I'm only manually correcting the outliers (a room with a strong tungsten cast, a shot where the window blew out more than the rest of the set) instead of building every image from a flat starting point. It's a starting point, not a finished edit, but it removes the repetitive part of the job so the manual time goes toward the shots that actually need judgment calls. If you're trying to tighten up a workflow that involves a lot of repetitive per-room correction, it's worth reading through our broader notes on building a faster photo editing workflow, since a lot of the same principles apply whether you're shooting interiors or anything else in volume.
Where the extra resolution is worth it, and where it isn't
Forty-five megapixels is genuinely useful for two things in this genre: keeping detail intact when a client or their marketing team crops a wide shot down to a vertical for social use, and giving you room to correct verticals without cropping the final image into an awkward, cramped frame. It's less useful for straightforward listing photography destined for MLS-sized web images, where a 24 megapixel file downsamples with zero visible difference and takes up half the storage. If your business is high-end architectural work headed for print, magazines, or large-format lobby displays, the resolution pays for itself. If it's mostly web listings on a fast turnaround, it's a nice-to-have rather than a requirement, and the extra file size becomes pure overhead in your storage and backup costs. Photographers weighing which body actually fits their delivery format might also find our comparison of culling tools useful when the bottleneck shifts from the camera to the software: how different photo culling tools compare in 2025.
Frequently Asked Questions
Do I need a tilt-shift lens for the Canon EOS R5 Mark II, or does in-camera correction cover it?
For most interiors and moderate exteriors, the built-in electronic level plus a manual perspective correction in post covers you fine. A tilt-shift lens (adapted from EF, since there's no native RF version yet) is worth carrying specifically for tall exterior elevations where you need the sensor plane kept parallel to the building without cropping into a wider lens.
What's the best exposure bracket setting for a window-heavy room?
A three to five-frame auto exposure bracket at 1.5 to 2 stops apart usually gives enough range to recover a bright exterior view through glass while keeping interior shadow detail clean, without generating so many frames that the blend becomes fiddly to manage later.
Will the R5 Mark II's electronic shutter cause banding under office LED lighting?
Less than the original R5 did, thanks to the faster stacked sensor readout, but it's not immune to every LED driver. Using electronic first-curtain shutter with flicker detection enabled, rather than the fully silent electronic shutter, gives more consistent results on tricky fixtures.
How many RAW files does a typical interior shoot generate, and how do I manage that volume?
A single well-covered angle with an exposure bracket and a focus-bracket stack can produce eight to fifteen frames, so a ten-room shoot easily runs into the thousands of files. Running the folder through a local culling pass before it hits your main catalog, grouping bracket sets and flagging the sharpest frame in each, keeps that volume from turning the edit into a multi-hour slog.