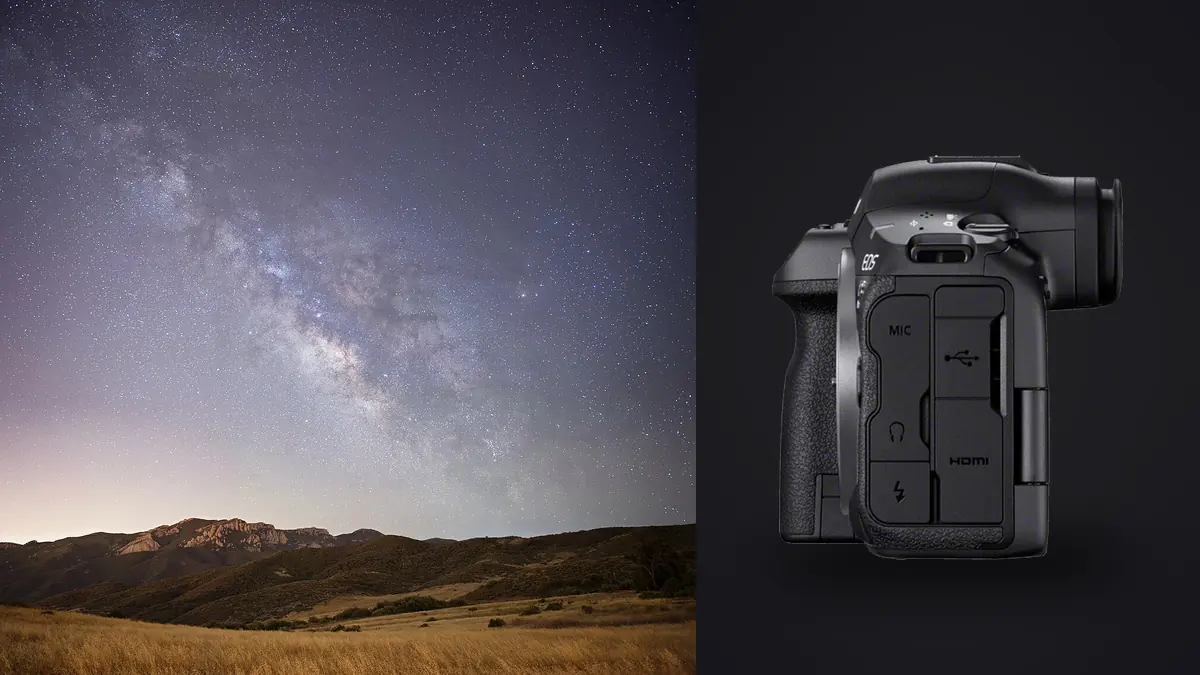
The first time I pointed a Canon EOS R5 Mark II at a genuinely dark sky, I made the mistake every high-resolution shooter makes at least once: I trusted the old "500 rule" from my crop-sensor days and got a frame full of slightly elongated stars that looked fine on the 3.2-inch screen and fell apart the moment I zoomed in on my laptop. A 45-megapixel sensor has no patience for sloppy exposure math. This guide is the exposure, lens, and RAW workflow I've settled into after several seasons of using the R5 Mark II for wide-field Milky Way work and tracked star stacking, written for photographers who already own the body and want to stop guessing.
Why the sensor changes your exposure math
The R5 Mark II uses a partially stacked 45MP sensor paired with Canon's DIGIC X processor and a dedicated DIGIC Accelerator chip, which is a fancy way of saying the readout is faster and the noise-reduction pipeline has more headroom than the original R5. In practice that means ISO 6400 files look noticeably cleaner than they did on the first-generation R5, and ISO 12800 is usable for wide starfields if you're not planning to push shadows aggressively in post. It does not mean you can ignore trailing. High pixel density is unforgiving of small movement, and 45 million photosites packed onto a full-frame sensor means each individual star covers fewer pixels than it would on a 24MP body. Any elongation that would be invisible at 24MP becomes obvious the moment you view a 45MP file at 100%.
This is the trade-off nobody mentions when they talk up the resolution bump: more megapixels buys you cropping room and print size, but it tightens your maximum single-exposure window before stars stop looking like points. If you're coming from an R6 Mark II or an older 6D, expect your safe exposure times to drop by roughly a quarter to a third at the same focal length.
Dialing in exposure without star trails
The 500 rule (500 divided by focal length) was designed for film-era resolution and doesn't hold up on this sensor. I now use a tighter NPF-style calculation and then shave a bit more off in the field once I've checked a test frame at full zoom. Here's what that actually looks like across the focal lengths I shoot most often for nightscapes and Milky Way panoramas:
| Focal length / aperture | Old "500 rule" ceiling | NPF-style ceiling (45MP) | What I actually use |
|---|---|---|---|
| 14mm at f/2.8 | ~36s | ~16s | 13-15s |
| 20mm at f/1.8 | ~25s | ~10s | 8-10s |
| 24mm at f/1.4 | ~21s | ~8s | 6-8s |
| 35mm at f/1.4 | ~14s | ~5s | 4-5s |
| 50mm at f/1.2 | ~10s | ~4s | 3-4s |
Those "what I actually use" numbers run a little short of the calculated ceiling on purpose. I'd rather stack twelve extra clean frames than throw away three because a gust of wind shook the tripod on second nineteen of a twenty-second exposure. If you're shooting on a tracker, none of this matters in the same way and you can push individual subs to two or three minutes, which I'll get to below.
Lenses that actually earn their place in the bag
Canon's own RF 15-35mm f/2.8L is the lens I reach for most because it covers the classic wide Milky Way framing and holds coma reasonably well into the corners by f/2.8, though it's not perfectly clean at 15mm wide open. The RF 14-35mm f/4L is lighter and sharper stopped down, but the f/4 max aperture forces you into higher ISOs than I'm comfortable with for single-exposure work unless you're tracking. For genuinely fast glass, the Sigma 14mm f/1.4 DG DN (native RF mount as of the past couple of years) gathers noticeably more light than either Canon zoom and lets you shave a stop or more off your ISO, which matters when you're stacking dozens of frames and want to keep read noise down across the whole set. On the tighter end, the RF 24mm f/1.4L is my pick for star-scapes where the foreground carries more weight than the sky, since 24mm still resolves individual constellations without the barrel distortion you get fighting a 14mm at the edges.
Coma control matters more than most spec sheets let on. A lens that's "sharp" in daylight reviews can still smear stars into little seagulls in the corners at f/1.4 to f/2. If you're buying new glass specifically for this, look for astrophotography-focused reviews that show 100% crops of the corners at maximum aperture, not center-frame resolution charts.
Manual focus is non-negotiable after dark
Dual Pixel CMOS AF on the R5 Mark II is rated down to roughly -6.5 EV with an f/1.2 lens attached, and it genuinely does better in low light than most bodies I've used, but it still hunts on a featureless night sky more often than I'd like. My routine is to find a bright star or a distant light, switch to manual focus, punch in with the 10x magnified live view, and nudge focus until the star shrinks to its tightest point. The in-camera focus guide overlay helps get you close, but the magnified view is where the actual work happens. Once focus is set, I tape the ring or switch the lens to manual-only mode so a stray bump doesn't undo ten minutes of work. Autofocus stays off for the rest of the session, full stop.
Interval shooting and keeping the battery alive
The built-in intervalometer handles star-trail sequences and stacking runs without an external remote, which is one less thing to carry and one less thing to fail in the cold. For a stacking session I'll typically set 20-30 frames at whatever exposure the table above suggests, with the interval gap set to the minimum the camera allows so I'm not losing sky time between frames. Long exposure noise reduction gets switched off entirely for this kind of shooting; LENR doubles your time per frame by shooting a dark frame after every light frame, and since stacking software does its own noise averaging across many exposures, you're better off using that time to capture more light frames instead.
Cold drains the LP-E6P faster than the spec sheet suggests, especially once you're below freezing on a clear winter night, which is exactly when the sky is at its best. I carry two spares in an inside jacket pocket and keep the camera powered through a USB-C power bank whenever I'm running a long stacking sequence, which also means I'm not swapping batteries mid-sequence and introducing a gap in the frame timing. Turn off GPS logging and Bluetooth if you're not using them; neither does anything for image quality and both quietly chew through a charge over a three-hour session.
The RAW capture plan for stacking
For a proper stacked image I capture four frame types: lights (the actual sky exposures at the settings from the table above), darks (same exposure time and ISO with the lens cap on, shot at the end of the session while the sensor is still at ambient temperature), flats (a even-lit frame through the same lens and focal length, usually shot at dawn against a white t-shirt stretched over the lens), and bias frames (fastest possible shutter speed with the lens capped, to characterize sensor read noise). The CR3 files come off the R5 Mark II at roughly 55-90MB apiece in 14-bit RAW depending on scene detail, so a 25-light stacking run with matching darks and flats adds up to somewhere north of 3GB before you've even started editing. Dual card slots mean I write RAW to the CFexpress card and a JPEG backup to the SD card, so if a card fails mid-session I'm not walking away with nothing.
One habit that's saved more than one session: shoot a handful of test exposures at your target settings before committing to a full 25-30 frame run, and check them at full magnification on the rear screen for coma, trailing, and stray light from a distant town glow you didn't notice with the naked eye. It's a lot cheaper to catch a framing or focus problem on frame three than frame twenty-five.
From memory card to finished stack
A single night of star-stacking work on this camera routinely produces 300-600 near-identical frames once you count lights, darks, flats, bias frames, and the test shots you didn't delete in the field. Scrolling that many 45MP thumbnails looking for the two or three subs a tripod bump or a passing satellite ruined is genuinely tedious, and it's the part of the workflow I've offloaded to AI-assisted culling through imagic. Its local sharpness scoring flags the handful of subs where focus drifted or wind shook the rig hard enough to soften stars, and because everything runs on the machine rather than round-tripping through a cloud upload, I'm not waiting on a multi-gigabyte transfer before I can start reviewing a folder that size. The burst and near-duplicate clustering is also genuinely useful here, since a run of twenty-five 8-second exposures at the same settings is about as close to a burst as anything a sports shooter would produce, and having them grouped rather than presented as five hundred separate thumbnails makes the review pass take minutes instead of the better part of an hour.
Once the culled lights, darks, flats, and bias frames are sorted, they go into dedicated stacking software (more on that below), and the resulting single stacked TIFF gets its color and contrast pass in Lightroom or Photoshop. If you shoot astro regularly enough to have a consistent look you like, imagic's apply_my_style feature is worth setting up specifically for this: train it on a batch of Milky Way frames you've already graded the way you want, and it'll carry that same treatment across a new season's stacks without you rebuilding the same curve and color adjustments from scratch every time you're back from a dark-sky trip. It's a small thing, but when you're processing four or five stacked images from the same trip, not re-deriving your white balance and contrast recipe each time adds up.
Stacking software: what actually reads a Canon CR3
Not every stacking tool handles Canon's CR3 format equally well, and this trips people up more than it should given how long CR3 has been Canon's default format.
| Software | Platform | CR3 handling | Best for | Price |
|---|---|---|---|---|
| DeepSkyStacker | Windows only | Native in recent 64-bit builds | Tracked deep-sky stacks with full dark/flat/bias calibration | Free |
| Sequator | Windows only | Direct read, no conversion needed | Fast untracked Milky Way stacks with sky-only masking | Free |
| Starry Landscape Stacker | macOS only | Direct read via macOS RAW support | Untracked nightscapes with complex foreground/sky masks | $69 one-time |
| PixInsight | Windows, macOS, Linux | Native RAW module, full calibration control | Deep processing, gradient removal, advanced weighting | $319 one-time |
| Photoshop (Stack Mode) | Windows, macOS | Via Camera Raw's CR3 support | Quick median-stack noise reduction on already-culled frames | Subscription |
I lean on Sequator for quick untracked Milky Way blends because the sky detection is fast and it handles the R5 Mark II's files without complaint, and I switch to PixInsight when I'm working a tracked deep-sky target and want proper weighted stacking with rejection algorithms rather than a simple average.
Do you still need a star tracker?
The honest answer is: it depends on what you're photographing, not how good your camera's high-ISO performance has gotten. For wide Milky Way frames at 14-24mm, the improved noise floor on the R5 Mark II genuinely narrows the gap between tracked and untracked shooting; stacking fifteen to twenty untracked 8-15 second frames gets you most of the way to what a tracker would give you at those focal lengths, with a lot less setup time and no polar alignment to fuss over in the dark. Where a tracker still earns its keep is anything past about 50mm, or deep-sky targets like nebulae and galaxies where you genuinely need two-to-five-minute individual subs to pull in faint detail. I bring a Star Adventurer GTi on trips where I know I want to shoot a specific deep-sky target, and leave it in the car on trips that are purely about wide nightscapes.
Field mistakes worth avoiding
Condensation is the one that's cost me the most frames. A camera carried from a warm car into cold night air will fog the front element within twenty minutes if you don't give it time to acclimate, and by the time you notice a soft halo creeping across your frames you've usually already burned through half your shooting window. I now leave the bag outside, zipped, for at least thirty minutes before I start setting up. A cheap lens-wrap dew heater powered off the same USB-C battery bank running the camera has all but eliminated the problem on longer sessions.
The other habit worth building is checking your histogram, not just your preview brightness, on the first test frame. The rear screen looks bright enough to convince you an exposure is fine when the actual histogram is crammed against the left edge with almost no data to work with. A slightly overexposed sky (as long as you're not clipping stars) gives stacking software more to work with than an underexposed one, since you can always pull exposure back down in post but you can't recover detail that was never captured. For fast batch review of a night's test frames once you're back at the computer, sorting them by focus score rather than eyeballing each one is a faster way to catch this kind of thing before you commit to a full sequence, and it fits into the same faster-review habits covered in our workflow speed tips.
Frequently Asked Questions
Does the EOS R5 Mark II stack star images in-camera?
No. Unlike some Olympus/OM System bodies that offer in-camera Live Composite or Starry Sky AF modes, the R5 Mark II has no built-in stacking function. It has focus bracketing for macro work and a capable intervalometer, but combining multiple exposures into a single low-noise star image is a post-processing step you'll do in dedicated software like DeepSkyStacker, Sequator, or PixInsight.
What ISO actually holds up for Milky Way shots on this body?
ISO 6400 is where I do most of my single-exposure wide-field work; noise is present but manageable and doesn't fight you in post. ISO 12800 is usable if you're stacking multiple frames, since averaging across subs suppresses random noise, but I avoid it for single-shot work where I'm not stacking. Beyond 12800 the shadow detail starts degrading faster than the extra light-gathering is worth for most nightscape purposes.
Do I need a star tracker given how much better high ISO performance is now?
For wide-field Milky Way work, not necessarily; stacking a set of shorter untracked exposures closes most of the gap. For anything telephoto or deep-sky where you need multi-minute subs to pull in faint nebulosity, yes, a tracker is still the difference between a usable image and a noisy one no amount of stacking will fully rescue.
How many light frames should I capture for a clean stack?
Noise reduction from stacking follows a square-root relationship, so going from 5 to 20 frames gives you roughly double the noise improvement, but going from 20 to 80 only buys you another factor of two on top of that. In practice I find 15-25 frames hits the point of diminishing returns for a typical nightscape session, and I'd rather spend extra sky time on a second composition than push one stack to 60 frames for a marginal gain.