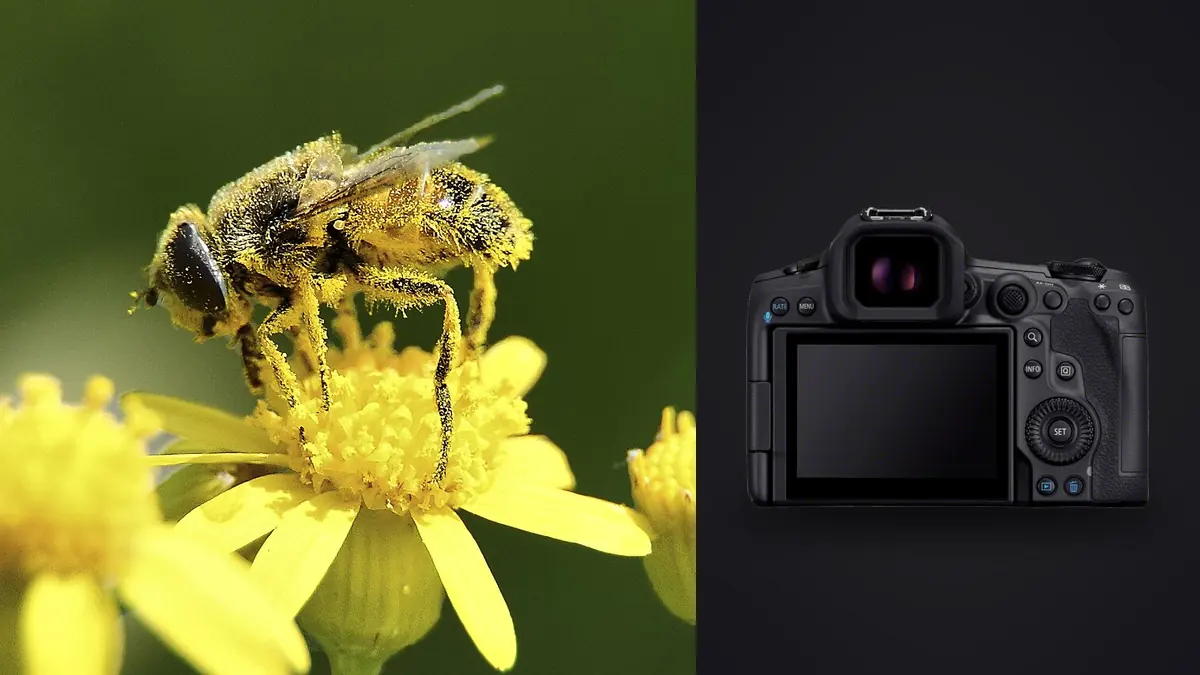
Macro and insect work exposes a camera's weaknesses faster than almost any other genre. Depth of field collapses to a sliver, subjects move on their own schedule, and you're often shooting handheld in low light under a canopy at 6am before the wind picks up. The Canon EOS R5 Mark II wasn't marketed as an insect camera specifically, but a stacked sensor, a faster buffer, and a pre-shutter buffering mode change how you can approach jumping spiders, dragonflies, and dew-covered damselflies compared to the original R5. After several months shooting it alongside a RF 100mm macro and an MP-E 65mm, here's what actually matters and what doesn't.
What Actually Matters for This Genre
The R5 Mark II carries a 45-megapixel stacked, back-illuminated sensor, the same resolution figure as the original R5 but with a much faster readout. For insect photography that readout speed matters more than the megapixel count does. Rolling shutter distortion on a fast-beating dragonfly wing or a fleeing beetle used to be the main argument against shooting electronic shutter on the original R5. On the Mark II, electronic shutter at up to 30fps is usable for erratic subjects in a way it wasn't before, and you keep full silence, which matters when you're six inches from a jumping spider that startles at the mechanical shutter's click.
In-body stabilization rated up to 8.5 stops sounds like a video spec, but it changes handheld macro too. At 1x magnification with the RF 100mm f/2.8L Macro, IBIS lets you shoot a stop or two slower than you'd otherwise risk, which matters because macro apertures are already forcing you toward f/8 to f/13 for usable depth of field, and every extra stop of shutter speed headroom buys you a lower ISO on a dim forest floor.
The feature that's changed my actual keeper rate the most is Pre-Continuous shooting. Half-press the shutter with continuous drive engaged and the camera buffers roughly half a second of frames before your finger completes the press. A bee launching off a flower head, a mantis striking, a damselfly's wings opening before takeoff: these are all moments you react to a beat too late with your eyes, and Pre-Capture closes that gap. It's not magic, and it eats through card space fast, but for behavior shots it's the single biggest workflow change from the original R5.
Autofocus: Where It Helps and Where You're On Your Own
Canon's subject detection on the Mark II covers people, dogs and cats, birds, horses, and vehicles. Insects are not a dedicated detection category, and that's worth knowing before you buy the camera expecting it to lock onto a hoverfly's compound eyes the way it locks onto a dog's. In practice, leaving the camera on Auto subject detection with a small AF area often works reasonably well on larger, high-contrast insects like dragonflies and bumblebees against a plain background, because the algorithm is generalizing from shape and edge detail rather than a trained insect model. On small, low-contrast, or camouflaged subjects (aphids, most moths at rest, anything green on green), it hunts, and you're better off dropping to a single AF point or switching to manual focus with the focus guide overlay.
For extreme magnification work with the MP-E 65mm f/2.8 1-5x, autofocus is irrelevant anyway. That lens has no AF motor. You focus by moving the camera (or a rail) back and forth until the plane lands where you want it, which at 5x magnification is a matter of fractions of a millimeter. The R5 Mark II's stabilized viewfinder and clean high-magnification live view make that manual hunt noticeably less fatiguing than it was on older bodies, but it's still a manual skill you build over a season, not something the camera does for you.
One practical habit: back-button focus with AF-ON separated from the shutter release, combined with a small Zone AF area rather than the largest tracking box. Insects don't fill the frame the way a bird or a dog does, so a large tracking area tends to grab the leaf behind the subject instead.
Focus Bracketing in the Field
The in-camera focus bracketing menu (Shooting menu, Focus Bracketing) lets you set up to 999 shots with an adjustable focus increment and exposure smoothing to compensate for aperture-related brightness shifts across the stack. For a resting butterfly or a beetle on bark, I typically run 20 to 40 frames at increment 3 with the aperture around f/8, then merge the sequence later in stacking software. The camera does not merge the stack itself; it captures the bracketed sequence and you combine the frames afterward.
Wind is the enemy here more than anything the camera controls. A bracket set of 30 frames at even a modest interval takes several seconds to capture, and if the subject or the surrounding foliage moves during that window, the stack has misaligned frames that either get discarded in post or introduce ghosting. Early morning, before wind picks up and while cold-blooded insects are still sluggish from overnight temperatures, is genuinely the best window for bracketed macro, not just a photography cliché.
Settings by Scenario
The right combination of drive mode, aperture, and AF approach changes a lot depending on what's in front of you. This is roughly how I set up for five situations I run into repeatedly:
| Scenario | Drive Mode | Aperture | AF Approach | Why |
|---|---|---|---|---|
| Dew-covered damselfly at rest, dawn | Focus bracket, 20-30 frames, increment 3 | f/8 | Single-point AF to establish start point, then manual lock | Cold insects barely move; you can afford the slow, careful approach for real depth |
| Bee or hoverfly working a flower | Electronic shutter, 20-30fps, Pre-Capture on | f/11 | Zone AF with Auto subject detection | Erratic hovering defeats single-point tracking; Pre-Capture buys back reaction time |
| Extreme magnification (MP-E 65mm, 2-5x) | Single shot, focus rail | f/5.6-f/8 | Manual only, lens has no AF | Depth of field is under a millimeter; stopping down further just adds diffraction softness |
| Dragonfly in flight over water | Mechanical 12fps (electronic risks wing wobble off bright water glare) | f/9 | Zone AF, subject registered and tracked | Trades frame rate for cleaner wing shape when reflections stress the rolling shutter |
| General handheld macro walk | Continuous low, ~5fps | f/10 | Focus guide plus single-point manual override | Keeps file counts sane for culling later and conserves buffer for the shot that matters |
Lens Pairings That Actually Get Used
The RF 100mm f/2.8L Macro IS USM is the lens I reach for most. Its 1.4x maximum magnification (via the internal spherical aberration control element) gives a bit more reach than a standard 1:1 macro without needing extension tubes, and the built-in stabilization stacks with the body's IBIS for genuinely usable handheld shots at moderate magnification. For anything beyond that, the MP-E 65mm covers 1x to 5x but demands a tripod or rail, off-camera flash, and patience; it is not a lens you casually hand-hold for a walk-around session.
For skittish subjects that won't tolerate a lens six inches away, a longer telephoto with extension tubes gets you working distance. An RF 100-400mm with a 12mm or 20mm extension tube gives up some magnification compared to a true macro lens but lets you photograph a dragonfly perched three feet away instead of forcing an approach that flushes it. It's a genuine trade-off, not a strict upgrade, and I switch between the two setups depending on how tolerant the subject is that day.
Light in Dense Habitat
Under canopy or in tall grass, ambient light is rarely enough for the small apertures macro work demands. A twin-flash bracket (Canon's MT-26EX-RT or a third-party equivalent) mounted around the lens hood gives even, shadowless light and lets you shoot f/11 to f/16 at 1/200s sync speed without cranking ISO into noise territory. Diffusion matters more than flash power here: a bare macro flash produces harsh, clinical highlights on shiny insect exoskeletons, while even a cheap diffuser dome softens that into something that reads as natural light. On overcast days I skip flash entirely and lean on the IBIS headroom instead, since flat light is often more flattering on iridescent wing surfaces than direct flash anyway.
After the Shoot: Getting Through the RAW Pile
A single morning of focus-bracketed macro plus a few Pre-Capture bursts on active insects routinely leaves me with 800 to 1,500 RAW files, and a meaningful chunk of those are near-duplicates from bracket sequences and burst runs. Sorting that manually, frame by frame, is where a lot of macro shooters lose the evening. This is the part of the workflow where I actually rely on imagic rather than scrubbing through Bridge or Lightroom by eye. It runs entirely on the machine, so 45-megapixel RAW files never leave the laptop for a cloud pass, which matters given how large a day's macro take gets.
Two things specifically help with this genre. Imagic's local sharpness scoring is useful for picking the true focus peak out of a bracket sequence, since with a shallow-DOF subject the sharpest frame in a stack often isn't obvious at a glance on a laptop screen, and scoring the whole set numerically catches the frame you'd otherwise miss. The duplicate and burst clustering groups a 30-frame bracket set or a Pre-Capture burst together automatically, so you're reviewing five or six clusters instead of scrolling through hundreds of nearly identical thumbnails one at a time. Once a season's worth of macro edits are done, the apply_my_style preset feature, trained on your own previous edits rather than a generic filter, speeds up the color pass on the next batch, since insect wings and dew have their own particular color and contrast needs that a stock preset rarely nails on the first try.
If you're new to culling software generally and want the mechanics behind sharpness scoring and clustering explained in more depth, how AI photo culling works covers that ground. For getting a large single-day take down to a manageable edit list faster, 10 tips for a faster photo workflow is worth a look too.
Field Logistics
The new LP-E6P battery gets you through a longer morning than the LP-E6NH did on the original R5, which matters when Pre-Capture and high frame rate bursts are both power-hungry habits. Older LP-E6NH and LP-E6N batteries still work in the Mark II, just with reduced total shots, so it's worth carrying the newer battery as your primary and the old ones as backup rather than the other way around. Dual card slots (CFexpress Type B and SD UHS-II) mean you can write RAW to the fast card and a JPEG backup to SD, though for macro bracket sequences I just write everything to CFexpress since the write speed keeps the buffer clearing fast enough to start the next bracket sooner.
Weather sealing on the body holds up fine to the morning dew and occasional light rain that comes with dawn insect photography, though the MP-E 65mm and most extension tube setups are less sealed than the body itself, so a rain cover is still worth packing rather than trusting the lens alone.
Frequently Asked Questions
Does the R5 Mark II's animal eye detection track insects the way it tracks birds or dogs?
No. Insects aren't a dedicated subject class in Canon's detection system, which currently covers people, dogs, cats, birds, horses, and vehicles. On larger, high-contrast insects like dragonflies against a plain background, Auto detection sometimes locks on reasonably well anyway, but on small or camouflaged subjects it hunts. Single-point AF or manual focus with the focus guide is the more reliable approach for most true macro work.
Is 45 megapixels enough resolution for small insects, or should I crop heavily instead of getting physically closer?
Cropping a 45MP file down to isolate a small subject works better than it did on older 20-24MP bodies, but it's still a fallback, not a strategy. Getting physically closer with a true macro lens or extension tubes preserves detail and depth-of-field control that cropping can't recover after the fact. Treat the extra resolution as insurance for the shots where you couldn't get close enough, not a substitute for the right lens.
Should I shoot RAW or RAW+JPEG for focus bracket sequences, given how many frames a set produces?
RAW only, generally. A 30-frame bracket set already doubles your storage and file count if you add JPEGs, and the JPEGs add nothing for stacking since you'll merge from RAW in dedicated stacking software regardless. The bigger practical problem is sorting that many RAW files afterward, which is where culling software that clusters bracket sequences together saves real time compared to reviewing each frame individually.
Does in-body stabilization replace a tripod or focus rail for macro work?
Only at moderate magnification. IBIS makes handheld shooting with something like the RF 100mm macro at 1x genuinely practical in a way it wasn't on older stabilization systems. Past roughly 2x magnification, and especially with a manual-focus lens like the MP-E 65mm, depth of field gets so thin that even IBIS-smoothed handholding isn't precise enough; a rail or tripod is still the right tool for extreme magnification and bracket sequences.