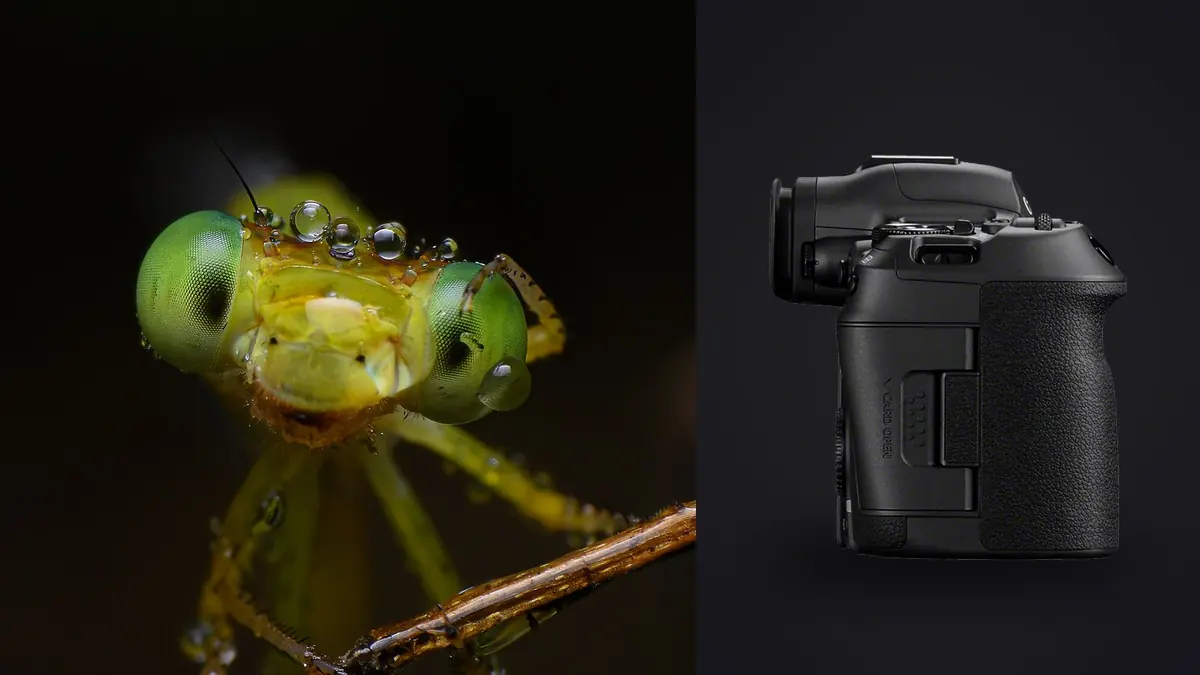
Why the R5 Mark II Changes the Calculus for Bug Photography
Macro insect work punishes cameras in ways landscape or portrait shooting never does. You are working at magnifications where a sneeze shifts the focal plane by a millimeter, apertures have to be closed down far enough that diffraction becomes a real cost, and the subject is frequently trying to fly, jump, or bite something before you get a usable frame. The Canon EOS R5 Mark II lands in this world with a handful of genuinely useful upgrades over the original R5, and a couple of features that read well on a spec sheet but barely register once you're on your knees in wet grass at six in the morning.
The short version: the stacked 45-megapixel sensor and its faster readout matter more for insect work than most general reviews give them credit for, the in-body stabilization is a real difference-maker for handheld macro, and the in-camera focus bracketing tool has quietly become one of the most useful things in the body for anyone stacking beetles, moths, or spider portraits. None of that means autofocus magically finds a jumping spider's eyes for you. It mostly doesn't, and I'll get into why further down.
The Sensor and Shutter Details That Actually Matter at 1:1
Forget the headline 8K video specs for a second, they are irrelevant to still macro work. What matters here is that the R5 II's sensor is stacked, which means the electronic shutter reads out fast enough to shoot at up to 30fps with continuous autofocus and none of the skewing you'd get on a rolling-shutter sensor if a dragonfly's wings are vibrating mid-frame. At high magnification, wing blur from rolling shutter distortion (not motion blur, actual geometric skew) used to be a real problem on older mirrorless bodies. It isn't here.
The pre-continuous shooting mode is the sleeper feature for insects specifically. Half-press the shutter and the camera buffers roughly half a second of frames before your finger fully commits, so when a fly finally takes off from a leaf you've already captured the wind-up. I use this constantly on skittish subjects like tiger beetles that bolt the instant they sense a shadow crossing them.
In-body stabilization is rated up to roughly 8.5 stops with coordinated lenses, and while that number is measured under conditions no macro shooter will replicate, the practical effect is real: handheld shots at 1:1 or beyond are noticeably easier to keep steady than they were on the original R5. That doesn't replace a focus rail or tripod for serious stacking work, but for opportunistic single-frame shots of a mantis you found while walking the dog, it buys you shutter speeds a stop or two slower than you'd otherwise trust.
Picking Glass: Working Distance Is the Whole Game
Magnification numbers get all the attention, but working distance is what determines whether you get the shot at all. Most insects have a flight or flee distance, and if your lens forces you inside it, the subject leaves before you focus. Here's how the common R5 II macro pairings actually behave in the field, not on paper.
| Lens Setup | Max Magnification | Working Distance at Max Mag | Best For | Real Trade-off |
|---|---|---|---|---|
| RF 100mm F2.8L Macro IS USM | 1.4x | ~13cm (5 in) | Dragonflies, butterflies, general insect portraits | 1.4x still isn't enough for eye detail on anything smaller than a large ant |
| Canon MP-E 65mm f/2.8 1-5x | 1x to 5x | <4cm at 5x | Jumping spider eyes, mite-scale detail, ant faces | No autofocus at all, no infinity focus, you focus by rocking on a rail |
| RF 100mm + 12mm extension tube | ~1.8x effective | ~9cm | Squeezing extra reach without buying a second lens | Loses close to a full stop of light and AF hunts more in dim understory |
| RF 24-105mm F4L + close-up diopter | ~0.5x | 25-30cm | Larger, flightier subjects like dragonflies sunning on reeds | Corner softness wide open, no substitute for true macro glass |
For most people starting insect macro on the R5 II, the RF 100mm is the right first purchase. The MP-E 65mm is genuinely brutal to use (fully manual, punishingly shallow depth of field, and you'll throw away most of your frames while learning the rocking-focus technique) but it's the only practical way to get past roughly 2x magnification without extension bellows or reversed lenses.
In-Camera Focus Bracketing for Stacked Insect Portraits
At high magnification, depth of field measured in fractions of a millimeter is the central problem of insect macro, more than lighting or even the insect cooperating. The R5 II's built-in focus bracketing lets you set a shot count (up to 999, though I've never gone past about 60 for a single beetle), a focus increment, and an exposure smoothing option, then fires the whole sequence automatically. For a stationary or torpid subject (cold mornings are your friend here, insects are sluggish before the sun warms them), this is dramatically faster than racking focus manually between shots.
A few settings actually matter for insects specifically. Set the increment small (1-3) for anything under 2x magnification, because the depth of field at those magnifications is thin enough that jumping in bigger steps leaves visible seams when you stack the frames later in software like Helicon Focus or Zerene Stacker. The camera doesn't do the stacking itself, it just captures the sequence; you still need dedicated stacking software to merge them. Also worth knowing: the bracketing sequence aborts if the insect moves between frames, which happens more than you'd like, so budget for several failed attempts per successful stack.
This is also where a 60-frame stack of a single weevil turns into a real culling problem. You don't need all 60 frames in your final edit, you need the handful that are actually sharp on the plane you care about, and picking through near-identical macro frames by eye is slow and easy to get wrong. I run these stacks through imagic before touching stacking software, since its local sharpness scoring flags which frames in the sequence are genuinely in focus versus which ones drifted when the insect shifted mid-bracket. It runs entirely on the machine, nothing gets uploaded, which matters when you're working through a card full of RAW files in the field with no signal anyway.
Autofocus Reality Check: Eye Control AF Doesn't Know What a Weevil Is
Canon's subject-detection autofocus on the R5 II recognizes people, animals (dogs, cats, birds), and vehicles. Insects are not a recognized category, and testing this repeatedly in the field, the camera does not reliably lock onto an insect's eyes the way it does a bird's. Occasionally it will grab focus on something insect-shaped if the composition resembles a small animal's face closely enough, but treat that as a happy accident, not a workflow.
What actually works is dropping to a single small AF point (or Spot AF) and placing it manually on the compound eye, combined with back-button focus so a half-press doesn't re-trigger a hunt every time the insect twitches. Eye Control AF, which tracks where you're looking in the viewfinder and moves the focus point there, is more useful for macro than I expected going in, since it lets you shift the AF point without taking a hand off the lens barrel to nudge the joystick, which matters when you're also managing a focus rail or a diffuser with your other hand.
Beyond about 1.5x magnification, autofocus becomes unreliable enough that most experienced macro shooters switch to manual focus entirely and move the whole camera forward and back to find focus, rather than turning the focus ring. The MP-E 65mm doesn't even offer autofocus as an option, so this technique is mandatory once you're using it.
Flash, Diffusion, and Freezing Wingbeats
Ambient light alone rarely cuts it for insect macro. Stopping down to f/11-f/16 for usable depth of field at 1:1 and beyond eats several stops, and handholding at those apertures without flash means either unusably high ISO or motion blur from a subject that never fully holds still. A twin-flash setup like Canon's MT-26EX-RT mounted around the lens barrel, or a ring light, solves the exposure problem and, done right, freezes wing motion far more effectively than shutter speed alone at these apertures.
The trade-off is that direct flash on a shiny, chitinous exoskeleton produces blown specular highlights that look nothing like the insect's actual coloring, especially on beetles and some wasps. Diffusion matters more here than flash power. A small softbox or even a piece of white translucent plastic clipped over the flash heads knocks down the hot spots considerably. I'd rather underpower a diffused flash and lift shadows slightly in post than deal with clipped highlights on an iridescent beetle shell, since that detail doesn't come back.
Diffraction is the other cost of stopping down this far. Past roughly f/16 on this sensor, you start losing resolving power to diffraction softening, which is a real trade-off against the depth of field you're buying. In practice this means focus stacking two or three frames at a wider aperture like f/8 often produces a sharper composite than a single frame shot at f/22, even though the single frame technically covers more depth of field.
Field Logistics: Heat, Humidity, and Card Slots
The R5 II carries the same weather sealing lineage as the original R5, which matters more for insect photography than most other genres because the best insect activity tends to happen in wet meadows at dawn, or in genuinely humid tropical understory if that's where you're working. Condensation moving a lens from an air-conditioned car into thick outdoor humidity is a bigger practical risk than rain is, and letting gear acclimate in a bag for ten minutes before opening it up is worth the patience.
Dual card slots (one CFexpress Type B, one SD UHS-II) are useful less for backup redundancy on a casual outing and more because focus-bracketed sequences generate a lot of files fast. A single morning of stacking a dozen different subjects at 30-60 frames each adds up to several hundred RAW files before lunch, and CFexpress write speed keeps the buffer clearing fast enough that a long bracket sequence doesn't stall partway through.
Getting Through the Take Without Losing the Afternoon
This is the part nobody mentions when they review the camera itself: a productive morning of insect macro on the R5 II leaves you with an enormous, repetitive card. Multiple bracketed sequences of the same beetle from slightly different angles, several nearly identical bursts of a dragonfly that wouldn't hold still, and a handful of true keepers buried somewhere in all of it. Sorting that by eye, frame by frame, is where a lot of macro photographers lose the will to finish editing at all.
This is the actual reason I moved my culling to imagic rather than just Canon's own software. Its duplicate and burst clustering groups those near-identical insect frames together automatically instead of leaving you to scroll past forty versions of the same jumping spider, and the local sharpness scoring inside each cluster surfaces which frame actually nailed focus on the eyes rather than the antennae or the leaf behind it. Because it's a one-time purchase running locally with no subscription and no cloud upload, it fits how most of this work actually happens: in the field or shortly after, often without reliable internet, on files you'd rather not hand to a server anyway.
Once the keepers are separated out, the "apply_my_style" feature is genuinely useful for insect work specifically, because macro subjects photographed against consistent backgrounds (leaf litter, bark, sand) tend to want a consistent color and contrast treatment across a whole gallery. Training it on a handful of edits you're happy with and letting it apply that look across a fresh batch saves the tedium of re-matching white balance and contrast on every single frame after a long shoot. If you're new to building a culling routine around this kind of high-volume, repetitive capture, the breakdown at how AI photo culling actually works covers the mechanics in more depth than makes sense to repeat here.
Frequently Asked Questions
Is the RF 100mm F2.8L Macro enough lens, or do I need the MP-E 65mm too?
For dragonflies, butterflies, larger beetles, and most spiders, the RF 100mm covers you completely and is far more pleasant to use because it autofocuses and has real working distance. The MP-E 65mm only earns its keep if you specifically want to get into ant-face and jumping-spider-eye territory beyond about 2x magnification, and you should expect a steep learning curve with a very high discard rate while you adjust to fully manual, rail-based focusing.
Does the R5 Mark II's animal eye detection work on insects?
Not reliably. Canon's subject detection categories cover people, animals like birds, dogs, and cats, and vehicles, but insects aren't a defined category, and testing in the field the camera doesn't consistently recognize or track insect eyes the way it does an animal's. Single-point or Spot AF placed manually, or full manual focus at higher magnifications, is the more dependable approach.
What aperture should I actually shoot at for insect macro on this camera?
f/8 to f/11 is usually the sweet spot for a single frame, balancing depth of field against diffraction softening on the 45-megapixel sensor. If you need more coverage than that gives you, a short focus-bracketed stack of two or three frames at f/8 typically resolves more detail than pushing a single frame all the way to f/16 or f/22.
How many bracketed frames do I actually need for a typical stacked insect shot?
It depends heavily on magnification and how much of the subject you want in focus. A dragonfly's whole body at moderate magnification might need only 8-15 frames. A jumping spider's face at higher magnification with the MP-E 65mm can easily need 40-60 frames to get clean coverage front to back. Start closer to the low end and add frames if you see gaps in sharpness once you review the stack.