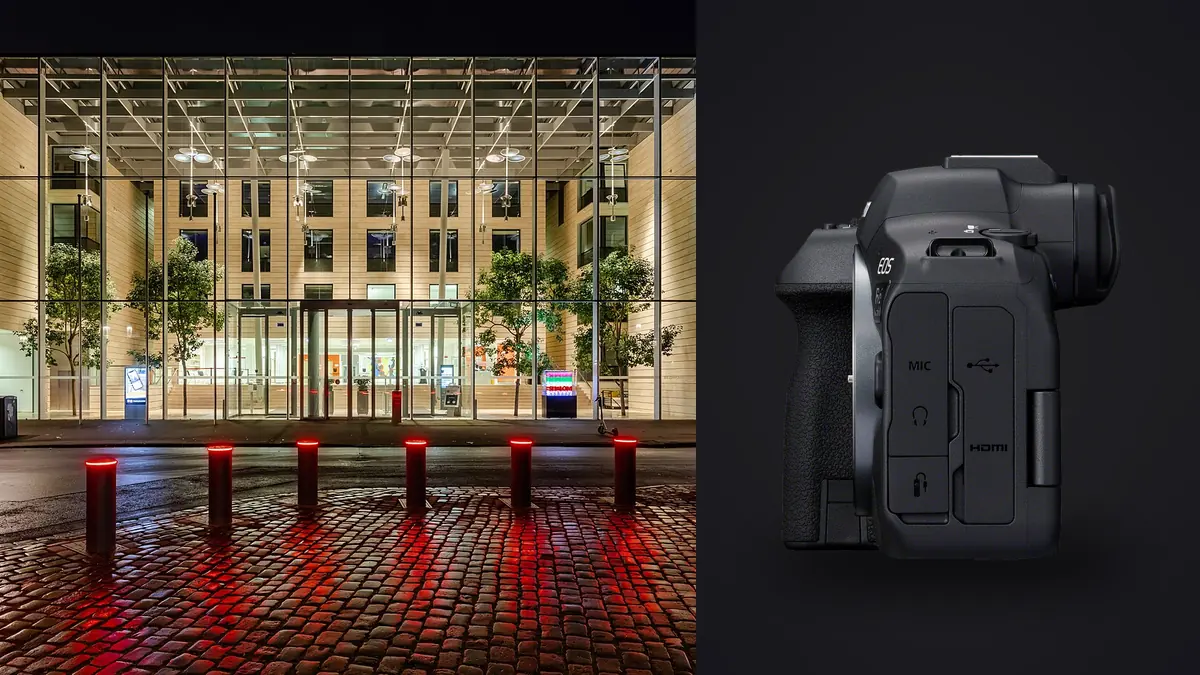
I picked up a Canon EOS R6 Mark II last year specifically to replace an aging 5D-series body for interior and architectural photography, and it took a couple of shoots before I trusted it in that role. It's a genuinely strong all-round camera. Whether it's the right tool for rooms, facades, and staged real estate depends on what you're actually optimizing for, and that's worth walking through honestly rather than repeating a spec sheet.
The resolution question nobody wants to answer plainly
24.2 megapixels is the number that gives architectural shooters pause, and the hesitation is fair. Interior work often means correcting converging verticals in post, which crops into the frame, and it means printing large for lobby displays or magazine spreads where every extra megapixel buys room to breathe. Sitting a file next to something from a 45MP body, the R6 Mark II image feels noticeably tighter once you've pulled a lens correction and squared off a doorway.
In practice, for real estate listings, hospitality galleries, and most interior editorial work delivered at web size or a single magazine spread, 24MP is genuinely enough. Full-page spreads from R6 II files are well within what 24MP can handle. Where it starts to bite is architectural work destined for building-scale prints or heavy perspective crops on ultra-wide shots, where you're sometimes discarding 20 to 30 percent of the frame just to square the lines. If that's your regular output, budget the crop into your lens choice, go wider than feels necessary, rather than expecting the sensor to bail you out later.
Keeping verticals honest
Architectural interiors live or die on straight lines. The R6 II's electronic level is accurate and easy to read in the viewfinder, which matters more indoors than out, because you're rarely shooting on a perfectly flat floor and there's no horizon to anchor your eye. I leave the level and a 3x3 grid overlay on for the entire duration of an interior job.
For genuinely convergence-free verticals on tall rooms or facades with a lot of height in frame, no amount of in-camera leveling replaces a shift lens. The R6 II has no native RF tilt-shift optic yet, but the EF TS-E 24mm f/3.5L II and TS-E 17mm f/4L both adapt cleanly through Canon's EF-RF mount adapter, with full manual shift control and, on the 24mm, tilt for extending depth of field across a room without stopping the aperture all the way down. It's slower to work with than a zoom and manual focus only, but for a formal architectural client paying for a straight, uncropped file, it earns its place in the bag.
Short of a shift lens, correcting verticals in software still works fine on most jobs. The files hold up to moderate keystone correction without falling apart at the edges, as long as you haven't pushed the ISO too far to compensate for a dim room.
Dynamic range and the reality of bracketed interiors
Any interior with a window in frame is a dynamic range problem. Base ISO dynamic range on the R6 II is good, not class-leading against the higher-resolution competition, and you'll notice it if you try to pull back a blown window from a single exposure. The practical answer, and the one I use on nearly every job, is auto exposure bracketing merged in post. I typically shoot a 5-frame AEB at 2-stop spacing for rooms with strong window light, dropping to 3 frames for evenly lit interiors under continuous studio lighting.
One thing worth knowing before shooting a listing under LED or fluorescent fixtures: the electronic shutter, which is otherwise excellent for silent operation, can pick up visible banding under flickering light sources at faster shutter speeds. I stick to the mechanical shutter for anything under mixed or LED lighting and save fully silent electronic mode for daylight-only rooms, or for moments when an agent or homeowner is standing in the doorway and I don't want the shutter slap interrupting a conversation.
Lens choices that actually suit interior rooms
Nobody needs another generic zoom recommendation, so here's what I reach for on a typical interior day and why, based on real jobs rather than a marketing bundle.
| Lens | Focal range | Distortion at wide end | Best use on an interior shoot |
|---|---|---|---|
| RF 14-35mm f/4L IS USM | 14-35mm | Moderate barrel at 14mm, corrects cleanly in raw processing | Small bathrooms, tight kitchens, anywhere you can't back up further |
| RF 15-35mm f/2.8L IS USM | 15-35mm | Mild barrel, slightly better control than the f/4 | Low-light interiors, twilight exteriors, dusk exterior-to-interior shots |
| RF 24-70mm f/2.8L IS USM | 24-70mm | Minimal across the range | Vignette shots, staged tabletop detail, furniture close-ups |
| EF TS-E 24mm f/3.5L II (adapted) | 24mm, shift only | Near-zero converging verticals with shift applied | Full-height rooms and facades where a client needs an uncropped straight file |
The 14-35mm f/4 does most of the heavy lifting on residential jobs. It's light enough to hand-hold through a full listing shoot and the IS pairs with the R6 II's in-body stabilization for genuinely usable handheld shots down around a quarter second, which matters when you're shooting a stairwell with no room for a tripod leg.
Tripod habits that actually change the files
The R6 II's IBIS is good enough to tempt you into shooting interiors handheld, and for a fast walkthrough or a real estate job on a tight schedule, that temptation is fine to give in to. For architectural work where the file will be scrutinized, I still put the camera on sticks with a leveling base under the tripod head rather than relying on the ballhead alone to get square. A leveling base lets you set the tripod roughly level once per room, then swing the head between compositions without re-leveling every time, which sounds like a small thing until you've done it on a job with forty compositions in a day.
I also shoot tethered to a tablet on jobs where a designer or architect is on site and wants to approve framing before I move on. The R6 II handles USB-C tethering over Canon's own app without much fuss, and being able to check a composition on a bigger screen catches crooked verticals and stray reflections that are easy to miss on the camera's rear display, especially in bright rooms where the LCD washes out.
Shooting occupied and staged spaces
A lot of interior work happens with people nearby: staging crews finishing a room, an agent on a call in the next room, a homeowner hovering by the door. The R6 II's fully silent electronic shutter mode is genuinely useful here in a way it wasn't on the original R6, and I use it constantly for staged real estate where I need to work fast without a mechanical clack every two seconds becoming background noise on someone's phone call.
The trade-off, as mentioned above, is banding under certain artificial lighting, and a slightly higher risk of rolling shutter distortion if anything in frame is moving quickly, which is rarely an issue in a still room but worth remembering if you're catching a ceiling fan or someone walking through a background hallway.
Focus stacking for depth across a room
Wide interior shots often need everything from a foreground countertop to a far wall in focus, and stopping down to f/11 or f/16 to get there costs shutter speed and can soften the file through diffraction. The R6 II's in-camera focus bracketing sequence works well for this, letting you fire a stack of frames at a wider, sharper aperture and blend them afterward. It's slower than a single exposure and it multiplies your frame count fast when you're already shooting HDR brackets, but for a hero shot of a great room with a fireplace in the foreground and a window wall behind it, it's worth the extra minute per setup.
The twilight exterior, and why IBIS earns its keep there
Every residential real estate package eventually asks for the dusk exterior shot, the one with the sky still holding some color and the interior lights glowing through the windows. That's usually a longer exposure on a tripod anyway, so IBIS doesn't matter much for the hero frame. Where it matters is the ten minutes before and after, walking the property line looking for a better vantage point, checking neighboring angles, grabbing a handheld establishing shot of the entry while the light is still doing something interesting. The R6 II's stabilization means I can grab a usable handheld frame at a quarter or even half second in that window instead of setting the tripod up three separate times while the color drains out of the sky. It's a small convenience that adds up to a better shot on the days when dusk only lasts about twelve usable minutes.
The part nobody talks about: what happens to 400 frames after the shoot
A single interior job at five rooms, five-frame HDR brackets, plus a couple of focus stacks per hero shot, adds up to several hundred frames before lunch. That's where the camera stops being the bottleneck and a card full of nearly identical exposures becomes the actual work. I run everything through imagic before I open a single raw file in an editor. Its duplicate and burst clustering groups each bracket set together automatically instead of leaving me to eyeball which five frames belong to which window, and the local sharpness scoring flags the one frame in a handheld stack that moved half a pixel, which matters a lot when you're merging exposures and one soft frame will blur the whole HDR result.
Because it runs entirely on the machine and never uploads anything, it's also a reasonable answer to a question clients ask more often than you'd expect: unreleased architectural and high-end residential photography sometimes needs to stay off third-party servers until a listing or a publication date goes live, and not sending a folder of someone's unfinished renovation to a cloud service is a genuinely simple way to keep that promise. If you're weighing tools for this against a subscription-based culling app, it's worth reading through a straight comparison of how AI photo culling actually works before committing to a workflow.
Building a consistent look across a long shoot
Interior and architectural clients notice inconsistency fast: a hallway that's warmer than the room it leads into, or a set of exteriors that don't match the interiors in the same gallery. Once I've settled on a grade for a set, whether that's a neutral, true-to-material look for architecture or a warmer, more inviting tone for real estate, I train imagic's apply_my_style feature on a handful of my own finished edits from that set and let it carry the look across the rest of the set before I go through and fine-tune individual frames. It's saved a genuine amount of time on 60-plus-image galleries where matching color by eye, room to room, used to be the slowest part of the day. At that point the app is doing the boring repetition and I'm spending my time on the few frames that actually need a human eye, which is roughly the trade you're paying for on the one-time license anyway.
Battery, cards, and the boring logistics
Dual UHS-II SD slots mean I shoot raw to one card and a backup JPEG to the second on any shoot where same-day previews matter. Battery life on the LP-E6NH is solid for a mirrorless body, comfortably getting through a half-day residential shoot with focus bracketing and bursts included, though I still carry a spare for anything past a few hours, especially in cold weather on an exterior twilight shot.
Frequently Asked Questions
Is 24 megapixels really enough for architectural photography?
For web galleries, real estate listings, and most magazine spreads, yes. For large-format architectural prints or jobs where you'll be cropping heavily to correct converging verticals, a higher-resolution body gives you more room to work with. Plan your lens choice to minimize how much cropping you'll need rather than counting on extra megapixels to fix it later.
Can I use my old Canon tilt-shift lenses on the R6 Mark II?
Yes. EF-mount tilt-shift lenses like the TS-E 24mm f/3.5L II and TS-E 17mm f/4L adapt fully through Canon's EF-RF adapter, with the shift and tilt mechanisms working exactly as they do on an EF body. Autofocus isn't relevant here since these lenses are manual focus regardless of mount.
Does the electronic shutter cause problems shooting indoors under LED lighting?
It can. Flicker from LED and fluorescent fixtures sometimes shows up as banding in electronic shutter mode, particularly at faster shutter speeds. Switching to the mechanical shutter avoids it entirely, so I default to mechanical for any interior lit primarily by artificial light and save the silent electronic mode for daylight-only rooms.
How many bracketed exposures should I shoot per room?
It depends on the contrast range, but 3 frames covers most evenly lit rooms and 5 frames at 2-stop spacing handles rooms with a bright window in frame against a darker interior. Going beyond 7 rarely adds anything useful and just slows down your culling later.