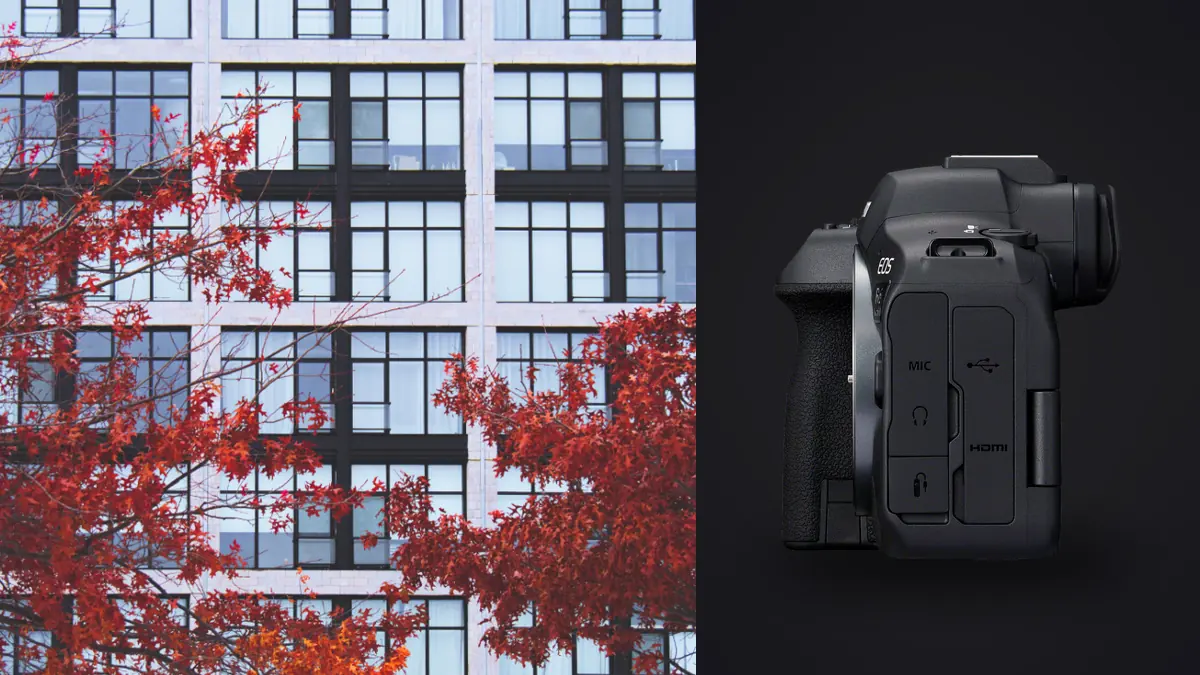
I picked up the Canon EOS R6 Mark II about eight months ago mostly for fast-moving subjects, and it took me a while to notice it had quietly become my default body for interiors too. Not because anyone marketed it that way. Architectural and interior photography has its own set of demands that don't line up neatly with sports or portrait specs sheets, and after a few dozen shoots in kitchens, lobbies, hotel rooms and one very stubborn stairwell in a converted mill building, I have opinions about where this camera earns its keep and where it doesn't.
This isn't a spec dump. It's what actually changed in my workflow once the R6 II became the camera I reach for on interior jobs, plus a few things I'd tell a friend before they buy one specifically for this kind of work.
The sensor is the right compromise, not the best on paper
24.2 megapixels sounds modest next to a 45MP R5 or a 61MP Sony body, and if you're shooting for double-page magazine spreads or huge architectural prints, that gap is real. But for the bulk of interior and real estate photography, which ends up on listing sites, hospitality booking platforms, or a designer's portfolio at web resolution, 24MP is more than enough headroom, and the smaller files move faster through my whole pipeline: faster to write to card, faster to cull, faster to hand off same-day when someone wants a quick gallery.
What matters more than resolution in interiors is dynamic range, because you're almost always fighting a mix of bright window light and dim interior fixtures in the same frame. The R6 II's sensor gives me roughly 3 stops of genuinely usable shadow recovery at base ISO before noise gets ugly, which is enough to pull detail out of a shadowed corner without a full HDR bracket in maybe six out of ten rooms. The other four, I still bracket. I'm not going to pretend one sensor eliminates exposure blending for high-contrast interiors, because it doesn't, but it cut my average bracket count from five exposures to three in daylight-heavy rooms, and that adds up over a full house shoot.
Autofocus and focus bracketing change how I shoot depth
Dual Pixel AF II with the R6 II is honestly overkill for a static room, but the in-camera focus bracketing function is not overkill, it's one of the two or three features I'd genuinely miss if I went back to my old body. Interiors often need everything sharp from a foreground table leg to a window six meters away, and stopping down to f/16 for depth of field costs you diffraction softness and forces slower shutter speeds. Instead I set the R6 II to shoot a bracketed stack, usually 8 to 12 frames, step increment around 3, and blend focus in post rather than fighting physics with aperture alone.
The catch: focus bracketing on this camera outputs a folder of full-resolution frames, not a stacked composite, and it doesn't tell you which frame in the stack is actually the sharpest at any given point. I used to eyeball this by zooming into each frame on the camera's screen, which is slow and error-prone when you're on a ladder and short on time. I now let imagic run its local sharpness scoring across the stack the moment I import, and it flags the sharpest frames in each cluster before I even open Lightroom. It's not doing the focus stacking itself, that's still a Photoshop or Helicon job, but it saves me from manually squinting at twelve near-identical frames trying to find the one where the crown molding is actually crisp.
Corner performance depends entirely on the lens, not the body
One thing worth saying plainly: the R6 II's autofocus and sensor won't fix a soft-cornered lens, and interiors punish soft corners more than almost any other genre because your frame edges are full of straight lines and detail (door frames, tile grout, ceiling trim) that make softness obvious. I shoot mine almost exclusively with the RF 14-35mm f/4L, and on a handful of tighter jobs I've rented the RF 15-35mm f/2.8L. Neither is a dedicated architecture lens, but both hold up well into the corners stopped down to f/8-f/11, which is where I live for interior work anyway.
In-body stabilization solves a real problem, but not the one people think
Canon rates the R6 II's IBIS up to 8 stops with certain RF lenses, and the marketing angle is always handheld low-light shooting. For interiors, the more useful benefit is different: it lets me hand-hold detail shots and tight vignettes in dim hallways or basements without dragging a tripod through a space I don't have full access to move around in. On a recent boutique hotel job, half the guest corridors were too narrow to set a tripod without blocking foot traffic, and being able to shoot handheld at 1/15s and still get a clean frame saved real time.
For the primary wide room shots though, I still use a tripod, not because the stabilization can't handle it, but because verticals matter more in architectural work than shake does. A tripod with a bubble level (or the R6 II's built-in electronic level overlay, which I lean on constantly) keeps my verticals straight in-camera, which means far less keystone correction in post and less cropping to fix converging lines. IBIS is a convenience feature here, not a replacement for careful setup.
What I actually shoot: exposure strategy by room type
This is the part that took the longest to dial in, because generic exposure advice doesn't account for how differently light behaves room to room in the same property. Here's roughly what I run on the R6 II depending on the space, based on actual settings logged from recent jobs rather than theoretical numbers.
| Space / lighting condition | Bracket count | Base ISO | Aperture | Why |
|---|---|---|---|---|
| Living room, large south-facing windows, midday | 3 exposures, 2EV apart | 100 | f/9 | Sensor's native shadow recovery covers most of it; bracket mainly protects blown window glass |
| Kitchen, mixed tungsten pendant + daylight | 5 exposures, 1.3EV apart | 100 | f/8 | Color temperature mismatch needs finer steps to blend cleanly, not just exposure |
| Interior at dusk, exterior windows lit blue hour | 4 exposures, 1.7EV apart | 400 | f/7.1 | Need one exposure for interior lamps, one for the fading exterior sky, blend between |
| Windowless bathroom or hallway, fixture light only | 1 exposure, no bracket | 800-1600 | f/5.6 | Contrast range is low enough the sensor handles it in one frame; bracketing wastes time |
| Stairwell with skylight, deep shadow at base | 7 exposures, 1EV apart | 100 | f/9 | Widest dynamic range spread of any interior scenario I shoot regularly |
None of this is unique to the R6 II specifically, but the camera's practical shadow recovery is what let me shorten several of these brackets compared to what I used to run on an older APS-C body. Fewer exposures per setup means less time locked to one tripod position, which on a paid interior shoot with a tight access window is worth more than people give it credit for.
Sorting through the files afterward
A single-family home walkthrough with bracketing on most rooms easily produces 400 to 600 raw files by the end of the day. That volume is where the camera's job ends and the culling job begins, and it's genuinely the part of interior work that used to eat my evenings. Every bracket sequence looks nearly identical at a glance, and the difference between "usable" and "reject" often comes down to whether a curtain moved in a breeze between frames three and four, or whether someone's foot is visible at the edge of frame two but not frame five.
I moved this whole sorting step into imagic last year, running entirely on my laptop rather than through a cloud uploader, which matters more than it sounds for architecture and interior work specifically, since shoots like these are often under NDA before a property listing or a renovation reveal goes public. Not having raw files touch a server anywhere is a real answer when a client asks how their unreleased space is being handled, not just a bullet point.
Practically, the parts I use most are the duplicate and burst clustering, which groups each bracket sequence together automatically instead of leaving me to scroll past 500 flat thumbnails, and the local sharpness scoring within each cluster, which flags the technically sharpest frame per group before I've looked at a single image. For a stairwell shot with seven bracketed exposures, that's the difference between me manually zooming into all seven or getting handed the one that's actually in focus at the handrail. I've also trained an apply_my_style preset off a batch of my own finished interior edits, so the first-pass color and contrast on new imports already leans toward how I actually grade these jobs, rather than a generic neutral profile I have to correct every time.
Where the R6 II's file size actually helps
This is where the more modest 24MP sensor pays off again. On a laptop without a desktop GPU, culling and previewing 500+ raw files from a 45MP or 60MP body is noticeably slower than doing the same pass on R6 II files. If you're doing this sorting on location, in a hotel lobby with the client still standing there wanting a rough gallery before you leave, that speed difference is not trivial. It's also part of why I settled on imagic as a one-time purchase rather than another subscription tool in my stack. I already pay for enough monthly software subscriptions; not adding a recurring culling fee on top, for something I run on every single shoot, mattered more once I actually did the yearly math.
Things I'd flag before you buy one for this specific use
- The mechanical shutter is rated for roughly 300,000 actuations. Bracket-heavy interior work chews through shutter count faster than most other genres because every frame in a 5-to-8-shot bracket counts individually. I shoot in electronic first-curtain most of the time on tripod work to ease this, though I switch to full mechanical for any exposure with visible ceiling fans or moving foliage outside a window, where electronic shutter banding or distortion can show up.
- There's no built-in perspective control the way a tilt-shift lens gives you. If your work leans heavily architectural exteriors rather than interiors, and you need true optical shift for converging verticals, you're either correcting in post or buying a TS-E lens with an adapter, and the R6 II doesn't change that math.
- Battery life drops noticeably when you're running focus bracketing sequences back to back with the vari-angle screen out for level-checking. I carry three batteries on a full-day interior job now where I used to carry two.
Frequently Asked Questions
Is 24 megapixels really enough for architectural photography clients?
For most interior, hospitality, and real estate delivery formats (web galleries, listing platforms, print brochures up to roughly A3), yes. Where it gets tight is large-format gallery prints or double-truck magazine spreads, where a 45MP+ body gives you more cropping room. 24MP interior files can work for print ads, but I wouldn't promise wall-sized prints from this sensor without discussing expectations first.
Do I need a tilt-shift lens if I already have the R6 II?
Depends on how much exterior architecture you shoot versus interiors. For interiors, careful tripod leveling and the camera's electronic level get you most of the way there, and remaining keystoning is a quick correction in Lightroom or Photoshop. For tall exterior facades where you need true optical shift to avoid converging verticals without cropping away half the frame, a tilt-shift lens still earns its cost, and the R6 II doesn't remove that need.
How many bracketed exposures should I actually shoot per room?
There's no universal number, it depends entirely on the contrast range in that specific space, which is why I stopped using a fixed bracket count across every room. A windowless bathroom might need zero brackets. A stairwell under a skylight might need seven. Chimping the histogram on location and adjusting bracket count room by room beats any fixed rule.
Can the R6 II handle real estate photography at high volume, like multiple listings a day?
Yes, and the smaller file size is an underrated advantage here specifically. Faster card writes, faster culling, faster export all compound when you're turning around three or four properties in a single day rather than one careful architectural shoot. The tradeoff is resolution ceiling, which rarely matters for MLS-sized listing photos anyway.
If you're weighing this camera against something with a higher resolution sensor for architecture specifically, it's worth reading through how different culling tools handle large bracket-heavy shoots before you commit, since the body is only half of what determines how fast you actually get from shutter click to delivered gallery. I've written more on that trade-off in our comparison of photo culling software, and if you're curious what's actually happening under the hood when software groups your bracket sequences automatically, this breakdown of how AI photo culling works covers the mechanics.