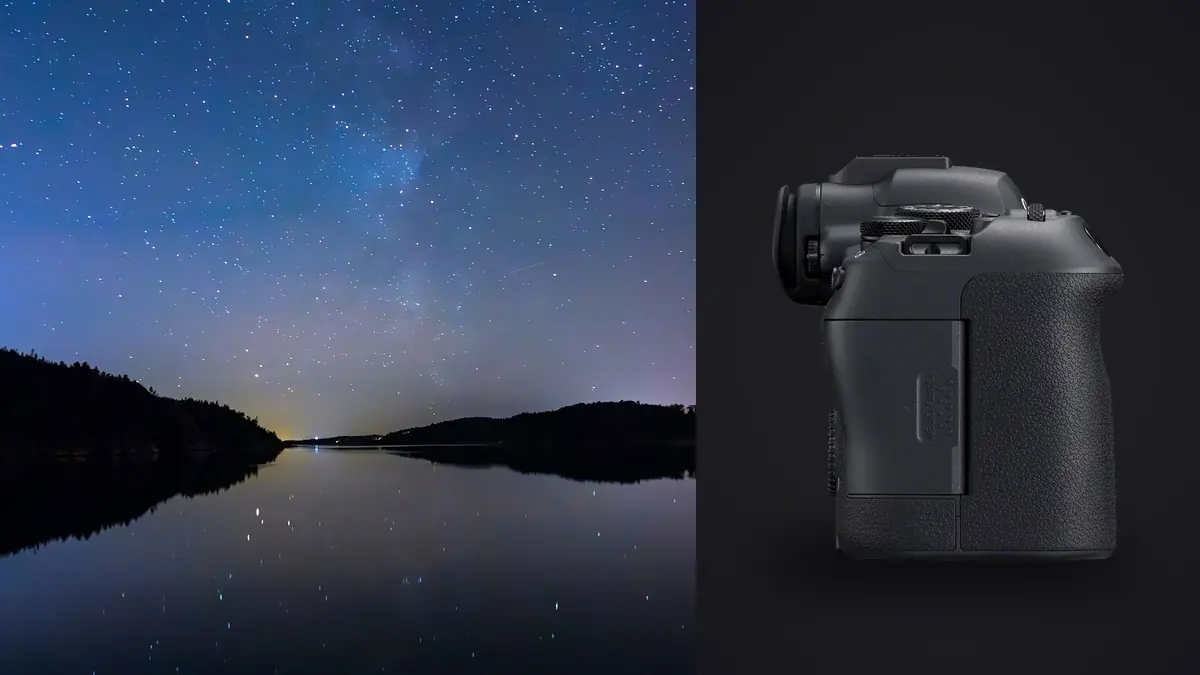
I took the Canon EOS R6 Mark II out to a field near Errigal in October, mounted it on a small star tracker, and spent three nights chasing a clean frame of the Andromeda core before the cloud came in for good. What I came away with wasn't a spec-sheet opinion. It was a working sense of where this camera actually helps a star-stacking session and where it just gets out of the way and lets the technique do the work.
The R6 Mark II was never marketed as an astro camera the way Canon's old EOS Ra was. It's a general-purpose 24.2-megapixel full-frame body that happens to have a sensor and a few menu features that suit long-exposure night work reasonably well. This is a practical rundown of setting it up for star stacking, what to expect from the files, and where the workflow actually breaks down if you're not careful.
What the Sensor Numbers Actually Mean for Stacking
The R6 II uses a 24.2MP sensor with roughly 6000 pixels across the long edge, which works out to a pixel pitch close to 6 microns. That's noticeably larger than the pitch on Canon's 45MP R5, and larger pixels generally mean better per-pixel signal-to-noise at high ISO, which matters a lot when you're gathering faint photons off a nebula or a dim section of the Milky Way core. It also means you get more headroom before diffraction softening becomes visible at moderate apertures, which is a smaller concern for wide astro lenses but still worth knowing.
The bigger pixel pitch also changes the math on how long you can expose before star trailing shows up, if you're shooting untracked. The old "500 rule" (500 divided by focal length) is a rough guide that ignores sensor resolution entirely. The NPF rule, which factors in aperture and pixel pitch, is more honest about what this specific sensor can handle. At 24mm and f/2.8, the 500 rule suggests around 20 seconds is safe. Run the NPF numbers for the R6 II's pixel pitch and you land closer to 11 to 12 seconds before pinpoint stars start to smear at 100% crop. That's a real difference if you're stacking dozens of subs and expecting each one to be tack sharp.
Setting Up in the Field
For lenses, I've had good results with the RF 15-35mm f/2.8L for wide nightscapes and a Sigma 14mm f/1.4 in RF mount for the widest Milky Way arch shots where light gathering matters more than a stop of extra sharpness. If budget is tight, an old manual-focus Rokinon 14mm f/2.8 adapted onto the RF mount still holds up fine in the corners once stopped down slightly, and manual lenses are honestly easier to focus precisely on a star anyway since there's no AF hunting to fight.
Speaking of focus: don't rely on autofocus for the sky itself. The Dual Pixel CMOS AF II system in the R6 II is genuinely capable down to about -6.5 EV, which is impressive for locking onto a distant porch light or a bright planet for a foreground reference point, but stars are point sources and AF systems (Canon's included) tend to hunt on them. Punch into 5x or 10x magnified live view on the brightest star in frame, use focus peaking if your eyes are tired by hour three, and lock it with a piece of gaffer tape across the focus ring so a stray bump doesn't cost you the session.
The fully articulating rear screen earns its keep here in a way I didn't expect going in. Tracker-mounted shots pointed near zenith are awkward to compose through a fixed screen, and being able to flip the panel out and angle it saved my neck more than once.
Untracked vs Tracked: Different Camera Settings Entirely
How you configure the R6 II changes completely depending on whether you're shooting handheld-on-a-tripod wide nightscapes or running a tracked deep-sky sequence through a small scope. The table below is what I actually dial in for each scenario, not a generic exposure chart lifted from a manual.
| Scenario | Typical lens / focal length | Sub-exposure length | ISO | Subs for a solid stack | Stacking tool |
|---|---|---|---|---|---|
| Untracked wide-field nightscape | 14 to 24mm, f/1.4 to f/2.8 | 8 to 13 sec (NPF limited) | 3200 to 6400 | 20 to 40 | Sequator or Starry Landscape Stacker |
| Tracked wide/tele, no telescope | 24 to 135mm on a star tracker | 60 to 120 sec | 800 to 1600 | 30 to 60 | DeepSkyStacker or Sequator |
| Tracked through a small refractor | 400 to 600mm equivalent, guided | 120 to 300 sec | 400 to 800 | 40 to 80 | PixInsight or DeepSkyStacker with calibration frames |
Notice the ISO drops as tracking improves and exposure time goes up. That's not arbitrary. Once the mount is doing the work of keeping stars pinpoint over minutes rather than seconds, you can afford to gather more actual light per frame instead of compensating with sensor gain, and the R6 II's read noise at ISO 800 is meaningfully cleaner than at ISO 6400.
The Star-Eater Question
Anyone who's spent time in astrophotography forums has heard about "star eater," the pattern-based noise reduction some older Canon DSLRs (the 6D Mark II and 5D Mark IV among them) applied internally even with long-exposure noise reduction switched off, which smeared out faint stars in a repeating grid pattern. It's a legitimate historical complaint about Canon bodies. From what I've seen shooting the R6 II across dozens of stacked sequences, and from what's been reported by others running flat-field tests on the mirrorless R-series, this specific artifact doesn't show up the way it did on those older sensors. I'd still recommend running your own flat-frame test before a big trip rather than taking anyone's word for it, mine included. Shoot a defocused, evenly lit frame at your working ISO, stretch it hard in your stacking software, and look for a grid.
Building the Stack: Darks, Flats, and Bulb Timing
The R6 II has a built-in interval timer and bulb timer buried in the shooting menu, which covers basic automated capture up to 99 frames without external hardware. In practice I still bring a cheap wired intervalometer for anything over about 30 subs, because the in-camera timer has a minimum gap between frames that eats into total integration time over a long session, and there's no live view feedback while it's running if something drifts.
Calibration frames matter more than people shooting their first stacked session tend to expect. Dark frames (same exposure length and ISO, lens capped) subtract out the sensor's own thermal noise pattern. Flat frames (a evenly lit surface, same aperture and focus) correct for vignetting and dust motes that show up as dark blobs after stretching. Bias frames are the shortest exposure your camera allows at the same ISO, used to isolate read noise. Skipping darks and flats is the single most common reason a first stack looks worse than the individual subs did on the back of the camera. The stacking software has nothing to correct against.
One quirk worth knowing: the R6 II's in-body stabilization has automatic tripod detection and will disable itself on a stationary mount, but I still turn IS off manually in the lens or camera menu before a tracked sequence. On a couple of older IS-equipped lenses I've used, leaving stabilization active during long bulb exposures introduced a barely visible softness that only showed up once I stretched the stack hard in post. Not every lens does this, but it costs nothing to switch it off.
From 200 Raw Frames to a Stack You Can Actually Use
A single deep-sky target shot at 60 to 80 subs plus calibration frames adds up fast. R6 II raw files run around 25 to 30MB each, so a full night chasing two or three targets can leave you with 8 to 12GB of frames to sort through before you even open stacking software. Most of that folder is near-identical exposures, which is exactly the kind of pile that's tedious to review frame by frame on a laptop screen at 2am with cold fingers. This is where I actually reach for imagic before touching DeepSkyStacker. It runs entirely on the laptop, no upload needed, which matters when you're on a remote site with no signal, and its sharpness scoring flags the handful of subs where a gust of wind or a guiding hiccup softened the stars just enough that they'd drag the stack average down. It also groups the visually similar frames from a sequence automatically, so instead of clicking through eighty thumbnails that look the same, you're reviewing clusters and pulling out the outliers. If you want the mechanics of how that scoring works, there's a longer breakdown at how AI photo culling works.
Choosing Stacking Software for the R6 II's Files
DeepSkyStacker remains the free, reliable default for tracked deep-sky sequences and reads Canon's CR3 raw files without complaint. Sequator handles nightscapes with a static foreground and moving sky well, and its sky-only masking saves a manual blend step for a straightforward Milky Way arch shot. Starry Landscape Stacker (Mac only) does a similar job with slightly better masking control if you're on Apple hardware. For anyone pushing into serious deep-sky work with a guided scope, PixInsight is the eventual destination, though the learning curve is steep enough that I wouldn't start there on your first stacked session.
Whichever tool you pick, export the stacked result as a 16-bit TIFF before you do any stretching or color work. Canon's CR3 files carry plenty of shadow detail to recover, but only if you're not throwing away bit depth at the stacking stage.
Finishing the Blend
Stretching a stacked astro file is its own skill and worth a separate deep dive on its own, but the short version is: work in small, deliberate curves adjustments rather than one aggressive levels pull, and keep an eye on the background sky staying neutral rather than drifting green or magenta as you push contrast. Once I've got a stretch I'm happy with on one target, I want every other frame from that same trip graded the same way rather than re-deriving the look from scratch each time. imagic's apply_my_style feature, which learns a preset from a folder of your own finished edits rather than a canned filter, has been useful for that specific problem: point it at a folder of stacks I've already finished grading and it carries that same color balance and contrast curve across the rest of the night's targets without me manually matching sliders on each one.
If your workflow is already creaking under the volume a single astro trip generates, it's worth reading through the broader habits in 10 tips for a faster photo workflow, most of which apply just as well to a folder of star stacks as they do to a wedding take.
Battery and Storage Notes Worth Knowing Before You Drive Out
The LP-E6NH batteries lose charge faster than their rated numbers suggest once temperatures drop toward freezing, and a long tracked session with the screen active for framing checks will chew through one in a few hours. The R6 II can run off USB-C power delivery through its port, which is a genuinely useful option for an all-night guided session if you bring a power bank rated for it, rather than swapping batteries in the dark. On storage, the dual UHS-II SD slots are worth setting to overflow rather than backup for a long night, since a session chasing three targets can easily fill a single card before sunrise.
Frequently Asked Questions
Do I need to keep in-body stabilization on for tripod-mounted star trails?
No. Turn it off. IS is built to counteract handheld motion, and on a locked-down tripod or tracker there's nothing for it to correct, so at best it does nothing and at worst it introduces a faint drift on certain lens and body combinations during long bulb exposures.
How many subframes is actually enough before I'm wasting a clear night?
For an untracked nightscape, 20 to 30 frames gets you most of the noise reduction benefit, and beyond 40 the returns flatten out fast. For a tracked deep-sky target, integration time matters more than raw frame count, so 60 subs at 90 seconds each beats 120 subs at 30 seconds each for the same total time invested, because longer subs collect more signal relative to read noise per frame.
Can I mix subs shot on different nights into one stack?
Yes, as long as framing, focal length, and rotation are close enough that the stacking software can align them, which is easier with a tracked target locked to the same RA/Dec than with a handheld nightscape where the horizon line shifts. Sky conditions and moon phase between nights will show up as inconsistent background gradient, so expect extra flattening work in post if you combine sessions.
Is the R6 Mark II worth it specifically for astrophotography over a cheaper DSLR?
If astro is your only use case and budget is tight, a used DSLR with a known-clean noise reduction history will get you similar stacked results for less money. Where the R6 II earns its price is everything around the edges: the articulating screen for awkward tracker angles, the low-light AF for nightscape foregrounds, in-body stabilization for handheld wide shots on nights you don't bring a tripod, and a body you'll actually use the rest of the year for everything else.