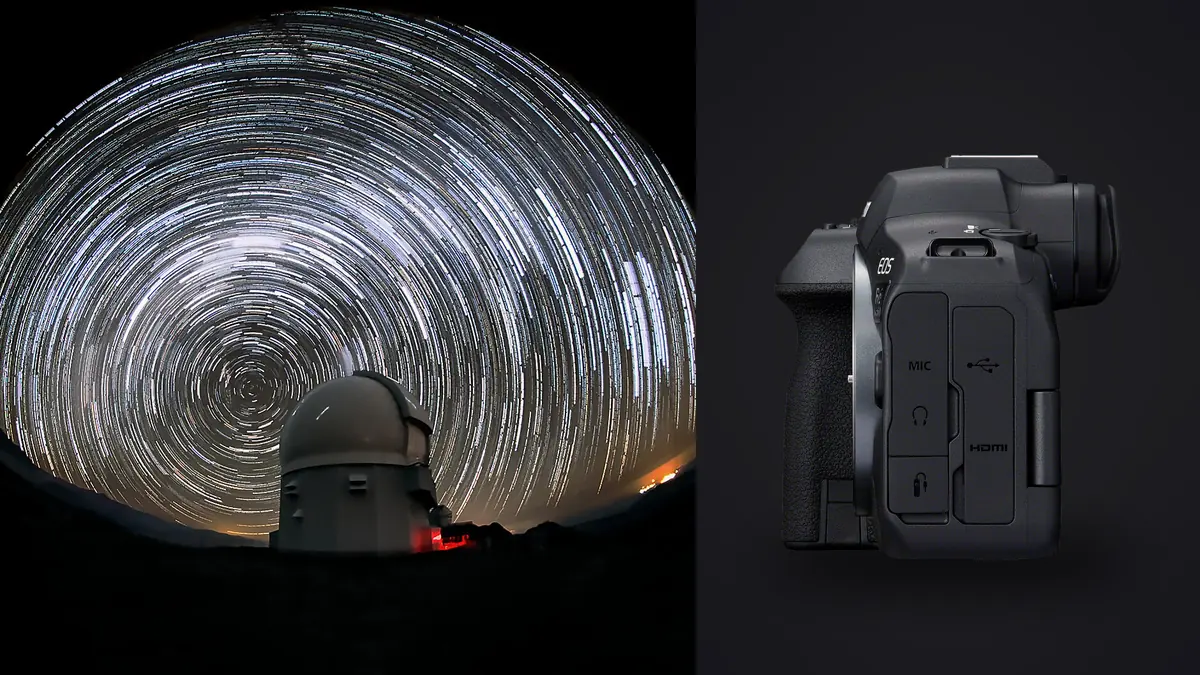
I took the R6 Mark II out to a Bortle 3 ridge in early spring expecting the usual fight: dead batteries by 2 a.m., a focus ring that drifts if you so much as breathe on it, and a memory card full of near-identical frames that all look sharp on a 3-inch screen and none of them actually are. Two of those three problems are still real. The third one is where a proper culling pass earns its keep, and I'll get to that. First, the camera itself, because a lot of what gets written about this body for night work is recycled spec-sheet copy that never touches an actual dark-sky trip.
A Sensor Built for Longer Exposures Than You'd Guess
The R6 Mark II carries a 24.2-megapixel full-frame sensor, which sounds like a modest bump from the original R6's 20.1 megapixels until you think about what that resolution buys you at night. Do the math on the sensor's physical width against the pixel count and you land on roughly a 6-micron pixel pitch, which is on the larger side for a modern full-frame body. Larger photosites gather more photons per pixel before the signal gets buried in read noise, and for astro work that translates into cleaner individual subs at ISO 3200 to 6400 than you'd get from a higher-resolution sensor squeezing the same sensor area into smaller wells. The R5, for comparison, packs 45 megapixels into the same frame size, which works out to pixel sites nearly a third smaller. Great for daytime landscape detail, less forgiving once you're pushing ISO into five figures to catch faint nebulosity.
ISO tops out natively at 102400, with an expanded ceiling beyond that which I've never found usable for anything except locating a lost lens cap in the dark. In practice, most of my Milky Way work sits between ISO 1600 and 6400 depending on how much light pollution is bleeding into the frame from the horizon. The base ISO of 100 is where you want to be for calibration frames (flats and bias) if you're doing a full DeepSkyStacker or PixInsight workflow, since low-ISO reads are cleaner and more repeatable between frames.
Glass That Actually Suits This Body
RF mount still has gaps compared to Canon's old EF lineup for dedicated astro glass, but there's enough now to build a real kit around the R6 Mark II. The RF 15-35mm f/2.8L is my go-to for wide Milky Way arch shots; it holds coma reasonably well into the corners by f/2.8 to f/4, though wide open at 15mm you'll still see some stretching in the extreme corners on a full-frame sensor that a crop body would simply never show you. The RF 14-35mm f/4L is the lighter, cheaper alternative if you're hiking to a location and don't need the extra stop.
For tighter deep-sky framing on a star tracker, the RF 85mm f/1.2L or the RF 100-300mm f/2.8L (used well stopped down, not wide open) both pair well with the sensor's resolution, though at that focal length you're leaning on tracking accuracy more than the camera. I've also had good results with manual-focus third-party RF glass like the Samyang/Rokinon 14mm f/2.8, which is cheap enough that scratching the coating on a dew-soaked night doesn't feel like a financial event.
Manual Focus Is Still the Real Skill Here
Dual Pixel CMOS AF II is genuinely good on this body, good enough that it will sometimes lock onto a bright planet or the moon if you're using an f/1.2 or f/1.8 lens and there's enough light. It will not reliably find focus on a star field, and I stopped trying to make it work for that years ago on other bodies. The routine that works: switch to manual focus, punch in with the 10x live view magnification on the brightest star in frame (or a distant streetlight if you're pre-focusing before the sky gets fully dark), and nudge the focus ring until the point of light shrinks to its smallest, tightest size rather than a bloated blob. The R6 Mark II's rear screen is bright enough to do this by eye even under fairly dark skies, and because it's a fully articulating panel rather than a tilt-only screen, you can angle it flat and readable when the lens is pointed close to the zenith, which is a genuinely annoying framing problem on cameras with tilt-only screens.
A Bahtinov mask still beats eyeballing it if you want to be certain, especially on faster lenses where the focus zone is razor thin. I keep one taped inside my camera bag lid so I can't leave it in the car.
How Long Can a Single Sub Run Before Stars Trail?
For untracked wide-field work, the exposure ceiling before stars start to smear into short streaks depends on focal length, and to a lesser extent on the sensor's pixel pitch, which is where the R6 Mark II's roughly 6-micron pixels come in. The NPF rule (an evolution of the old "500 rule" that accounts for aperture and pixel size, not just focal length) gives noticeably shorter maximum exposures than the crude 500-rule math a lot of people still use, and on a 24-megapixel sensor the gap between the two methods actually matters. Here's roughly where I land on this body, rounded from field testing rather than a lab bench:
| Lens / Focal Length | Aperture Used | Max Single Sub (untracked) | Typical ISO (Bortle 3-4) | Subs for ~20 min Stack |
|---|---|---|---|---|
| RF 14-35mm f/4L @ 14mm | f/4 | ~14 sec | 3200 | ~85 |
| RF 15-35mm f/2.8L @ 15mm | f/2.8 | ~13 sec | 2500 | ~90 |
| RF 24-70mm f/2.8L @ 24mm | f/2.8 | ~8 sec | 4000 | ~150 |
| RF 35mm f/1.8 IS Macro | f/2 | ~6 sec | 5000 | ~200 |
| RF 50mm f/1.2L | f/1.8 | ~4 sec | 6400 | ~300 |
| RF 85mm f/1.2L (tracked) | f/2 | 90-120 sec | 1600 | ~10-13 |
The last row is the reminder that once you're past 35mm or so, untracked exposure times get short enough that you're better off strapping the camera to a star tracker (a Skywatcher Star Adventurer or an iOptron SkyGuider Pro, in my case) and running much longer, much cleaner subs at lower ISO. The trade-off is obvious: more gear to haul, polar alignment to get right in the dark, and a mount that can fail silently if a cable snags mid-sequence. I've lost a full hour of subs to a tracker that stopped tracking without any indication on the readout. Worth knowing before you commit a whole night to one target.
Turn Off In-Camera Long Exposure Noise Reduction
The R6 Mark II's Long Exposure Noise Reduction feature takes a dark frame after every exposure and subtracts it in-camera, which sounds useful until you realize it doubles your effective time per sub. Shoot a 4-minute tracked exposure with LENR on and the camera is unavailable for another 4 minutes while it processes. For a stacking workflow you want as many subs as possible in a finite dark-sky window, so I leave LENR off entirely and shoot a batch of dark frames separately (lens cap on, same ISO, same shutter speed, same ambient temperature) at the start or end of the session instead. DeepSkyStacker, Sequator, and PixInsight all handle dark-frame calibration far more flexibly than the camera does, and you keep every minute of clear sky for light frames instead of losing half of it to in-camera processing.
One thing worth testing on your own copy of the body before a big trip: shoot a wide star field at your normal working ISO, pixel-peep the RAW at 100%, and look closely at the faintest stars near the edges of dynamic range. Some Canon bodies over the years have shown a mild in-camera noise-reduction artifact, sometimes nicknamed the "star eater" effect in astro forums, that can thin out the dimmest pinpoint stars under certain settings even with LENR switched off. I haven't seen it be a dealbreaker on my own R6 Mark II files, but it takes twenty minutes to check and it's cheaper than finding out after a five-hour session that your faintest stars didn't survive.
Battery Life Once You Factor In Cold Air
Canon rates the LP-E6NH at somewhere around 580 to 760 shots depending on whether you're using the viewfinder or the rear screen, but that CIPA number comes from a stills test cycle that has nothing in common with running bulb exposures back to back for four hours at 2°C. In real winter conditions I get roughly two and a half to three hours of continuous long-exposure shooting per battery before voltage sags enough that the camera shuts down mid-cycle. I carry four batteries for anything longer than a single-target session and keep the spares in an inside jacket pocket rather than the camera bag, since a cold battery reads lower charge than it actually has. The R6 Mark II charges over USB-C in camera, which means a power bank clipped to the tripod leg can keep one battery topped up while you're shooting on another, though I wouldn't run the camera directly off a power bank mid-sequence unless you enjoy the small chance of a brownout killing a partial exposure.
Weather Sealing, Dew, and the Screen That Actually Helps
The magnesium-alloy chassis and gasket sealing on the R6 Mark II hold up fine against the kind of heavy dew you get on a still, clear night near open water, which is exactly the kind of night that produces the best transparency for deep-sky work. It's not a substitute for a dew heater strap around the lens barrel though; the front element will fog regardless of how sealed the body is, and I've had a session go from usable to a soft-focus mess in about twenty minutes without one. The rear screen fogging is a separate annoyance the articulating hinge actually solves: angling the screen away from your breath and flipping it face-in when you're not chimping shots cuts down on condensation building up on the display itself, which matters more than it sounds like when you're checking focus every ten minutes.
What to Do With 200 RAW Files Before Sunrise Feels Real
A single night chasing a Milky Way panorama or a tracked nebula target routinely leaves me with somewhere between 150 and 400 RAW frames once you count light frames, darks, flats, and the inevitable batch where the tracker drifted and every sub in a ten-minute stretch is a smear. Reviewing that by eye on a laptop screen at a picnic table is where most of my post-processing hours used to go, and it's the part of the workflow that used to make me put off editing a session for a week.
This is where I actually use imagic on astro nights rather than for general culling. Its local sharpness scoring catches the soft subs in a sequence, which matters a lot more here than in regular portrait or event work because "soft" on a star field isn't obvious at a glance the way an out-of-focus face is. A star that's a half-pixel off critical focus still looks like a point of light on a laptop screen; it's only once you stack fifty of them that the mush becomes visible, by which point you've already thrown away the night. Running a sharpness pass across the batch before stacking flags the marginal subs early, while you can still reshoot if the sky holds. For star-trail sequences specifically, where you might have 300+ nearly identical frames from a two-hour interval-timer run, the burst and duplicate clustering groups those look-alike frames together instead of forcing a frame-by-frame scroll through a folder that all looks the same at thumbnail size. If you haven't looked at how that kind of clustering actually works under the hood, we cover the mechanics in more detail in how AI photo culling works.
Where This Fits Before Stacking Software, Not Instead Of It
To be clear, it isn't a stacking tool and doesn't try to be. DeepSkyStacker, Sequator, and PixInsight still do the actual registration and integration work; nothing replaces that step. What it handles is the culling pass that happens before any of those programs open a file, and for astro trips specifically, running entirely offline with no upload and no account check-in matters more than it does for a studio shoot. A lot of good dark-sky sites are also dead zones for cell signal, and the last thing I want on a laptop battery running on a tailgate at 1 a.m. is software waiting on a network call that isn't coming. imagic doesn't need one. Cull on the mountain with zero connectivity, come home with a folder that's already down from 380 frames to the 140 that are actually sharp and usable, and start stacking without re-triaging everything from scratch at the kitchen table.
Keeping a Consistent Look Across a Whole Season
The other place I've settled into a habit is on the editing side, once a stack is done and I've got a single integrated master file to grade. Milky Way cores and nebula targets both benefit from a fairly specific color treatment (pulling the core's natural brown-gold tones out of the automatic white balance without oversaturating them into orange, keeping the airglow green in wide shots from turning into a sickly cast), and it took me a season of trial and error to land on an edit I was happy applying consistently. Once I had a handful of finished edits I actually liked, I trained a custom apply_my_style preset in imagic on those files, so newer sessions from later in the season pick up the same starting point automatically instead of me rebuilding tone curves and color balance from a blank slate every single time I import a new stacked master. It's not a substitute for judgment on each image, wide shots and telephoto nebula crops still need different finishing, but it saves rebuilding the baseline every time, and it's kept my astro catalog from that season looking like it came from four different people. If you want more on the color side of this, the guide to photo color grading goes deeper into building a consistent palette across a body of work.
Frequently Asked Questions
Can the R6 Mark II's autofocus track stars for astrophotography?
Not reliably. Dual Pixel CMOS AF II can occasionally lock onto very bright targets like the moon or a planet with a fast lens wide open, but it isn't built to find focus on a field of dim point sources, and I've never gotten a consistent result trying. Manual focus with 10x live view magnification, ideally checked against a Bahtinov mask, is still the dependable method.
Is 24.2 megapixels enough resolution for printing a stacked astro image?
For most print sizes, yes. A well-registered stack from a 24.2-megapixel sensor holds up fine to 20x30 inch prints and beyond, especially since stacking itself increases effective resolution and reduces noise compared to any single sub. If you're printing large panoramic mosaics stitched from multiple frames, resolution stops being the limiting factor almost immediately since the stitched file is many times larger than any single exposure anyway.
Should I shoot the R6 Mark II's electronic shutter or mechanical shutter for star trail sequences?
I use electronic first-curtain for tracked long exposures to avoid any shutter-induced vibration at the start of the frame, and full mechanical for untracked wide-field bursts where vibration matters less over a short handful of seconds. Full electronic (silent) shutter works fine too for star trails specifically, since there's no mechanical wear concern running it for hundreds of consecutive frames, though rolling shutter skew isn't a practical issue at these shutter speeds either way.
How many spare batteries should I bring for an all-night stacking session?
For anything past two or three hours of continuous bulb exposures in cold weather, plan on three to four LP-E6NH batteries rather than trusting the CIPA rating, which is based on a stills test cycle that doesn't resemble long-exposure shooting. Keep spares warm in an inside pocket rather than the camera bag; a cold battery under-reports its actual charge and can shut the camera down mid-sequence sooner than you'd expect.