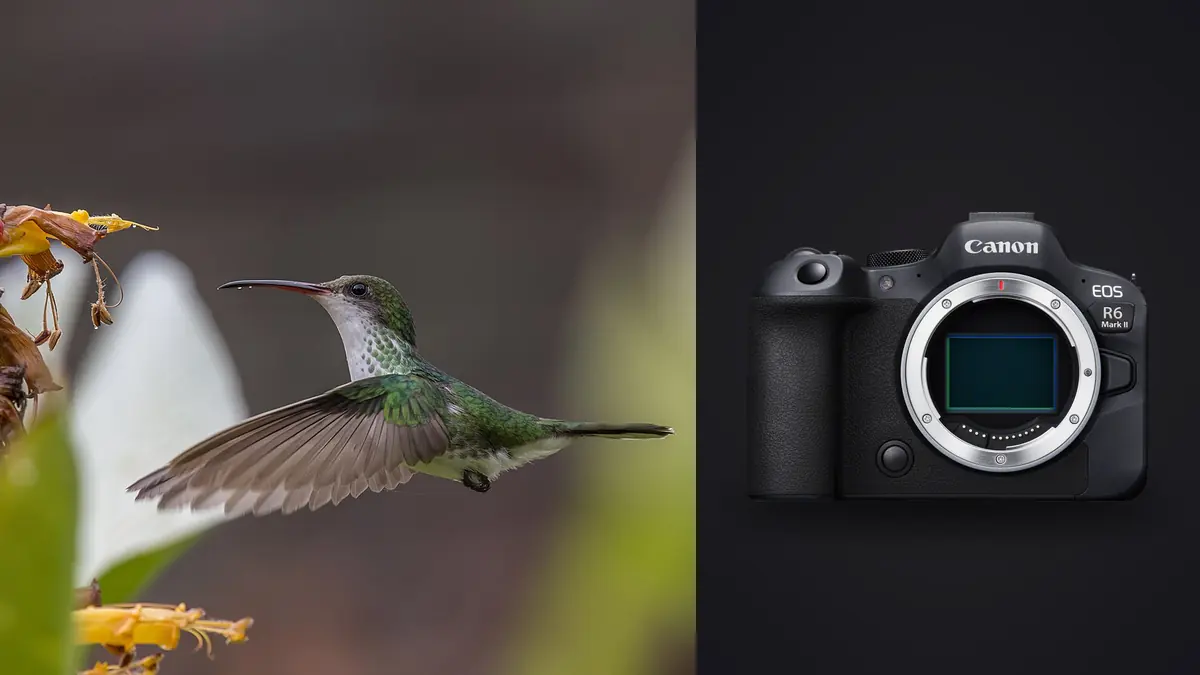
A Season Chasing Ospreys and Sanderlings with the R6 II
I picked up the Canon EOS R6 Mark II mainly because my old R6 kept losing the plot on birds against busy backgrounds, and because I wanted dual UHS-II slots instead of the mixed CFexpress arrangement on the R5. What follows isn't a spec sheet rewrite. It's what actually mattered over a spring spent on a reservoir watching ospreys fish, and a few weeks on a tidal flat photographing sanderlings and dunlin working the wrack line at speed. Both subjects expose different weaknesses in a camera, and the R6 Mark II handled them differently well.
Autofocus: Where Dual Pixel CMOS AF II Actually Earns Its Keep
The R6 Mark II's 24.2-megapixel sensor pairs with Dual Pixel CMOS AF II and Canon's deep-learning subject detection, which includes a dedicated bird mode under the Animal Priority setting. In practice this means the camera will pick out a bird's eye against sky, water, or reeds without you steering a focus point onto it manually. Against open sky it's close to automatic. Against a cluttered background like a marsh edge with branches and reflections, it still does reasonably well, though it will occasionally lock onto a wingtip or a bright patch of feather rather than the eye, especially on smaller, fast-moving shorebirds where the eye is a handful of pixels.
For flight work I settled on AF Case 2 (continue to track subjects, ignoring possible obstacles) with tracking sensitivity nudged toward -1 and acceleration/deceleration tracking at 0. Case 4 is tempting for erratic subjects, but I found it made the AF a little too eager to jump to a closer bird crossing the frame, which is exactly the wrong behavior when you're following one osprey through a stoop. I also moved focus off the shutter button entirely and onto the AF-ON button, because with 40fps electronic shutter available, a half-press that refocuses mid-burst can waste a chunk of a sequence on a bird that was never going to be sharp anyway.
One thing worth knowing before you rely on it in the field: bird eye detection on the R6 Mark II works best when the bird's head is at least roughly a few dozen pixels across in the frame. On a bird crossing at 15-20 meters with a 500mm lens this is fine. On a distant raptor circling a thermal at 100+ meters, the camera usually falls back to whole-subject tracking rather than the eye specifically, which is still useful but noticeably less precise for critical sharpness.
Burst Speed, Rolling Shutter, and the Buffer Wall
The R6 Mark II shoots up to 40fps with the electronic shutter and 12fps mechanical, and for birds in flight I lived in electronic shutter almost the entire season. The sensor isn't stacked, so there's a real rolling shutter tradeoff: fast horizontal pans following a bird cutting hard across the frame can show a slight skew on straight background elements like a horizon or a dock railing. On the bird itself, wingbeats move fast enough that I never saw obvious distortion on the subject, but I did notice it on background power lines during one hard pan on a peregrine stoop, so it's not purely theoretical.
The bigger practical constraint is the buffer, and it's tied directly to card speed since the R6 Mark II has no CFexpress slot, just dual UHS-II SD. Burning a bird taking off, gaining altitude, and banking away can easily run four or five seconds at 40fps, which is 160-200 frames, right around where a slower card starts to choke.
| Card / Shutter Mode | Approx. RAW frames before slowdown | Approx. CRAW frames before slowdown | Rough buffer clear time |
|---|---|---|---|
| UHS-II V90 (approx. 300MB/s), electronic 40fps | ~185-195 | ~550-600 | 6-8 sec |
| UHS-II U3 budget card (approx. 95MB/s), electronic 40fps | ~85-95 | ~250-270 | 12-15 sec |
| UHS-I card, electronic 40fps | ~70-80 | ~190-210 | 20+ sec |
| Any UHS-II card, mechanical 12fps | Rarely fills in a normal sequence | Rarely fills | Clears almost continuously |
These are field numbers from my own cards, not a lab bench, so treat them as directional rather than exact. The practical lesson held up all season though: a bargain UHS-II card will genuinely cost you the second half of a good flight sequence. I now shoot exclusively on V90-rated cards for anything with wings, and keep a slower card as backup storage in the second slot rather than as an active recording target during flight sequences.
Glass That Actually Reaches, and What Crop Mode Costs You
Most of my season was on the RF 100-500mm F4.5-7.1L, which autofocuses reliably on the R6 Mark II even with the RF 1.4x extender attached (effective 140-700mm, max aperture f6.3-10). Add the RF 2x extender and autofocus starts to hunt more in anything but good light, since you're pushing the effective aperture to f9-14 at the long end and the system has less light to work with. For a fixed-perch bird this is manageable. For a fast flight sequence in overcast conditions, I found the 1.4x a much more reliable choice than the 2x.
The RF 800mm F11 is worth mentioning separately because it's the lens that got the most confused questions from other photographers at the reservoir. It has no optical image stabilization of its own and leans entirely on the body's in-body stabilization, which the R6 Mark II rates up to roughly 8 stops with compatible lenses. Fixed at f11, it's not a lens for low light or fast shutter speeds in dim conditions, but for a bright morning with a bird holding still on a perch at real distance, it's remarkably sharp for the weight (about 1.26kg) and the price.
The 1.6x APS-C crop mode turns the 500mm end of the zoom into an effective 800mm field of view, which sounds like a free lunch until you check the output file size: cropping to the APS-C region of a 24.2-megapixel sensor leaves you with roughly 9.4 megapixels. That's plenty for web use and reasonable print sizes, but it's a real resolution cost, and I only reach for it when the alternative is not getting the shot at all, such as a bird flushing unexpectedly closer than my lens's minimum working distance would otherwise suggest cropping in post.
Weather Sealing, Battery Life, and Full Days Outside
The body is weather sealed to a similar standard as the original R6, which in practice meant light rain and heavy dew never caused an issue, but I still used a rain cover during one genuinely wet morning on the coast rather than trust the seals in a downpour. Battery life on paper (CIPA rated around 580 shots) undersells reality badly for burst shooting, since CIPA testing counts single-shot cycles rather than long bursts. On a typical four-hour morning session heavy on 40fps bursts, one LP-E6NH comfortably lasted the whole outing, and I only swapped batteries on longer full-day sessions.
Dual UHS-II SD slots meant I could run simultaneous RAW backup during the season's more consequential shoots (a returning migratory flock that wouldn't repeat for a year), which cuts your effective buffer numbers from the table above roughly in half since both cards are writing at once. Worth planning around if you're backing up in the field rather than after the fact.
The RAW Flood: What Happens After You Get Home
A single good flight sequence at 40fps for four or five seconds is 160-200 RAW files. A four-hour morning chasing multiple birds easily produces 2,000-3,000 frames, most of them near-duplicates from the same burst with only a handful genuinely sharp on the eye. At around 28-30MB per uncompressed RAW file (CRAW closer to 12-14MB), that's 60-90GB from a single outing, and going through it frame by frame in a standard RAW browser is the part of wildlife photography nobody enjoys.
This is the point where I stopped trying to cull manually. I run the day's cards through imagic before I open anything in an actual editor. It scores focus and sharpness locally on the machine (nothing gets uploaded anywhere, which matters when you're doing this from a laptop at a trailhead with no signal), and it groups burst sequences together so instead of scrolling through 190 near-identical frames of one osprey banking, I'm looking at maybe 8-10 clustered groups with the sharpest frame from each flagged. From there I can compare the shortlist against each other rather than against the whole take. On a heavy shooting day this is the difference between an hour of culling and fifteen minutes.
Once the keepers are picked, the apply_my_style feature in imagic is the other piece I lean on, since it's trained on my own past edits rather than a generic wildlife preset. My birds-in-flight edits tend to pull shadow detail out of underwing feathers and hold back highlight clipping on white plumage in bright sky, and having that applied automatically to a fresh batch means I'm adjusting a handful of outlier frames instead of starting from scratch on every image. If you're new to the idea of automated culling before editing, how AI photo culling works covers the mechanics in more depth than I've gone into here.
A Few Settings I'd Change on Day One
If I were setting up an R6 Mark II for birds in flight again from a fresh box, I'd change the following before the first outing: switch to electronic shutter for anything airborne and accept the rolling shutter tradeoff on hard pans, set AF Case 2 with tracking sensitivity at -1, move focus to back-button AF, enable Animal Priority with bird detection specifically rather than the general animal setting, and shoot CRAW instead of RAW unless you have a specific reason not to, since the buffer depth difference is large enough to matter on a genuinely long sequence and the quality difference at typical wildlife editing latitude is hard to see. I'd also format both cards to V90 UHS-II from the start rather than mixing card speeds across the two slots, since a fast primary card paired with a slow backup card in simultaneous-write mode drops your effective buffer to whichever card is slower. For general RAW-heavy workflow habits beyond this camera specifically, 10 tips for a faster photo workflow has some overlap worth reading alongside this.
Frequently Asked Questions
Is 40fps electronic shutter actually necessary for birds in flight, or does 12fps mechanical get the shot?
For a bird holding a steady flight path, 12fps mechanical is often enough, and it avoids the rolling shutter risk entirely. Where 40fps earns its keep is the unpredictable moment: a takeoff, a strike, a mid-air correction. Those events last a fraction of a second and 12fps can genuinely miss the peak wing position, while 40fps gives you several frames inside that same window to choose from.
Do I need CFexpress cards for the R6 Mark II when shooting birds in flight?
The R6 Mark II doesn't have a CFexpress slot at all, only dual UHS-II SD. The practical takeaway isn't about CFexpress but about not cheaping out on the SD cards you do buy: a genuine V90-rated UHS-II card clears the buffer roughly three times faster than a budget UHS-II card in my testing, which is the difference that actually shows up in missed frames during a long flight sequence.
Is the 1.6x crop mode worth using for extra reach on distant birds?
It's useful as a situational tool rather than a default setting. You're trading resolution (roughly 9.4 effective megapixels from the 24.2-megapixel sensor) for reach, so I use it when a bird is closer than my lens's working range would otherwise flatter, or when I need the extra framing margin for an erratic flier, but I shoot full frame by default and crop in post whenever there's time to decide.
How do you realistically manage the number of RAW files from a single day of birding in flight?
Volume is the real challenge more than any single camera setting. A busy morning easily produces a few thousand frames, most of them redundant bursts of the same bird. Running the cards through local culling software before opening an editor, so sharpness scoring and burst grouping do the first pass for you, is what makes that volume manageable without spending your evening scrubbing through duplicates by eye.