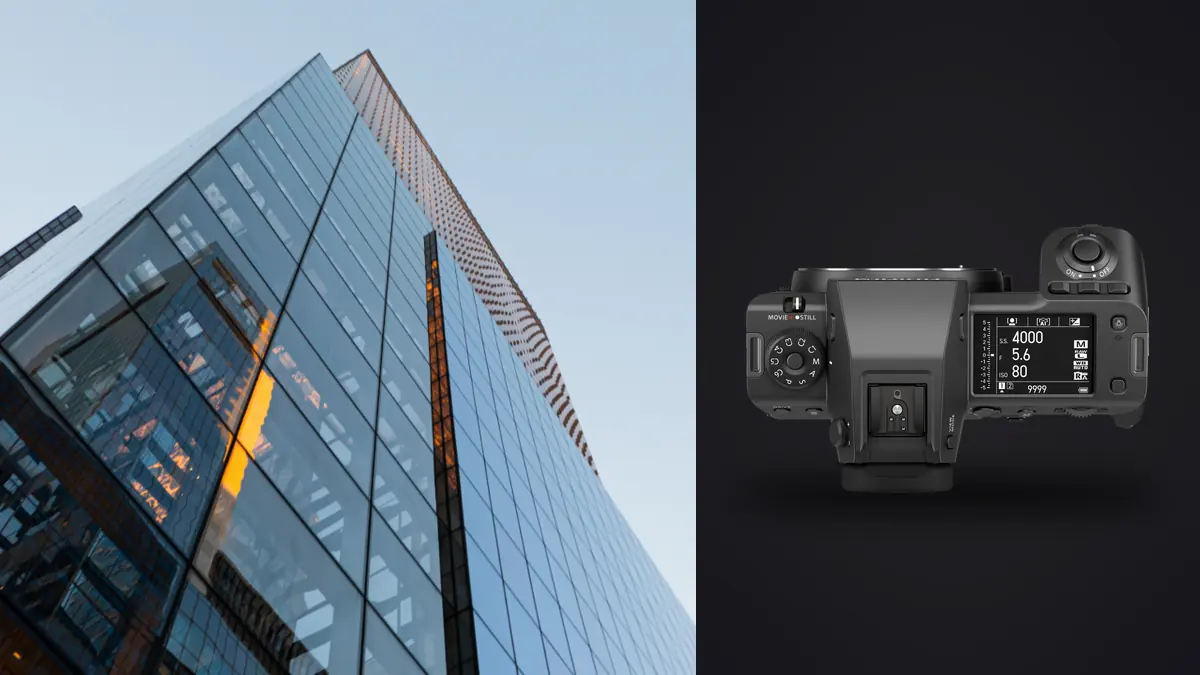
I picked up the GFX 100 II about eight months ago, mostly to replace an aging GFX 100S that had started throwing card errors on long tethered sessions. I didn't buy it for architecture specifically, I shoot a mix of interiors, some product work, and the occasional portrait job, but interiors are where the camera has ended up earning its keep. Architectural and interior photography is unforgiving in a specific way: you're usually stuck with a fixed vantage point, the light is rarely cooperative, and clients zoom into 100% crops on their monitors looking for softness in the crown molding. A camera that's merely good doesn't survive that kind of scrutiny for long.
This isn't a spec sheet regurgitation, imagic's own Fujifilm GFX 100 II page covers that side. It's what changed in my actual workflow once I started using this body for interior jobs, where it helped, and where it didn't matter nearly as much as Fujifilm's marketing implies.
Sensor resolution and dynamic range, not just numbers on a box
The 102-megapixel sensor gets talked about mostly in terms of print size, which misses the point for interior work. What matters more day to day is the file's ability to hold detail in shadow corners of a room while a window is blowing toward white, without a chain of bracketed exposures for every single angle. I still bracket for anything with direct sun coming through glass, that's non-negotiable in this genre, but I've cut my typical bracket count from five exposures to three on most interior shots because there's enough recoverable shadow detail in the base exposure that I don't need the extra stops of insurance.
Base ISO on this body sits at 80, with an extended low setting available, and that low native ISO matters more for interiors than it sounds like it should. A lot of interior work happens at ISO 80-200 on a tripod with a two or three second shutter, and the noise floor at those settings is close to nonexistent. Where I do notice grain creeping in is when I'm shooting available-light interiors handheld in the evening, cafes, lobbies, that kind of thing, and I've pushed to ISO 3200 or above. It's usable, but it's not the clean file people expect from a sensor this size. Medium format buys you dynamic range and resolution far more reliably than it buys you high-ISO cleanliness.
Which GF lenses actually earn a place in the bag
Fujifilm's GF lens lineup isn't huge, but for interior and architectural work you only need a handful of them anyway. Here's what I actually reach for on a job, and what I've left at home more than once.
| Lens | 35mm-equivalent | Max aperture | Shift/tilt | Where it earns its keep |
|---|---|---|---|---|
| GF20-35mm F4 R WR | 16-28mm | f/4 | No | Tight rooms, stairwells, elevators. My most-used lens on residential interiors by a wide margin. |
| GF23mm F4 R LM WR | 18mm | f/4 | No | Exteriors and large open-plan spaces where the 20-35 zoom's distortion gets harder to correct cleanly. |
| GF30mm F5.6 T/S | 24mm | f/5.6 | Yes, tilt and shift | Verticals correction in-camera on hero shots for print or client walkthroughs. Slow to work with, worth it for the flagship frame of a shoot. |
| GF32-64mm F4 R LM WR | 25-51mm | f/4 | No | Room-scale coverage, kitchens, living spaces where a wider lens would exaggerate the proportions. |
| GF110mm F2 R LM WR | 87mm | f/2 | No | Material and fixture close-ups, hardware, tile, textile detail shots that go alongside the wide room images. |
The 20-35 is the workhorse here, full stop. It's sharp corner to corner by f/8, distortion is mild and corrects easily, and the constant f/4 aperture means I'm not fumbling with exposure compensation every time I change focal length mid-shoot. The 30mm tilt-shift is the one people ask about most, and I'll be honest about it: it's slow to use, manual focus only in any meaningful sense, and stopped down to f/11 or narrower before it's genuinely crisp edge to edge. I don't reach for it on every angle in a shoot, maybe two or three frames per job, reserved for the shots that are going to end up large on a wall or on the cover of a portfolio.
Tilt-shift, pixel shift, and getting verticals right without fighting Lightroom
Architectural interiors live or die on straight verticals. Converging lines on a doorframe or a bookshelf read as amateurish no matter how good the light is. You've got two ways to solve this: correct it in post with the transform tools, or shoot it correctly with a tilt-shift lens in the first place. I use both, but they're not interchangeable in practice.
Correcting verticals digitally works fine most of the time, and honestly for eighty percent of interior frames I don't bother with the tilt-shift lens at all, I just shoot the 20-35 slightly wide and crop after straightening. But every digital correction costs you resolution at the edges, and on a wide interior with a low ceiling you can end up throwing away a meaningful chunk of the frame to get the lines straight. That's where the 30mm T/S pays for itself: shift the lens instead of tilting the camera up, and you keep the full sensor's resolution with no perspective stretching at the edges.
Pixel shift is the other party trick worth mentioning, and it's more useful for interiors than I expected going in. The camera can composite multiple shifted exposures into a single much higher-resolution file, useful for a hero shot of a kitchen or a lobby that's going to print large or get used in a magazine spread. It requires a completely static subject and a tripod, which rules it out for anything with people or moving light (a ceiling fan, curtains near an open window), but for an empty room at the right time of day it produces files with a level of fine detail, grout lines, wood grain, fabric weave, that a single exposure simply doesn't match. The catch is processing time and file size. A composited file from this mode is large enough that I only use it on the two or three frames per job that are actually going to be printed or published at scale, not as a default capture mode.
Tethering and the realities of shooting on someone else's schedule
Interior and architectural shoots often happen on someone else's clock, such as a design firm walking through a finished space, or a stager who needs the room reset between angles. Tethering to a laptop on-site with USB-C has been reliable on this body in a way the previous generation occasionally wasn't for me, no dropped connections mid-session, which used to happen often enough on older Fuji bodies that I'd budget extra time for it. Being able to pull an image up on a 27-inch monitor and have the owner or a designer confirm styling and composition before I move the tripod has cut down on repeat visits more than any single lens or sensor upgrade has.
Dual card slots (CFexpress and SD) mean I can shoot RAW to both cards simultaneously on shoots where losing the take isn't an option, a one-off visit to a location, for instance. For lower-stakes work I'll just shoot to the faster card and treat the SD slot as overflow.
What happens after the shoot: brackets, near-duplicates, and where I stopped doing this by hand
Here's the part of interior photography nobody puts in the marketing copy: the volume of files. A single residential job, say twelve rooms, three angles per room, three-to-five exposure brackets per angle, plus a handful of detail shots and the odd tilt-shift frame, easily runs past six hundred RAW files before lunch. Most of those are near-identical brackets of the same composition, plus the inevitable few frames where the tripod got bumped or a cloud passed over mid-bracket and the exposure sequence doesn't line up cleanly with its neighbors.
I used to sort through all of that manually, zooming into each frame in a bracket set to pick the sharpest one before merging exposures. That's the part of the job I've mostly handed off to imagic now. It runs entirely on my machine, no upload step, which matters when interior shots need to stay private before a property listing or a launch goes public, and it scores sharpness locally so I can sort a folder of six hundred files down to the frames actually worth merging or editing in a fraction of the time it used to take. It's also decent at flagging the near-duplicate brackets, the same composition shot three times because I wasn't sure the tripod had settled, so I'm not manually eyeballing which of three nearly identical frames has the least camera shake.
The other piece that's turned out more useful than I expected on this kind of work is the apply_my_style preset feature, which trains on your own past edits rather than a generic filter. Interior work tends to have a consistent look per property type, so once I've graded the first batch of rooms in a set, applying that same trained look across the rest of the set saves a genuinely large chunk of the editing day, especially on sets of forty or fifty finished images where you want visual consistency across the whole set, not forty images that each look like they were graded separately. If your process already leans on a repeatable culling and workflow routine, a piece like tightening the day-to-day workflow is worth a look alongside whatever tool you're using to sort the take.
Field notes: the stuff that actually trips people up
A few things I didn't fully appreciate until I'd shot several jobs with this body:
The in-body stabilization is rated for a lot of stops, and it's genuinely good, but I still put the camera on a tripod for the vast majority of interior work anyway. It's not about the stabilization failing, it's about repeatability. When a client asks to see three exposures blended or wants a different lighting setup tried on the exact same composition, a locked-off tripod position is what makes that possible. IBIS is great for the handheld detail shots and the walk-through frames, not a replacement for a tripod on the frames that matter.
The electronic viewfinder, if you're using the detachable unit, tilts, and that sounds like a minor convenience until you're shooting a low-angle frame near a baseboard and don't want to lie on the floor of a client's freshly cleaned space. Small thing, saved my knees more than once.
Battery life is fine for a normal shoot day but tethered live view sessions with the rear screen active drain faster than you'd expect. I carry three batteries on any job longer than a few hours, which wasn't necessary with smaller-sensor bodies I used previously.
Frequently Asked Questions
Is the GFX 100 II overkill for interior photography, or does the resolution actually matter?
It depends on delivery size. If you're shipping web-resolution images for a real estate listing, you don't need 102 megapixels and a cropped-sensor or full-frame body will get the job done. Where the resolution earns its place is large-format print, architectural portfolio work, or jobs where a client might crop into a detail from a wide room shot after the fact. For day-to-day listing photography, the bigger practical win from this body is the dynamic range, not the pixel count.
Do I need the GF30mm tilt-shift lens, or can I get away with digital perspective correction?
For most jobs, digital correction in post is enough, and it's far faster to work with than a manual tilt-shift lens on a tripod. Reach for the tilt-shift specifically on hero frames, wide rooms with low ceilings where correction would otherwise cost you too much of the frame at the edges, or work destined for large prints where edge softness from digital stretching would show.
How well does the GFX 100 II handle mixed lighting in interiors, tungsten lamps against daylight from a window?
Better than I expected, but I still shoot a custom white balance off a gray card when a room has strong mixed sources, rather than trusting auto white balance to split the difference. The extra dynamic range helps you recover a workable result either way, but getting the white balance closer in-camera saves real time later when you're trying to make tungsten-lit corners and daylight-lit windows sit together believably.
What's the realistic file management burden for a full day of interior shooting with this camera?
Heavier than most photographers expect going in. A busy day easily produces five to eight hundred RAW files once you count brackets, detail shots, and the occasional redo. Between the file sizes involved and the sheer bracket volume, a culling pass before you start merging exposures or grading isn't optional, it's the difference between an editing session that takes an afternoon and one that eats your whole week.