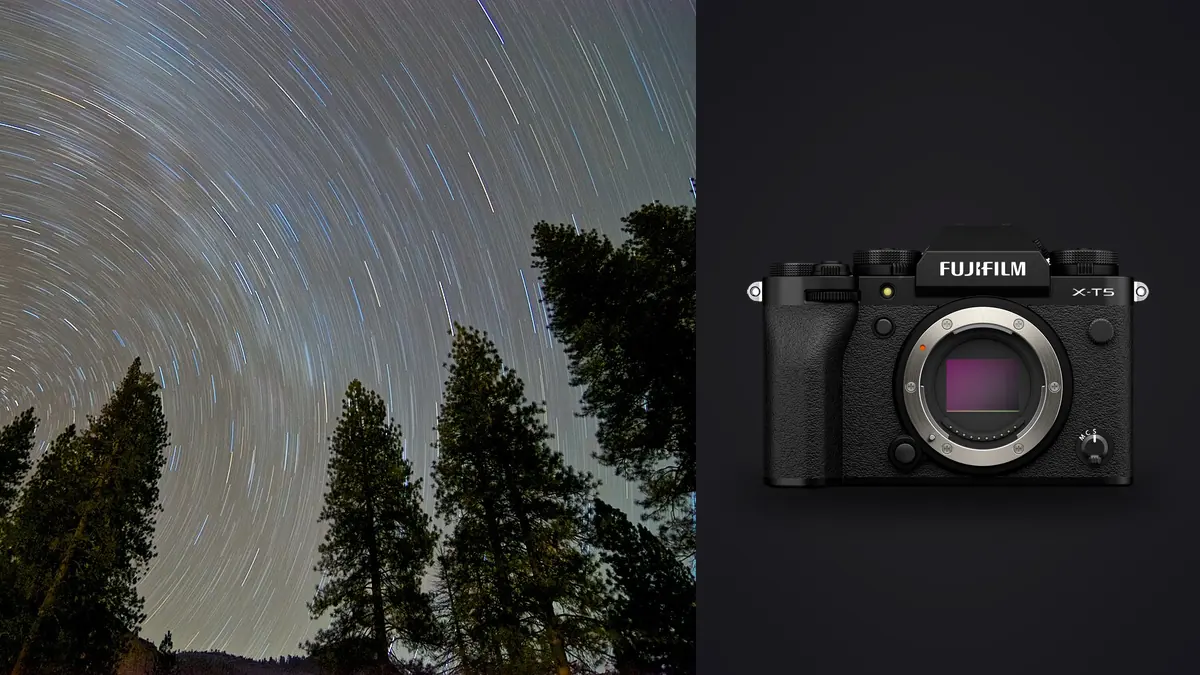
I bought the X-T5 for travel and street work, not for astro. It ended up under a dark sky in the Peak District three weeks after I got it, mostly because I was curious whether the 40 megapixel sensor would actually hold up once you started stacking dozens of frames instead of judging a single exposure on a laptop screen. The short answer is that it holds up well, but not in the way the spec sheet implies, and there are a few X-Trans-specific headaches worth knowing about before you drive two hours to a dark site and find out the hard way.
This isn't a full review of the camera. It's what I've learned running the X-T5 through maybe fifteen actual astro sessions since late 2022, covering wide Milky Way frames, some tracked deep-sky attempts with a small star tracker, and a couple of star trail sequences that ran three hours unattended. Some of it applies to any APS-C body, some of it is specific to Fuji's sensor design and menu quirks.
The X-Trans Sensor and What It Does to Star Fields
Fuji uses a 6x6 X-Trans color filter array instead of the standard Bayer pattern almost everyone else uses. For daylight work this is mostly a non-issue, and arguably an advantage for fine texture and moire resistance. For star fields it's a different story. Because the pattern repeats over a larger block than Bayer does, some RAW converters have historically struggled to demosaic star points cleanly, producing a smeary, slightly "worm-like" texture around bright stars, especially at higher ISOs. People in the astro-Fuji forums have been complaining about this since the X-T1 days.
It's better than it used to be. Adobe's demosaic algorithm for X-Trans has improved a lot, and if you're processing in Lightroom or Camera Raw on a recent version, the worming is subtle enough that you'd need to pixel-peep at 100% to notice it on individual stars. But if you're using an older or more literal demosaic (some open-source raw processors still handle X-Trans poorly), you'll see it. My workaround is boring but reliable: I convert every RAF to a 16-bit TIFF in Lightroom before it goes anywhere near stacking software, rather than feeding raw RAF files directly into tools that may use their own weaker demosaic engine.
Getting the Exposure Right Before You Start Stacking
Forty megapixels on an APS-C sensor means a pixel pitch of roughly 3.4 microns, which is tight. Tight pixels reveal star trailing sooner than the classic "500 rule" accounts for, because that rule was written for cameras with much bigger, blurrier pixels. In practice I've found I need to cut the traditional number by close to half to keep pinpoint stars sharp at 100% crop, which matters a lot once you're stacking, because any trailing in individual subs gets baked into the final stack and can't be fixed later.
IBIS stays off for anything on a tripod. It's genuinely excellent for handheld low-light work (Fuji rates it around seven stops), but on a stationary tripod it can introduce a very faint hunting motion as the system looks for movement that isn't there. I also never touch the 160MP pixel-shift multi-shot mode for star fields. It's built for static subjects photographed across sixteen or twenty sequential frames, and the sky moves measurably even in the few seconds that sequence takes, so you get misaligned composites rather than a cleaner single frame. It's a great feature for architecture and product work. It has no place in a stacking workflow built around dozens of separately-aligned exposures.
Starting points I actually use in the field
| Focal length (actual) | 35mm-equivalent | Max shutter before trailing shows at 100% | Starting ISO | Starting aperture |
|---|---|---|---|---|
| 8mm | 12mm | ~20 sec | 3200 | f/4 |
| 10mm (10-24mm zoom) | 15mm | ~15 sec | 4000 | f/4 |
| 16mm | 24mm | ~8 sec | 5000 | f/2 (stopped from f/1.4) |
| 23mm | 35mm | ~5 sec | 6400 | f/2.2 |
These aren't derived from a formula, they're what's worked for me across enough nights that I trust them more than the math. Your mileage will vary a bit with atmospheric seeing and how strict you are about pixel-level sharpness, but they're a reasonable starting point rather than a guess.
Choosing Glass for the Crop Sensor
The 1.5x crop is the single biggest adjustment coming from full frame. A 16mm lens behaves like a 24mm for framing, which is fine for Milky Way work but means you need genuinely wide, genuinely fast glass to get the same field of view and light gathering a full-frame shooter takes for granted. Here's what I've actually shot with on the X-T5, not a list pulled from a spec sheet.
| Lens | Effective focal length | Max aperture | Corner coma wide open | Approx. price |
|---|---|---|---|---|
| Fujifilm XF 8mm f/3.5 R WR | 12mm | f/3.5 | Well controlled, minor softening only in the extreme corner | ~$800 |
| Fujifilm XF 10-24mm f/4 R OIS WR | 15-36mm | f/4 | Visible coma at 10mm wide open, mostly gone by f/5.6 | ~$700 |
| Fujifilm XF 16mm f/1.4 R WR | 24mm | f/1.4 | Noticeable stretching at f/1.4, cleans up nicely by f/2.2 | ~$1,000 |
| Viltrox 13mm f/1.4 AF | 20mm | f/1.4 | Better than its price suggests, minor coma even wide open | ~$500 |
| Rokinon/Samyang 12mm f/2 (manual) | 18mm | f/2 | Some corner stretching, but usable for wide Milky Way frames | ~$350 |
My honest pick out of that list is the XF 16mm f/1.4. It's not the widest option and it's not cheap, but the combination of a bright maximum aperture and manageable coma once you stop down half a stop makes it the lens I reach for most often. The Viltrox is the one I'd tell a friend on a budget to buy instead; it punches well above its price for astro use even if the autofocus motor (irrelevant here, since you're focusing manually anyway) is nothing special.
Running the Actual Sequence
For stacking, you want dozens of identically-exposed frames of the same patch of sky, plus a set of dark frames (lens cap on, same ISO and shutter speed) to subtract out sensor noise patterns. The X-T5's built-in intervalometer handles the sequence itself well: set your interval a couple of seconds longer than your exposure to give the buffer time to clear, and let it run. Where the camera gets less convenient is battery life. The NP-W235 is a decent battery for a mirrorless body, but a two-hour stacking session in near-freezing temperatures will chew through one faster than you'd expect from daytime shooting, since cold hits mirrorless batteries hard and the sensor is drawing power continuously between subs. I carry three batteries for anything longer than ninety minutes and keep the spares in an inside jacket pocket, not in the camera bag.
Focus is manual, always. Autofocus in near-total darkness on a star field is unreliable at best. I focus on the brightest star I can find using the rear screen zoomed in to maximum magnification with focus peaking on, lock it, and then tape the focus ring if I'm worried about bumping it during a long session. The X-T5's screen is a three-way tilt rather than a fully articulating vari-angle panel, which is a minor annoyance when you're shooting almost straight up toward zenith and the screen won't rotate to face you; I've ended up crouched at odd angles more than once because of it.
Weather sealing matters more for astro than people expect, mostly because of dew rather than rain. A humid night near a lake or river will fog a front element within twenty minutes if you don't have a lens warmer or hand warmer strapped around the barrel. The body itself has handled damp grass and heavy dew without complaint across every session I've used it for.
From 100 Subs to a Stack: the Culling Step Nobody Talks About
Here's the part that surprised me the first time I did it seriously. A ninety-minute session at one shot every fifteen seconds gives you around 360 subframes. Not all of them are usable. Planes and satellites cross the frame more often than you'd think (satellite trains especially, if you're anywhere near a recent Starlink launch), a gust of wind can nudge the tripod on a frame or two, and focus can drift very slightly over a long cold session as the lens barrel contracts. Scrolling through 360 nearly-identical star fields at 100% zoom looking for the ones with a faint plane streak or a soft-focus outlier is genuinely tedious, and it's exactly the kind of repetitive visual check that's easy to miss when you're tired at midnight.
I run the batch through imagic before it goes anywhere near stacking software. Its local sharpness scoring flags the handful of frames where focus drifted or the tripod moved, and since a lot of consecutive star subs look near-identical to the eye, the duplicate and burst clustering makes it fast to confirm you're keeping a genuinely representative set rather than three hundred frames you've stopped actually looking at individually. Everything runs on the machine, nothing gets uploaded anywhere, which matters to me with raw astro files that can run to 80MP-equivalent TIFFs once converted. It's a small step, but it's saved me from feeding a plane-streaked frame into Deep Sky Stacker more than once, which quietly wrecks an otherwise clean stack. If you're new to how automated culling actually scores sharpness rather than just guessing, it's worth reading up on how AI photo culling works before trusting it with anything precious.
Stacking Software and RAF Compatibility
Deep Sky Stacker reads Fuji RAF files natively on Windows and does a competent job, though I still get more consistent star alignment converting to TIFF first rather than feeding it RAF directly, for the demosaic reasons mentioned earlier. Sequator is faster for a quick Milky Way stack and handles the sky/foreground blending well if you're combining a stacked sky with a single sharper foreground exposure, which is standard practice for wide landscape astro shots where the foreground doesn't need sixty frames of noise reduction. On Mac, Starry Landscape Stacker is the one I've had the best luck with for X-T5 files, again working from converted TIFFs rather than RAF.
None of these tools were built with X-Trans in mind specifically, so the extra conversion step is just part of the workflow rather than something to fight. Once you accept that and build it into your process, the actual stacking is no different from any other camera: align on stars, reject outliers, integrate, then bring the stacked file back into your usual editor for the final grade. If your night sessions are eating into time you'd rather spend shooting, it's worth reading through some general tips for a faster photo workflow, since a lot of the same batching principles apply just as well to a folder of 300 star subs as they do to a wedding gallery.
Star Trails Are a Different Animal
If you're shooting trails rather than a stacked pinpoint sky, the settings change: shorter individual exposures (20-30 seconds is plenty), lower ISO since you're not fighting to freeze star motion, and you stack for addition rather than alignment, using something like StarStaX. The intervalometer setup is identical, just running longer, often two to three hours. One thing I've learned the hard way: don't bother trying to save a color grade you like from a stacked Milky Way edit and reapply it identically to a trails sequence. The tonal range and dynamic range profile are different enough that a preset built for pinpoint stars tends to crush the trail highlights. I do keep a saved look in imagic's apply_my_style built from my own past astro edits for consistent color on stacked Milky Way frames specifically, since that's the kind of repetitive grading (same blue-to-purple sky tone, same warm foreground lift) where having it trained on my own previous edits actually saves real time across sessions, rather than trying to make one preset do two different jobs.
Frequently Asked Questions
Is 40 megapixels overkill for star stacking, or does the extra resolution actually help?
It helps, but it's a double-edged sword. More resolution means finer star points and more detail in the final stack, which is genuinely nice for large prints. It also means trailing becomes visible at shorter shutter speeds than you'd expect from a 24 or 26 megapixel body, and file sizes balloon fast once you're converting hundreds of RAFs to TIFF. If you're stacking on a laptop rather than a desktop, budget extra time and drive space accordingly.
Do I need a star tracker with the X-T5, or is a static tripod enough?
For wide Milky Way frames, a static tripod with the exposure limits above is enough, and it's what most of my usable shots have come from. For deep-sky targets (nebulae, galaxies) at longer effective focal lengths, you really do need a tracker; the APS-C sensor's lighter files and the X-T5's relatively modest 557g body weight actually make it a decent, low-payload option for smaller trackers that would strain under a heavier full-frame body and long lens.
Does the X-Trans sensor make the X-T5 a bad choice for astrophotography compared to a Bayer sensor camera?
Not a bad choice, just one with an extra workflow step. The demosaic quirks are real but manageable once you convert to TIFF before stacking rather than feeding raw RAF files into software that doesn't handle X-Trans well. I wouldn't call it a reason to avoid the camera if you already own Fuji glass.
How many subframes should I actually shoot for a clean stack?
For a reasonably clean Milky Way stack I aim for at least 20-30 light frames, plus 15-20 matching dark frames. More helps up to a point of diminishing returns, somewhere around 40-50 frames, beyond which you're mostly adding processing time rather than visible noise reduction. This is also where culling before stacking pays off: a stack of 30 genuinely clean frames beats a stack of 50 frames where five are plane-streaked or slightly soft.