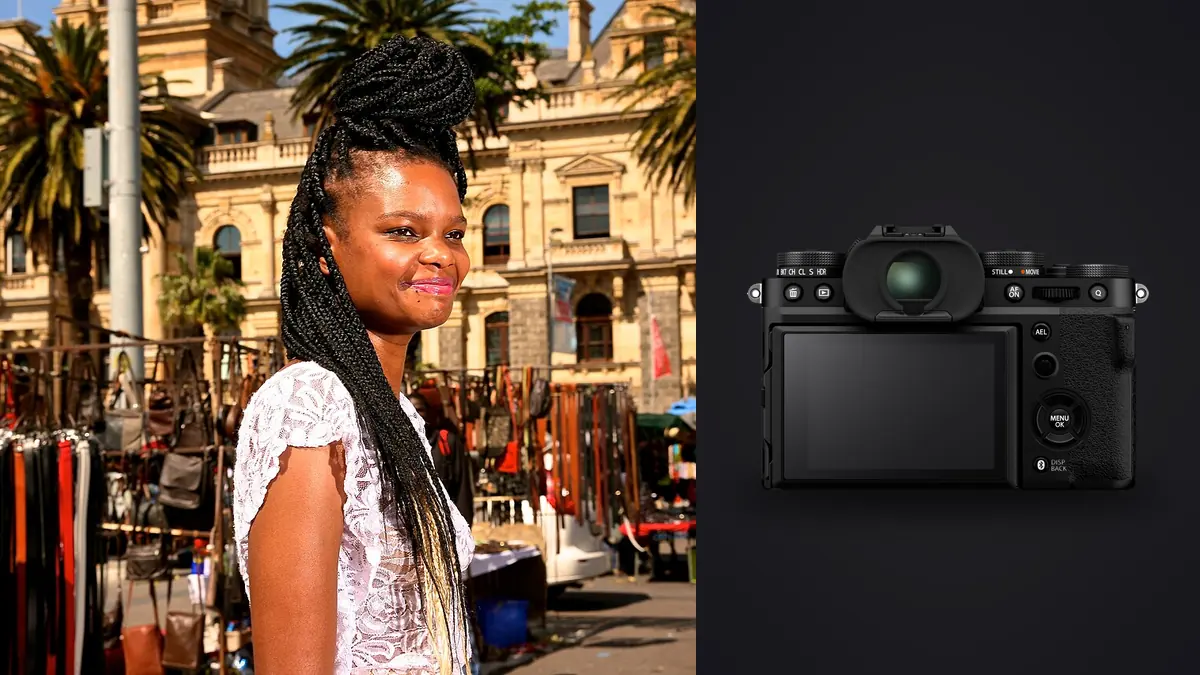
Picture a two-day lookbook shoot for a small activewear brand: twelve looks, three models, a studio morning and a rooftop afternoon. Your usual full-frame body is in for a sensor clean, and a friend loans you an X-T5 with a 33mm f/1.4 and a 50-140mm f/2.8 rather than letting you rent something you'd have to learn on set. It's the kind of body worth reaching for whenever a lookbook calls for fast turnaround and a lot of looks in a single day. This is what actually changed about the workflow, not the marketing version.
Why an APS-C Body Makes Sense for Look Coverage
Lookbook work is different from editorial or portrait work in one important way: the garment has to read clearly in the frame, not just the model's face. A full-frame body at f/1.4 gives you creamy separation on a headshot but often throws the hem of a jacket or the texture of a knit out of focus if the model shifts weight between shots. The X-T5's APS-C sensor, at the same aperture and framing distance, gives roughly one to one and a half stops more depth of field than full frame. That sounds like a downside if you're chasing bokeh, but for a full-look shot where the client needs the entire garment sharp from shoulder to hem, it's actually doing some of the work for you. I still carry fast primes, but I stop them down more on this body than I ever did on full frame, and I get away with it because the files hold detail well past f/5.6.
The 40.2-megapixel sensor matters more for lookbook delivery than it does for most other genres. Clients ask for square crops for Instagram, vertical crops for a lookbook PDF, and wide crops for the website banner, all from the same capture. Shooting one frame and cropping four ways out of a 40MP RAW file holds up at print resolution in a way a 24MP file starts to struggle with once you're down to a tight torso crop. I stopped shooting three focal lengths of the same pose for different platforms and started shooting one clean frame wide enough to crop from.
The Lenses That Actually Earned Their Place in the Bag
I tested four lenses before settling on a working kit. The 18-55mm kit zoom is genuinely useful for the first pass of a new set, since it lets you find the framing fast without swapping glass, but it's not what I'd pick for a final gallery. The table below is what actually stayed in rotation and why.
| Lens | Full-frame equivalent | Weight | Where it earns its keep on a lookbook set |
|---|---|---|---|
| XF 33mm f/1.4 R LM WR | ~50mm | 360g | Standard full-look frames; natural perspective, no distortion on straight hemlines |
| XF 56mm f/1.2 R WR | ~85mm | 445g | Close-crop beauty and detail shots (stitching, texture) between full looks |
| XF 50-140mm f/2.8 R LM OIS WR | ~76-213mm | 995g | Rooftop and street locations where you can't move the model to fill frame |
| XF 16-55mm f/2.8 R LM WR | ~24-84mm | 655g | Group looks and environmental frames with two or three models in one shot |
The 56mm f/1.2 gets more use than you might expect walking into this genre. Clients almost always want a handful of tight detail shots per look, a cuff, a zipper pull, a texture close-up, and that lens renders those with enough separation to feel premium without needing a macro. The 50-140mm at f/2.8 stays on the body for anything shot outdoors where you're working from ten or fifteen feet back, which happens more on lookbook shoots than studio ones because clients increasingly want the "in the wild" aesthetic instead of a seamless backdrop.
Where the Buffer and the Screen Actually Slow You Down
The X-T5 shoots 40MP RAW at up to 15fps with the mechanical shutter and 20fps electronic (with a 1.29x crop), and on paper that sounds like plenty for a fashion shoot where the model is walking or turning. In practice, at full 40MP RAW plus JPEG (I keep a JPEG alongside for quick previews), the buffer fills faster than I'd like on a fast-moving sequence, maybe 15 to 18 frames before it starts to slow, depending on the card. I switched to UHS-II cards specifically for this kind of shooting and it helped, but if you're shooting a model jumping or a jacket flaring open mid-turn and you hold the shutter down for two full seconds, you'll feel the buffer catch up with you on the tenth or eleventh frame. I've learned to shoot in short deliberate bursts of five or six rather than holding the shutter, which also, honestly, cuts down on how many near-identical frames I have to sort through later.
The screen is the other place the X-T5 shows its age for this specific job. It's a three-way tilt, not a fully articulating flip screen, which is fine for landscape framing but awkward the moment you rotate the camera to portrait for a vertical lookbook crop, which is most of the time in this genre. I ended up shooting a lot of verticals through the viewfinder rather than the screen, which isn't a dealbreaker, but if you're used to a vari-angle screen on another system, expect to adjust.
What Happens After the Shutter Stops
A two-day lookbook shoot with twelve looks and short deliberate bursts can still leave somewhere between 900 and 1,400 RAW files by the end of day two. The client needs a gallery of maybe 60 to 80 finished images, roughly five to seven per look. Getting from 1,200 files to 70 finals is often the part of the job people dread most, sitting at a laptop at 11pm flipping through frame after frame of the same pose looking for the one where the fabric fell right and nobody blinked.
This is the part of the workflow where imagic actually changed how I structure the shoot day, not just the edit. I run the card through imagic on a laptop between setups now, since it processes everything locally with no upload step, which matters on jobs where the brand hasn't announced the collection yet and won't sign off on anything leaving the building before launch. The duplicate and burst clustering groups each five-or-six-frame burst together automatically, so instead of scrolling through a wall of nearly identical shots I'm looking at maybe 200 clustered groups instead of 1,200 individual files. Within each cluster, the local sharpness scoring flags which frame actually has crisp focus on the garment, which matters more than it sounds, because at f/2.8 on a moving subject it's easy for a frame to look sharp on the model's face on a small screen and be soft across the jacket when you check it at full size later.
The X-Trans sensor's color filter array does add one wrinkle here worth mentioning: some editors demosaic X-Trans RAF files more slowly or less cleanly than they handle a standard Bayer file, so previews built on old software can look mushier than the actual RAW data supports. If your culling tool is generating previews from a poor demosaic, you'll reject sharp frames because the on-screen version looks soft. That's worth checking with whatever software you're using before you trust its verdict on a borderline frame. If you're new to the general idea of software-assisted culling versus doing it by eye, this piece on how AI photo culling actually works is a decent starting point before you commit a whole workflow to it.
Color, Skin Tone, and Getting the Grade Consistent Across Twelve Looks
Fujifilm's film simulations get talked about a lot, and for a lookbook shoot the one that actually earns its reputation is Nostalgic Neg for skin tones under mixed daylight and shade, which is common on a rooftop location where half the set is in open sun and half is under an awning. I shoot the JPEG preview in that simulation just to judge skin tone on the fly, but the final image always comes from the RAW file graded from scratch, because a lookbook needs consistent color across twelve completely different garment colors, not twelve individually pleasing frames.
That consistency problem, keeping the same white balance and contrast character across a shoot that spans a studio morning and a rooftop afternoon with completely different light, used to mean building a fresh set of adjustments for roughly every third look. What's actually saved time is training imagic's apply_my_style feature on a batch of my own previously graded images from an earlier shoot with similar lighting, then letting it apply a starting grade to the new RAW files before I go in and fine-tune per look. It's not a substitute for adjusting exposure and white balance frame by frame, garments reflect light too differently for that, but it means every image starts from roughly the same tonal baseline instead of me manually resetting curves every time the light changes. For anyone building out a repeatable grading process rather than starting from zero each shoot, this guide to color grading workflow covers the manual side of what I'm describing here.
A Realistic Day on Set
Day one started in a rented studio with a single 6-foot octabox and a reflector, four looks scheduled before lunch. The X-T5's in-body stabilization meant I could hand-hold the 50-140mm at 1/60th for a couple of the quieter static poses without a tripod, which saved setup time between looks since I wasn't repositioning a tripod head every time the angle changed. Weather sealing didn't matter that morning, but it mattered a lot on day two, when the rooftop location got hit with a light drizzle around 3pm and I kept shooting through it rather than packing up and rescheduling, which would have blown a tight launch timeline.
Battery life across the two days was fine but not spectacular, I went through two batteries on day one alone shooting mostly bursts with image review after each set, which is a habit worth breaking on this body since chimping between every burst eats into the battery faster than it needs to. Dual UHS-II card slots meant I recorded a backup copy to the second card throughout, which on any shoot you can't redo isn't optional regardless of what camera you're shooting.
Where the X-T5 Actually Falls Short for This Job
I want to be straightforward about the limits rather than pretend this body has none. The buffer depth at full 40MP RAW+JPEG is the biggest one for fast movement sequences, jumping shots, fabric-in-motion shots, anything where you'd naturally hold the shutter for two or three seconds. The tilt-only screen is a real friction point for a genre that shoots portrait orientation as often as landscape. And while the APS-C sensor's extra depth of field is genuinely useful for full-look shots, it works against you on the tight beauty crops where clients do want that shallow, editorial look, so you end up shooting the 56mm f/1.2 wide open more than you might on other jobs just to get separation the sensor size doesn't hand you for free.
None of that stops this from being a strong lookbook body. The resolution headroom for multi-platform crops, the weight (the whole kit above comes in lighter than a comparable full-frame f/2.8 zoom kit alone), and the fact that clients on a tight turnaround don't care what sensor size delivered the file, they care whether the gallery is ready on schedule, all matter more day to day than the spec-sheet gaps.
Frequently Asked Questions
Is 40 megapixels actually necessary for a lookbook, or is it just a bigger file to manage?
For a single-platform delivery, no, you don't need it. For a lookbook that gets cropped into square social posts, vertical PDF pages, and wide website banners from the same capture, the extra resolution means you can shoot one clean frame and crop four ways without losing print-usable detail. If your client only ever needs one fixed crop ratio, a lower-resolution body will save you storage and editing time with no visible downside.
Does the APS-C sensor hurt background separation compared to a full-frame body?
Somewhat, yes, at matched apertures and framing. You'll get roughly a stop to a stop and a half more depth of field on the X-T5 than an equivalent full-frame setup, which actually helps full-look shots stay sharp end to end but works against you on tight beauty crops where you want the background to melt away. The 56mm f/1.2 wide open closes most of that gap for close-up work.
How many frames should I expect to shoot per look, and how does that affect the edit?
On this kind of job I average five to eight frames per pose across two or three poses per look, which for twelve looks lands somewhere around 900 to 1,400 total RAW files for a two-day shoot. Shooting in short deliberate bursts instead of holding the shutter down keeps that number manageable and also keeps the buffer from filling mid-sequence. Grouping those bursts automatically before you sit down to edit is what keeps the review manageable instead of scrolling through more than a thousand near-duplicate frames one at a time.
Can the X-T5 keep up with a model moving quickly without stalling mid-burst?
Mostly, but not indefinitely. On fast UHS-II cards you'll get roughly 15 to 18 full-resolution RAW+JPEG frames before the buffer starts to slow the burst rate, which is enough for a typical jump or turn sequence but not enough for holding the shutter through several seconds of continuous movement. Shooting shorter, more deliberate bursts around the peak of the movement works better than trying to capture the whole motion in one long sequence.