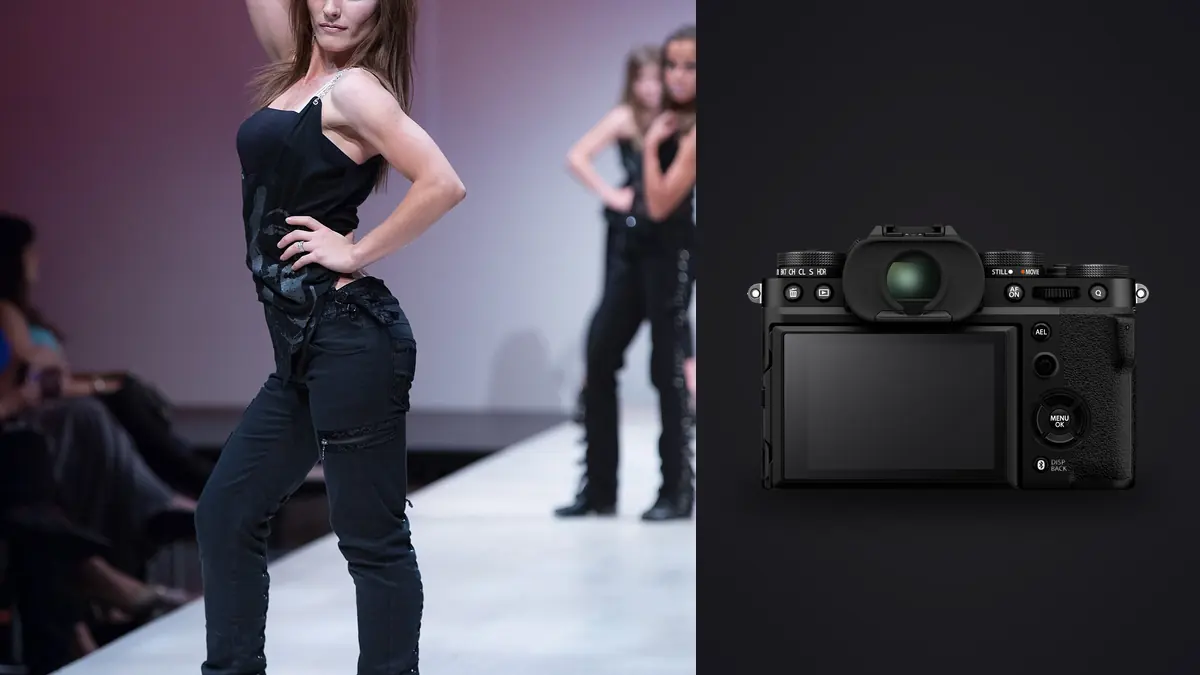
Lookbook days are a different animal from an editorial shoot or a wedding. You are running through fifteen, twenty, sometimes thirty-five looks in a single afternoon, the client's brand manager is standing behind the monitor checking that every belt buckle and hemline reads correctly against the last season's shots, and the deliverable at the end is not a curated set of favorites, it is a consistent, near-mechanical set of hero frames per look that all need to sit next to each other on a product page without looking like they came from six different photographers. I have run a handful of these days on a Fujifilm X-T5 body over the last year, mostly for small apparel brands and one shoe label doing a pre-launch catalog, and the camera earns its keep in some very specific ways and gets in the way in a couple of others. This is not a spec sheet regurgitation. It is what actually mattered on set.
Resolution is a double-edged sword on a lookbook day
The X-T5's 40.2-megapixel APS-C sensor is the headline spec, and for lookbook work it is genuinely useful in a way it might not be for, say, event photography. Brands crop hero shots into a dozen different aspect ratios across their site, their lookbook PDF, and their social feed, and having a 7728 by 5152 pixel native file to work from means you can punch into a three-quarter shot for a close detail crop on a jacket's stitching without the file falling apart. On a 24-megapixel body I would have had to plan those detail crops as separate shots. With the X-T5 I've gotten away with pulling them out of the same frame as the full-length shot, which saves real time when the schedule only allows two or three frames per pose before the model needs to move.
The flip side is that 40 megapixels is unforgiving. Garment steaming that would pass fine on a 24-megapixel file starts showing every crease at 100% on this sensor, and stylists who are used to shooting with more forgiving bodies need to actually re-steam between looks rather than eyeballing it from six feet away. I've had a brand manager zoom into a raw file on a laptop mid-shoot and flag a wrinkle in a sleeve that nobody in the room could see with the naked eye. Budget extra steaming time into the day if you're moving to this camera from something lower resolution, because the sensor will find problems your garment team didn't know they had.
Aspect ratio crops that actually match a lookbook deliverable
One thing I didn't appreciate until I started shooting these jobs is how much time the X-T5's in-camera aspect ratio options save at the review stage. You can set the crop before you shoot rather than cropping later in post, which means the client is reviewing frames on the tethered monitor in roughly the shape they'll actually use. Here's how the numbers break down and where each one has actually earned a place in a lookbook workflow for me.
| In-camera crop | Approx. resolution | Where it fits a lookbook set |
|---|---|---|
| 3:2 (native, no crop) | ~39.8 MP | Full-length hero shots and any frame headed for print, where you want every pixel of retouching room |
| 4:3 | ~35 MP | Catalog thumbnail grids and some ecommerce template slots that expect a taller-than-wide frame without going all the way to square |
| 16:9 | ~34 MP | Website hero banners and lookbook trailer stills, but risky for standing full-length shots since it crops hard top and bottom |
| 1:1 | ~26.5 MP | Instagram grid posts and swatch-style detail shots; least framing room if the client asks for a re-crop later |
| 65:24 (panorama) | ~22 MP | Rarely used, but handy for a wide group frame across a rack of finished looks at the end of the day |
My habit now is to shoot the hero frames at native 3:2 no matter what, and only switch the in-camera crop to 1:1 for the handful of frames specifically meant as social content, because reprocessing a 1:1 crop back out to 3:2 later is not possible and plans change about which shots need which ratio more often than you'd think.
Color science, fabric, and the moire problem nobody warns you about
Fujifilm's film simulations get a lot of attention and Astia is a reasonable starting point for skin tones on a lookbook shoot, softer than Provia and less contrasty than Classic Chrome. But I don't lean on the in-camera JPEG rendering for anything color-critical, because fashion work demands literal color accuracy, not a pleasing interpretation of it. If the brand's red is a specific red matched to a Pantone swatch, no film simulation gets you there reliably, you still need a gray card or color checker under consistent lighting and you still need to grade against the physical garment in the room. Treat the film simulations as a fast preview look during the shoot, not as a substitute for careful color work afterward. What did catch me off guard on this camera specifically is moire on fine repeating fabric patterns. The X-Trans sensor's non-Bayer color filter array has a real reputation for suppressing moire better than a standard Bayer sensor, and it does, most of the time. But herringbone jackets, fine pinstripe suiting, and mesh athletic fabric can still produce visible interference patterns at 40 megapixels, particularly if the model is far enough from camera that the weave sits right at the sensor's resolving limit. I now check every patterned garment at full zoom on the tethered screen before we move on, because catching it in the moment costs thirty seconds and catching it after the model has gone home costs the whole reshoot.
What the shoot day actually feels like
In-body stabilization rated to 7 stops sounds like overkill for a tripod-and-strobe lookbook setup, and most of the day it is, but it earns its keep in the gaps between formal setups. A lot of lookbook days include a handheld segment, walking shots down a hallway or across a set for the brand's social content, and the IBIS lets you shoot those at shutter speeds you'd otherwise need a monopod for. Burst speed is where things get interesting. The X-T5 does 15fps on the mechanical shutter and up to 20fps if you're willing to accept the crop that comes with the electronic shutter at that speed. For catching a coat mid-swing or hair mid-flip between poses, that's plenty, arguably too much, because a five-second burst at 15fps hands you 75 nearly identical frames of the same three seconds of movement. Multiply that across thirty looks and you're looking at well over a thousand raw files by the end of a single day, most of them redundant. The buffer does fill faster than you'd like if you're shooting lossless compressed raw and chaining bursts back to back, so I've started dropping to compressed raw for anything that isn't going straight to a hero crop. That volume problem is exactly the reason I stopped trying to cull lookbook takes by eye on the plane home. Running the day's card through imagic before I even open a grading tool means the sharpest frame out of each burst gets flagged by its local focus scoring and the near-duplicate frames from a burst get grouped together automatically, so I'm reviewing thirty clusters instead of a thousand individual frames. It runs entirely on the laptop, nothing gets uploaded anywhere, which matters more than people expect on these jobs since you're often shooting an unreleased collection under an NDA and the last thing a brand wants to hear is that their pre-launch line touched a cloud server before it touched their own approval process.
The screen "downgrade" that isn't, for this particular job
The X-T5 dropped the fully articulating vari-angle screen that the X-T4 had and went back to a three-way tilting mechanism, and a lot of the initial reviews treated that as a straightforward step backward. For video work or a run-and-gun handheld style, it probably is. For a lookbook shoot run mostly off a tripod, it's arguably the better design. Most full-length fashion frames are shot in portrait orientation, which means the camera is rotated 90 degrees on an L-bracket for a big chunk of the day. A vari-angle screen that flips out to the side is fantastic in landscape orientation and genuinely awkward once the body is rotated, it tends to end up pointing somewhere you don't want it or getting blocked by the bracket itself. The X-T5's tilt mechanism keeps the screen roughly where you expect it in both orientations, which sounds like a small thing until you've spent a day crouching to check focus on a screen that's facing the wrong way.
Lens choices that actually got used
My working kit for these jobs has settled into three lenses. The XF16-55mm f/2.8 stays on the body for the bulk of the day because a lookbook schedule doesn't leave time for lens changes between every look, and f/2.8 zoomed to the long end is enough separation from most seamless backdrops. The XF56mm f/1.2, or the newer WR version, comes out for close beauty and accessory detail shots where you want the background to disappear completely, jewelry, bag hardware, shoe stitching. And the XF23mm f/1.4 handles the wider environmental shots when a client wants the lookbook to include a few frames that show the location rather than just the garment on white. I've tried the XF90mm f/2 for compressed, flattering three-quarter shots against a plain backdrop and it's excellent, but on a tight schedule the extra distance you need from the model to use it properly eats into time you don't have, so it stays in the bag more than it comes out. One more thing worth mentioning about the 160-megapixel pixel shift multi-shot mode: don't bother with it for anything involving a live model. It needs a completely static subject and a tripod-mounted camera across roughly twenty exposures, which rules out anyone breathing. Where it has actually been useful is on still-life accessory shots between look changes, a bag or a pair of shoes set up on a small table while the next model is getting dressed, where the extra resolution genuinely helps if the client wants to print a giant format point-of-sale image later.
Getting from the card to a finished set
The mechanical part of a lookbook shoot, the shooting itself, usually wraps by early evening. The part that actually eats hours is turning twelve hundred raw files into the eighty or so finals a brand needs, at a consistent grade, on a deadline the client set before they'd seen a single frame. For more on why culling is the actual bottleneck on jobs like this rather than the shooting, it's worth reading through how AI photo culling works if you haven't already looked at how the sharpness and duplicate detection side of it works under the hood. Once I've narrowed each look down to its best two or three frames, I build the color grade on the first four or five approved looks the way the brief calls for, matching the garment's real color against the swatch, getting skin tones right under whatever mix of strobe and ambient light is in play. From there I train imagic's apply_my_style preset on those graded frames, which means the rest of the day's looks preview close to the finished grade automatically instead of me rebuilding the same curve and color balance thirty separate times. It's not a substitute for actually checking each look against the garment, brand colors are too specific for that, but it cuts the repetitive part of the grading pass down considerably, and since it's a one-time cost built into the app rather than a subscription, it doesn't add a recurring cost the way some cloud-based grading tools do. If color consistency across a big batch like this is new territory, the guide to photo color grading covers the fabric-and-skin-tone balancing act in more depth than I have room for here.
Frequently Asked Questions
Is 40 megapixels actually necessary if the lookbook only ends up on a website?
Not for the final web-sized export, no. Where it helps is upstream, giving you room to crop a detail shot out of a full-length frame without shooting it separately, and giving the retoucher more pixels to work with on skin and fabric before the file gets downsized. If the brand never prints anything and never wants alternate crops, you could get away with less resolution. Most brands eventually ask for a crop you didn't plan for, though, and that's when the extra resolution pays for itself.
Do I need the X-T5's pixel shift mode for this kind of shoot?
Almost never for anything with a person in the frame, since it requires a completely static subject across a multi-exposure sequence. It's only worth setting up for still-life accessory or product shots you're capturing between wardrobe changes, and even then only if the client has a specific large-format print or point-of-sale use in mind.
How does the X-T5 hold up across a full day with a stylist and brand team on set?
Battery life is the honest weak point. Plan on four batteries for a full lookbook day and keep a charger running between setups, because tethered live view and constant chimping between poses drains the battery faster than normal shooting. Everything else, the weather sealing, the dual card slots, the tethering over USB-C, has been reliable across every shoot I've used it for.
Is the X-T5 a real alternative to full frame for a client used to seeing full-frame lookbooks?
For a studio lookbook with controlled lighting, most clients cannot tell the difference in the final delivered images, and the APS-C 1.5x crop factor actually gives you a bit more working distance for a given field of view, which is convenient in a tight studio. Where full frame still has a real edge is extremely shallow depth of field wide open in low light, so if a brand specifically wants that heavily blurred, almost dreamy background look at f/1.2 in a dim location, a full-frame body with a fast prime will get there more easily.