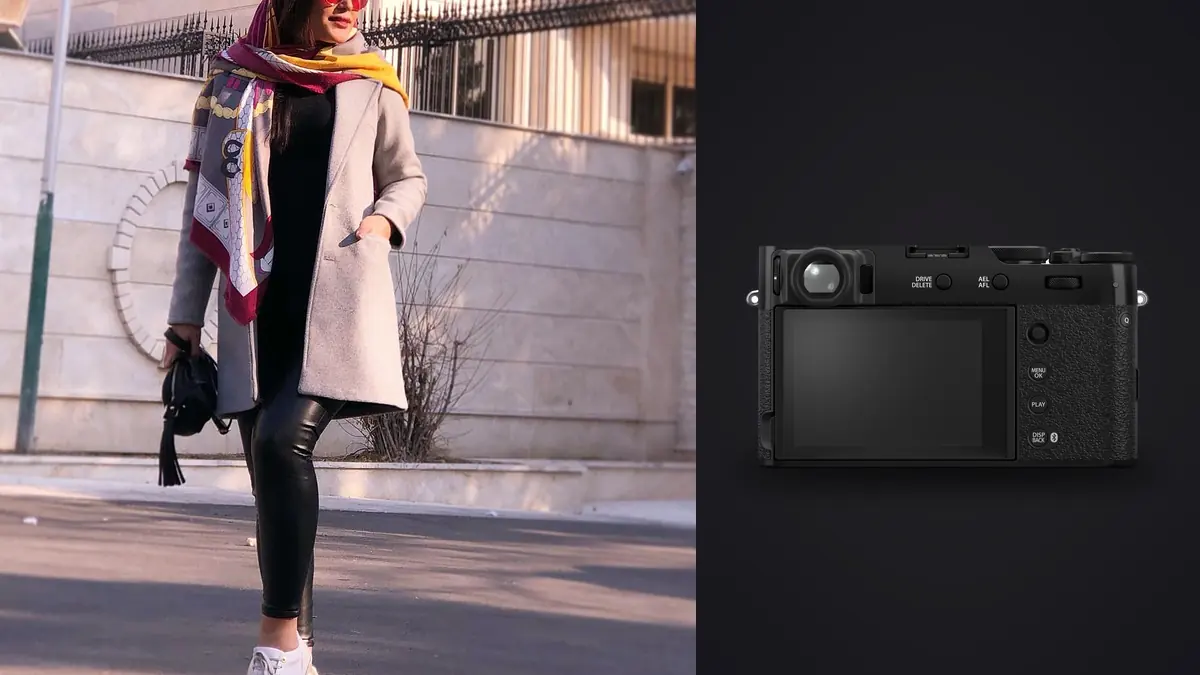
Picture a small outerwear brand hiring a photographer for a 38-look lookbook: one model, one rented studio corner with a seamless, then a half day on location outside for the "worn in the wild" shots. Budget is tight enough that a full mirrorless kit with three lenses and a second body as backup is hard to justify. A Fujifilm X100VI as the only camera for the studio half of the day sounds like a bit of a dare, and it could stay in the bag rotation for the location half too. This is not a spec-sheet review. It's what can happen when a fixed-lens compact has to carry real client deliverables against a deadline.
One lens, thirty-eight looks: what the fixed 23mm actually costs you
The X100VI's lens is a 23mm f/2, which gives you a 35mm-equivalent field of view on the APS-C sensor and never changes. For a lookbook that mixes full-length garment shots, three-quarter crops, and the occasional detail on a zipper pull or button, that's a genuine constraint. You don't zoom to reframe, you walk. On a studio set with a fixed backdrop that means physically stepping in and out between every second or third frame rather than standing in one spot and racking a zoom ring.
It can help the shoot's pace more than you'd expect. With a zoom you tend to nudge focal length by five or ten millimeters and call it a new composition. With a fixed 35mm-equivalent, every reframe is a real decision: closer, further, lower, or don't bother. The model and photographer can fall into a rhythm faster than expected, and an art director pulling selects live on a tethered laptop may notice that the images have more consistent geometry across the set than lookbooks shot with a 24-70mm zoom, where perspective quietly shifts from frame to frame as the photographer zooms rather than moves.
Digital teleconverter crops versus the optical converters
Fujifilm builds in digital teleconverter crop modes that simulate 50mm and 70mm equivalent framing by cropping the sensor and interpolating back up, and I used the 50mm crop constantly for three-quarter body shots where I didn't want to close the physical distance and crowd the model. It's genuinely useful, but it's not free: you're trading resolution for reach, and on a lookbook where the client might later want to blow a detail shot up for a print catalog or a trade show banner, that matters.
| Framing mode | Effective focal length | Resolution after crop | Approx. print size at 300 dpi | Best use on a lookbook day |
|---|---|---|---|---|
| Native, no crop | 35mm equiv. | 40MP (7728 x 5152) | about 25.7 x 17.2 in | Full-length garment shots, group looks, environmental context |
| Digital tele, 50mm setting | 50mm equiv. | approx. 20MP | about 18 x 12 in | Three-quarter body, walking shots, isolating one model from background clutter |
| Digital tele, 70mm setting | 70mm equiv. | approx. 10MP | about 13 x 8.6 in | Accessory and fabric detail, tight headshots for a lookbook grid page |
| WCL-X100 II converter | 28mm equiv. | 40MP, no loss | about 25.7 x 17.2 in | Interior establishing shots, group looks in a tight studio corner |
A practical rule: native framing for anything the client will print large or crop hard in post, digital tele for anything destined for a web gallery or a lookbook PDF page where 10 to 20 megapixels is already overkill. A wide converter is a better answer in a cramped fitting room than backing into a wall.
The leaf shutter matters more than the megapixel count
The detail that actually changed how I lit the location half of the day was the leaf shutter. Because the shutter mechanism sits in the lens rather than in front of the sensor, the X100VI syncs with strobes at shutter speeds a focal-plane shutter camera can't touch without high-speed sync tricks that eat into your flash power. I was running a single battery-powered strobe through a shoot-through umbrella against bright midday sun, and I could hold a wide aperture for shallow depth of field while still using a fast enough shutter speed to knock the ambient light down, without switching the strobe into HSS mode and losing two stops of output in the process.
Pair that with the built-in neutral density filter (about 4 stops), and you get a genuinely useful combination for outdoor lookbook work: wide-open aperture for separation from a busy street background, ND engaged to tame the exposure, strobe or reflector doing the fill, and no HSS penalty on flash power. I've built the same setup on a full-frame body before and it required either stepping down to f/8 or renting a variable ND filter and still fighting sync speed limits. This is one of the few times a fixed-lens compact out-punches gear a photographer would normally reach for on a paid job.
Color out of the box, and why it saved a step
The brand's creative director wanted a specific mood: slightly desaturated, cool shadows, warm skin. Rather than build that from scratch in post on every one of the roughly 1,900 frames I ended up shooting, I set a film simulation on camera that got close in-camera and adjusted from there. Fujifilm's simulations are not just a JPEG gimmick if you're shooting a hybrid workflow (RAW plus JPEG, or RAW with the simulation baked into your raw converter's starting point); they're a legitimate way to get the team looking at roughly graded images during a live review on set instead of flat log-style files nobody can judge color from.
| Film simulation | Rendering character | Where it worked on this shoot |
|---|---|---|
| Provia | Neutral, accurate baseline | Reference frames for matching the brand's existing color guide |
| Astia | Soft contrast, flattering skin tones | Close beauty and face-forward shots |
| Reala Ace | Punchy but accurate color, firmer contrast | Product-forward detail shots of hardware, zippers, buckles |
| Classic Neg | Muted, slightly greenish shadow cast, visible grain | The "worn on the street" location set, for a more editorial mood |
| Eterna | Flat, low contrast, cinema-leaning | Behind-the-scenes video clips for the brand's social feed |
None of that replaces retouching. It just means the client review during the shoot shows something closer to the final look, which cuts down on the "can we see it warmer" round trips that usually happen when everyone's staring at flat, unprocessed RAW previews on a laptop in direct sun.
The part nobody warns you about: what 1,900 frames actually looks like
Here's the number that matters more to a working photographer than any spec sheet: a full lookbook day with a model who's comfortable in front of the camera generates an absurd number of frames. Between safety bursts on every pose, the model shifting weight or blinking, and re-shooting each look from two or three distances, I came home with just under 1,900 exposures for 38 finished looks. That's roughly 50 frames per look, most of which are near-duplicates a half second apart.
Culling that by eye, at a reasonable pace, is an evening lost. This is where I stopped doing the review manually and ran the day's card through imagic before I even opened Lightroom. Its burst and duplicate clustering grouped the walking sequences and near-identical poses automatically, and the local sharpness scoring flagged which frame in each burst actually had crisp focus on the eyes versus the ones where the model had drifted half a step out of the plane of focus, something that's easy to miss on a laptop screen in daylight. It runs entirely on the machine, no cloud upload, which mattered here because the brand hadn't announced the collection yet and didn't want unreleased garment photos touching a server they didn't control. Going from 1,900 frames to a shortlist of around 140 candidates took maybe twenty minutes instead of the better part of a night. If you want the mechanics of how that scoring and clustering actually works, we've written it up separately at how AI photo culling works.
The other piece that helped on the retouching side: once the retoucher had graded the first five or six selects to match the creative director's reference mood, I used imagic's apply_my_style feature, which trains a preset off your own edited examples rather than a generic canned look, to carry that grading across the rest of the shortlist consistently. It's not a substitute for a retoucher's eye on the hero images, but for the volume shots that fill out a 38-look lookbook, consistent color across the set saved real hours.
Handling on a set that doesn't stop moving
Weight and size aren't a footnote on a shoot like this, they change how the day runs. The X100VI is light enough to hold up on a wrist strap between setups without your shoulder complaining by 3pm, and the hybrid viewfinder (you can flip between optical and electronic with a lever on the front) let me frame quickly in bright sun on the location half of the day, when an all-electronic finder on some competing compacts washes out. In-body stabilization is new to this body compared to earlier X100 models, and it showed up in the keeper rate on the handheld location shots at slower shutter speeds under cloud cover, fewer soft frames than I expected from a small fixed-lens body.
Battery life is the honest downside. Expect to burn through four batteries across a full day between chimping constantly for client review and shooting nearly 1,900 frames. If you're taking this camera onto a paid commercial set, buy or rent at least three spares and charge them all the night before, because there's no swapping to a vertical grip with a second cell here.
Where it actually fell short
I want to be straight about the limits, because a lookbook client doesn't care that a camera is charming. The fixed f/2 maximum aperture is fine outdoors and in a lit studio, but it's not a low-light camera, and if the art director wants a moody, underlit set with available light only, you'll be pushing ISO further than you would on a fast prime. The leaf shutter's fastest speed is aperture-dependent (it tops out lower as you open the aperture), so if you want both f/2 and the absolute fastest shutter speed at the same time, you don't fully get both. And because there's no lens swap, if the creative director suddenly wants a genuinely compressed 85mm-equivalent look for a hero shot, the digital teleconverter gets you there optically softer than a real telephoto would, not a dealbreaker for web and PDF delivery, but that crop shouldn't be handed over for a large-format print without a conversation first.
Frequently Asked Questions
Do I need the wide or tele conversion lens for a lookbook shoot, or is the digital teleconverter enough?
For most lookbook deliverables (web gallery, PDF, social crops) the built-in digital teleconverter's 50mm and 70mm equivalent modes are enough, since you rarely need the full 40 megapixels on a detail or three-quarter shot. Reach for the physical WCL wide converter only when you're genuinely boxed in by a small space and need real optical width rather than stepping back, since the digital crop can't help you go wider.
Can the leaf shutter really sync with strobes faster than a normal shutter, or is that overstated?
It's real and it was the single most useful hardware trait on the outdoor half of this job. Because the shutter is in the lens, you can sync flash at shutter speeds that would require high-speed sync (and a real flash power penalty) on a focal-plane shutter body. The tradeoff is that the fastest available shutter speed drops as you open the aperture wider, so you're balancing depth of field against your top usable shutter speed rather than getting both maxed out simultaneously.
Is 40 megapixels overkill for a lookbook that's mostly going on a website and a PDF?
For final delivery, yes, largely. Most web and PDF lookbook use lands comfortably under 10 megapixels per image. Where the resolution earns its keep is in giving you room to crop hard on a frame you like without visible softness, and in future-proofing the shoot in case the brand wants a print catalog or trade show banner later, which is exactly the kind of ask that comes back six months after everyone assumed the images were "just for the website."
How many usable frames should I expect from a full lookbook day with this camera?
Plan on a high shot count relative to your final selects. On this shoot I ended up with roughly 1,900 exposures for 38 finished looks, which is typical once you count safety bursts and reframes per pose. Budget your evening (or your culling tool) accordingly rather than assuming you'll eyeball a few hundred frames at the end of the day; that assumption is usually where a lookbook workflow starts running late. A few habits from our faster photo workflow guide apply directly here, particularly shooting deliberately in bursts rather than machine-gunning every pose.