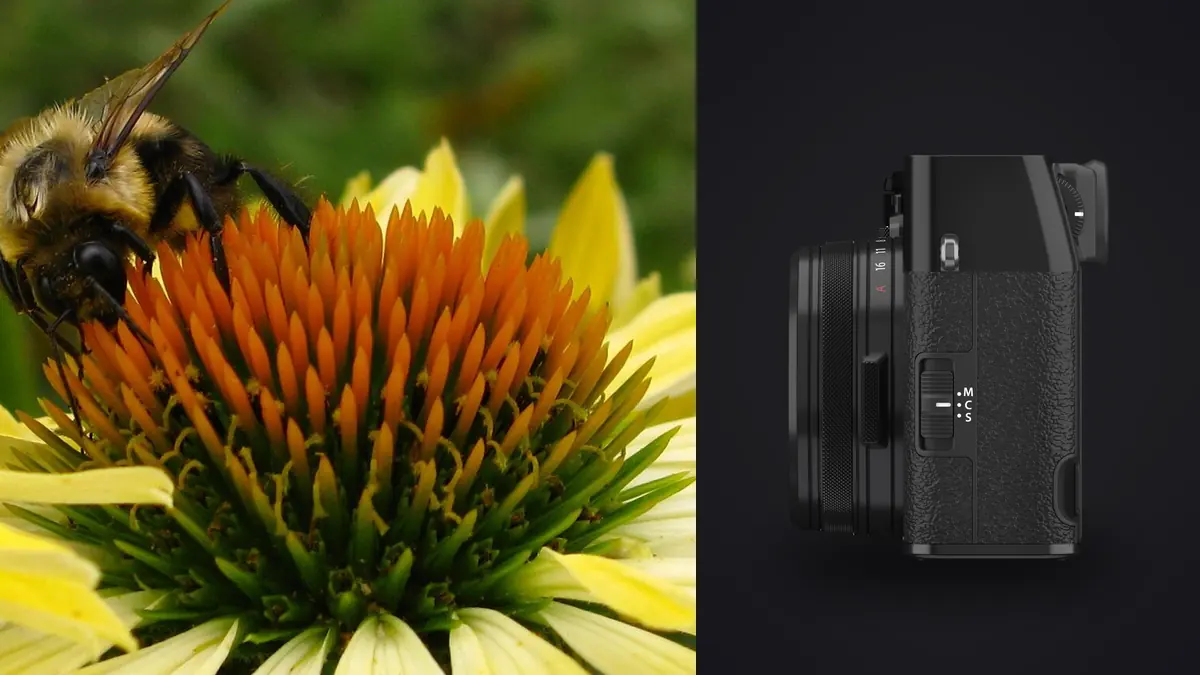
The X100VI is not a macro camera. It has a fixed 23mm f/2 lens (35mm equivalent) that was designed for street work, environmental portraits, and documentary shooting, not for filling a frame with a jumping spider's eyes. I want to get that out of the way immediately, because a lot of what gets written about this camera and insects treats "macro mode" as if it were a hidden superpower Fujifilm forgot to advertise. It isn't. What it is, though, is a genuinely interesting tool for close-focus insect work once you understand its actual limits and stop expecting it to behave like a dedicated 90mm or 100mm macro lens.
I've carried the X100VI on a few dragonfly-heavy pond mornings and one very sweaty afternoon photographing praying mantises in a friend's garden, mostly because I already had it around my neck for other shooting and didn't want to swap bags. What follows is what I actually learned about where it holds up and where it doesn't.
What the Macro Switch Actually Does
Here's the detail most reviews get wrong: flipping the macro toggle on the X100VI does not extend the lens's closest focusing distance. In normal AF mode, the lens can already rack down to about 10cm from the sensor plane, which puts the front element roughly 4 to 5cm from your subject at minimum focus. That's already close. What the macro switch does is narrow the autofocus search range so the camera only hunts within that near zone instead of sweeping the whole focus range looking for contrast. In practice that means faster, more reliable lock-on when you're already close to a subject, and it means the camera won't waste a half-second racking out to infinity and back when a hoverfly lands two inches from the lens. It's a hit-rate feature, not a magnification feature.
The actual magnification you get at minimum focus works out to roughly 0.20x. For comparison, a true macro lens gets you to 1.0x, where a 20mm insect fills 20mm of your sensor's long dimension. At 0.20x, that same insect occupies about a fifth of the frame width, which is enough for a solid environmental shot of a beetle on a leaf but nowhere near enough to fill the frame with a fly's compound eyes. If you've shot with a 90mm macro before and are expecting X100VI results, recalibrate that expectation now.
Closing the Gap With Screw-On Diopters
The lens barrel itself has no filter threads. You need the small adapter ring Fujifilm sells for the X100 series (it's the same ring used to mount the optional wide and tele converters), which gives you a 49mm thread. Once that's on, close-up diopter filters are the cheapest and most effective way to push magnification further without adding real bulk to what's supposed to be a compact camera.
I tested three setups against the native macro mode over a couple of outings, measuring roughly rather than in a lab, but consistently enough to trust the pattern:
| Setup | Approx. working distance to subject | Approx. magnification | Handling notes |
|---|---|---|---|
| Native macro mode, no filter | 4-5cm | ~0.20x | Fast AF lock, but this close you'll cast a shadow over small subjects |
| +4 diopter (49mm screw-on) | 9-10cm | ~0.28x | Easiest to use handheld, still keeps AF speed |
| +10 diopter (49mm screw-on) | 5-6cm | ~0.45x | AF starts to hunt in low light, manual focus more reliable |
| Raynox DCR-250 (clip-mount, 49mm adapter) | 4cm or less | ~0.55-0.60x | Best magnification available, but working distance gets tight enough to spook insects |
The +4 diopter ended up being the one I reached for most. It's a small enough boost that autofocus still works properly in decent light, and the extra breathing room between the lens and the subject matters more than the numbers suggest when you're trying not to startle a damselfly off its perch. The Raynox gets you the most magnification on paper, but at that working distance your own shadow and the air movement from just walking up become real problems with anything that can fly away.
Where the 40MP Sensor Actually Helps
The X100VI's 40.2MP X-Trans CMOS 5 HR sensor is the thing that makes this whole approach viable at all. Because you're starting with so many pixels, you can crop aggressively after the fact and still land on a usable file. Cropping to roughly 40% of the frame area from a native shot still leaves you around 16MP, which is plenty for web use and reasonably sized prints. In effect, you're using resolution to buy back some of the magnification the lens doesn't give you optically. It's not the same as true macro, an insect photographed this way and cropped will never have the same edge-to-edge micro-detail as one shot at 1:1 through a purpose-built lens, but for documenting a species or getting a shareable shot of a mantis's head, it's more than adequate.
This is also where shooting uncompressed lossless RAW instead of the compressed option earns its keep. The file size difference is real (roughly 80MB versus 40MB per frame), but when you know a shot is going to get cropped hard, you want every bit of fine texture the sensor recorded, especially on things like fly wing venation or the fuzz on a bee's thorax where compression artifacts show up first.
The Leaf Shutter Is the Underrated Part
This is the feature nobody mentions when people talk about the X100VI for macro work, and it's the one I actually think matters most. Because the X100VI uses a leaf shutter built into the lens rather than a focal-plane shutter, it syncs with flash at any speed up to its full mechanical limit of 1/4000s. Most interchangeable-lens cameras cap flash sync somewhere around 1/200s or 1/250s, which forces you to either drop shutter speed (and deal with ambient light blur or overexposure outdoors) or add expensive high-speed sync gear.
For insect photography, full-range flash sync means you can use a small off-camera flash to freeze wing motion on something like a hoverfly, while still shooting at 1/2000s or faster to kill ambient light and drop the background to near-black. It's the same trick studio macro photographers use to get that punchy, isolated-subject look, and the X100VI gives it to you natively without a high-speed sync flash. Add the electronic shutter option, which goes up to 1/180,000s, and you also get a genuinely silent capture mode, useful for subjects that react to shutter clatter (jumping spiders in particular seem to notice mechanical shutter sound).
Stabilization and Handheld Reality
The X100VI was the first in this line to get in-body stabilization, rated around 6 stops. At normal shooting distances that's a nice-to-have. At 5-10cm from a subject, it's closer to essential. Any body sway gets magnified proportionally the closer you focus, and without IBIS I found myself needing a monopod or a beanbag rest just to keep shots usable at anything under 1/250s. With it on, I could reliably handhold down to around 1/60s for stationary subjects like a resting butterfly, though anything actively moving still needs a fast shutter speed regardless of stabilization, since IBIS does nothing for subject motion blur.
Weather Sealing, With a Catch
Insect photography happens in the conditions insects like: damp mornings, pond edges, humid gardens after rain, exactly when dew-covered webs and slow, cold-blooded subjects make for the best shots. The X100VI has weather-resistant gaskets throughout the body, but it is only fully sealed when you have both the front adapter ring and a protective filter attached. Shoot it bare, which is how most people carry it day to day, and the front of the lens assembly is exposed. If you're planning a morning around wet grass and pond mist, budget for a cheap 49mm protective filter on top of the diopter setup, or swap them in depending on what you're shooting that day.
RAW Files and the X-Trans Question
Fujifilm's X-Trans color filter array handles fine, repetitive detail differently than a standard Bayer sensor, and insect subjects are full of exactly the kind of fine, repetitive detail (compound eye facets, wing veins, leg segmentation) that has historically given some RAW converters trouble, producing a slightly smeared or "watercolor" look in fine texture. Adobe's Fuji-specific processing has improved a lot in the last few years and most current versions of Lightroom and Camera Raw handle it well, but if you're on an older converter version or a niche RAW tool, it's worth test-processing one close-up frame before you commit a whole outing to it.
The other practical wrinkle is volume. Focus bracketing (built into the X100VI's shooting menu, letting you set a number of frames and a step size) is the standard way to get more usable depth of field at close focusing distances, where the actual in-focus zone at f/2.8 or f/4 might only be a couple of millimeters deep. The camera doesn't stack these in-camera, it just fires the sequence and hands you the individual frames, so a single insect might generate 15-20 nearly identical RAW files that need sorting before you even open a stacking tool like Helicon Focus or the stacking function in Photoshop.
This is the point where I stopped trying to eyeball which frame in each bracket sequence was actually the sharpest. I run these folders through imagic before touching a stacking tool, since it scores sharpness locally on the machine and clusters near-duplicate bursts, which turns a folder of 200 bracket frames from six different subjects into something I can actually sort through in a few minutes instead of squinting at thumbnails. Everything processes on-device rather than uploading to a cloud service, which matters when I'm culling a card in a tent at a nature reserve with no signal. If you want more detail on how sharpness-based culling actually works under the hood, there's a breakdown at /blog/how-ai-photo-culling-works.
Building an Editing Workflow Around This Camera
Insect macro shots tend to need a fairly consistent edit: pulled-back highlights on shiny exoskeletons, lifted shadow detail in the legs and antennae, and usually a slight warmth shift depending on whether you're working with Fujifilm's Provia, Classic Chrome, or Reala Ace simulation as your JPEG starting point. Once I'd settled on a look I liked across a batch of dragonfly shots, I trained imagic's apply_my_style feature on those edits, so newer batches from the same kind of shoot get a consistent starting point applied automatically instead of me rebuilding the same set of adjustments from scratch every time I come back from a pond with 300 new frames. It's not a substitute for individual attention on the keeper shots, but it saves real time on the first pass.
If your existing workflow is already creaking under bracket sequences and burst shooting from other gear, it's worth a broader look at where the time actually goes; the general workflow tips at /blog/10-tips-faster-photo-workflow apply just as much to a folder of insect brackets as they do to a wedding take.
Should You Actually Use It for This
If you already own an X100VI for street or travel work and want to photograph insects opportunistically without carrying a second body and macro lens, it's genuinely capable of good results within its limits: environmental insect shots, moderately close portraits of larger subjects like dragonflies and mantises, and web or small-print output thanks to the sensor resolution. If you're planning dedicated macro sessions chasing true 1:1 detail on small subjects like ants or aphids, this isn't the tool, and no amount of diopter stacking changes that math. Buy or borrow a real macro lens for that work. The X100VI's value here is as a capable secondary option that happens to be in your hand already, not as a replacement for purpose-built macro gear.
Frequently Asked Questions
Does the X100VI's macro mode give it true 1:1 macro capability?
No. Native magnification tops out around 0.20x, roughly a fifth of true macro. Adding a strong close-up diopter like the Raynox DCR-250 can push that closer to 0.55-0.60x, but you won't reach 1:1 without a dedicated macro lens on a different system.
What filter thread size does the X100VI use for close-up filters?
The lens barrel has no threads on its own. You need Fujifilm's adapter ring (the same one used for the wide and tele converter lenses), which adds a 49mm thread that accepts standard screw-on diopters and protective filters.
Is the leaf shutter actually useful for insect flash work?
Yes, more than most people expect. It syncs flash at any speed up to 1/4000s mechanically, which lets you freeze wing motion with a small flash while keeping shutter speed high enough to darken the background, without needing high-speed sync gear.
How do you manage the number of RAW files from focus bracketing?
The camera fires the bracket sequence but doesn't stack it, so a single subject can produce 15-20 similar frames before stacking. Running the folder through a local culling tool that scores sharpness and groups near-duplicate bursts, such as imagic, cuts the sorting time down before you ever open a stacking program.