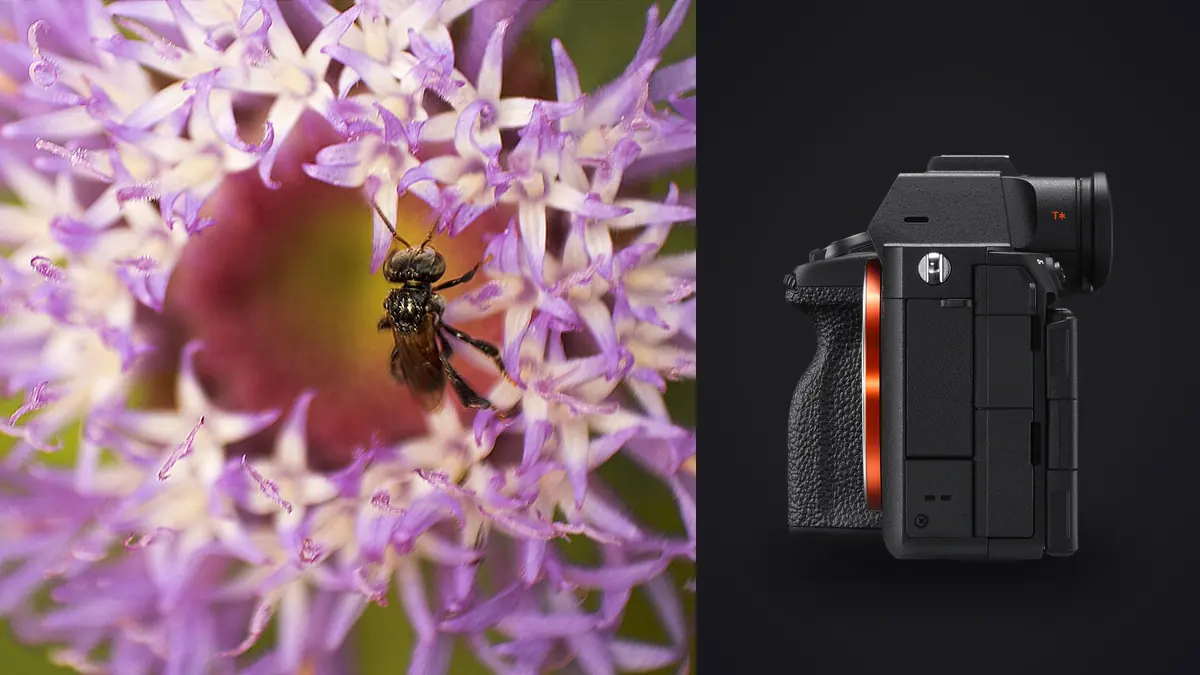
The first thing that changes when you point a Sony A7R V at a jumping spider instead of a landscape is your relationship with distance. At 1:1 magnification, a sensor that resolves fine detail across a whole frame stops being a nice-to-have and starts being the difference between a leg that reads as individual hairs and a leg that reads as a smudge. I have spent the better part of two seasons running the A7R V on dragonflies, robber flies, and the odd uncooperative mantis, and this is what actually held up once the light got bad and the subject started walking away from me.
What the 61-megapixel sensor buys you at 1:1
The A7R V's 61-megapixel back-illuminated sensor is the same resolution class Sony has used since the A7R IV, and for macro work that resolution matters more than it does for most other genres. At life-size magnification you are often working with a depth of field measured in fractions of a millimeter, so any extra pixels give you room to crop into the one plane that's actually sharp without falling apart at print or web size. A 24-megapixel body forces you to nail framing in the field because there's no fat to trim later. With 61 megapixels, a slightly wide composition of a hoverfly on a thistle head can still be cropped to a tight portrait and hold up at 2000 pixels wide for a blog post or a 16-inch print.
The tradeoff is diffraction. Insect macro almost always wants small apertures for depth of field, but on a 61-megapixel sensor diffraction softening becomes visible earlier than it would on a lower-resolution body, typically somewhere around f/11 depending on how critically you're viewing the file. I still shoot most static insect subjects at f/13 to f/16 because the depth of field gain is worth the softness, but I've stopped pretending f/22 does anything useful on this body. It doesn't. You lose more to diffraction than you gain in depth of field past roughly f/16 to f/18.
Pixel Shift Multi Shooting is the other resolution trick worth mentioning, though it's a niche one for insects. It stacks up to 16 frames on a tripod to build a composite with more resolved detail and less noise, and it's genuinely useful for a motionless subject like a dew-covered damselfly at first light before it has warmed up enough to fly. It's useless for anything moving, which in insect photography is most of the time.
Autofocus for subjects that don't hold still
Sony added insect-specific subject recognition to the A7R V's AI autofocus system through a firmware update, and it's a real feature, not marketing dressing. Point the camera at a beetle or a fly and the camera will often lock onto the compound eyes specifically rather than the whole body, which is exactly the plane you want in focus for a portrait-style macro shot. It works best when the insect has some size in the frame already; at true 1:1 with a small subject like an ant, I still rely on manual focus and physical body movement more than autofocus, because the system needs enough resolved detail to recognize an eye pattern in the first place.
For anything that flies, hovers, or skitters, and that covers most of what makes insect photography interesting, continuous autofocus with subject tracking is what actually gets usable frames. I shoot bursts far more here than in any other genre I use this camera for. A dragonfly perched and vibrating its wings before takeoff might give you a two-second window; a robber fly on a fence post might tolerate one approach before it's gone. Burst shooting through that window and sorting afterward beats trying to time a single decisive frame, and it's the single biggest reason my card fills up faster shooting insects than shooting almost anything else I photograph.
That habit creates its own problem. A ten-second burst at insect scale produces a dozen frames that look nearly identical to the eye but differ by microns of focus shift as the insect breathes or the wind moves the stem it's on. Sorting that by eye on a laptop screen after a full day in the field is slow and it's exactly the kind of tedious first pass that gets rushed, which is where I lean on imagic's local sharpness scoring to rank a burst by actual focus accuracy on the eyes rather than guessing from thumbnails. It runs on the machine, nothing leaves the laptop, and it turns a folder of forty near-identical wasp frames into a ranked shortlist in the time it takes to make coffee.
Focus bracketing is built into the A7R V's menu and it's worth setting up before you leave the house rather than fumbling through it in the field. For a stationary subject like a resting butterfly or a spider in its web, a bracketed sequence at narrow step widths and then a stack in post gives you depth of field that no single aperture on this sensor can deliver without diffraction eating the detail. I keep a custom button mapped to trigger the bracket sequence because digging through menus while a butterfly is deciding whether to leave is how you lose the shot.
Building a macro kit around the body
The A7R V doesn't come with a macro lens, obviously, and the E-mount macro options push the body's resolution differently depending on which one you pick. I've used three of these regularly enough to have opinions.
| Lens | Max magnification | Min focus distance | Stabilization | Best for |
|---|---|---|---|---|
| Sony FE 90mm F2.8 Macro G OSS | 1:1 | 28cm | In-lens OSS + IBIS | General insect work, portable, native AF speed |
| Sigma 105mm F2.8 DG DN Macro | 1:1 | 29.5cm | None (relies on IBIS) | Value option, similar working distance to the Sony |
| Laowa 90mm F2.8 2X APO Macro | 2:1 | 17.5cm | None, manual focus only | Extreme close-up on small insects, no AF hunting to fight |
| Sony FE 50mm F2.8 Macro | 1:1 | 16cm | None (relies on IBIS) | Compact travel option, tight working distance limits skittish subjects |
The 90mm G OSS is what stays on the camera most of the time. Autofocus is fast enough to track a landing bee, the working distance at 28cm keeps you far enough back that most insects don't immediately bolt, and the OSS plus the body's in-body stabilization combine well for handheld shooting when you don't want to carry a tripod through undergrowth. The Laowa is the specialist tool. Going to 2:1 magnification on small subjects like jumping spiders produces frames the 90mm simply can't match, but it's manual focus only, which means every shot is a physical dance of rocking the camera forward and back until the eyes snap into the plane. It rewards patience and punishes anyone in a hurry.
The 50mm macro is the one I recommend least for insects specifically, even though it's a fine lens. Its short working distance at magnification puts the front element close enough to spook anything with compound eyes and a nervous system, which rules out a lot of what makes insect photography fun. It's better suited to static subjects like flowers, seed pods, or product work.
Field technique that actually matters
Early morning is the unglamorous secret to insect macro. Insects are ectothermic, so before the sun has warmed them past their activity threshold, dragonflies and butterflies sit still long enough for a proper approach and even for focus bracketing. By mid-morning the same dragonfly that let you get within a foot at 6am is gone the second your shadow crosses it. I plan macro outings around temperature more than around light quality now, which is a habit landscape photography never taught me.
Diffused flash solves the two biggest problems at once: it lets you stop down for depth of field without dragging shutter speed into blur territory, and it fills in the shadow that a lens barrel this close to a subject inevitably casts. A small diffuser clipped over a flash bracket, angled slightly off-axis rather than straight on, keeps the compound eyes from turning into flat glare. Handheld without flash, I rarely trust anything slower than 1/500 at true macro magnification, because breathing alone moves the focal plane more than you'd think.
| Aperture | Depth of field at 1:1 (approx.) | Diffraction impact on 61MP sensor |
|---|---|---|
| f/5.6 | Under 1mm | Negligible, but rarely enough coverage for a whole insect |
| f/11 | ~2mm | Slightly visible on close pixel inspection |
| f/16 | ~3mm | Noticeable softening, still usable after modest sharpening |
| f/22 | ~4mm | Significant softening, generally not worth the depth of field gained |
Those depth of field figures shift with the specific lens and exact magnification, but the pattern holds across all four macro lenses I've tested on this body: past roughly f/16, you're trading real sharpness for depth of field you could get more cleanly through focus stacking instead.
From memory card to finished frame
A full day chasing insects with this body routinely leaves me with 1,500 to 2,500 RAW files, most of them bursts of the same three or four subjects from slightly different angles and focus points. That volume is where the workflow either holds together or falls apart. I shoot everything as compressed RAW rather than the uncompressed option, mostly because at 61 megapixels the file size difference adds up fast across a season of macro outings, and I haven't found a practical quality cost that matters for web or print output at normal viewing distances.
Sorting that volume by hand used to be the part of insect photography I dreaded most. What I run now is imagic, which does the first pass locally on the laptop: it clusters burst sequences and near-duplicate frames together instead of making me scroll through forty visually identical shots one at a time, and it scores focus sharpness on each frame so I can jump straight to the one where the eyes are actually crisp rather than eyeballing thumbnails on a small screen in bad light. Because everything runs offline, there's no upload wait between a field session and a first look, which matters when you're working from a laptop with patchy connectivity at a trailhead. If you haven't compared how different culling approaches actually handle burst-heavy shoots like this, this breakdown of how AI photo culling works covers the mechanics in more depth than I can here.
The other piece I've come to rely on is imagic's apply_my_style feature, which trains a preset off edits I've already made rather than a generic macro or wildlife profile pulled from a preset pack. Insect macro has a fairly narrow color and contrast look I keep returning to (slightly cooler greens, punchy but not oversaturated eye highlights), and having that applied automatically to a fresh batch as a starting point saves real time compared to building it from scratch in every editing session. It's a starting point, not a final answer. Wing translucency and eye reflections still need individual attention, but not having to rebuild baseline contrast and white balance from zero on every import is a meaningful chunk of time back.
None of this replaces the RAW converter you already use for the actual pixel-level edit. It just means fewer of the 2,000 files from a day in the field make it that far, and the ones that do are the ones actually worth the time.
For context beyond the mastering sony a7r v for macro insect photography guide focus in entry 95, continue with imagic's local photo workflow. These resources connect the subject to a practical local review process.
Frequently Asked Questions
Is the Sony A7R V worth the resolution for insect macro, or is a lower-megapixel body enough?
If you routinely crop into small subjects like ants or jumping spiders, the extra resolution gives you real working room that a 24 or 33-megapixel body doesn't. If you mostly photograph larger insects like dragonflies or butterflies filling more of the frame, a lower-resolution body will get you to a similar final image with smaller files and less demanding storage. The A7R V earns its resolution specifically at the smallest end of the insect size range.
Does the A7R V's insect subject recognition actually work in the field?
It works reliably on subjects with enough frame size for the system to resolve an eye pattern, which in practice means most dragonflies, butterflies, bees, and larger beetles. On very small subjects at high magnification, or on insects with unusual eye structures like some spiders, it's inconsistent enough that I still default to manual focus with focus peaking rather than trust it completely.
What shutter speed do I actually need for handheld insect macro on this body?
In-body stabilization helps with camera shake, but it does nothing for subject or breathing-induced focal plane movement at 1:1 magnification, which is the bigger problem. I don't go below 1/500 handheld without flash, and closer to 1/1000 for anything with wings that might twitch mid-exposure.
Is focus stacking necessary, or can autofocus and a small aperture get enough depth of field alone?
For a whole insect in sharp focus front to back at true macro magnification, no single aperture on this sensor gets you there without meaningful diffraction softening. Focus bracketing and stacking in post is the only way to get full-subject sharpness without the tradeoff, and it's worth the setup time for any subject that will hold still for the two or three seconds a bracket sequence takes.