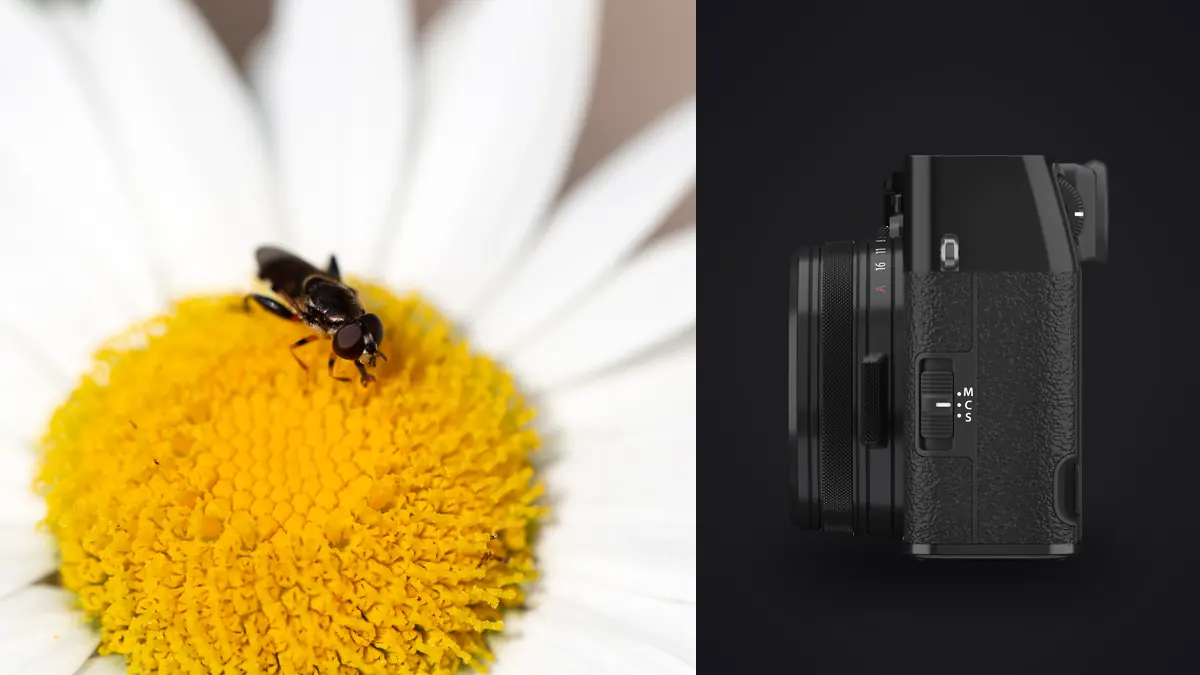
The Fujifilm X100VI is not a macro camera, and Fujifilm has never pretended otherwise. The lens is fixed to the body, it tops out at 23mm (35mm equivalent), and even in its dedicated "macro mode" the closest it will focus is around 10cm from the front element. There is no mount to swap onto a 90mm 1:1 macro lens when a fat carpenter bee lands three feet away. And yet a lot of X100VI owners end up pointing the camera at insects anyway, because it's the camera already in their jacket pocket on a morning walk, and a dew-covered dragonfly sitting still on a reed is too good to pass up. This is a straight account of what the camera can actually deliver on bugs, where the fixed lens genuinely limits you, and the small kit of cheap accessories and habits that separate a usable frame from a blurry green smear.
What "macro mode" on this lens actually means
There's a small switch on the lens barrel that toggles between normal focusing and macro mode, which shifts the minimum focus distance down from roughly 40cm to about 10cm. That sounds close, and it is, but "close focusing" and "macro" are not the same thing. True macro photography is usually defined by reproduction ratio: at 1:1, a subject that is 20mm long projects as a 20mm image on the sensor. The X100VI's 23mm lens, even at its closest focus, only manages something in the neighborhood of 0.3x life size. That's enough to make a flower or a large moth fill a meaningful chunk of the frame. It is not enough to make a jumping spider or an aphid look like anything other than a speck you'll crop into later and regret.
The other wrinkle is that this is a wide lens doing close-up work. A dedicated macro lens in the 60-105mm range gets its magnification while sitting a comfortable 15-20cm or more away from the subject. The X100VI has to get physically close to compensate for its short focal length, which creates the single biggest practical problem for insect work: working distance. More on that below.
The realistic magnification ladder
Here's roughly what each approach gets you, based on how the lens and its available accessories actually behave in the field. None of these numbers are lab-measured, they're the kind of estimate you'd get from actually shooting the comparisons back to back.
| Approach | Added cost | Approx. magnification | Working distance | Autofocus |
|---|---|---|---|---|
| Macro mode, no accessories | $0 | ~0.3x | ~10cm | Reliable on still subjects |
| +4 clip-on close-up filter (49mm, via adapter ring) | ~$20-30 | ~0.45-0.5x | ~6-7cm | Slower, occasional hunting |
| +10 clip-on close-up filter | ~$20-30 | ~0.6-0.7x | ~3-4cm | Frequent hunting, manual focus recommended |
| Digital teleconverter (50mm/70mm equiv. crop) | $0 | No true magnification change | Unchanged | Unchanged; affects JPEG framing only |
The pattern is obvious once you lay it out: every route to more magnification on this camera also shrinks your working distance, and shrinking working distance is where insect photography with a fixed 23mm lens starts to fight you.
The working-distance problem is the whole ballgame
At 10cm from the front element, your lens is close enough to cast a shadow directly over the subject, which is exactly the light you don't want on something with a shiny exoskeleton. Add a diopter filter and you're down to a few centimeters, close enough that your own breathing moves the framing and any twitchy insect either flies or drops off the leaf before you've focused. Compare that to a 90-105mm macro lens on an interchangeable-mount body, which gets 1:1 magnification from 15-20cm away or more, plenty of room to keep your shadow off the subject and stay outside the flight-distance threshold of most insects.
This is not a knock on the X100VI so much as an honest description of what a 23mm lens forces on you. In practice, it narrows the realistic subject list to insects that are either large, slow, or simply not paying attention to you: bumblebees deep in a foraging pass on a flower head, resting butterflies with wings closed on a cool morning, damselflies and dragonflies perched and sunning themselves, garden spiders sitting still in the center of an orb web. Anything genuinely tiny (aphids, ants, most beetles under 10mm) or genuinely alert (jumping spiders, most flies) is a bad match for this setup. You'll get some frames, but the hit rate will be low and the sharp keeper rate lower still.
Getting more magnification without more glass
The cheapest real upgrade is a clip-on close-up filter (sometimes sold as a "close-up lens" or diopter), screwed onto the 49mm filter thread that becomes available once you fit the official adapter ring, or a third-party equivalent. A +4 diopter is a reasonable starting point: it pulls magnification up noticeably without collapsing working distance to nothing. A +10 gets you closer to genuine macro territory but also gets you close enough that depth of field becomes a hairline and working distance becomes uncomfortably short for anything but a cooperative subject.
The digital teleconverter, which simulates 50mm and 70mm equivalent framing at the press of a button, is worth understanding correctly rather than treating as a magnification tool. It's a crop plus an in-camera upscale applied to the JPEG. It does not change what the lens is physically resolving, and if you're shooting RAW+JPEG (which most people doing careful insect work should be), the RAW file comes out uncropped regardless of what the teleconverter setting shows in the viewfinder. It's genuinely useful as a framing aid, letting you preview a tighter crop through the EVF before you shoot, but don't expect it to substitute for actual magnification.
Given the sensor's resolution (40.2 megapixels), aggressive cropping in post is a legitimate third option. A bug that occupies 20 percent of the frame at capture still leaves you with roughly 8 megapixels after cropping down to it, which is plenty for web use and social posting, tighter for large prints but workable. Between a moderate diopter and a generous crop, you can get most of the way to what feels like real macro reach without adding much weight to the bag.
Depth of field, light, and the leaf shutter's one real advantage
At close focus, depth of field collapses to a few millimeters even stopped down to f/8 or f/11, so getting an insect's eyes, head, and thorax all sharp in one frame is close to impossible unless the subject's body happens to sit on a single plane parallel to the sensor. The practical fix is less about the aperture ring and more about body position: get low, align yourself so the insect's long axis runs parallel to your sensor plane rather than receding away from you, and consider manual focus with focus peaking turned on rather than trusting autofocus to land exactly where you want it. Racking focus by physically rocking your body a centimeter forward and back while watching the peaking highlights is a slower technique than autofocus, but it's the one that actually works at these distances.
The leaf shutter built into this lens does earn its keep here, just not for the reason most people expect. Because it's a leaf shutter rather than a focal-plane shutter, it syncs with flash at any speed up to 1/4000s mechanically, well past the roughly 1/200-1/250s sync limit you'd hit on a typical focal-plane shutter body. That matters if you want to underexpose the ambient background to darken it and pop a small flash or LED panel for fill without needing high-speed sync tricks. The built-in 4-stop ND filter is useful for the same kind of daylight-flash balancing act, though for genuine macro work you'll rarely be shooting wide open at f/2 anyway since depth of field is already too thin to spare, so the ND filter matters less here than it does for the X100VI's other party trick, shallow-depth portraits in bright sun.
Autofocus and burst shooting on subjects that won't hold still
The hybrid phase and contrast-detect autofocus is solid for stationary or slow-moving subjects, but macro mode brings real focus breathing, and hunting near the minimum focus distance is common, especially once a clip-on diopter is fitted (the camera has no idea the accessory is there, so it will sometimes rack past the true focus point before settling, or fail to settle at all). For anything past casual, switch to manual focus and use the rock-forward technique described above rather than fighting the AF system at its closest limits.
For burst shooting, the electronic shutter's 20fps ceiling sounds appealing for catching a bee mid-wingbeat, but electronic shutters read the sensor line by line, and fast-moving wings can come out skewed or smeared (rolling shutter distortion). The mechanical leaf shutter tops out around 11fps but gives you an undistorted wing shape, which matters more for insect photography than the extra frame rate does. Either way, 40-megapixel RAW files fill the buffer fast, so a long burst on a hovering hoverfly will bottleneck the card write speed well before you run out of subject.
This is where a card full of near-identical frames becomes a real workflow problem rather than a hypothetical one. Chasing focus on a twitchy dragonfly with burst mode on typically produces dozens of frames where the difference between the sharp one and the soft one is a single millimeter of focus shift you can't see on a camera's rear screen in the field. Since imagic runs its sharpness scoring and duplicate/burst clustering entirely on the local machine, no upload required, it's a reasonable way to sort a card of 300-400 near-identical insect frames down to the dozen actually worth editing, without needing a signal out in a field or a garden. That matters more for this kind of shooting than for most genres, because the fixed lens forces you into more spray-and-pray bursts than a proper macro lens would.
Editing what you actually got
Fujifilm's X-Trans color science and film simulations (Velvia for saturated greens on foliage, Classic Chrome for a flatter, more documentary look) are baked into the JPEGs straight out of camera, which is part of why so many X100-series shooters lean on JPEG rather than RAW. If you shoot RAW for the extra cropping latitude, though, you lose that in-camera look and have to rebuild it in post, which gets tedious across a batch of fifty insect crops that all need the same green channel pulled back and the same contrast curve applied. This is the kind of repetitive, consistency-dependent editing that imagic's apply_my_style feature is built for: train it on a handful of macro or nature edits you've already made and it applies that same look across a new batch, which keeps a set of insect photos looking like they belong to the same shoot even when some are RAW crops and others are digital-teleconverter JPEGs with different starting points. If you want a deeper look at building a consistent grade across a series like this, the color grading guide covers the underlying approach in more detail, and if the culling side of a big insect card is new territory, how AI photo culling works walks through what the sharpness and duplicate detection is actually doing under the hood.
Is it worth using this camera for insects at all
If you already own an X100VI for street or travel work and want to grab the occasional bug shot when something cooperative crosses your path, yes, absolutely, and a $25 clip-on diopter tucked in a jacket pocket is worth carrying. The results won't match a real macro lens, but a resting swallowtail or a bumblebee working a lavender spike will look genuinely good, helped along by the sensor's resolution and the lens's inherent sharpness at moderate apertures.
If insect macro photography is the actual goal rather than an occasional bonus, don't buy this camera to do it. The fixed 23mm lens is the wrong tool for the job regardless of which accessories you stack onto it, and no amount of diopters or digital teleconverter cropping changes the fundamental working-distance and magnification ceiling built into the optical design. A used APS-C body with a proper 60mm or 90mm macro lens will out-perform this setup on every insect-specific metric that matters, for less money than the X100VI costs on its own.
Frequently Asked Questions
Can the X100VI's macro mode get a true 1:1 close-up of an insect?
No. Even in macro mode the lens tops out around 0.3x life size on its own, well short of the 1:1 ratio that defines true macro. A clip-on close-up filter can push that closer to 0.5-0.7x, which is enough for larger insects but still not a full 1:1 reproduction.
Do I need the adapter ring to add close-up filters?
Yes, in most cases. The X100VI's lens barrel doesn't expose a filter thread on its own, so you need Fujifilm's adapter ring (or a compatible third-party version) fitted first before a 49mm close-up filter, ND filter, or protective filter will thread on.
Is the digital teleconverter useful for macro shots?
It's useful as a framing preview, letting you see a tighter 50mm or 70mm equivalent crop in the viewfinder before shooting, but it doesn't add optical magnification. It's an in-camera crop and upscale applied to JPEGs, and it has no effect on the RAW file if you're shooting RAW.
What insects are realistic subjects for this camera?
Larger, slower, or more tolerant insects work best: bumblebees mid-forage, resting butterflies and moths, perched dragonflies and damselflies, and stationary garden spiders on a web. Small or skittish subjects like ants, aphids, and jumping spiders are a poor match given the lens's short working distance at close focus.