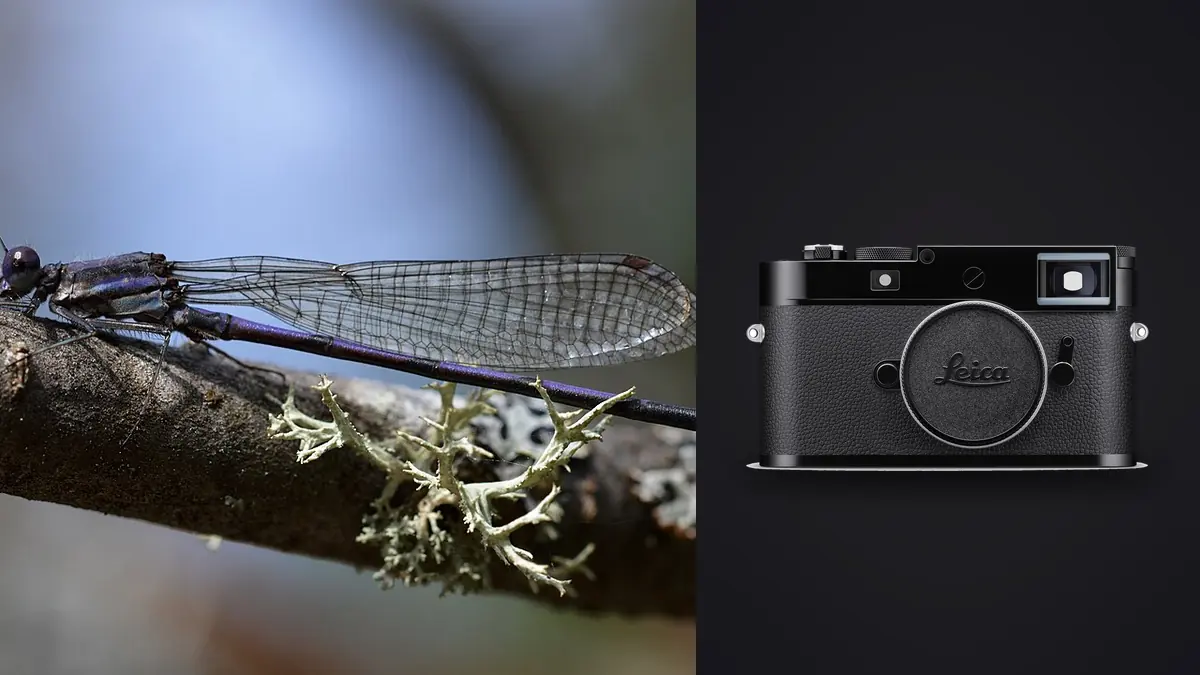
A rangefinder is the wrong tool for macro photography by every conventional argument. You can't see through the lens to check focus at close range, the coupled rangefinder mechanism physically stops working a few feet from the subject, and there's no autofocus to chase a jittery hoverfly around a flowerhead. And yet I've spent the better part of two summers pointing an M11 at dragonflies, jumping spiders, and the occasional angry wasp, and it works better than it has any right to. Not because Leica designed the M11 for this. Because the M11 happens to have live view, a genuinely excellent sensor, and enough resolution to crop your way out of a lot of framing mistakes.
This isn't a "buy this camera for macro" piece. If insect macro is your main genre, a mirrorless body with real-time eye tracking and a dedicated 1:1 macro lens will get you more keepers per hour, full stop. This is for the M11 owners who already have the body (see imagic's Leica M11 page if you're still deciding), already love the files it produces, and want to know what it takes to point that camera at something six millimeters long.
Why the rangefinder patch quits on you
Every M-mount lens is built around a cam that translates the focus helicoid's rotation into the rangefinder's coupled second image. That cam has a mechanical range, and on virtually every M lens it runs out of travel around 0.7 meters. Get closer than that and the rangefinder patch simply stops moving, focus confirmed or not. It's not a firmware limitation and no amount of practice fixes it. It's a physical stop built into the lens mount geometry that's been unchanged since the M3.
Which means macro on an M-series body was never going to happen through the viewfinder. The M11 solves this the same way it solves focusing any close-focusing lens: live view on the rear 2.95-inch touchscreen, or the clip-on Visoflex 2 electronic finder if you want something eye-level and shielded from sun glare. Both give you focus peaking with adjustable peaking color and a magnified focus window you can drag around the frame. For insect work, I leave peaking on red (it shows up best against green foliage) and punch in to the 10x window rather than trusting peaking alone. At 1:1 magnification, peaking highlights a band of "roughly in focus" that's still wider than the actual insect's eye.
Getting close enough: the lens question
Leica's own answer is the Macro-Elmar-M 90mm f/4, a lens that ships with a screw-on close-up element. Without it, the lens focuses like any other 90mm M lens, rangefinder coupled, down to about a meter. Thread the close-up element on and it drops to roughly 1:2 magnification at around half a meter, but the rangefinder cam disengages the moment you do, forcing you onto live view whether you want to or not. It's an elegant solution and an expensive one, and 1:2 is still short of the 1:1 that most dedicated macro lenses promise.
For true 1:1, the more interesting route is out of the M mount entirely. Leica's own L-mount adapter lets you run the APO-Macro-Summicron-SL 60mm f/2.8 on an M11 body. You lose autofocus either way (the M11 has no AF motor contacts regardless of adapter), but you gain a lens actually engineered for 1:1 reproduction, with correspondingly better corner performance at high magnification than a 90mm Elmar asked to do more than it was designed for.
The budget path is a helicoid adapter, essentially a variable-length extension tube built into the mount itself, paired with an old manual-focus macro lens from another system. A Nikon AI Micro-Nikkor 55mm f/2.8 on a Leica M to Nikon F helicoid adapter is the combination I keep coming back to: it's cheap, optically it holds up surprisingly well stopped down, and the helicoid gives you continuously variable extension instead of the fixed jumps you get from stacking tubes.
| Setup | Max magnification | Focus method | Approx. cost (used) | Trade-off |
|---|---|---|---|---|
| Macro-Elmar-M 90mm f/4 + close-up lens | 1:2 | Live view only once close-up element is fitted | $2,800-3,400 | Native M glass, rangefinder disengages, priciest option |
| APO-Macro-Summicron-SL 60mm f/2.8 + M-Adapter L | 1:1 | Manual, live view | ~$2,600 + ~$250 adapter | Best optical performance, adds noticeable weight and length |
| Helicoid M adapter + Micro-Nikkor 55mm f/2.8 AI | 1:2 native, ~1:1 with tube | Manual, live view | $150-300 adapter + $200-400 lens | Cheapest real macro glass, adapter flange tolerance varies by seller |
| Extension tubes behind a 50mm Summicron | ~1:3 | Manual, live view | $80-150 tubes | Softer corners, fine for testing the concept before committing |
The aperture trap at high magnification
Here's the part that catches people who are used to shooting the M11 at normal distances. The M11's 60-megapixel sensor has a pixel pitch around 3.76 microns, tight enough that diffraction softening becomes visible earlier than it would on a lower-resolution body, usually somewhere past f/8 at infinity-focus distances. Macro makes this worse, not better, because effective aperture narrows as magnification increases. A lens marked f/8 at 1:1 reproduction is behaving closer to f/16 in terms of the actual diffraction-limited resolving power reaching the sensor. Stop down to f/16 chasing depth of field on an insect's compound eye and you're effectively shooting through something like f/32 worth of diffraction, and the file goes soft everywhere at once, not just outside the focus plane. The workaround isn't a secret setting, it's accepting a genuinely narrow depth of field. I shoot most insect macro on the M11 between f/5.6 and f/8 and let the focus plane do the work rather than the aperture. If I need more of the subject sharp, that means a focus-stacked sequence rather than stopping down past the point of diminishing returns.
Light, without the flash system Leica never built
The M system has no dedicated macro ring flash, and the SF 60 speedlight's TTL metering wasn't designed with 1:1 reproduction ratios in mind. Rather than fight it, I've had better results with a small manual twin-flash bracket that straps around the lens barrel, dialed in manually and checked on the histogram rather than trusted to auto exposure. It's slower than TTL macro flash on a modern mirrorless body, but it's consistent once you've found your settings for a given magnification and subject reflectivity. For anything that holds still, a cheap clip-on LED ring light is honestly the better tool. Continuous light means focus peaking actually has something to grab onto in live view, which matters more than people expect once you're squinting at a 10x magnified patch of screen trying to tell a spider's foreleg from a blade of grass.
Working distance and why mornings matter
At 1:1 with a 60mm lens, working distance from the front element to the subject shrinks to a few centimeters, close enough that your own shadow becomes the biggest lighting problem you'll face and close enough that most insects notice you before you've finished framing. Dragonflies and bees at dawn, while they're still cold and sluggish, tolerate a lens getting close in a way they never will by midday. Spiders on webs and resting butterflies are far more forgiving subjects than anything mid-flight; I'd budget for those first if you're learning the manual-focus-at-1:1 skill rather than starting with something that moves fast.
What the M11's resolution actually buys you here
60 megapixels sounds like overkill for a subject that's already filling the frame at 1:1, but it earns its keep in a specific way: it gives you room to crop after the fact when your manual focus lands a millimeter off where you wanted it, which happens constantly with live subjects. A frame that's 90% correctly focused at 60MP still has enough resolution left after a moderate crop to hold up for print or a decent-sized web image. That's a real advantage of the sensor, not marketing language, and it's saved plenty of otherwise-lost shots for me. The flip side is that at 1:1 with an active subject you're not shooting one frame per encounter, you're shooting fifteen or twenty as the insect shifts and your manual focus hunts to keep up, and 60MP DNGs pile up fast. This is where I actually rely on imagic rather than scrolling through a card by eye. Its local sharpness scoring runs on the actual pixel data of each frame, which matters a lot for macro because the difference between the sharp frame and the near-miss in a burst is genuinely a fraction of a millimeter of focus shift, not something you reliably catch by eyeballing a thumbnail. The duplicate and burst clustering groups those fifteen-frame sequences of the same dragonfly together automatically instead of leaving you to sort them one by one, and because it runs locally, none of it depends on uploading raw macro files somewhere with a signal, which matters when you're shooting from a nature reserve boardwalk with no connectivity. If you're new to this kind of triage workflow, our breakdown of how AI photo culling actually works covers the mechanics in more depth.
Building a repeatable edit for a very specific look
Insect macro has its own editing quirks, exoskeleton sheen tends to blow out under any hard light, compound eyes need a particular kind of local contrast to read as more than a black dot, and green backgrounds shift color casts more aggressively than most other macro subjects. Once I'd worked out an edit that handled all three consistently across a season's worth of shots, I set it as an apply_my_style preset in imagic so new batches from the same location pick up that treatment automatically instead of me rebuilding it shot by shot. It's a small thing but it adds up over a summer of shoots, and it's one of the few parts of this whole process that doesn't require me to think about manual focus at all.
Frequently Asked Questions
Does the M11's rangefinder actually focus at insect-macro distances?
No, and this isn't specific to the M11, it's true of every M-mount body back to the M3. The coupled rangefinder cam runs out of mechanical travel around 0.7 meters. Anything closer than that has to go through live view on the rear screen or the Visoflex, with focus peaking and magnified zoom doing the work the rangefinder patch can't.
What aperture actually keeps an insect's eye sharp without the whole frame going soft from diffraction?
Somewhere between f/5.6 and f/8 in most cases. Because effective aperture narrows with magnification, an f/8 setting at 1:1 behaves closer to f/16 in terms of diffraction, and pushing further to f/16 or f/22 for "more depth of field" tends to soften the entire frame rather than extending what's sharp. If you need more in focus than one aperture stop will give you, a focus-stacked sequence beats stopping down further.
Do I need the Visoflex, or is the rear screen enough for manual macro focus?
The rear screen is enough optically, it shows the same live view feed with the same peaking and magnification tools. The Visoflex mainly helps in bright sun, where the rear screen washes out and makes fine peaking judgment harder, and it lets you brace the camera against your eye for steadier handheld framing at high magnification. Neither is required, but I reach for the Visoflex on anything shot outdoors after mid-morning.
Is the 60-megapixel file actually useful for insect macro, or just a bigger file to manage?
It's genuinely useful, mainly as insurance for imprecise manual focus. When your focal plane lands slightly off the eye you wanted (which happens often with live subjects), the extra resolution gives you room to crop in post and still end up with a usable image. The cost is file volume: a session chasing dragonflies at 1:1 can easily produce several hundred 60MP DNGs, which is where fast local culling stops being optional and starts being the difference between reviewing a shoot the same evening or a week later.