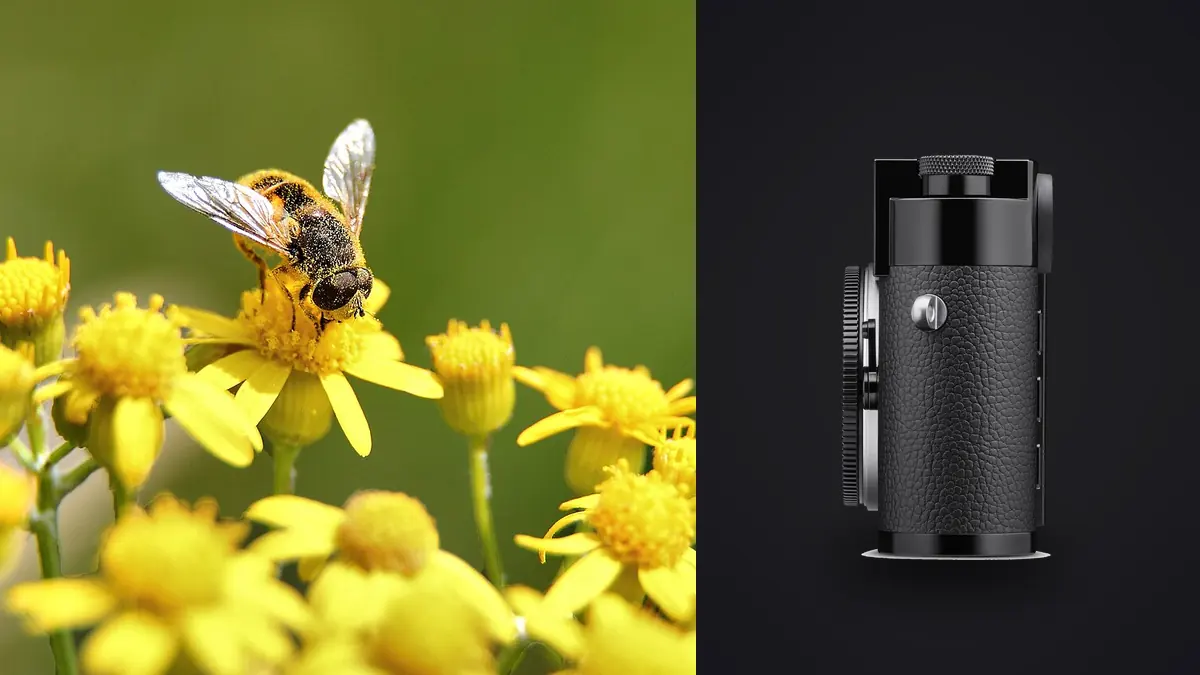
The Leica M11 is not the camera anyone would hand you if you said "I want to photograph dragonflies and jumping spiders up close." It has no autofocus, no image stabilization, and a rangefinder mechanism that physically refuses to focus inside roughly 70 centimeters on most of its lenses. And yet a small, stubborn corner of the M-mount world does exactly this kind of work, and some of it is genuinely good. This isn't an argument that the M11 secretly beats a modern mirrorless macro rig, because it doesn't, not for volume, not for hit rate, not for working speed. It's slower and more expensive per keeper frame. But if you already own the system, or you're drawn to the discipline of doing macro work entirely by hand, here's what actually holds up once you're kneeling in wet grass at 6am.
The rangefinder problem, stated plainly
A rangefinder measures distance through a mechanical linkage tied to the lens's focusing helical, projecting a second image through a small window that you align with the primary viewfinder image. That linkage has a base length, and the shorter the effective base, the less precisely it can resolve small changes in distance. Leica engineered the M11 to be usable down to roughly 0.7 meters with most current M lenses, and older or wider lenses sometimes stop even further out. At 0.7 meters with a 50mm lens, you're getting something like 1:15 magnification. A dragonfly at that reproduction ratio is a speck in the frame, not a macro shot.
This is where the Visoflex 2 electronic viewfinder changes the equation. Because it reads directly off the sensor rather than through the rangefinder patch, it isn't bound by the coupling range at all. You can rack a lens's helical all the way to its true minimum focus distance and the Visoflex will show you exactly what's in focus, magnified for confirmation. Every serious macro approach on the M11 that follows below assumes you're shooting through the Visoflex, not the optical finder. If you've been trying this handheld through the rangefinder window and wondering why nothing closer than a coffee cup will focus, that's why.
The one M-mount lens actually built for this
Leica does make a purpose-built option: the Macro-Elmar-M 90mm f/4. Used alone it reaches about 1:3.4 magnification at a minimum focus distance around 0.77 meters, which is enough for larger, more cooperative subjects like resting butterflies, big orb-weavers, or dragonflies perched and warming themselves in the sun. It's a small, folding lens (it collapses for storage, a nice touch on a body already built around compactness), and the optical quality is what you'd expect from Leica glass at f/4 and above: contrasty, well-corrected, no real complaints.
The magnification jumps to roughly 1:2 when you add Leica's Macro-Adapter-M, the accessory shooters usually just call "the goggles." These clip over the lens mount and physically shift the rangefinder coupling, which is a clever bit of mechanical engineering, but it also means the rangefinder patch is now useless at that focus range and you're back to needing the Visoflex anyway. Minimum focus with the goggles attached drops to around 0.5 meters, giving you a working distance in the 20 to 25 centimeter range depending on exactly how you measure it. That's workable for bees, wasps, larger moths, medium beetles. It is not workable for anything the size of an aphid or a jumping spider's face, where you'd want true 1:1 or better.
Going past 1:2: adapting glass through the Visoflex
For higher magnification, most M11 macro shooters stop looking inside the M catalog and start adapting. A helicoid M-mount adapter (Leitax and a few smaller machinists make these for Nikon F, Canon FD, and other legacy macro lenses) lets you mount an old 100mm or 105mm f/2.8 macro lens designed for 1:1 reproduction, focus it manually through its own native helical, and use the adapter's helicoid for fine adjustment beyond that. Because you're viewing through the Visoflex, focus confirmation is straightforward even without any electronic coupling. Manual aperture control on the donor lens is the other requirement, since nothing here talks to the M11's meter automatically beyond stop-down metering, which the M11 handles fine in aperture priority.
The more extreme (and much cheaper) route is a reversed 35mm or 50mm lens on a reversing ring plus helicoid adapter. Reversing a wide-to-normal lens dramatically increases magnification, sometimes past 2:1, but the working distance collapses to a few centimeters, which is a real problem when the subject is a living insect that can simply walk or fly away from a lens hood eight centimeters from its face. This technique is better suited to static subjects: dew on a spiderweb, a dead leaf's texture, a butterfly wing detail on a specimen that's already still.
| Setup | Approx. magnification | Working distance | Focus method | Rough added cost | Best suited to |
|---|---|---|---|---|---|
| Macro-Elmar-M 90mm f/4 (no goggles) | 1:3.4 | ~55-60cm | Rangefinder or Visoflex | Lens only, ~€1,400-1,800 used | Dragonflies, large butterflies at rest, flowers |
| Macro-Elmar-M 90mm f/4 + goggles | 1:2 | ~20-25cm | Visoflex only | +€350-500 for adapter | Bees, wasps, larger moths and beetles |
| Adapted 100mm macro (helicoid adapter) | 1:1 | ~12-15cm | Visoflex only, fully manual | €150-250 adapter + donor lens | Small beetles, spiders, fine wing/eye detail |
| Reversed 35-50mm lens | 2:1 to 3:1 | ~4-8cm | Visoflex only, manual aperture | €40-90 total | Static subjects, texture, dew, specimens |
Working the actual encounter
None of this matters if you can't get the insect and your focal plane to meet at the same instant, and without autofocus, that's entirely on you. The technique everyone converges on is focus-and-rock: set the lens to roughly the magnification you want, lock it there, and move your whole body forward and back a few centimeters until the subject snaps into the Visoflex's focus peaking or magnified view, then fire. It sounds crude and it is, but it's also how a lot of dedicated macro shooters on any system work anyway, autofocus or not, because continuous AF tends to hunt at these distances regardless of brand.
The M11 does have a usable continuous shooting mode, and it's worth leaning on here even though this isn't a camera anyone buys for burst speed. Firing a short sequence while you rock through the focus plane gives you several chances at the same moment instead of one, which matters enormously when the margin for error at 1:1 is under two millimeters. Timing your outings helps more than any piece of gear: insects are far more cooperative in the first hour after sunrise, when overnight cold has left them sluggish and often dew-covered, than they are by mid-morning once the sun has warmed them into full mobility. A tripod is worth carrying for static subjects like webs or resting moths, but for anything that might move, handheld with a wide stance and braced elbows gets you more shots per hour than fighting a tripod head's fine adjustments.
Depth of field math you can't talk your way around
At 1:1 on a full-frame sensor, depth of field at f/8 is on the order of one to two millimeters, and that's before accounting for subject movement. An insect's compound eyes and the tip of its wings can easily fall on opposite sides of that plane. Stopping down to f/11 or f/16 buys you a bit more coverage, but the M11's 60-megapixel sensor starts showing diffraction softening past roughly f/8 to f/11, so you're trading edge-to-edge resolution for depth, and at some point you're just moving the softness from "background" to "everywhere."
Given that, single-frame macro on this body is realistically a technique for subjects with a mostly flat plane facing the lens (a moth's wing seen straight on, a spider's face) rather than anything with real depth to it. For subjects that need more coverage, the practical answer is manual focus bracketing: shoot a short sequence racking focus in small increments through the subject and stack the results afterward in something like Helicon Focus or Photoshop's built-in stacking. The M11 has no in-camera focus bracketing feature, so this is entirely a manual rack-and-shoot process, which again rewards a fast continuous drive and a steady hand more than any menu setting.
What comes home with you afterward
Here's the part nobody mentions in the gear reviews: a single morning of focus-and-rock shooting on a moving subject produces an ugly ratio of frames. You might come back with 400 exposures of one dragonfly and have twelve that are actually sharp where it counts. At 60 megapixels, that's not a small folder to review by eye, and squinting at each RAW at 100% to find the handful of genuinely sharp frames is exactly the kind of task that eats an evening. This is the point where I stopped doing that manually and started running the take through imagic before touching Lightroom. It scores sharpness locally per frame, so the rocking sequences where focus swept past the subject get flagged as soft before I ever open them, and the near-duplicate frames from a single burst get grouped instead of forcing me to scroll past forty thumbnails of the same beetle. It all runs on the machine, no upload step, which matters when you're working through a field day's worth of 60MP DNGs and don't want to wait on anything. If you want the broader argument for why sorting before editing saves real time on any high-volume shoot, not just macro, this piece on how AI photo culling actually works covers the mechanics in more depth than I will here.
Once the keepers are picked, the second place the workflow speeds up is editing consistency. Insect macro tends to benefit from a repeatable look, usually a slightly darkened or desaturated background to keep the eye on the subject, consistent shadow handling on the exoskeleton detail. Rather than rebuilding that grade from scratch every session, I trained imagic's apply_my_style feature on a batch of edits I was happy with, and it now applies a starting point that matches my own past decisions instead of a generic macro preset pulled off the internet. It's not magic, it still needs adjustment per image, but it cuts the repetitive part out.
Is this combination actually worth building?
Honestly, for most people getting into insect macro, no. A modern mirrorless body with a native 100mm 1:1 macro lens, phase-detect autofocus, and in-body stabilization will out-produce this setup on hit rate alone, probably by a factor of five or more on a given outing. If the goal is volume, species documentation, or paid stock work, buy that system instead and don't fight the M11 for this particular genre.
Where the M11 approach earns its keep is narrower: photographers who already own the system for other work and don't want a second body, or anyone who genuinely prefers the deliberate, one-shot-at-a-time nature of manual macro over spray-and-pray autofocus bursts. There's also a real image-quality ceiling advantage in the 60MP sensor once you do land a sharp frame, since the triple-resolution DNG format lets you shoot at full 60MP for maximum cropping room on distant subjects, or drop to 36MP or 18MP when file size and buffer speed matter more than absolute resolution. It's a niche inside a niche. I keep doing it because I like the process, not because it's the efficient answer.
Frequently Asked Questions
Can the Leica M11 autofocus on insects for macro work?
No. The M11 is a fully manual-focus rangefinder body with no autofocus system of any kind. Focus is set either through the rangefinder patch (for standard distances) or through the Visoflex 2 electronic viewfinder for anything closer than roughly 0.7 meters, where rangefinder coupling stops working reliably.
Why won't my M lens focus closer, even manually turning the ring past its marked minimum?
Most M-mount lenses are mechanically limited by the rangefinder coupling cam, which physically stops the helical from turning past a certain point, typically around 0.7 meters. This is a hardware limit tied to how the rangefinder base length works, not a setting you can override. Lenses built for closer work, like the Macro-Elmar-M 90mm f/4, use a different cam profile, and the Macro-Adapter-M goggles physically decouple the rangefinder to allow even closer focus, viewed through the Visoflex.
Do I need the Visoflex EVF, or can I do macro through the optical rangefinder window?
For anything beyond about 1:3 magnification, you need the Visoflex. The optical rangefinder patch loses accuracy and eventually stops coupling entirely at close distances, while the Visoflex reads live off the sensor and has no such limit, plus it offers focus peaking and magnified view that the optical finder can't provide.
Is the M11's 60-megapixel sensor a problem for macro because of diffraction?
It's a real tradeoff rather than a dealbreaker. Diffraction softening becomes visible on this sensor's pixel pitch somewhere around f/8 to f/11, which is right in the range you'd normally want for macro depth of field. In practice this means accepting either a slightly softer file at f/16 for more coverage, using the triple-resolution DNG's 36MP or 18MP mode which is more diffraction-tolerant, or leaning harder on manual focus stacking at wider apertures instead of trying to get everything sharp in one frame.