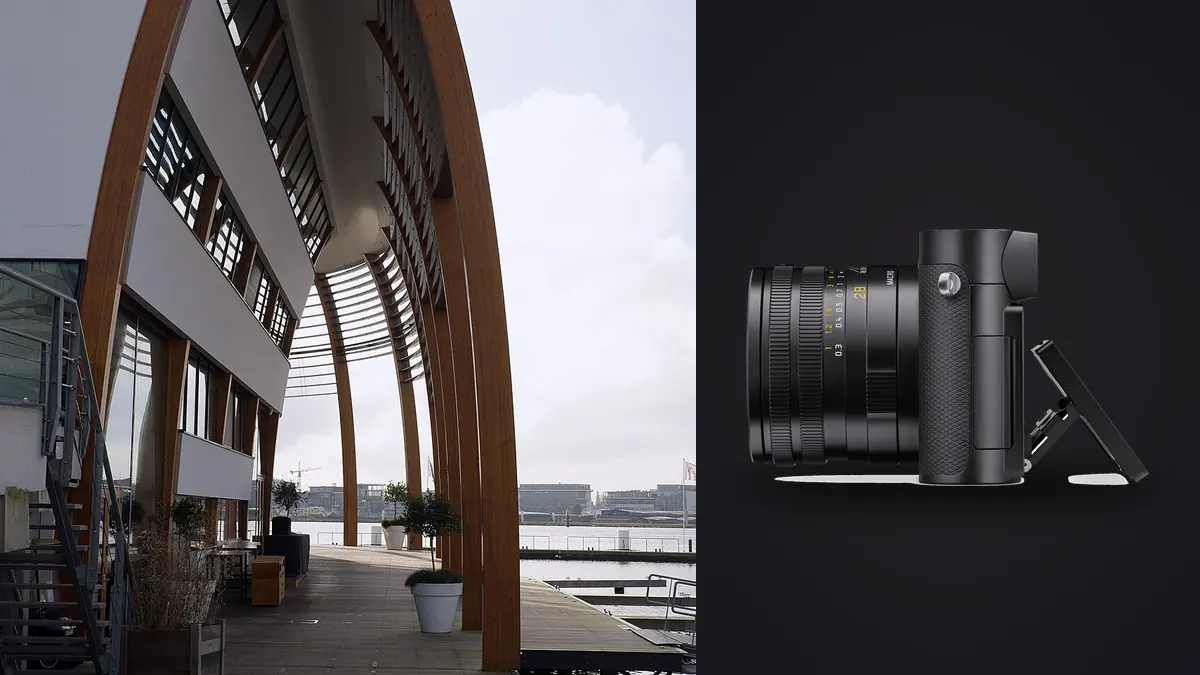
I got talked into buying a Leica Q3 by a friend who shoots luxury real estate in Lisbon, and my first reaction was that a fixed 28mm lens sounds like a strange choice for architectural work. Most of what I'd read about interior photography assumed you wanted a system with room to swap glass: a tilt-shift for verticals, a wider zoom for tight stairwells, maybe a longer lens for detail shots from across a room. A camera that only does one focal length felt like a step backward. Eighteen months of shooting interiors with it later, I don't feel that way anymore, though I'd be lying if I said the Q3 replaced my tilt-shift kit outright.
This isn't a spec-sheet review. Leica's own marketing already covers resolution numbers and sensor generations well enough. What I want to lay out here is what actually changes when you point this specific camera at rooms, staircases, kitchens, and building exteriors regularly, where it earns its keep, and where it genuinely doesn't.
A fixed 28mm turns out to be closer to correct than limiting
Architectural and interior photographers gravitate toward wide primes and wide zooms for a reason: most rooms are small relative to the furniture in them, and you need enough field of view to show a space as a coherent whole rather than a corridor of clipped corners. 28mm sits at almost exactly the focal length that real estate and interior shooters land on anyway after years of trial and error with zooms, usually somewhere between 24mm and 35mm depending on the room. Leica just built the camera around that decision instead of making you choose it every time.
The part that actually surprised me is the crop system. The Q3's 60-megapixel sensor is oversized enough that Leica lets you punch in digitally to 35mm, 50mm, and 75mm equivalent framings without physically changing anything, and because you're starting from 60 megapixels, the 35mm crop still leaves you with a genuinely usable file, somewhere in the high 30s of megapixels. The 50mm crop drops further, into the high teens, and by 75mm you're working with a file better suited to a detail shot on a website gallery than a double-page spread. For interior work this matters more than it sounds: you can shoot the wide establishing frame of a living room at 28mm, then punch to 50mm without moving your feet to isolate a mantelpiece or a light fixture, and both files come off the same sensor with the same color response. I use the crop modes constantly for material and hardware close-ups, cabinet pulls, tile grout lines, the join on a custom staircase rail, the kind of shots a listing agent or an architect wants but that don't justify carrying a second lens for. The trade-off is real, though. You lose the ability to go wider than 28mm short of a screw-in wide converter, and there are stairwells and small bathrooms where I've wanted another four or five millimeters of width and simply couldn't get it. On a tilt-shift kit you'd solve that by stepping back and shifting; here you sometimes just can't fit the whole room in.
Macro focusing earns its place on interior jobs
Leica dropped the separate macro adapter that the Q2 needed and built close focusing straight into the Q3's autofocus system, down to around 17cm. On a lot of shoots that gets used less for grand architectural drama and more for the boring-but-billable stuff: swatches of stone or wood finish for a designer's portfolio, a manufacturer's plaque on an appliance, stitching detail on upholstery. Having that available on the same body, without unscrewing anything, saves real time on jobs where you're bouncing between wide room shots and tight product-style details in the same hour.
Verticals are where this camera quietly does its best work
Converging verticals are the single most common technical flaw in amateur interior photography, and also one of the easiest to fix if your tools support it. Tilt the camera up even slightly to fit a tall window or a vaulted ceiling into frame and the walls start leaning inward. Professionals either correct this with a tilt-shift lens at capture time or fix it afterward in software, and both approaches have downsides: tilt-shift lenses are slow to work with and expensive, and heavy post-capture correction on a wide-angle file eats into your resolution as you stretch and crop the edges back into a rectangle. The Q3 has a built-in perspective correction feature with a live grid overlay that shows you exactly how much lean is happening as you compose, and it can apply keystone correction in-camera to the JPEG, or tag the correction data onto the DNG so it applies automatically when you open the file in Lightroom. I don't use it on every frame, but for stairwells, double-height entryways, and anything with a strong vertical line running through it, having the grid live in the viewfinder while I compose has changed how I shoot. I catch lean before I press the shutter instead of fighting it in post, and because I'm starting from 60 megapixels, the crop that comes with any correction still leaves plenty of resolution for a large print or a hero image on a listing page. Pair that with the electronic level, which shows roll independently of the perspective grid, and you get a camera that's genuinely trying to help you keep architecture looking like architecture rather than a funhouse mirror. It's a small thing that adds up across a full house shoot.
Shooting a full property with one body, quietly
A typical interior job for me now runs something like this: arrive an hour before the light I actually want, walk the property once with just the camera to figure out which rooms get direct sun and when, then shoot room by room, usually two or three exposures per angle at different settings rather than a full bracket sequence, since the sensor's dynamic range handles most window-versus-interior contrast without needing five stops of bracketing. The leaf shutter tops out at 1/2000s mechanically, and the electronic shutter goes further and silently, which matters more than you'd think in an occupied home or a museum interior where a loud mechanical clack draws attention every single frame. I've shot inside a working restaurant during service hours and nobody at the tables noticed the camera at all. Leaf shutter flash sync at any speed is the other quiet advantage. If a room needs a pop of fill flash to balance a bright window without killing the ambient exterior view, you're not locked to 1/200s the way you would be with a focal-plane shutter. That flexibility saved a shoot for me once in a west-facing kitchen where the only way to keep the counter from blowing out against the window light was syncing well above what a typical DSLR shutter allows. Weight matters too, more than most gear reviews admit. At around 740 grams body and lens combined, the Q3 rides on a wrist strap all day without the fatigue of a full-frame body plus a 16-35mm zoom, let alone a dedicated tilt-shift lens which tends to be heavier still. On a job where you're climbing ladders, crouching in closets, and repositioning constantly through a five-bedroom house, that weight difference by hour four is not trivial.
| Setup | Effective focal range | Vertical correction | Approx. kit weight | Rough kit cost | Where it wins |
|---|---|---|---|---|---|
| Leica Q3 (fixed lens, digital crop) | 28mm native, 35/50/75mm crops | In-camera grid + correction | ~740g | ~$5,995 | Fast, quiet, single-body walkthroughs |
| Full-frame body + 16-35mm zoom | 16-35mm continuous | Manual, post-capture only | ~1,150g | ~$3,500 | Tight stairwells, widest rooms |
| Full-frame body + dedicated tilt-shift lens | Fixed (commonly 17mm or 24mm) | Optical, at capture, full resolution | ~1,300g | ~$5,700 | High-end architectural exteriors, publication work |
Where the Q3 actually falls short for this kind of work
I don't want this to read like a sales pitch, because the camera has real limits for architectural and interior use. There's no interchangeable lens, so if a job needs a genuinely wide 16mm for a cramped ensuite or a longer lens for a compressed exterior facade shot from across the street, you're either bringing a second camera or accepting the limitation. There's no in-body stabilization either, which the optical stabilization in the lens partly compensates for but doesn't fully replace when you're shooting handheld at slower shutter speeds in dim hallways. Battery life on a full-day multi-property shoot is mediocre enough that I carry three spares as a matter of habit. And at close to six thousand dollars, it's not a rational first purchase for someone building an interior photography business from zero; a competent full-frame body with a 16-35mm zoom will get a beginner further per dollar. The digital crop modes are also not a free lunch. They're genuinely useful, but a 75mm crop file from this sensor is not going to hold up to the same scrutiny as a native 75mm prime would if you're delivering to a client who prints large. I treat the tighter crops as detail-shot tools, not as a replacement for actually having a longer lens when the job calls for one.
What changes once you're back at the desk
Interior shoots generate an odd mix of files: a handful of near-identical framings of the same room shot at slightly different exposures or angles while you're figuring out the light, plus dozens of legitimately distinct rooms and detail shots. Sorting that by eye after a five-property day is where I used to lose an evening. I run everything through imagic now before I open Lightroom, mostly because its local sharpness scoring catches the handheld frames where a slight camera shake softened an otherwise well-composed shot, which happens more than I'd like to admit when you're moving quickly through a house without a tripod. It also clusters the near-duplicate frames from those "trying to get the angle right" sequences so I'm not scrubbing through six versions of the same kitchen corner manually. The other piece that's become part of my actual workflow rather than a novelty is imagic's apply_my_style preset. After grading a batch of interior jobs by hand, roughly correcting white balance for mixed daylight and tungsten, pulling back highlight clipping in windows, I trained the preset on my own edits so new jobs land closer to my finished look before I touch a slider. It's not magic and I still adjust individual frames, but starting from something that already resembles my grading instead of a flat RAW import shaves a meaningful chunk of time off a job with 200-plus interior frames. Everything runs locally on the machine too, which matters when you're handling a client's unreleased property before a listing goes live and don't want files touching a cloud service you don't control. If you're comparing culling tools generally rather than committing to one, it's worth reading up on how AI photo culling actually works before picking a workflow, since not every tool handles bracketed interior sequences the same way.
Frequently Asked Questions
Is the Leica Q3's 28mm lens actually wide enough for interior photography?
For most rooms, yes. 28mm is close to the sweet spot professional interior shooters settle on after experimenting with wider options, wide enough to show a room's proportions without the obvious barrel distortion you get from anything under 20mm. Where it struggles is genuinely small spaces, tight bathrooms, narrow stairwells, walk-in closets, where a 16-20mm lens has real advantages. If your work leans heavily toward small residential spaces, budget for a wide converter or accept you'll need a second camera occasionally.
Does the digital crop mode actually replace carrying extra lenses?
Partially. The 35mm and 50mm crops hold up well enough for most delivery sizes, including large prints in the case of the 35mm crop. The 75mm crop is thinner, useful for web-sized detail shots but not something I'd rely on for a large-format architectural print. Treat the crop modes as a convenience for detail shots and mild reframing, not a full substitute for a longer lens when a job genuinely calls for one.
How does the Q3 compare to a tilt-shift lens setup for correcting verticals?
A tilt-shift lens corrects verticals optically at the moment of capture, which preserves full resolution and produces the cleanest result for demanding publication or high-end architectural work. The Q3's in-camera perspective correction is a digital correction applied after the fact (either baked into the JPEG or tagged onto the DNG), which is faster to work with and good enough for the large majority of real estate and interior jobs, but it does cost you some resolution at the edges of a heavily corrected frame. For everyday interior and real estate shoots the Q3's approach is fast enough that I rarely miss the tilt-shift; for architectural photography destined for print publication, I still reach for it.
Is a fixed-lens camera like the Q3 a sensible choice for someone starting an interior photography business?
Only if budget isn't the primary constraint. A full-frame body paired with a 16-35mm zoom costs meaningfully less, covers a wider focal range including the tight spaces where 28mm struggles, and is the more conventional starting kit for a reason. The Q3 makes more sense as a second body for photographers who already have a wider zoom setup and want something lighter and quieter for walkthrough-style shoots, or for photographers who've decided the workflow speed and image quality are worth the premium.